Members CJs The Witch of the West

Members CJs The Witch of the West

Hedgehog

Always Off-Roading Jeeper
Posts
9,370
Thanks
4
Location
Tucson/Marana Arizona
Vehicle(s)
-1975 Jeep CJ5, 360 V8, Headers, Duel Exhaust,T15 transmission, D-20 Transfer case, Twin Stick Conversion, Warn 8274 Winch
-1951 Willys Wagon, 4 cylinder, "F" head, little rust, very close to stock
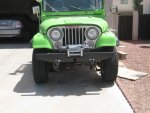
It is said on the internet, "If there are no pictures it doesn't exist." So to bring my Jeep into Internet existance I present, "The Witch of the West". I'm not really into giving my vehicles names, but hey with that color she speaks to me:
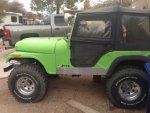
GreenJeep1.jpg

This is how I first saw her. She's a 1975 CJ5, AMC 304 V8, T-15 3 speed transmission, T-20 Transfer case, it is lifted with 35" BFGoodrich tires all for a negotiated price of $2250. If I had only known that EVERYTHING on the Jeep needed to be either fixed or replaced. He did say the transmission jumped out of reverse, a common thing for a T-15 and he finally got the turn signals to work.

I truly hated the tires and the lift and the Diamond plate dash you can't see. They were the first things to go.
 
Last edited:
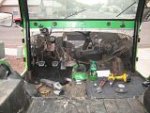
The first thing to go was the dash.

th_NoDash.jpg

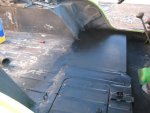
The next job was to find some leg room:

th_DriversSideCut.jpg th_DriversSideFirstPatch.jpg

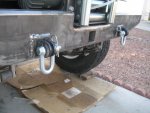
My friend commented on the whimpy bumpers so the front bumper had to go. I made this one form scratch. 3/16" steel tube with some recovery points and a winch slot. I'm sort of proud of how it turned out:

BumperTowPointBoth.jpgBumperFinishedFront.jpg
 
Last edited:
She got new Nerf bars (they didn't fit so had to be modified a bunch), I find these help old fat men get in and out.

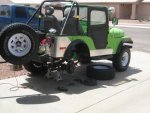
The big tires have gone the way of Craigslist. There were 6 different kinds of lug nuts holding them on. Replaced with new nuts, 31x10.5x15's and wagon spoke wheels. Not flashy, but practical.

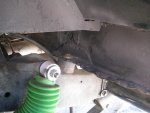
The shocks are new, the boots came with the Jeep 3 out of 4 were green, one was black. Can't help but laugh. It only takes 8 nuts to put on shocks, the jeep had 5 different kinds holding them on.

The Jeep came without seats installed. These are Expidition seats that came with the Jeep. After building brackets the seats proved to be far to tall for a Jeep. Low back seats are taking their place.

Another thing the Jeep came with, well more without was emergency brakes. New cables, new brake guts and one new brake piston. This is turning out to be a trend with the Witch. 3 out of 4 wheel cylinder pistons were fine, the fourth needed replacement.

RearBrakePassangerSide.jpg
 
Last edited:
I posted this in the "What did you do with your CJ today" thread, but it also applies here.

Patches in pictures:

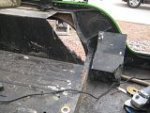
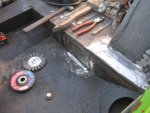
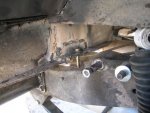
This started with a necessary fix, the passenger side body mount was in bad shape and needs attention. The picture is ugly, the MIG machine spatters a lot, but cleans up with the wire wheel. Unfortunately I can't get to the weld area with the wire wheel so it's a strong weld with ugliness all around:

IMG_0005-3.jpg


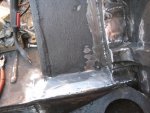
The drivers side seemed in better shape, but fooled me. the first thing that need to happen was a fix in the seating area to bed transition. This is obviously a hot bed for rust. Asking the impossible please ignore the area around the center square repair.

IMG_0002-5.jpg

The center mount repair. Again it's not beautiful, but strong. Several layers of welds are obvious. I can't get in there to make it as pretty as possible though:

IMG_0004-4.jpg

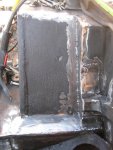
This repair made it obvious that my original notch repair was less than "good enough". It was necessary to dive into an unexpected patching frenzy. Shown are several patches. The notch needed fixing, then the seat belt reinforcing needed some work. The seat belt reinforcing was inundated with rust. it got new washers that looked UGLY, then the UGLY was covered with a 16 ga. patch. The rust in there was sealed away hopefully never to be seen again. I haven't drilled the new seat belt hole yet:

IMG_0001-4.jpg

Admittedly there is some repair to the notch seams as well. I wish I'd had the MIG welder during the notch creation.
 
The second part of the post:

It isn't pretty, but the total picture before paint:

IMG_0003-5.jpg

The welds were cleaned up a little with a 60 grit flap wheel. Granted for a professional welder it isn't a pretty picture, but the repair is STRONG. It is MUCH better than it was before the "repair".

I keep looking at the passenger side, I know it needs similar repair, at the very least the seat belt area needs attention. I'm sure, very soon, you will be seeing that patch as well
 
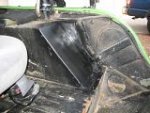
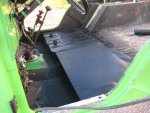
I stole an idea I saw on a post from WSS. His Jeep had a cover over where the inside the cab gas tank would be in an older Jeep. I really liked the idea of having under seat storage without the hassle of the seat legs. So out came the seat in went a bunch of work making a frame work and fitting a 12 ga sheet of metal. Worked GREAT, modifying my existing seat bracket didn't work out nearly as well. Back to the drawing board for that. Here's a picture:

IMG_0003-6.jpg


IMG_0002-6.jpg


Now there's a nice place for ropes, tool boxes, BIG guns, ammunition, a nice soft bankie' ........ Love this modification, thanks WSS for the idea.

........ ALSO, yesterday I added the blunted corner to my wheel notch. You can see it in the passenger side picture. The welds aren't good. I was following the horrible job I did with the stick welder, lots of weld contamination. It ain't pretty but it works better than it did before.
 
"The Witch" is nearing completion. Today she got new Warn Premium hubs, front bearings and seals.

Electrical issues are still a problem.
 
01/28/14 - Exciting day, "The Witch" is now a legal road warior. Just to show who was boss, just after she was inspected, she ran out of gas. Now I know not to completely trust the gas gauge.

Note: with a 360 under the hood, this thing sounds rumbly and has some serious hop .... that is if you've got the guts to use it.
 

Jeep-CJ Donation Drive

Help support Jeep-CJ.com by making a donation.

Help support Jeep-CJ.com by making a donation.
Goal
$200.00
Earned
$10.00
This donation drive ends in
Back
Top Bottom