Build Thread 1982 Jeep CJ7 old school build

Build Thread 1982 Jeep CJ7 old school build

OldsCool

Jeeper
Posts
66
Thanks
0
Location
Oakwood, GA
Vehicle(s)
1982 CJ7, 360, T15, Dana 20, AMC 20, Dana 30
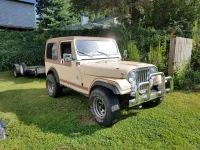
Wanted to start a build thread to document my project CJ7 . As in the title, it's an 82 model. When I bought it I must have been out of my mind. It barely ran, was (and still is) ratty and rough around the edges, but at least it had a whole host of PO installed problems and I paid way too much for it :rolleyes: I have taken pictures all along the way and will start posting them as soon as I can find a better photo hosting site.

:chug: here's to hoping the mods will approve my thread without any pictures so far

20180824_171941_zpszmoptjd8.jpg
 
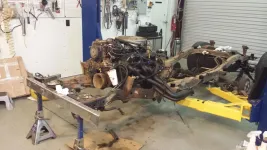
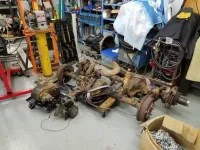
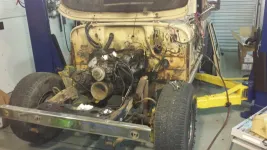
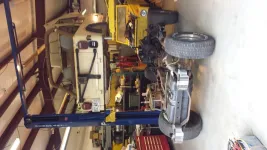
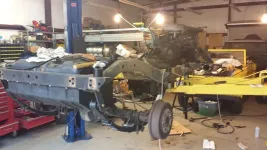
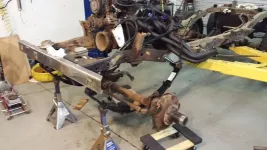
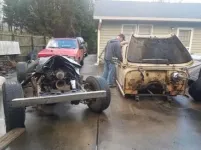
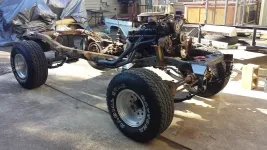
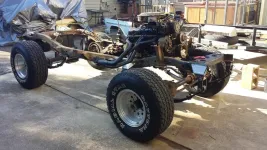
I think I've finally hit the the lowest point of the rebuild process. It seems as though it can't get any more disassembled than it is right now. Rear axle is a 1986 Grand Wagoneer Dana 44 and is temporarily mocked into place on BDS 5" YJ leaf springs, which will be the same leafs used front and rear. The front axle is going to be a 1976 Jeep Wagoneer Dana 44 with flat top knuckles. I am going to wait and see what the drag link angle looks like before deciding for sure if I want to machine the passenger side knuckle for high steer.

I've loaded a couple of pictures to a laptop and this is a practice run to see if I can upload pics directly. Let me know if you guys can see it.

:chug:
 

Attachments

  • frame.jpg
    frame.jpg
    98.3 KB · Views: 59
Fun times...sure there is lots more you can disassemble if you so desire...lol
Oh yes....it must really suck having a lift on hand...lucky bugger...will enjoy your journey...
 
Thanks. I'm sure I could too, but I'm not going for a restoration on this one, just a rebuild to be like I want it, for whatever I wind up getting into.

The lift is at my father's shop. I'm lucky that he lets me use it almost any time, so it's a blessing and a curse at the same time. A blessing because it makes things so much easier, but a curse because it allows me to let things get out of hand. Take its current state....this started out as a simple fuel injection conversion!
 
Back to the beginning of the build process.....

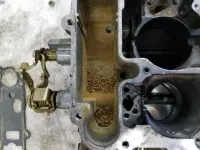
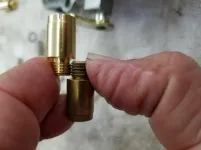
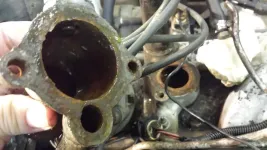
As I'd said earlier, the Jeep barely ran when I got it. It had an Edelbrock 1405 4 barrel carb on it at the time. The accelerator pump squirters were nearly clogged shut so it had a very hard stumble just off idle. I ordered a rebuild kit from Amazon and it was a mixed bag of results. The gaskets were okay but the new needle seats were the wrong thread pitch so I had to use my old ones. When I disassembled it I discovered the float bowls were full of dirt and crud! After the rebuild could finally drive it regularly.
 

Attachments

  • 20180812_133755.jpg
    20180812_133755.jpg
    92.8 KB · Views: 38
  • 20180818_134504.jpg
    20180818_134504.jpg
    80.2 KB · Views: 37
  • 20180812_133759.jpg
    20180812_133759.jpg
    91.4 KB · Views: 37
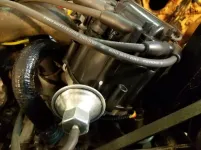
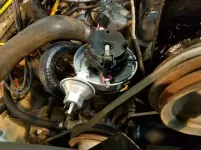
Trying to stay with a "dependability" attitude at the time, my next focus was the ignition system. I ordered an el-cheapo HEI conversion distributor from eBay. When I got it compared it to the one my dad had bought from Summit for his Bronco. Besides the obvious engine-specific differences, they were on pat with one another. Same boxes and packing. only the one from Summit had their sticker obviously applied over the original label. Being a machinist, the first thing I looked for were machining flaws and I'm happy to say I saw none at all. It looked for all intents and purposes to be a very well made piece. I'm hoping that if it's good enough for them to put their name on it, it should be good enough for me. Sorry I didn't get any better pics of the install, but it went smoothly and the engine definitely seemed more responsive afterward.
 

Attachments

  • 20181126_155512.jpg
    20181126_155512.jpg
    90.6 KB · Views: 58
  • 20181126_155655.jpg
    20181126_155655.jpg
    93.8 KB · Views: 54
After getting it running reliably I discovered the next problem. The cooling system. I had no fan shroud and a questionable fan clutch so those areas were addressed. I also had a sneaking suspicion that the thermostat was MIA, and I was correct.

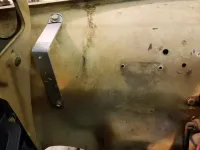
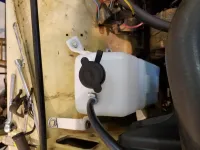
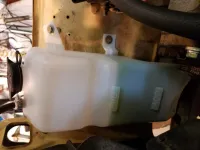
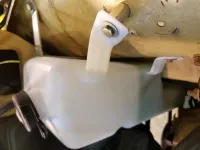
Also missing was the radiator overflow bottle. I ordered a new one but upon receiving I quickly discovered why it was gone. The Jeep has fenderwell headers and they occupied the space formerly taken by the bottle. I made a quickie bracket to install it on the other side of the engine bay and all was good. The cooling system was finally doing its job of keeping things at a constant, cool temperature.
 

Attachments

  • 20181223_103858.jpg
    20181223_103858.jpg
    90 KB · Views: 33
  • 20181201_122506.jpg
    20181201_122506.jpg
    88.7 KB · Views: 50
  • 20181201_124610.jpg
    20181201_124610.jpg
    85.8 KB · Views: 44
  • 20181201_124619.jpg
    20181201_124619.jpg
    83.6 KB · Views: 51
  • 20181201_125509.jpg
    20181201_125509.jpg
    81.7 KB · Views: 37
I'd been keeping an eye out on classified ads for parts I wanted. Luckily I found everything I wanted in a short amount of time.

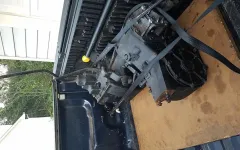
A Ford NP435 (with an NP205 I won't use)
The previously mentioned 1976 & 1986 Wagoneer Dana 44 's
Dana 300 Transfer Case
And a York A/C compressor and brackets from the 1986 Wagoneer
Bill Hamilton TBI fuel injection conversion system
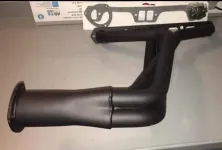
New in the box (but never used) Hooker fenderwell headers to replace the old rusty and leaky ones

I ordered an adapter from Novak to mate the 435 & 300 together, only to find out a week later that I'd be waiting at least a month to get it due to the output/input shaft being backordered. Would have been nice to know ahead of time, but I can't get too upset about it since I have plenty of other things to keep me busy in the mean time.

Now that the easy part was done, the hard work would soon begin.....
 

Attachments

  • 20181012_184956.jpg
    20181012_184956.jpg
    99 KB · Views: 71
  • 20181119_155946.jpg
    20181119_155946.jpg
    99.1 KB · Views: 60
  • 20180818_205301.jpg
    20180818_205301.jpg
    41.4 KB · Views: 49
When I pulled the Jeep into the shop I had the intention of only doing the fuel injection conversion and getting the engine square and level in the engine bay, and this is where things started to get out of control.

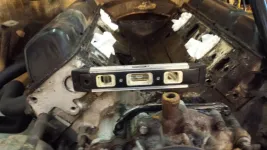
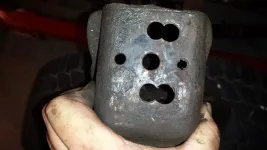
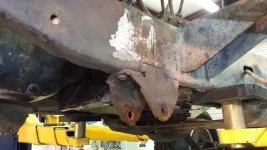
But back to the start of it, the person(s) that owned this old thing in the past had done some interesting things to it. The engine was unlevel, crooked and too far back. So far back it was hitting the firewall on the driver side. I discovered the passenger side frame mount was bolted into the wrong set of holes, and the driver side frame mount needed to have the rubber mount bolt holes redrilled on the center of the mount. After this was taken care of the engine sat where it should, square and level. Then I installed the new headers. I used new gaskets and Permatex Ultra Copper sealant for a hopefully leak free seal. Then I realized...I forgot to weld the O2 bung in the driver side header collector :rolleyes:

Weighing my options, and knowing I needed access to the top of the fuel tank anyway, I realized it was only a couple more wires to disconnect, and I was going to have to take the body mount bolts out for the Daystar 1" body mount kit....well you know where I'm going with this.
 

Attachments

  • 20181230_135604.jpg
    20181230_135604.jpg
    96.3 KB · Views: 71
  • 20181227_140411.jpg
    20181227_140411.jpg
    94.6 KB · Views: 55
  • 20181224_122346.jpg
    20181224_122346.jpg
    99.3 KB · Views: 89
  • 20181230_140752.jpg
    20181230_140752.jpg
    94.1 KB · Views: 39
  • 20181227_124715.jpg
    20181227_124715.jpg
    97 KB · Views: 40
When I took the body off I knew I'd need the lift to work on the frame, so I built a skate for the body to roll around on. Sorry I didn't get pics of it when I did it but I was ready to move it out in between rain showers.

Resized_20190104_165046_zpsxp9w7g0h.jpg

After that I mocked the rear axle in place.

20190112_153310_zpsg3butnzk.jpg

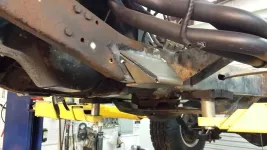
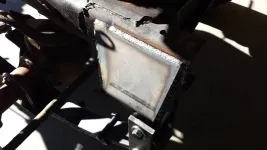
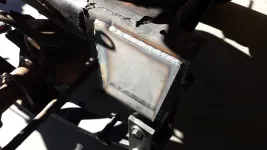
Then I set about to getting the front axle mounted. I ordered outrigger brackets and spring hangers from Barnes 4WD. Nice parts for sure and very heavy duty. It's making me second guess building my own for the shackle ends since all I have lying around is 3/16" materials. I"ll probably mock something up to see how it turns out. If I'm not happy with it I can always scrap it and order pre-fabbed stuff made from sturdier materials.

20190114_180123_zpsesywpurl.jpg

I have to say it's been a while since I've removed rivets and I can say that I still hate them just as bad today as I did the first time I did it :mad:

Outriggers mocked into place

20190115_185042%201_zps2fstdj0g.jpg

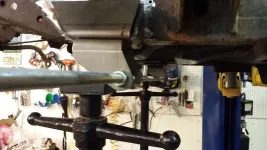
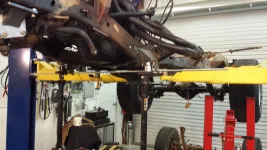
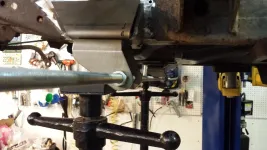
I used a 6' piece of 9/16" threaded rod to set the perch center distance and to align the spring hangers. After measuring every which way I could think of (twice), I tacked them in place

20190118_182228_zps3k2xkqig.jpg

Front axle sitting on the springs. Tomorrow I plan to make my attempt at fabricating the previously mentioned shackle hanger outriggers

20190118_190646_zpsfyy07lyn.jpg


Edit: Well I see that Photobucket seems to be as flaky as ever and only posting a couple of the linked pics lol. I'll load them directly also in case the others go away as well.
 

Attachments

  • Resized_20190104_165046.jpg
    Resized_20190104_165046.jpg
    20 KB · Views: 34
  • 20190118_182215.jpg
    20190118_182215.jpg
    96.4 KB · Views: 60
  • 20190118_182228.jpg
    20190118_182228.jpg
    95.4 KB · Views: 41
  • 20190118_190646.jpg
    20190118_190646.jpg
    96 KB · Views: 34
Last edited:
Cool goings on in this thread...!!! Love the fact that you've got a full blown lift in your shop...

Looking forward to watching your progress...
 
Cool goings on in this thread...!!! Love the fact that you've got a full blown lift in your shop...

Looking forward to watching your progress...

Much appreciated! The shop belongs to my father and the lift does make things much easier. I'm lucky he lets me use it almost any time I need it.

As for progress, I did work on it a bit yesterday but no pics except ones my wife took of my old ugly mug so I'll spare you guys the horror. I also went through the materials I had on hand and decided to just go with another pair of the Barnes 4WD outrigger brackets for the shackle end up front. I'll piddle with it off and on this week until they arrive, maybe make another pair of shackles for the front, start fabbing the front bumper and get the winch plate fitted. I'll be sure to take more pics along the way.

:chug:
 
Headers are very nice.

I've decided to add a 1" body lift and was looking at the MORE aluminum pucks. Noticed you are looking at the Daystar. What are your thoughts on the two approaches?

I'll end up with a total lift of 1.5"; shackles+body.
 
Thank you. The headers are something I used to see all the time on Jeeps when I was in high school and I always loved that sound. To be honest though, I'm sure they'll be something I will tire of eventually lol. The older I get the more I value things that aren't obnoxiously loud, but I really wanted a throwback Jeep and those things just scream "old school" to me.

As for the body lift, I honestly didn't even know about the MORE pucks. I did look at the Performance Accessories 1" body lift but after looking at my stock body bushings I knew they'd need to be replaced as well. They were all cracked and falling apart, and also a lot of the large washers were very rusty and didn't have much life left in them.

So it came down to price for me. A body lift plus a new set of body bushings of questionable quality would have been double the price. Also, I've not had great luck with rubber products from China, and every set of bushings I ran across seemed to be of that quality and origin, so I decided to go with the 1" taller poly body mount set from Daystar and just have both in one. I did have an issue when the kit arrived; it came with the poly mounts but no hardware, which seems to be a common thing when looking at Amazon reviews. I contacted the seller and Daystar shipped the hardware to me so now it's a complete kit.

The only thing I can say about the quality of the kit is that the poly is much harder than I was expecting, but I'm sure it's the appropriate hardness for the application. The hardware was of good quality, too. The bushings fit very well in the body mount holes so I don't think I'll have any issues with initial fitment. The bushings come with a steel bushing molded into the poly mount so wear inside the frame side mounts shouldn't be an issue. Time well tell on their longevity.

I found the hardware missing from all of the 0" lift kits as well. It is the major reason I'm going 1". I think the poly will hold up well. I've been looking at Daystar and Prothane as well. I'm currently installing all new Prothane leaf and shackle poly bushings.

Did you replace the Transmission plate mount?
 
I will be swapping it out, but unfortunately it's in backorder land with the rest of my stuff coming from Novak.
 
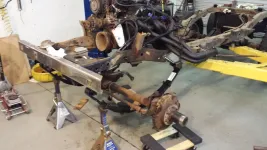
Finally got it back on its feet this weekend. I opted to buy the front outriggers from Barnes 4WD and I'm glad I did. They look nice and at my working pace I'd still be fabbing them this coming spring.

20190126_152030_zpsjkwdxsp6.jpg

20190126_143221_zpso98cayvy.jpg
 

Attachments

  • 20190126_143221.jpg
    20190126_143221.jpg
    100.5 KB · Views: 53
  • 20190126_152030.jpg
    20190126_152030.jpg
    93.9 KB · Views: 69

Jeep-CJ Donation Drive

Help support Jeep-CJ.com by making a contribution.

Help support Jeep-CJ.com by making a contribution.
Goal
$200.00
Earned
$25.00
This donation drive ends in
Back
Top Bottom