• Hello Guest, we are proud to now have our Wiki online that is completely compiled and written by our members. Feel free to browse our Jeep-CJ Wiki or click on any orange keyword when looking at posts in the forum.
    To dismiss this notice
    click the top right X.

Build Thread 77 CJ-7 Renegade Frame Off Restoration

Build Thread 77 CJ-7 Renegade Frame Off Restoration

WV 77Cj7

Jeeper
Posts
70
Thanks
0
Location
Hedgesville W.V.
Vehicle(s)
1977 Jeep CJ-7 Renegade
Hi guys- new to the forum here..I've been reading about the CJ7 's for months planning out the rebuild of a 77 I've acquired from my dad. Ive decided on this build thread to chronicle the restoration of this rust bucket.

A little history on the jeep- He bought it new back in 77 before he had any kids, and over the years it sat outside and slowly rusted away. I still don't know a whole lot about it since i haven't had a decent place to work on it, so once i figure out the stats on it will update my profile. However things I've picked up over the years- It came with the dealership installed Meyer plow option offered back in 77. I believe the plow is a 6.5'. Its in need of being restored as it was also left out to weather.

I recall a bunch of years ago dad pulled the jeep into the garage to try and slow the rusting taking place.. some patch panels were riveted in as he didn't have the time, tools or money to do the fix properly (couldn't stay permanently as a ford 1929 Model A calls the garage home). About 10 years ago the jeep was taken to a fab shop and the rear frame was repaired as it had badly rusted out like I've seen so many others do. The repair is strong.. once i yank the body ill take some pictures.

Everything was repainted and put back together. The soft top wreaked havoc on the jeep as it leaks during heavy down pours. The body is completely rusted out.. to the point its not safe to be driven any longer. I know this old jeep used to be a work horse, and has paid for itself 10 times over plowing. Always told myself growing up albeit i couldn't do anything at the time, id return it back to the way it looked the day it rolled off the dealership lot.

Some pictures:

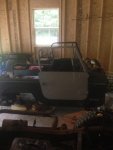
Garage that i built this spring specially for this project (obviously not even done.. I'm anxious):
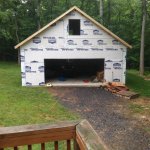
IMG_1821_zpsd448ec4b.jpg

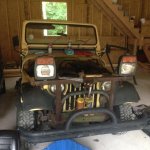
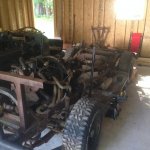
The Project:

IMG_1804_zps726682b9.jpg

The day i picked it up from my dads it started giving me problems.. a quick napa trip fixed this one:
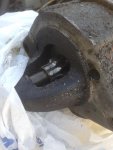
IMG_1476_zps88a2801a.jpg

Future resting place for the next couple of years:
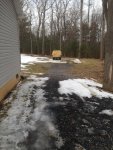
IMG_1480_zps277b0a93.jpg

Meyer Plow:
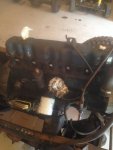
IMG_1485_zps215f750e.jpg
 
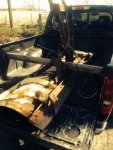
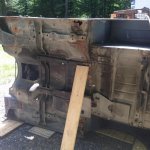
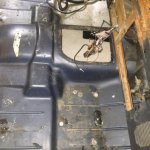
I decided on a YJ tub swap since the rust on the cj is beyond repair. 200 dollars for the tub, tail gate, and sport style roll bar. Made a 3 hour trip to northern pa last saturday to pick it up. Tub is basically in perfect condition with minimal rust on the rear quarters below the doors. The previous owner fiberglassed the floor board for some unknown reason.

IMG_1797_zps239d7439.jpg

IMG_1816_zps6433440a.jpg

IMG_1817_zps17897e1b.jpg
 
Awesome project. It's sooooo cool that you have a history with this Jeep! Well worth the effort. You are to be commended for keeping yet another Jeep from fading into oblivion. Just a sentimental fool myself...

Sent from my GT-I9152 using Tapatalk
 
Awesome project. It's sooooo cool that you have a history with this Jeep! Well worth the effort. You are to be commended for keeping yet another Jeep from fading into oblivion. Just a sentimental fool myself...

Sent from my GT-I9152 using Tapatalk

My goal with this project is to revive her and pull another 37 years of use out of the jeep. Should be a learning experience on many fronts.
 
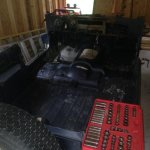
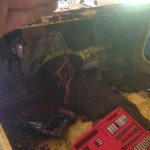
Stripped down most of the components on the old tub. The dash is shot.. windshield seals went bad and as a result this has rusted everything out. I cut out the defroster slots in an effort to have a pattern to transition to the yj tub.

I still need to remove the A/C and see what can be done to revive that, as well as remove the roll bar. I have a yj, but I believe I'm going to use the CJ roll bar to keep it as original as possible once restored.

IMG_1880_zps2f35364a.jpg

IMG_1898_zpsb01de7ec.jpg

IMG_1896_zps7c9019bd.jpg
 
Gotten a bunch more since my last post.

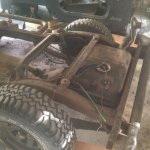
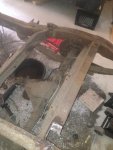
Removed the fuel lines, tank/shield and I've cut the rear bumper which was rusted through (welded on) off. Also cut the front plow light angle iron and plow mount off along with the front bumper. Dad used this old jeep to push old stumps out back in the day, and as you can see theres a hell of a dent in the front radiator crossmember to prove it.

Best idea I've got to fix it so far is to make a small cut on the bent part and try to hammer things back into place/ then weld. Im trying my best to avoid removing this piece because it looks like it will be a royal PITA to do and i don't want to risk misaligning the frame.

IMG_2100_zpsa225f3ed.jpg

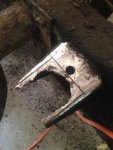
Also cut out the old body mount sections that are rusted to prep for welding.

IMG_2082_zps31132aad.jpg

IMG_2081_zps4f6ce8bf.jpg

IMG_2084_zps6530221d.jpg

Scored a super nice pair of hard jeep doors which are from what I've gathered are the correct style for this year jeep, complete with the original striker plates. Doors are in surprisingly great shape, and the interior trim pieces look brand new. Going price seems to be about 400+ around here.. only paid AMC 150 .

IMG_2043_zpsb838048b.png

IMG_2047_zps021f500e.jpg

Buying a welder next week so once i learn to put down some good beads ill be using it to repair rust on the YJ body as well as some minor frame work. More to come!
 
Labor day weekend-

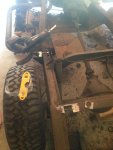
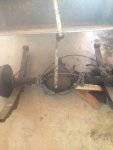
Stripped the rear drive shaft, axle and suspension from the jeep. The rubber bushings in the leaf springs seized up and melted around the bolts making them nearly impossible to remove. Ended up drilling the rubber bushings out and pounding it off with a sledge hammer once loose enough.

IMG_2116_zps5468bb3e.jpg

Used the skid steer to move the axle to the front of the garage so i could disassemble.

IMG_2118_zpsbfeb9116.jpg

All cleaned up after the tear down:

IMG_2122_zpsb5f4c7e4.jpg

IMG_2124_zps4a46ee50.jpg

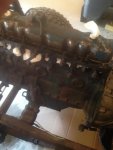
After this was all done i moved on the engine to get the headers off:

IMG_2129_zps22f534a0.jpg

IMG_2130_zpse07566ab.jpg

All finished:
IMG_2137_zps9e4edb97.jpg
 
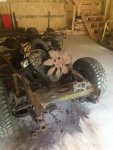
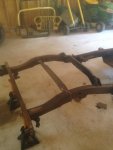
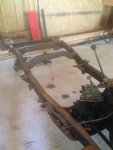
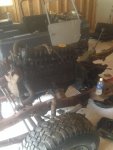
So today i wheeled the frame out of the garage. I didn't think it would be heavy with the engine resting on the front wheels and the back of the frame stripped down. Boy was i wrong. I walked it out by hand.. i pulled it back into the garage with the skid steer after.

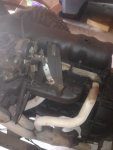
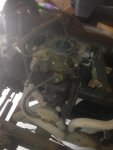
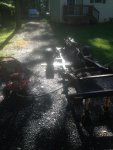
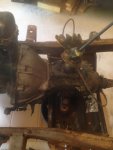
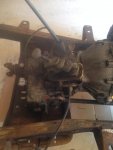
Stripped all the grease and mud off of it from over the years with a pressure washer. Taped off what i could using some left over house wrap tape which works surprisingly well against water. Engine looks much better.

IMG_2146_zpsf1f24ea5.jpg

IMG_2149_zps77d63f77.jpg

IMG_2148_zpsdacfaff4.jpg

IMG_2150_zps01a13c5a.jpg

IMG_2147_zps9836e213.jpg

Waiting on funds to purchase an engine stand and lift so i can pull the engine and Transmission off the frame. Once i do that i can break down the front suspension and move on to welding up the bad spots on the frame.
 
Hey! good luck and I will be watching for updates! I want to rebuild my CJ eventually, in a perfect world I get a new high end fiber glass tub but I know my self better and just might try and find a good yj tub. when I do my build I will be living in CT again so I would like to not have it rotted again in 10 years lol
 
Hey, good luck with your project! It looks like my project. I had to buy also a new body and a new frame.

Greetings from Germany
Sietschei


Gesendet von meinem iPhone mit Tapatalk
 
Do you still have access to skid steer? you can save that $200 and use it on the Jeep by pulling engine with skid steer. Also check around there are places that rent engine hoists.... just also thought about how my grandfather used to pull engines with a chain and come along wrapped around some 2x4s laying across ceiling joists. more than 1 way to skin that cat :chug:
 
Do you still have access to skid steer? you can save that $200 and use it on the Jeep by pulling engine with skid steer. Also check around there are places that rent engine hoists.... just also thought about how my grandfather used to pull engines with a chain and come along wrapped around some 2x4s laying across ceiling joists. more than 1 way to skin that cat :chug:

I do have access, I'm just trying to decide how i want to do things. I could use the steer, but the engine lift might be beneficial for the tub since its fairly heavy and bulky. Not 100% sure what i will do. I may look for a craigslist lift.

As for the project.. last week i made some progress followed by some progress this week.

Stripped the tub of the dash and air box.

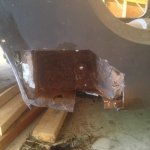
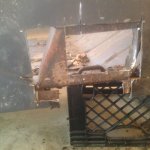
Started surgery on the passenger side tub today. The PO had the steps on the side of the tub and the bolt holes for these are a cause of some rust in the typical tub areas.

image2_zpsbd576684.jpg

image1_zpsc8859a8e.jpg

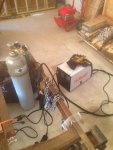
Finally got all my welding gear together so pending activities next weekend I'm going to start teaching myself to weld. Im lucky i have a brother who knows how to weld who will show me the basics if i don't fare too well learning myself. Once i can lay a decent bead on some clean sheet i plan to build a welding cart, and then once comfortable ill prep some patch panels and get this show underway.
 
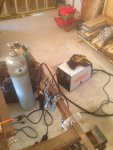
Not much progress on the jeep.. but i spent the morning setting my new welder up and running my first couple of beads ever. Very pleased with the unit.

image1_zps5c253df3.jpg

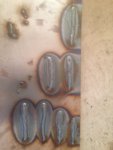
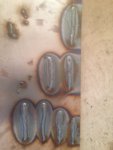
Couple of test beads:
image2_zps21141b7c.jpg
 
Not much progress on the jeep.. but i spent the morning setting my new welder up and running my first couple of beads ever. Very pleased with the unit.

image1_zps5c253df3.jpg

Couple of test beads:
image2_zps21141b7c.jpg

your welds are looking pretty good, easy way to tell is to flip your work over and check for weld penetration, a strong weld will melt thru your work to the other side :chug: Be careful with heat on sheet metal it makes it warp quick, I was taught to spot weld every few inches take your time so your metal wont warp. After you go around your piece then put a spot weld right next to the previous weld and work your way around very slowly til you have a solid weld grind it flat and repeat. Keep your metal cool, I used a wet towel near the weld joint as a heat soak, also with any gap welding your doing having copper or brass on the back side of the gap will help to keep the weld from falling thru I would try to keep my panel near room temp as I was welding them and grinding on them :chug: practice practice practice heat is not as a big concern on the frame as it is thicker and will absorb heat better with out warping Have fun with it my Hobart Handler was my toy in the garage
 
your welds are looking pretty good, easy way to tell is to flip your work over and check for weld penetration, a strong weld will melt thru your work to the other side :chug: Be careful with heat on sheet metal it makes it warp quick, I was taught to spot weld every few inches take your time so your metal wont warp. After you go around your piece then put a spot weld right next to the previous weld and work your way around very slowly til you have a solid weld grind it flat and repeat. Keep your metal cool, I used a wet towel near the weld joint as a heat soak, also with any gap welding your doing having copper or brass on the back side of the gap will help to keep the weld from falling thru I would try to keep my panel near room temp as I was welding them and grinding on them :chug: practice practice practice heat is not as a big concern on the frame as it is thicker and will absorb heat better with out warping Have fun with it my Hobart Handler was my toy in the garage

I'll keep the copper trick in mind. Where could I find a chunk of that? The sheet in the picture is 16g with .035 wire. The back side of the sheet had great penetration with no burn through, but I'm contemplating either .030 or even .023 wire for the jeep as the pa els are slighter 18 gauge. I'm going to mock up some butt welds and try them out for I put anything into the jeep. I practiced some plug welds and fixed an old lawn mower trailer. Working on a welding cart right now. Do you grind your welds down before coming back and making another pass after cooling? I did see first hand what the heat does to the metal. Warped that 16gauge like it was nothing.
 
I'll keep the copper trick in mind. Where could I find a chunk of that? The sheet in the picture is 16g with .035 wire. The back side of the sheet had great penetration with no burn through, but I'm contemplating either .030 or even .023 wire for the jeep as the pa els are slighter 18 gauge. I'm going to mock up some butt welds and try them out for I put anything into the jeep. I practiced some plug welds and fixed an old lawn mower trailer. Working on a welding cart right now. Do you grind your welds down before coming back and making another pass after cooling? I did see first hand what the heat does to the metal. Warped that 16gauge like it was nothing.


When I was doing my patch panels in my floors, I spot welded all the way around till i was done and the metal was cool then i ground the welds flat keeping the grinding wheel moving to control heat. inspected welds and filled in any holes left til I had a solid joint all the way around. Takes for ever but I did not wanna see repaired floor panels every time I looked at it. Also I had .030 wire felt like it filled the gaps better/faster. I did start with .023 seemed to take longer. On the copper you can try Eastwood.com they sell it, and a lot of other useful tools and chemicals :chug:
 
When I was doing my patch panels in my floors, I spot welded all the way around till i was done and the metal was cool then i ground the welds flat keeping the grinding wheel moving to control heat. inspected welds and filled in any holes left til I had a solid joint all the way around. Takes for ever but I did not wanna see repaired floor panels every time I looked at it. Also I had .030 wire felt like it filled the gaps better/faster. I did start with .023 seemed to take longer. On the copper you can try Eastwood.com they sell it, and a lot of other useful tools and chemicals :chug:


I've done a lot of reading and .030 seems to be the general consensus so I think I'll give that a try. Luckily I just picked up a spool. .023 would be a bit more hassle as the drive roll inside only accommodates .030 and .035. I'll check them out on the copper. Thanks for the reccomendation!
 
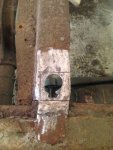
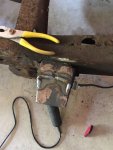
Started to repair the frame mounts today. Need to grind these welds down and hit it again. I think using an extension cord with the welder is cutting down on the power a bit, causing a minimal lack of penetration. This mount is about half done.

image1_zps85fad2fc.jpg
 

Jeep-CJ Donation Drive

Help support Jeep-CJ.com by making a contribution.

Help support Jeep-CJ.com by making a contribution.
Goal
$200.00
Earned
$25.00
This donation drive ends in
Back
Top Bottom