Build Thread 84 CJ7 Restore

Build Thread 84 CJ7 Restore

mikeg2

Jeeper
Posts
21
Media
34
Thanks
0
Location
Salt lake city, utah
Vehicle(s)
84 CJ7, 258, T5, AMC20, D30, D300
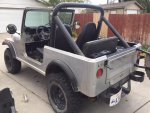
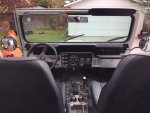
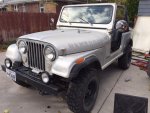
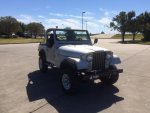
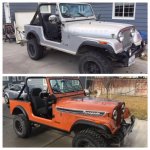
Hello everyone, this is my first post as a new member. Hopefully you all find this as exciting as I have. This is my second CJ7 , the first was an 82 that was a complete rust bucket. I sold it about 5 years ago because I didn't have time to deal with it anymore. Since then my wife and I really missed our Jeep adventures. So for my 40th birthday my wife wanted to get me a project Jeep, but she couldn't buy it for me, so we started looking halfway through last year. I finally found one in central Utah last October where the body was in great condition (almost rust free) and the mechanics were above average for a Jeep that year. It seemed like the perfect project, so we bought it. The first two months I spend underneath fixing all the oil leaks (well, most of them) and once I was happy with how it was running, I turned to the body. I'm more of a mechanical person, never done any body work/paint, so I was looking forward to the challenge. Here are some before pics:
https://www.jeep-cj.com/forums/attachment.php?attachmentid=23179&stc=1&d=1518120128
https://www.jeep-cj.com/forums/atta...ent.php?attachmentid=23182&stc=1&d=1518120128
 

Attachments

  • IMG_4844.jpg
    IMG_4844.jpg
    45.5 KB · Views: 61
  • IMG_4845.jpg
    IMG_4845.jpg
    40.1 KB · Views: 38
  • IMG_4848.jpg
    IMG_4848.jpg
    46.3 KB · Views: 38
  • IMG_4841.jpg
    IMG_4841.jpg
    46.6 KB · Views: 90
Cool... welcome to the forum.

Nice Jeeo...!!!
 
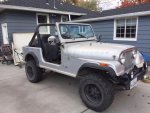
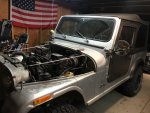
Welcome ! Looks a little like mine
 

Attachments

  • image.jpg
    image.jpg
    19.3 KB · Views: 30
Last edited:
Thanks! So having never done any body work before I started watching a lot of YouTubes, trying to prep for what was coming, but that just left me with more questions. Initially, I wanted to start the bodywork in the spring, but then I ran into someone who used to work at a body shop and now she just paints out of her garage. So I got a lot of hands on training working on her car, which gives you a lot more confidence if you've never done any painting and body prep before. And since it was all fresh in my mind, I just dove right into it. Since work is always slower for me during the holidays, I was hoping to finish everything before mid January...it was December 5th.

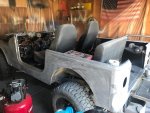
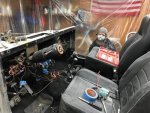
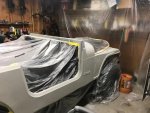
Bought a diesel jet heater (because Salt Lake City in December) a bigger compressor, sanders, etc. The underside of my jeep had already been sprayed with some sort of rust inhibitor, but the entire body was littered with tiny little rust specs. I thought it would be easy to just sand everything down, but holy :dung: that takes a lot of time. And one tiny little spec on the surface meant a quarter sized spot of rust on the tub. In order to ensure we got all the rust off, we had to take all the paint off the tub. Using a DA sander and 40 grit, it still took two of us about two weeks and about 80 hours each. Definitely my least favorite part of the project.
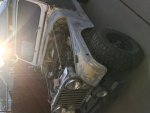
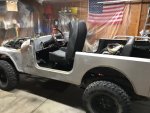
Also, once we took the paint off, we found numerous little "easter eggs" waiting for us. From bad bondo jobs to cracks in the tub. You can see in the second pic that the driver side fender was almost all bondo to begin with, but it was poorly done, so we had to reshape that entire fender. We also learned once taking off the windshield seal that I needed a new windshield frame. And taking off the dash broke literally every little old plastic piece, but I was going to replace those anyways. The guy who owned it before me just used it for hunting up in the mountains and never cleaned it, so I was ready to burn everything inside the jeep anyways.


https://www.jeep-cj.com/forums/atta...ent.php?attachmentid=23193&stc=1&d=1518312939
 

Attachments

  • IMG_0025.jpg
    IMG_0025.jpg
    95.8 KB · Views: 66
  • IMG_0028.jpg
    IMG_0028.jpg
    68 KB · Views: 33
  • IMG_0040.jpg
    IMG_0040.jpg
    94 KB · Views: 43
  • IMG_0068.jpg
    IMG_0068.jpg
    54 KB · Views: 41
  • IMG_0063.jpg
    IMG_0063.jpg
    59.7 KB · Views: 39
Take the carpet out and see what is under that. Not hard to do. You never know what is hiding under that.
 
Take the carpet out and see what is under that. Not hard to do. You never know what is hiding under that.[/QUOTE

Actually, the carpet is new. I put it in after I bought it. The tub is in amazing condition. I couldn't find rust anywhere inside.
 
Take the carpet out and see what is under that. Not hard to do. You never know what is hiding under that.[/QUOTE

Actually, the carpet is new. I put it in after I bought it. The tub is in amazing condition. I couldn't find rust anywhere inside.

Ok. That's a very good thing. Carpet can really bring on the rust if it gets wet
 
Once we got all the surface rust removed and bondo'd the parts that needed it, it was time to prime! Two coats later and we're ready for the base. Also, the new windshield came in and it looked great, but the way they package those things is insane. Trying to get the glue off that holds the foam packaging padding took an hour or two.
 

Attachments

  • IMG_0181.jpg
    IMG_0181.jpg
    50 KB · Views: 34
  • IMG_0191.jpg
    IMG_0191.jpg
    89.3 KB · Views: 33
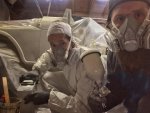
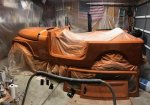
Base coat was very enjoyable. Clear coat less so. We sprayed all the accent pieces & bolts and roll cage black but we used a matte clear coat which makes it look different. I really like the contrast. We also used the matte clear coat for everything interior, dash & instrument panel.
 

Attachments

  • IMG_0225.jpg
    IMG_0225.jpg
    49.2 KB · Views: 41
  • IMG_0205.jpg
    IMG_0205.jpg
    78.1 KB · Views: 39
  • IMG_0204.jpg
    IMG_0204.jpg
    84.1 KB · Views: 35
  • IMG_0186.jpg
    IMG_0186.jpg
    50.3 KB · Views: 41
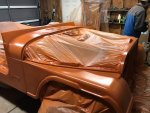
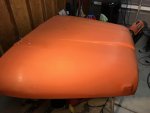
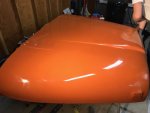
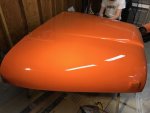
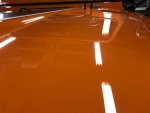
I thought after the clear coat, the rest would be easy, but I didn't realize how in depth the cutting and polishing had to be if you wanted a mirror finish. I learned the hard way by cutting through the clear coat with the buffing pad...so new paint and clear on the hood! But that ended up being a good thing because I did a much better job the second time around. You can see the difference in steps from the first cut to the final polish. It's really satisfying to see.

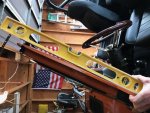
One setback we ran into was installing the windshield. After we got the glass in place and mounted the windshield, I couldn't get the same measurements from one side to the other (the measurement you need to install the soft top from the top of the windshield to the back of the jeep was off by more than an inch from one side to the other). I finally figured out that it was dropped and bent...couldn't see it with the eye, but when you put a level up to it, you could see. I contacted the company and they shipped me a new one...which was nice, but I was out of paint and clear coat, so I had to spend another $80 on paint and wait another 10 days to finish.
 

Attachments

  • IMG_0315.jpg
    IMG_0315.jpg
    78.3 KB · Views: 76
  • IMG_0316.jpg
    IMG_0316.jpg
    82.9 KB · Views: 73
  • IMG_0317.jpg
    IMG_0317.jpg
    87 KB · Views: 72
  • IMG_0341.jpg
    IMG_0341.jpg
    47.9 KB · Views: 71
  • IMG_0274.jpg
    IMG_0274.jpg
    59.9 KB · Views: 84
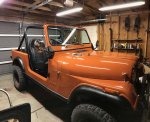
Once we finished up new windshield it all came together pretty quickly. I used a truck bed liner to paint the fenders and rocker panels and pieced together the dash with all the new parts I bought. It really looked good when it was all put back together! Final step was the decals. I always wanted a vintage looking Jeep!
 

Attachments

  • IMG_0271.jpg
    IMG_0271.jpg
    56.1 KB · Views: 145
  • IMG_0342.jpg
    IMG_0342.jpg
    65.2 KB · Views: 130
  • IMG_0343.jpg
    IMG_0343.jpg
    57.6 KB · Views: 105
  • IMG_0344.jpg
    IMG_0344.jpg
    55.2 KB · Views: 105
  • IMG_0346.jpg
    IMG_0346.jpg
    50.7 KB · Views: 101
Wow. Love the pics. Wish I had the skill and time to do stuff like this!
 
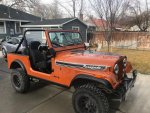
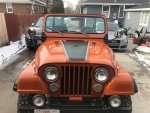
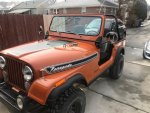
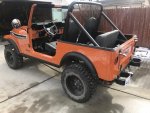
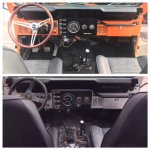
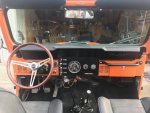
Here are some before and after pics. I think it took me more time to figure out what color to paint it than it did to actually do the work. I ended up settling on a color from 1977, Tawny Orange, paint code 7Y. I used the decals from a 1973 Renegade . Phoenix Graphics out of Arizona makes any decal that Jeep ever used. They're expensive, but it looks so good now! Start to finish was about five weeks. Not too bad for a winter project. Now time for Moab!
 

Attachments

  • IMG_0351.jpg
    IMG_0351.jpg
    62.6 KB · Views: 123
  • IMG_0352.jpg
    IMG_0352.jpg
    49.7 KB · Views: 100
  • IMG_0349.jpg
    IMG_0349.jpg
    46 KB · Views: 79
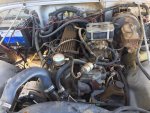
Engine pic? Please
 
It's not much to look at right now, but here you go. I'll be working on the engine this spring. I'm also trying to figure out how they are venting the valve cover. It has a breather where the cap usually is, a pcv valve in the next port and an open port in the rear that hooks to the charcoal canister? It's weird.
 

Attachments

  • IMG_0496.jpg
    IMG_0496.jpg
    98.4 KB · Views: 100
Good job. Really looks nice. Like the orange, but still partial to silver. Keep the hood closed until you get to that. :)
 
Very nice you did a great job :notworthy:
 

Jeep-CJ Donation Drive

Help support Jeep-CJ.com by making a contribution.

Help support Jeep-CJ.com by making a contribution.
Goal
$200.00
Earned
$25.00
This donation drive ends in
Back
Top Bottom