• Hello Guest, we are proud to now have our Wiki online that is completely compiled and written by our members. Feel free to browse our Jeep-CJ Wiki or click on any orange keyword when looking at posts in the forum.
    To dismiss this notice
    click the top right X.

Build Thread A year long 1980 CJ5 build/adventure.

Build Thread A year long 1980 CJ5 build/adventure.

brownrxmd

Jeeper
Posts
100
Media
2
Thanks
0
Location
Wittmann, Az
Vehicle(s)
1980 Jeep Cj5.
5.3 Vortec
SM465 transmission
D300 Transfer
3.07 gears
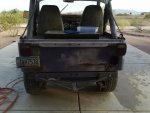
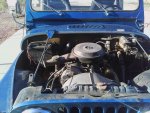
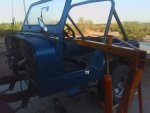
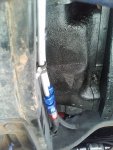
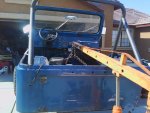
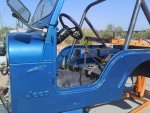
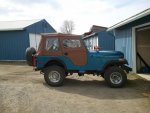
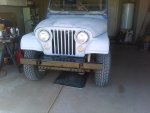
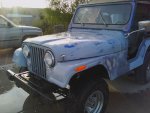
In the spring of 2013 I found myself with a 1980 Jeep CJ5 . There was no rust on the body or frame as it has spent it's entire life living in Arizona. For the past 25 years or so it was used primarily for hunting and at that end was towed from Phoenix to Flagstaff once a year for elk hunting. The tires on it were so old, that they simply fell apart while sitting in my driveway one. Like a bad set of retreads. So here is my build.
546622_3196947964883_944450272_n.jpg
543754_3196945004809_1421623279_n.jpg
544806_3196946204839_1926579717_n.jpg
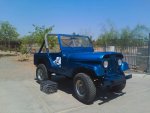
The paint on the hood was peeling up above the carburetor, I think there had been a minor fire under the hood at some point. I don't profess to be a body man but I sanded, tried my hand at bondo, and used shaker cans of primer. No tailgate but the jeep had a swingaway tire carrier that made the loudest racket when driving. I removed it and tried to patch up a few holes and eventually welded it all together, makes a great place to carry fuel cans.
577353_3196963805279_1515140215_n.jpg
A buddy of mine has a 90 Jeep with electrical bugs. In exchange for fixing his electrical bugs he agreed to spray my jeep for me in his backyard paint shed with some left over paint he had.
IMG_20130529_070636.jpg
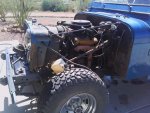
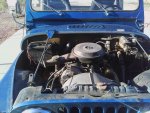
At some point I decided I wanted to do a 5.3 swap. The engine that was in the jeep came from a 79 oldsmobile and mated to a SR4 Transmission . The engine might have put out 70 horses. One frustration with the engine was that if I drove any trails the needles would unseat and the jeep would run so rich top speed would be about 30 mph. This happened so frequently I got to where I could reseat the needles in about 10 minutes.
IMG_0073.jpg
IMG_20130212_112042.jpg
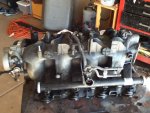
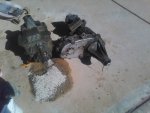
This was the first part I bought. I had doubts about wiring and found an ad on Craigs for a 5.3 wiring harness for cheap. I got to the guys house told him my plans and he threw in this intake manifold, the ecm, wiring harness, xfer case (chevy truck xfer case wouldn't fit) An SM465 Transmission and a few other pieces for free! His focus was on drifting and his little garage in the backyard resembled a junkyard.
Initially I battled two fronts, one was keeping this a secret from friends and family who would scoff at the idea of "fixing" this perfectly running jeep and secondly and more importantly the cost. I didn't want to get my butt handed to me several thousand dollars down the road. The first thing I did was research, I read everything from every forum I could find, secondly I made a spreadsheet to determine cost then lastly I started collecting parts, least expensive first. Note: the cost spreadsheet was a stupid idea.
IMG_0080.jpg

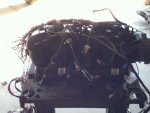
The wiring harness was daunting at first, I considered buying a harness from a vendor but it was cost prohibitive. After working on the harness a couple of thing became apparent. 1. With the exception of a few wires like oil pressure, water temp. sensor and alternator wires almost all of the connections from the harness connect to sensors and fuel injectors on the Intake manifold, so in theory and practice I was able "wire up" the 5.3 before I ever purchased the motor. 2. Other than to tidy things up if you do not want to cut into the wiring harness there is no reason to do so really. The wires I removed had to deal with the automatic Transmission , since I was going with a manual Transmission I didn't need the automatic Transmission wires. Instead of cutting them out I simply could have rolled up connector and "stowed" it away somewhere. The provisioning of the ECM takes care of connections not used.
1wiring.jpg
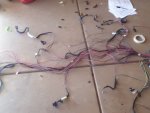
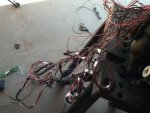
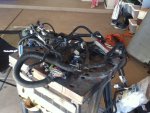
This is the wiring harness that came with the manifold, unmolested.
3wiring.jpg
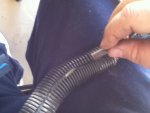
First I laid the harness on the garage floor and cut away the protective tubing.
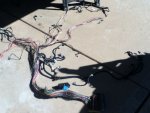
4wiring.jpg
This is the harness without the tubing. The wires will keep their general shape.
IMG_0070.jpg
IMG_0071.jpg
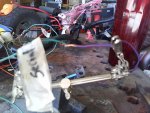
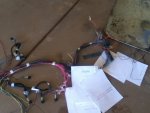
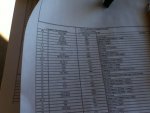
Using a handy pinout guide I began removing wires that weren't needed such as auto Transmission connector, fuel level sender, abs etc. Even though I was only planning on using the front O2 sensors I kept the rear O2 sensor wires attached and simply had the rears programmed off in the ECM.
IMG_0067.jpg
My wiring pinout sheet.
IMG_0069.jpg
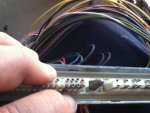
Removing wires from the ECM connector. I kept the wires I removed and labeled them just in case I made a mistake.
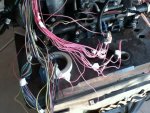
IMG_0078.jpg
The goal is to get the wiring down to 4 wires, 12v keyed, 12v constant, ground, and ignition switch. All of the Pink wires are 12v keyed.
I used this website: Vortec 4.8/5.3/6.0 Wiring Harness Info for information.
IMG_0076.jpg
IMG_0077.jpg
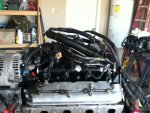
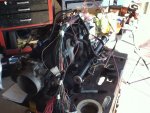
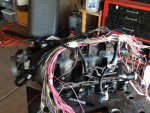
Harness laid out on intake. You can see fuel injectors are wired.
IMG_0074.jpg
IMG_0079.jpg
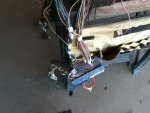
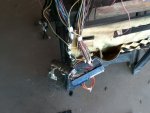
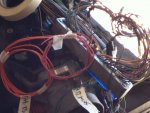
There are two ECM connectors, The Red and the Blue connector. I kept my wires labeled.
IMG_0080.jpg
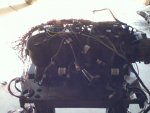
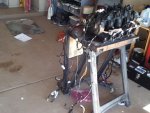
After removing wires and double checking my pinout sheet I started reusing the old wiring cladding to put my harness back together.
IMG_0100.jpg
After tidying up my wiring I set that project aside waiting for the day I could buy the engine to put this on.
 
IMG_20130212_112042.jpg
When I got the intake manifold I also ended up with this np208(?) xfer case and the sm465 Transmission . The xfer case wasn't going to work with my project for lots of reasons, size, also driveside output. The SM465 on the other hand was an awesome find, or so I thought... The output shaft of this particular model was going to require me to spend way more money at Novak than I wanted. Also I didn't have plans or the know-how to rebuild this Transmission . So both of these got sold at a substantial profit, Cha-ching!
IMG_20130210_182101.jpg
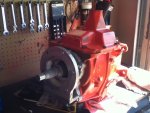
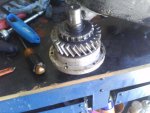
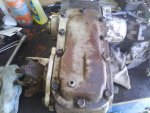
This SM465 was a barn find, it was nasty greasy and 25 bucks. I popped the top off of it when I got home and it looked fine to me, full of oil, no water and gears were shiny, there were knicks in the reverse gear but that's normal for these transmissions. I cleaned it up and ordered the Dana 300 adapter from Novak. You can tell the HUGE difference in output shafts between the two.
7.jpg
The Novak Adapter for the Dana 300 .
4a.jpg
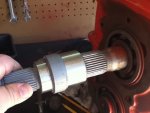
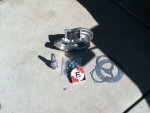
Instead of having to rebuild the Transmission and replace the output shaft I bought this sleeve from Novak that makes the spline count correct.
dana300adapter.jpg
The Novak Dana 300 adapter kit. This cost more than the engine.

3.jpg
2.jpg
7a.jpg
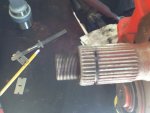
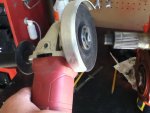
The original shaft was a bit too long so I had to measure and use a cut-off wheel to make it right. This was the first BIG decision I had to make, if I messed this cut up, then the whole project would have been toast.

IMG_0178.jpg
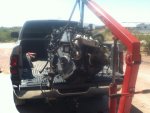
Engine arrives! I bought a 5.3 flex-fuel out of a 2002 Suburban, complete with all accessories, harness, and ecm. The cost originally 600.00 bucks, the AC compressor was not needed so the junkyard knocked a hundred bucks off. Then during loading, the forklift driver knocked the back glass out of my camper shell. So I got the engine for 400 bucks. Not a bad bit of haggling. Oh and the junkyard ordered me a set of camaro exhaust headers!

IMG_0182.jpg
IMG_0187.jpg
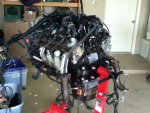
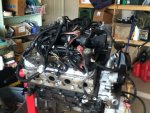
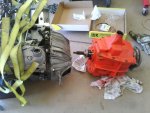
Engine on stand with it's stock wiring harness. My other intake with modified wiring harness is on the work table behind the engine.

IMG_0195.jpg
IMG_0207.jpg
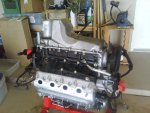
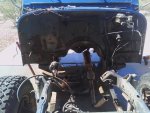
First order of business was to strip down the engine to be cleaned and inspected. The truck headers would not fit between the frame rails so they were thrown out.
IMG_0208.jpg
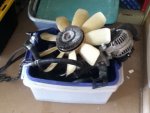
All of the accessories I put in this plastic box.

IMG_20130408_130704.jpg
IMG_20130408_131123.jpg
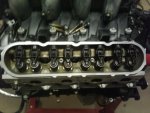
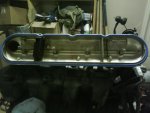
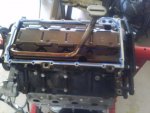
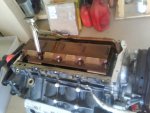
Valve covers came off and new gaskets installed.

IMG_20130409_160857.jpg
IMG_20130409_152801.jpg
IMG_20130409_152651.jpg
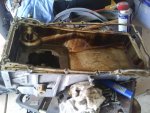
Rotating the engine over I removed the oilpan.
IMG_20130409_145108.jpg
I removed the old gasket cleaned out the pan, inspected the pickup tube seal and put it back together.

IMG_20130411_083212.jpg
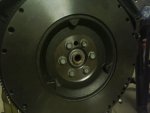
I ordered a flywheel and got it bolted on.

IMG_20130411_083159.jpg
IMG_20130411_093100.jpg
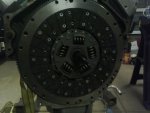
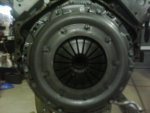
I also ordered a LUK clutch kit and got it lined up.

IMG_20130411_094311.jpg
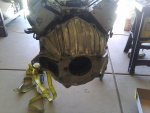
Finding an affordable bellhousing was difficult. I went back to the guy I got the intake off of and he happened to have one that had cracks in it. My next door neighbor happens to have welding skills and repaired the bellhousing for me.

IMG_0203.jpg
IMG_0206.jpg
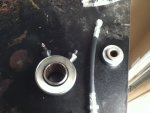
I bought this hydraulic clutch bearing from Speedway motors but after second thought I decided to go with an external slave cylinder setup because it would be easier to replace. A few months later I noticed Speedway stopped selling these, apparently they were prone to leak. I should have returned mine but didn't.
IMG_20130411_094740.jpg
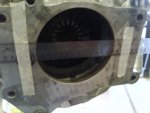
I taped a ruler across the back of the bellhousing. and measured from the clutch fingers to the ruler.
IMG_20130411_095548.jpg
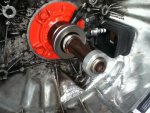
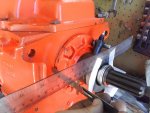
Then measured the face of the bearing to determine how many shims to use. This is still showing the hydraulic bearing that I did not use, but the steps were the same for the bearing I actually did use.

IMG_20130411_100610.jpg
IMG_20130411_105645.jpg
I then slid the two together.

IMG_20130529_070636.jpg
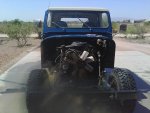
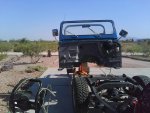
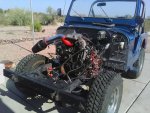
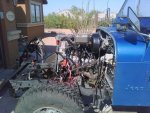
With the new engine and Transmission sitting off to the side, it was time to gut the jeep.
 
IMG_20130529_095348.jpg
So first the hood and fenders came off.

IMG_20130529_100652.jpg
Then the front grill and radiator.

IMG_20130529_101708.jpg
disconnect the steering column, remove battery, disconnect drive line, unhook exhaust, remove shifters from Transmission and xfer case and loosen engine mount bolts.

IMG_20130530_085535.jpg
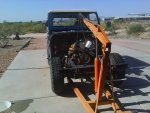
Moved engine crane into place and slowly removed the engine. A first for me!

IMG_20130530_095351.jpg
I moved the whole thing to my work table so I could remove the Dana 300 .

IMG_20130530_101348.jpg
My jeep had a Acme hardtop on it that I never could find doors for, so I put in on Craigs for sale. The guy who came to pick it up fell in love with the project and wanted my old V6 too. I sold him the V6 and tranny for 400 bucks plus a brand new dual electric fan unit I would need for my radiator! Woohhoooo!

IMG_20130530_104517.jpg
IMG_20130530_105012.jpg
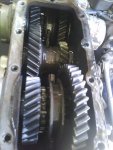
The insides looked brand new, except for the far shifter fork was missing a piece of plastic, so I ordered a new set of those and gasket kit.

IMG_20130530_110844.jpg
IMG_20130530_122824.jpg
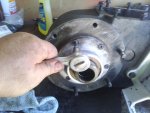
The Dana 300 was a pain to take apart and put back together. I wish I had just opened the inspection cover and replaced the shift pads. it wasn't leaking anywhere and was pointless. Also having never done this stuff before I'm always second guessing myself of whether or not I put it back together ok.
 
Nice write up. Looking to hear more.
 
IMG_20130531_185935.jpg
IMG_20130601_084138.jpg
IMG_20130530_101400.jpg
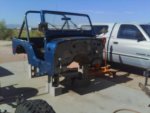
Next was time to remove the tub. I used the engine crane to lift the tub off the frame and set on blocks.

IMG_20130601_084157.jpg
Tub on blocks.

IMG_20130601_090214-1.jpg
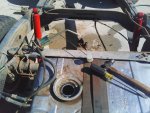
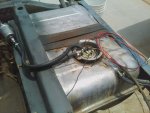
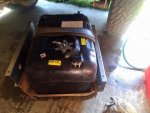
The fuel tank was less than a year old but since I was going fuel injected I had to install a fuel pump. I bought the pump and sending unit from Novak.

IMG_20130601_125512.jpg
IMG_20130601_125543-1.jpg
New pump installed and fuel filter and hoses run to filter.

IMG_20130601_125543-1.jpg
IMG_20130601_124238-1.jpg
IMG_20130601_122726-1.jpg
IMG_20130601_101928.jpg
I bought all of my fuel lines and connectors from Summit racing. I don't fully understand -6AN fittings etc but the folks at Summit do and the salesman I spoke with on the phone was patient and helped me enormously. I looped the supply and return lines and applied 12v to the pump to test. I lived to tell the tale.


IMG_20130412_140244.jpg
IMG_20130412_140328.jpg
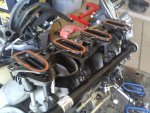
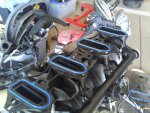
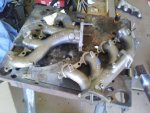
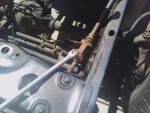
Back inside I removed the intake and put new gaskets on. I noticed there was a crack in the intake and luckily I had a spare already wired up!
IMG_20130411_094303.jpg
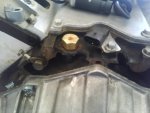
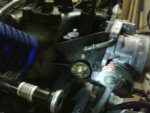
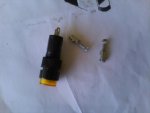
I replaced the electronic oil pressure switch with one that I use with the jeeps aftermarket oil pressure gauge.

IMG_20130408_133515.jpg
IMG_20130408_133523.jpg
IMG_20130408_133538.jpg
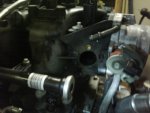
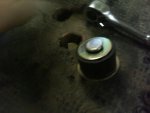
The replacement intake has this hole in the side, I'm sure it was for some California emission thing as the other didn't have it. I bought a plug for it and sealed it.


IMG_20130601_182845.jpg
IMG_20130411_105946.jpg
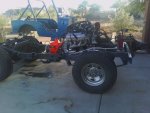
I didn't show the pics but I ordered the engine mounts from Novak and bolted those on to the frame. Next I installed the new camaro headers and used the crane to drop the engine and Transmission onto the frame. I also bought a 1 inch body lift.

IMG_20130610_090948.jpg
I added the oil pressure gauge to the engine. And fuel lines are installed.
 
Awesome! Great Pictures too. Looking forward to more. Rod
 
IMG_20130610_174250.jpg
This is a momentary switch which will simulate the ON/START of the ignition key.
IMG_20130610_174329.jpg
This is a toggle switch which supplies the voltage to the ecm. Simulates turning the ignition key from OFF to RUN.
IMG_20130610_090954.jpg
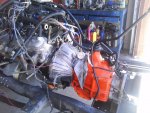
After I bolted the engine and Transmission into place I filled the engine with oil and rigged up a switch to start it with. The engine started on the first try, nothing melted, the fuel tank didn't explode and the engine was running, oil pressure was great and this was THE MOMENT for me.
 
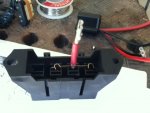
My 5.3 conversion fuse block

IMG_0161.jpg
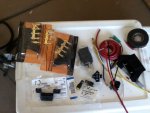
I used information from Brendan at lt1swap.com for most if not all of the engine electrical stuff. His knowledge was invaluable and he programmed my ecm for cheap and he had a 1-2 day turn around time. The guy really knows his stuff and shares what he knows. This pic is basically all of the parts needed to build a fuse block and obdII port. I bought double everything just in case I broke something or lost something and I didn't want to have to source it out.

IMG_0081.jpg
The object is get this mess of wires down to just a few wires. I needed a constant 12v battery, 12v switched, ignition switch, a tach, a ground, obdii, and a MIL (check engine light).

IMG_0079.jpg
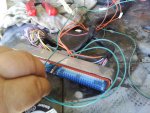
These are the (blue and red connectors) that plug into the ecm. I always kept a colored cap on one of the connectors out of fear of getting them confused, however in hindsight they are keyed and cannot be confused.

IMG_0163-1.jpg
IMG_0164.jpg
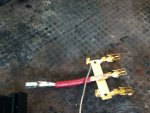
This was the first connection I made for my fuse block.

IMG_0169.jpg
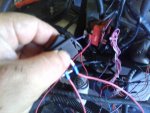
I left the labeling on the pink wires, as it's hard to tell one pink wire from the next.
IMG_0170.jpg
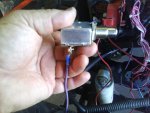
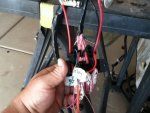
The relay on the left works the fuel pump. The one on the right the ecm.

Pin50GreenWire.jpg
This is the wire that will go to obdii connector.
IMG_20130519_123039.jpg
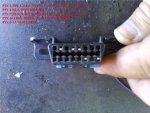
I ended up getting the obdii port out of the original vehicle. And the wire on the obdII port was purple so I soldered the 2 together.

OBDTOPVIEW.jpg
The pinout for my obdII port.

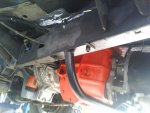
IMG_20130519_134743.jpg
My MIL light. I decided I didn't want a light in the jeep, just in case it would be on all the time. I mounted the fuse block and OBDII port under the hood.
 
Puttin it all back together

IMG_20130611_124149.jpg
IMG_20130618_072925.jpg
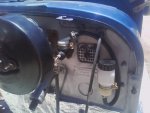
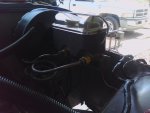
While the tub was on the blocks I undercoated the jeep tub and spray painted the firewall. Put insulation along the bottom of the firewall and Transmission tunnel. The remote reservoir and master cylinder I got from speedway motors. The supply line I had made locally at a hydraulic shop. The power brake booster came off a 93 wrangler.

IMG_20130613_160209.jpg
IMG_20130613_160159.jpg
IMG_20130613_160148.jpg
Using the engine crane I put the body back on the frame.

IMG_20130613_162817.jpg
IMG_20130613_162826.jpg
IMG_20130613_162849.jpg
There was plenty of room in front of the engine I could have slid the engine forward another inch if I didn't use the stock engine mount bolt holes. If I had had time I would have

IMG_20130613_172441.jpg
IMG_20130614_133835.jpg
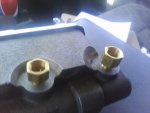
Since I was upgrading the engine I decided to upgrade to power brakes, and power steering. The new brake master cylinder required these two adapters. If I'd had time I would have replaced the brakes lines and proportioning valve.

IMG_20130614_140532.jpg
The new master cylinder has the ports on the opposite side as the stock manual brake reservoir.
IMG_20130618_060956.jpg
The power steering gear was a major pain to install and stop fluid leaks. Also it is a very tight fit between the supply line and the 3 core radiator.

IMG_20130618_072940.jpg
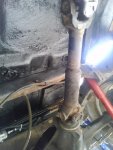
Rear driveline is reattached. The driveline was completely compressed due to the change in length. I drove all the way to Alaska at great risk. In January of this year I had two new drivelines made by Youngs driveline in Anchorage Ak, the front driveline was extended so long I could count the splines. I actually drove without it installed.
 
Re: Puttin it all back together, Engine electrical and Transmission mount

IMG_20130614_074512-1.jpg
IMG_20130618_060704.jpg
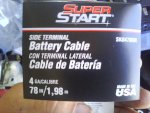
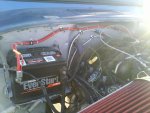
Because the battery sits in opposite corner of the Electrical block I had to run this 78 inch battery cable along the firewall.

IMG_20130614_161321.jpg
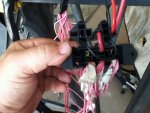
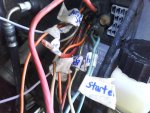
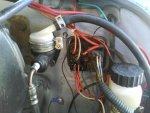
The Cj has two firewall connectors, the one on the right serves the lights. The one on the left serves everything else. There is a 12v supply from the battery and the rest serve things like the heater blower motor, ignition, etc. I referred to the Jeep service manual for the wire pinouts, the labeled the wires.

IMG_20130615_161248.jpg
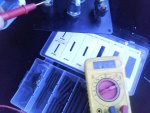
I attached a voltmeter to each wire to make sure they functioned as labeled.

IMG_20130618_060751.jpg
Wiring harness laid out. I decided to mount my ecm and fuseblock on the driver side fender. The throttle cable is a chevy cable that I bought off a corvette parts vendor. The fuel lines I made myself, I have enough fuel line left that I actually a few spares just in case something breaks on the trail.
IMG_20130618_060739.jpg
This is my fuse block and ecm.

IMG_20130618_060714.jpg
Two new heater hoses.

IMG_20130618_130251.jpg
IMG_20130618_144825.jpg
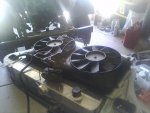
The new three core aluminum radiator with dual cooling fans and controller. I had to have a bung welded into the top right side of the radiator, the hose you see is a bleed hose that connects to the top of the engine to keep air out of the system. It's difficult to see in the bottom pic but the hose connects just below the throttle valve.

IMG_20130618_163740.jpg
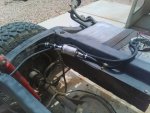
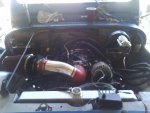
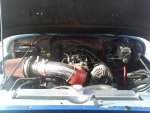
I also got the stock air intake from the donor vehicle however it was about a foot longer than would work so I bought this cold air intake off ebay. It's worked flawlessly.

IMG_20130618_163726.jpg
IMG_20130618_163751.jpg
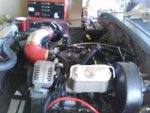
Engine bay after radiator installation. You can tell that there is plenty of room between the pullies and the radiator.
IMG_20130629_120849-Copy.jpg
IMG_20130629_131211-Copy.jpg
IMG_20130629_132639-Copy.jpg
IMG_20130629_133002.jpg
IMG_20130629_135418.jpg
IMG_20130629_141318.jpg
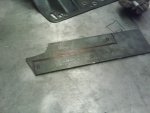
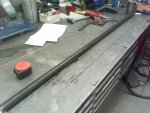
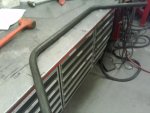
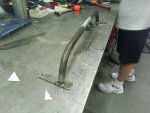
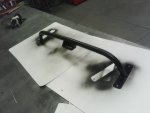
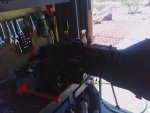
I didn't like the way the Transmission skid plate was working out. So I opted to do away with the skid plate and I fabricated a mounting bar. Eventually I will fab a skid plate. But for several reasons this bar was a wise choice. It is chromoly steel and very sturdy. Secondly I have very easy access to the tranny both top and bottom. I don't climb rocks or go on rough trails, I will be using the jeep as an overland vehicle. So for me ease of repairs is paramount.
 
Re: Puttin it all back together, Interior

IMG_20130620_181417.jpg
IMG_20130619_152320.jpg
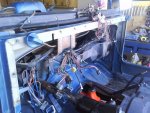
I spent a good deal of time sorting through the PO's wiring ideas and thinning out the wires to stock level. The interior is in surprising great shape. Everything actually works on this jeep. It even has tilt steering.

IMG_20130622_182401.jpg
IMG_20130622_182411.jpg
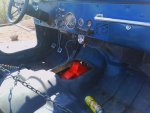
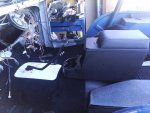
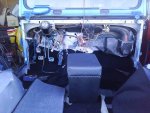
Some people think carpet is a waste in a jeep, I for one like the feel of carpet, I like that I can run wires under it and it helps deaden outside sounds. Sure it gets dirty but that's what vacuums are for. I had to buy a blank tunnel cover and cut out the holes for the shifters. I also installed a center console.

IMG_20130629_085243-Copy.jpg
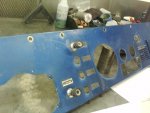
My stock cj panel was in really good shape but I wanted something different to set my jeep apart from others.

IMG_20130629_085251.jpg
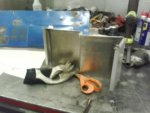
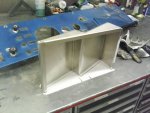
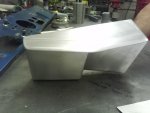
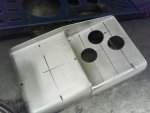
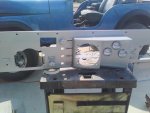
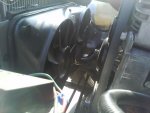
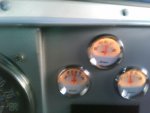
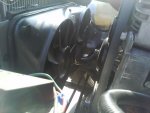
I decided to fab up a center piece that would face the gauges towards the driver.
IMG_20130629_094208.jpg
IMG_20130629_095851.jpg
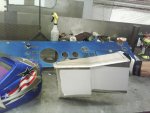
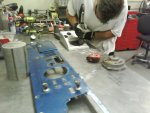
The cluster panel was made out of pieces of aluminum, and welded together.
IMG_20130629_102548-Copy.jpg
IMG_20130629_103315-Copy.jpg
IMG_20130629_104412-Copy.jpg
IMG_20130629_105214-Copy.jpg
IMG_20130629_134927.jpg
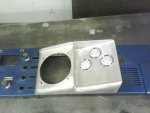
I then cut out the middle of the dash panel and riveted the console together.
I had intended on installing a head unit just under the three gauges, however the angle of the cluster prevented that from happening.

IMG_20130626_174537.jpg
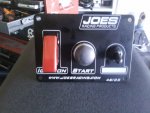
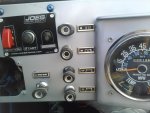
I bought this ignition switch from Speedway Racing.

IMG_20130624_081451-1.jpg
IMG_20130626_184001.jpg
IMG_20130626_184350.jpg
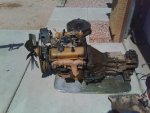
Installation was fairly straight forward. Using the jeep service manual and a DVM I was able to wire it and mount it to the dash. The Key Switch still locks the steering column. I like being able to kill the interior accessories with the flip of a toggle. My jeep has three fuse blocks. The stock fuse block for all the stock jeep accessories. Then there is the engine fuse block for the engine stuff. I also installed a third fuse block just above the center hump for accessories that I plan to install in the future such as a radio. My thinking was if there was a failure in any one fuse block then it wouldn't interfere with anything else.
IMG_20130630_085550.jpg
IMG_20130701_074901.jpg
IMG_20130701_074923.jpg
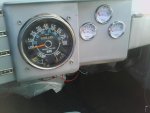
The finished dash.
IMG_20130701_074501.jpg
IMG_20130701_074412.jpg
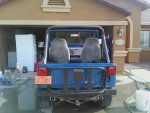
View from the back after seats were reinstalled.
 
Final results of my build,,,,so far.

IMG_20130701_074611.jpg
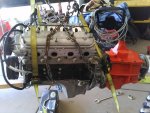
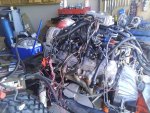
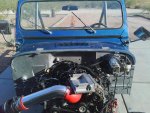
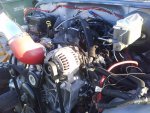
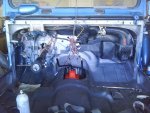
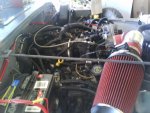
Front view of engine.

IMG_20130701_074621.jpg
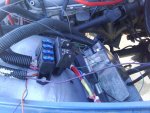
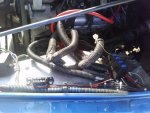
"Electrical Side" of engine bay. The fan temp controller is at the far left, the OBDII connector, the fuse block and ECM.

IMG_20130701_074634.jpg
IMG_20130730_053954.jpg
Cooling system works great. After my build I had a couple of weeks before I started my trip to Alaska. The daytime temps in Phoenix in July are most always over 100 degrees. The engine never got hot and the temp needle stayed at around 197 F.

IMG_20130701_074634.jpg
I ran the fuel lines down the passenger frame rail and then up the firewall where I made a flexible fuel line connection. The fuel pump puts out at least 60psi of pressure. I think 54 psi is required for the 5.3 to even start.
IMG_20130701_074714.jpg
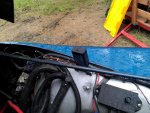
Electricals coming out of firewall. I left a few wires that are not needed, just in case I decided to add an accessory under the hood. For instance I plan on adding a windshield washer.

IMG_20130701_074754.jpg
IMG_20130701_074836.jpg
My Transmission mount I fabbed together. Some might cite my Dana 300 for not being clocked but I don't see the need for it, and it looks like it's hanging low but it is definitely not the lowest point. I might also add that when I began this conversion I had intended on going with 1 piece axles. I put an ad on Craigs to trade axles. I had 4.10's. I got an answer and the guy drove down from Prescott with a crew and swapped his axles for mine. So now I have USAlloy axles and they are much taller, 3.07's if I remember correctly. The engine turns over around 1800 rpm at 55 mph and 2000 rpm at 60.

IMG_20130709_081338.jpg
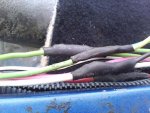
I went through the wiring from front to rear. Jeep had put these crimps at certain points in the wiring for the lights. These can become weak after oh,,,,30 or 40 years, so wherever I found a crimp I soldered and heat wrapped them.

IMG_20130727_083547.jpg
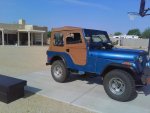
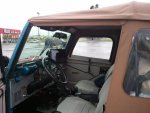
A few days before I left I got my Bestop in. I don't know when the last time the jeep had a top on it. I got it with a bikini top, and then bought an original vinyl top but it didn't have the bows. I traded that back to the guy I bought it from for a hardtop however I never found doors to fit, so I sold it to another guy and got this softop.
IMG_20130729_180226.jpg
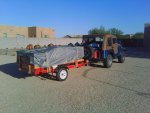
My jeep loaded for Alaska. I built this trailer I bought from Harbor Freight. I towed at least a thousand pounds of stuff to Alaska with it. I averaged 20 mpg.
IMG_20130803_180101.jpg
 
After the initial build. Things I've done to complete the jeep.

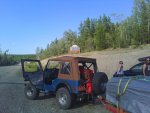
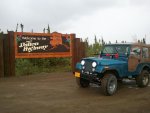
I spent nearly 6 months gathering parts and researching before I had enough parts to tear into the jeep. The initial project took me less than a week of work. I very rarely had to leave the house for any parts not thought of. My goal was to build a vehicle I could take just about anywhere. I've always wanted to go to Alaska but never had the funds, never had the time, or whatever. But now I had both. So I my goal was to come to Alaska, work and enjoy my trip on somebody elses dime. I have lived in a very remote fly-in village in the Kenai Peninsula. I drove to Alaska in 5 days. I spent three months this summer driving north past the artic circle south to Yellowstone, down into Mexico, up the pacific coast highway and back to Alaska.

2014-04-10125600.jpg
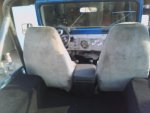
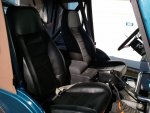
Before starting on my summer trip I had to replace the 40 year old stock cloth seats. I went with these Rugged Ridge adjustable highbacks.

2014-04-11171149.jpg
2014-04-11171201.jpg
IMG_20140527_094907.jpg
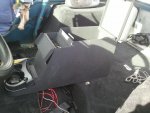
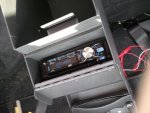
I also replaced the center console with another center console and a JVC head unit with XM radio, USB, cd AM/FM and Pandora.

2014-04-10145035.jpg
New headlight switch.

2014-04-12115925.jpg
2014-04-18151011.jpg
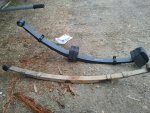
New 2.5 inch lift kit with Hydro7000 shocks. My old springs were flatter than Becky from the 8th grade.

2014-05-29152516.jpg
Screenshot_2014-05-29-20-12-16.jpg
Screenshot_2014-05-24-18-55-03.jpg
I installed a ASUS Transformer tablet with bluetooth and GPS. It is mated to a bluetooth device installed on the OBDII port and is now my primary source for gauges.


Screenshot_2014-05-23-01-24-43.jpg
Also keeps track of where the jeep has been and makes a heat map which will show me any piece of information I want from simple speed, rpm, acceleration, torque, to injector pulse width of cyl 1.

Screenshot_2014-05-29-22-31-12.jpg
Screenshot using Sygic GPS.

IMG_20140527_082242.jpg
Bluetooth device plugged into obdII port under the hood.

2014-05-31151619.jpg
IMG_20140529_120512.jpg
Lighting upgrade installed HID headlights and wide beam LED's and Spot LED's.

Screenshot_2014-05-31-19-39-06.jpg
Torque pro showing that I cross 66' 33 north, the arctic circle.
2014-05-31%2016.59.00_1.jpg
North of the Arctic Circle at this hamburger joint in the middle of nowhere.

In preparation for my next outing which will happen in February in mid winter I have installed a few other items.

IMG_20141205_133406027_HDR.jpg
Last week I installed a new Warrior Roof Rack.
IMG_20141205_152025361.jpg
Also installed a new tow bar.

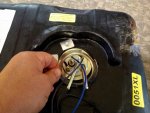
On my trip up from Arizona last year I was over 200 km from Smithers BC when my jeep just died. The fuel pump had been getting loud and I suspected it was burnt out. After two days I finally got a tow back to Smithers at a cost of 500 bucks. The day I got into Smithers happened to be BC day, apparently that's a holiday up there and everything is closed. I removed the gas tank at 3 am in a hotel parking lot and I found it wasn't the pump motor itself it was bad construction on the part of Novak. The insulating washers were eroded and the pump was shorting out, luckily it didn't spark bad enough to explode.
I was able to repair what I had and limped the other 2000 miles to Homer. I dropped the tank at least a half dozen times in order to repair it enough to make it to the next fuel stop. A disaster that I will not repeat.

IMG_20140920_144834.jpg
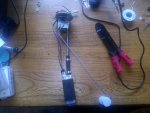
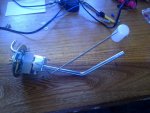
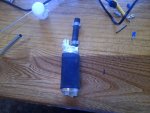
I bought a new fuel pump motor and ordered a 21 gallon poly tank, I made my own fuel pump using the new motor and the fuel sender from the new tank and I have a back up fuel pump to keep with me.

IMG_20140920_145444.jpg
IMG_20140818_163458-1.jpg
IMG_20140818_163525.jpg
Just installed the new pump and sending in my 21 gal mts tank.

IMG_20141001_130404.jpg
The new tank took a day to build with 99 percent of the construction in building the fuel pump. I could do a write up on that later, the tank itself took a couple of hours to install in the jeep. I now have a range of 400 miles between fill ups. I boon for me.

A few other things I've done since coming to Alaska. Last spring I did the Chevy S10 heater blower motor conversion. That made a huge difference in heating and defrost. Last winter I drove from Homer to Anchorage and the inside of the windshield kept a coating of ice on it. Now the heater blows like a hurricane. I put new pedal pads on my clutch and brake pedals. I replaced my tilt steering column with a tilt steering column from a 79 camaro. They're exactly the same. It just bothered me to have slop and wiggle in my column. I rebuilt the one I bought and installed new bearings, signal cancel and signal arm. It's a much nicer column than the one I took out.

The 93 wrangler brake booster I put in the jeep was less than desirable. I'd wished I had kept my manual brakes. When I got to Arizona this past summer I bought a new dual brake booster made for the cj now it really stops! I also had to replace the front brake rotors, pads, and replace the front spindle bearings. The engine starting running cooler, even when the out side temps were near 110 degrees the engine was barely above 160. This kept the engine in open loop and running rich. I replaced the thermostat, on the 5.3 the thermostat and the thermostat housing are 1 piece. Took about 20 mins to replace.
I also bought new tires. Last summer when I started the trip I bought new mud terrain tires, well they suck on ice and snow. So this summer I bought AT General Grabbers that are snowflake rated. An incredibly smooth and quiet tire, I seriously believe these have to be the best suv/truck tires I've ever owned. I can hardly wait to see how they perform in ice and snow on my way back south in February.
I now have a new Cobra cb model 29 LX lcd that has been tuned. I have it hooked up to a 102 inch whip antenna. I also have a gps satellite Emergency Locator Beacon/messenger on the way (Spot Gen3). This has been one heck of a year and a half for me and the jeep. I can hardly wait to see what is next.
 
thanks 74GR8R2, it was a fun build and I'm really proud of it, maybe more so because it actually runs and drives. It's a hit around the gas pumps, especially up here because of the metal tub. I can hardly wait til February gets here and I start heading south,,,,again. Thanks for the compliments, hope you're heading into a Merry Christmas!
 
I'm glad you liked it Jim. Looking back it's hilarious to think I ever 'thought' I had a budget planned for this thing. A jeep just knows how to suck you in.
 
Awesome! A trip most of us just dream about. :chug: Good job on the jeep too.

"My springs were flatter than Becky from 8th grade." :laugh::laugh::laugh: Now that's funny! Rod
 
Hey Peanut Butter thanks, it was a dream of mine for a long long time. Two previous failed attempts, one on a motorcycle and one in an old 70's something international harvester that got like 2 mpg. Heck I didn't even have gas money back in those days. Of course there is always something else I can do to the jeep. It never ends.
 

Jeep-CJ Donation Drive

Help support Jeep-CJ.com by making a contribution.

Help support Jeep-CJ.com by making a contribution.
Goal
$200.00
Earned
$25.00
This donation drive ends in
Back
Top Bottom