• Hello Guest, we are proud to now have our Wiki online that is completely compiled and written by our members. Feel free to browse our Jeep-CJ Wiki or click on any orange keyword when looking at posts in the forum.
    To dismiss this notice
    click the top right X.

Build Thread Combat Barbie's CJ-7 rebuild

Build Thread Combat Barbie's CJ-7 rebuild

clear82star

Jeeper
Posts
37
Thanks
0
Location
Boise
Vehicle(s)
1984 CJ-7
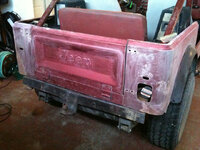
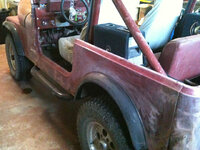
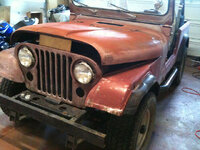
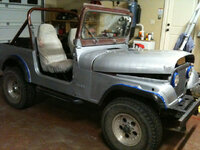
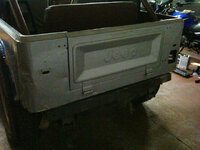
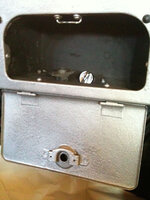
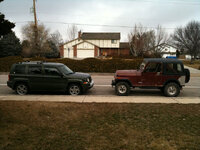
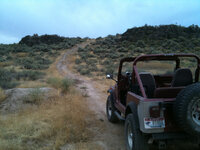
I've owned several Jeeps in the past: 2 YJ's and a TJ. I've always wanted "the original round headlights", then I got stationed in Idaho, was finally able to buy a house (with attached garage), I couldn't think of a better time in my life to own one to work on. Here's some photos of what it looked like when I bought it. Took a lot to get it started just to get it home, and it died at every other red light… grrrr. It had been sitting for a while and (now I know) the engine was not well taken care of. I had a Jeep Patriot when I bought it (hence the side by side photo), but now own a Xterra.
IMG_1020.jpg
IMG_1148.jpg


[FONT=&quot]Here's the start/prep of my paint project:[/FONT]
[FONT=&quot] [/FONT]
[FONT=&quot]
IMG_1536.jpg
[/FONT]
[FONT=&quot]IMG_1538.jpg[/FONT]
IMG_1539.jpg
IMG_1540.jpg
IMG_1551.jpg

IMG_1553.jpg


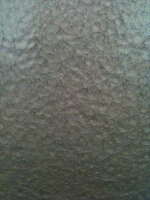
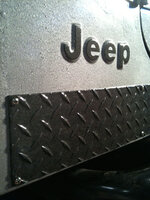
I chose Rustoleum hammered finish because I really like the finish (reminds me of my grandfather’s toolboxes and hides surface imperfections) and it’ll be easy to fix and scratches in the future. Plus you can paint right over rust with a little prep.
IMG_1641.jpg
IMG_1651.jpg
IMG_1541.jpg
IMG_1542.jpg
IMG_1543.jpg

IMG_1579.jpg


Then I prepped and painted the “interior” with rustoleum gloss and then rhino-lined it. I only have one picture of the rustoleum gloss prior to rhino lining it:

IMG_2293.jpg


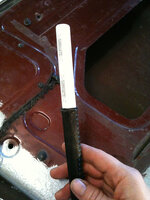
In the process I also made my own replacement handles. It’s a combination of 1 inch tubular webbing purchased at REI and flexible white PVC-? pipe found at Home Depot:
IMG_1573.jpg


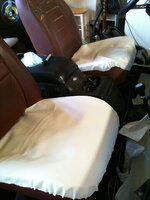
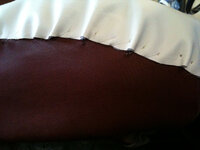
And salvaged the old seats (what can I say I’m cheap) by using suturing skillz to attach some vinyl to the worn out seat bottoms:
IMG_1580.jpg
IMG_1581.jpg
 
Last edited:
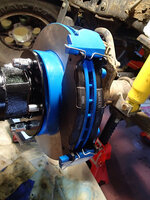
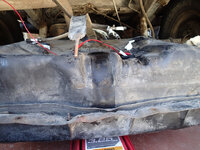
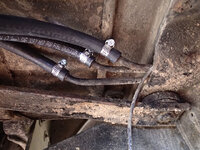
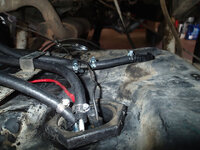
Next project was to drop the gas tank to figure out why my gas gauge wasn’t reading the level. I cleaned it up, made sure I had continuity between the sending wire from the tank to the back of my gauge in the dash. I also cleaned up my ground, painted over it to hopefully future proof rust formation. While I was there, I replaced the soft fuel line.

P7270010.jpg
P7270021.jpg

P7270022.jpg
P7300029.jpg

P8040108.jpg
 
Last edited:
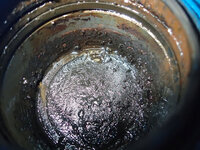
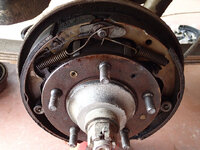
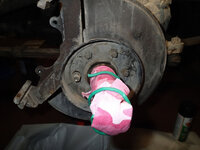
Onto the brakes. Ewww. Rear drums first. Still don’t know 100% what the fluid was, but thinking/hoping it was from the blown dust cover. Plus, differential fluid has a certain sulfur smell to it, and I didn’t get that from this.

P9220001.jpg
P9220002.jpg

PA040025.jpg


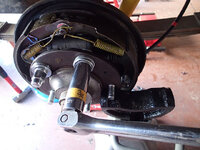
This is my version of pressing on new wheel studs:
PA210078.jpg
 
Last edited:
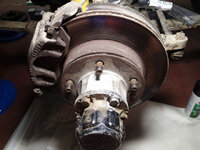
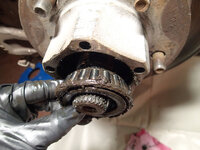
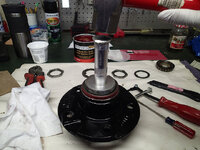
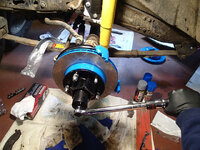
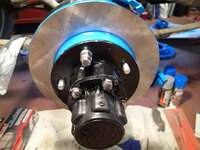
Front brakes and repack wheel bearings.

P9280007.jpg
P9280008.jpg

P9280009.jpg

P9280016.jpg
P9280019.jpg
PA150041.jpg
PA150042.jpg

PA150044.jpg
PA150045.jpg

Replacing oil seal, pressing it in with a seal driver:

PA150046.jpg


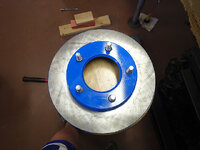
Painted even the hat of the new rotors:

PA150050.jpg


Replaced hardware with stainless steel and also painted the brake dust guard:

PA150051.jpg

PA150052.jpg
PA150053.jpg
PA150054.jpg


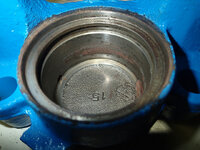
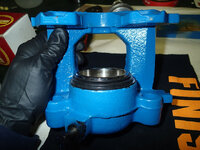
The inside of the calipers. SICK.

PA150056.jpg

Cleaned up the best I could:
PA150061.jpg


New pistons with seals:

PA150062.jpg
PA150063.jpg

PA150064.jpg

PA190065.jpg


And new soft brake lines and crush washers:

PA190072.jpg

PA190073.jpg

PA190074.jpg
 
Last edited:
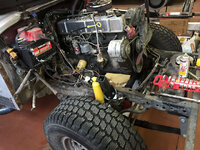
I was getting some blow-by and having to replace spark plugs every couple hundred miles due to the large amount of oily residue on my electrodes. So this last winter I decided to rebuild/remanufacture the engine myself. My dad gave me his old cherry picker (this thing is a beast, 2 TON capability) and I bought an engine stand off of craigslist for $35. Here’s the tear down summary:

Front grill/radiator removed:

IMG_4584.jpg

IMG_4585.jpg


Clamping off fuel-in with my homemade “gentle” vise-grips:

P1080127.jpg


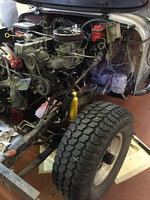
Driver’s side fender removed:

IMG_4586.jpg


Passenger’s side fender removed:

IMG_4587.jpg


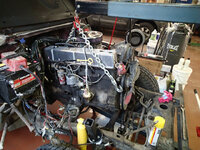
All hooked-up (unbolted bell housing to tranny):

P1110171.jpg


Yes! Out!

P1110172.jpg


Taking off bell housing and flywheel:

P1110174.jpg

P1110176.jpg

P1110178.jpg


Taking valve cover off:
P1260106.jpg


Starting to look pretty naked:

P1260113.jpg


Head removed:
P1260114.jpg

P1260115.jpg

P1260118.jpg


Look at all that slack in the timing chain!

P1270083.jpg


Oil pain off:

P1270087.jpg
 
Last edited:
Congrats. You now own what is consider a "real Jeep" (the actual Jeep model). Looks like you didn't waste any time tearing it apart and bringing it back to life. You may want to keep an eye on those rear brakes. That odd fluid may have been the wheel seals (theres an inner and outer) leaking some. It's a wet tube axle. I see it's still the factory 2 pc. axle also. You may want to put that on your short list of future mods, putting in 1 pc. axles ($300). It's a common failure point.
 
Yes! The plan is to do the one piece axles this next winter or so. I will keep an eye on it. There's no leak right now but I didn't drive it much before it's been parked for the time-consuming rebuild. How can you tell its 2-piece still from the pictures I posted?? I assumed it was an internal thing... Thanks!


Sent from my iPad using Tapatalk
 
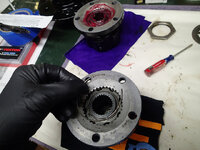
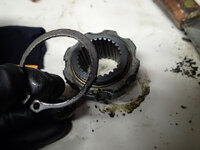
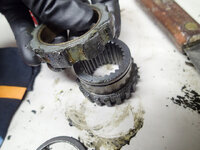
The 2pc. axles have the big nut on the end that holds the splined hub and axle together.
 
Good detail here. :chug:
PLEASE move that MSD ign bx from sit'n on that battery so close to those 2 terminals-:eek:
How many cans did the re-paint take of that 'hammertone'?? Looks really good.
LG
 
Thanks LG! Just under 2 cans. I'll go move the ign box now!


Sent from my iPad using Tapatalk
 
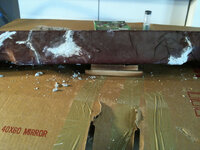
So, as it turns out, there’s a 6+ inch crack in my block :( The only good news is that it does not extend into the soft plugs or cylinder:

P4210108.jpg


Also, there’s this modified soft plug in my block, which my machinist tells me is an “in the vehicle repair”. He says that the joker that sold me this Jeep knew very well about the crack and sold it to me as is without making mention of it. Grrrr…

P4210109.jpg


I tried to get a good picture of it, but there was also a considerable lip in the cylinders

P4210111.jpg


So, after a large amount of time spent on research about crate motor options (btw, I would seriously use ProMar out of New Jersey if I was going this route) and debating if I really wanted to spend the time it would take to find a new block and rebuild it myself (for the experience), I decided to go with the rebuild once I found a used block out of Salt Lake City for $250.

Here’s most of my parts from the machine shop, once I got the block, head, and crank machined and back. Oh, and my new block’s main was out of spec, so I also paid to have the “line bored”-sp?

P2240089.jpg


Head ready for painting:

P3040092.jpg


Block ready for painting, used Corroseal as my primer:

P3080102.jpg


My homemade paint booth (since it was too cold at the time to paint outside yet). I used a respirator, had a box fan going out as exhaust and fresh air inlet from a cracked door.

P3090109.jpg


Pretty!

IMG_4916.jpg

IMG_4918.jpg


Filing the imperfections on the oil filter mating surface:

IMG_4923.jpg


What I used to lube the cam before VERY CAREFULLY inserting into block:

P3100124.jpg

P3100128.jpg


Placing bearings:

P3100129.jpg


Then crank:

P3100130.jpg


Checking clearances on each main:

P3100134.jpg


And thrust bearing:

P3110139.jpg


Installing “top” half of rear main seal:

P3110137.jpg


Carefully marking each main cap bolt as it was torqued down:

P3110144.jpg


Tapping on sprocket using a very large socket (the one I use for the front wheel bearings)
P3110146.jpg


New timing chain :)

P3110148.jpg


Oiling down inside of cylinder and making sure crank was at lowest part of travel to ensure my con rod bolts didn’t ding the crank’s beautifully machined surface:

P3110151.jpg

P3120156.jpg


Double-checked compression rings clearance:

P3100114.jpg


Oiled rings and made sure they were in the correct orientation per the manual

P3120160.jpg


Rented compression ring tool and inserted into cylinder:

P3120167.jpg


Tapped into cylinder with wooden handle and dead blow hammer:

P3120169.jpg


Checking clearances on each con rod bearing surface as well with plastiguage:

P3120172.jpg


Used ARP fastener lube:

P3240080.jpg

P3240081.jpg

P3240083.jpg


DONE! (…with the pistons)

P3120184.jpg


Flipped engine over and lubed up bottom of lifters with assy grease

P3250089.jpg

P3250090.jpg


Used this magnet to help me drop them in the block. Lubricated edges with the Hi-Zinc lube.

P3250091.jpg

P3250093.jpg

P3250094.jpg

P3250097.jpg
 
Last edited:
Love the AMC engine blue! Great build thread :chug:
 
Oh my goodness… this head bolt situation has been a PAIN! My block (that I bought from Salt Lake b/c mine was cracked), now I know, must be from 1980 and earlier, when Jeep was using 1/2” diameter head bolts. My 1984 head/block is from the time frame when they were using 7/16” diameter head bolts (I believe 1981-1986). Thus the chase begins. I start with head bolts that are 7/16” in diameter. Not noticing there was excessive play in the bolts when tightening them down, I started torqueing them… until they stripped the edges of the threads: FFFAAAAAAAQQQQ!!! Took the head back off, and gasket, and cleaned out the threads with air, and then went thru with tap and die, got 1/2" head bolts (the AMC 258 i6 / 4.2l kit) from ARP.

P4210098.jpg

P4210101.jpg


Reassembled. But then, the 1/2" diameter bolts would not go through my head which is used to having only 7/16” diameter bolts going through. Dissassemble. Take back to machine shop to have head bored out. Reassemble.

P4210103.jpg


Start threads and get them mostly down… when the ones on the passenger’s side bottom out about 1/2" too early!!! Dang it! The AMC 258 i6 / 4.2l kit ([FONT=&quot]112-3601)[/FONT] has all one length bolts and is for the Eagle’s and such, the “original” AMC 258 i6 / 4.2l before Jeep got a hold of the blue prints and started changing dimensions. So… a call to ARP, explaining situation, and I got the right kit number (146-3601). I was nervous about this, knowing they went to 7/16” and it was for the 4.0L kit. But he verified they were 1/2" in diameter and I exchanged my 112-3601 for the 146-3601 through my machine shop.

Lined the head, gasket, and block back up, and got to work… yet again. Placed thread sealant on my #11 bolt:

P4210106.jpg

P4210107.jpg


And put ARP assy lube on the others:

P4230002.jpg

P4230003.jpg


Started all the bolts, then labeled them for ease in torqueing them down in the correct sequence:

P4230005.jpg


FINALLY!

Then started with the push rods. Grease ends with assy grease before dropping them in, making sure each on was in the center of the lifter:

P4230007.jpg

P4230010.jpg

P4230008.jpg


Lubed the bottom of my rocker arms, where the pushrods will be pushing up against:

P4230011.jpg


Greased up the bearing surface:

P4230012.jpg


Then installed bridges and torqued down the bolts a 1/2 turn at a time to 21 ft-lbs (don’t quote me on that, but I believe so).

P4230013.jpg
 
Last edited:
While I waited for the machine shop and shipping for all the shenanigans with the head bolts, it gave me some time to clean up the axillary parts/components and paint them pretty colors.

Cleaned up the aluminum valve cover in my parts washer and painted the raised edges with this blue painter’s marker. We will see how long it lasts or if the color even stays blue. The valve cover shouldn’t get above 200 deg F, so should be okay.

IMG_5069.jpg


Labeled cylinder numbers and firing order:

IMG_5070.jpg


Took me the longest amount of time to clean up this bad boy. Super dirty with engine grease and road grime. But now it’s good and shiny

IMG_5071.jpg


This is the exhaust manifold, after a coat of corroseal (rust converter). I painted it with the aluminum colored high heat paint you see in the picture, don’t have a a photo of the finished product I guess.

IMG_5072.jpg


Cleaned up the intake manifold and painted it with that marker as well:

IMG_5074.jpg


My engine fan, same AMC blue as engine:

IMG_5075.jpg
 
Last edited:
Looking sharp, certainly something to be proud of!
 
Wow! You've got skilz. ;)
 
Wow very nice. Pulling that head on and off must've got frustrating. Glad you got it licked. Great looking work. :notworthy:
 
Good job-let me suggest that you brush some oil on the timing chain and sprockets.
Same for the rockers-
Best of luck-Pictures are very good.
LG
 
Flipped the engine over on the stand in order to install my new oil screen/pick-up on my new oil pump. I saw many iterations of this on-line, I choose to use a combination wrench over the lip of the end of the oil screen to hammer it in. I heated the oil pump to about 300 degrees first with a heat gun and then took the oil screen straight out of the freezer to install.

P5040001.jpg

P5040002.jpg

P5040003.jpg


Onto the timing chain cover. Used some RTV sealant around the outer edges of the oil seal before pressing it in with a 4x4 block of wood and a rubber hammer

P5040004.jpg


Then installed the cam bolt to torque spec. Used some blue thread-locker too:

P5040005.jpg


As I was putting together the camshaft weeks earlier, I thought (mechanically) that there was nothing keeping the camshaft in place. (the crankshaft at least has the thrust bearing) I discussed this with my machinisit and he suggested this “newer” aftermarket hollowed bolt with spring and “rod” that will push again the timing chain cover gently if needed. Not sure if necessary, but I picked up the kit from moparonlineparts.com along with the bushing that sits inside the timing chain cover. I believe most people’s tabs for this bushing are usually worn off when it comes to rebuild.

P5040007.jpg

P5040008.jpg


Installed oil slinger:
P5040009.jpg

P5040010.jpg


And installed the timing chain cover after meticulously painting over the numbers/marks for timing J

P5040011.jpg


Onto the oil pan. Used Totally Stainless Kit with included anti-seize:

P5040012.jpg


All snugged down to spec J
P5040013.jpg


I put some RTV in the corner were 2 metal pieces would connect:
P5040014.jpg


Same with the rear main seal (RTV on the corners)
P5040016.jpg


Had some trouble getting the old exhaust donut off. Tried a combination of a vise grip and hammer to remove. No Dice
IMG_5337.jpg


Ended up scoring it thinking it would break off easier in chunks. No dice
IMG_5546.jpg


Finally got so frustrated I took the angle grinder to it
IMG_5549.jpg


I filed it with a hand file after the initial angle grinder with cut-off wheel cuts, but still used this:
IMG_5551.jpg


to help seal this:
IMG_5547.jpg

to the exhaust manifold. I’m sure y’all will have good other better ways of tackling and I’m all ears, but you are a day late and a dollar short ;) always wanting to learn though…

pressed on vibration damper/crankshaft pulley/harmonic balancer with too rent from O’Reilly’s:
IMG_5872.jpg


painted grill and fenders while I had them off:
IMG_5878.jpg

IMG_5879.jpg


after priming the oil pump, verified all the way to the rockers were being lubed (also turn crank a full 360 deg and then primed again for 2 minutes
IMG_5885.jpg


painted inside front fenders with truck bed liner:
IMG_5889.jpg

IMG_5890.jpg


after priming oil pump, made sure I was at TDC after the COMPRESSION stroke for cylinder #1…
P9050023.jpg


and installed the dizzy with the rotor pointed right at the #1 cylinder for timing on the dizzy cap:
P9050026.jpg

P9050028.jpg


Checking proper gap:
P9050042.jpg


Anti-seize to threads before installing spark plugs
P9050031.jpg


new custom wires, will cut to length:
P9050029.jpg


Haha, used my home coaxial cable stripper and it worked PERFECTLY!
P9050046.jpg


snugged down the connecter with needle nose pliers
P9050047.jpg


prior to clamping down
P9050048.jpg

P9050049.jpg


All done!
P9050051.jpg


now off the engine stand and onto blocks! (moving on from this point is SO exciting!!
P9050053.jpg


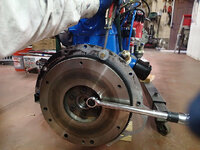
holding flywheel from spinning while I tighten the flywheel bolts to 110 ft-lbs
P9050056.jpg
 
Last edited:
Yeah! Back to it’s home! It was a big day that day!!
IMG_5965.jpg


I painted the fenders and grill using a spray gun, getting all edges (previously I had just brushed it on and there was plenty of spots that were still the factory original paint).
IMG_5879.jpg

IMG_5878.jpg


I also “rhino-lined” the inside of the fenders
IMG_5889.jpg

IMG_5890.jpg


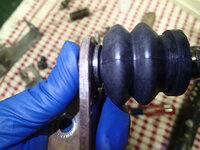
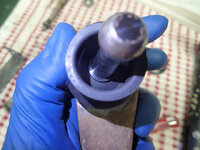
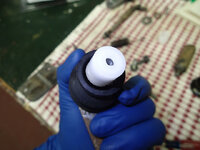
I cleaned up the clutch kit with a rebuild kit and purchased a new boot for the rod that connects the clutch pedal the the linkage/bell crank.
P9080001.jpg


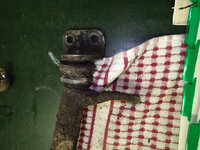
Before shots:
P9080002.jpg

P9080003.jpg

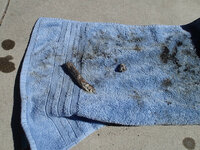
The massive amount of dirty/water sogged grease the the tube pooped out:
P9080004.jpg

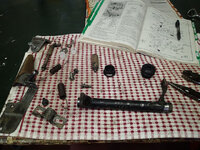
All the parts cleaned with my parts washer and some new replacements
P9080005.jpg

Assembly of the bell crank/clutch linkage
P9080006.jpg
P9080007.jpg
P9080009.jpg
P9080010.jpg

P9080011.jpg

P9080014.jpg


Filling with new grease:
P9080015.jpg


Covering grease nipple with a vinyl vacuum cap because I can
P9080016.jpg


All hooked back up:
P9080023.jpg


Starting to look more and more like a road-worthy Jeep!
P9080025.jpg


Charging up the battery, getting ready to start for the first time!
P9090030.jpg


After starting for the first time, any distance even a couple city blocks, it was overheating, so I had to pull apart the thermostat to see it would open at 195 deg F.
IMG_6005.jpg


It did not. This picture is the new thermostat boiling that DID open at boiling water temp (I believe 212 deg F)
IMG_5974.jpg


But that apparently wasn’t my only problem. The auto parts store I bought my water pump from sold me the serpentine belt water pump (with reverse drive). I was not astute enough when installing to realize that the blades were pointing in different directions. Clearly there’s a difference when they are side by side.
IMG_6059.jpg


Previous to my changing the water pump, I had coolant boiling over and exiting through the coolant reservoir tank! I was like, what the F…

Anyway, now that that is all done, it’s running great :)
 

Jeep-CJ Donation Drive

Help support Jeep-CJ.com by making a contribution.

Help support Jeep-CJ.com by making a contribution.
Goal
$200.00
Earned
$25.00
This donation drive ends in
Back
Top Bottom