Build Thread Frame Off Restoration '76 CJ5

Build Thread Frame Off Restoration '76 CJ5

srmcnamara

Jeeper
Posts
18
Thanks
0
Location
Orcutt, CA
Vehicle(s)
1976 CJ5 AMC 304, T150 3 Spd, D20
Well my dad was probably the 3rd or 4th owner this 1976 CJ5 . He got it in the early 90s when I was probably only 5. We had some interesting stories of the Jeep's origins. We were told it had been sunk before in a lake, don't know much about that. One thing I did discover through the build is it had to have rolled at some point. The frame was tweaked/repaired in the past, though still tweaked a bit. The roll bar has been tweaked as well, you can see one part of the bed is slightly pushed down while the other pulled up where the bar is mounted. Nothing too horrible though, not readily noticeable. The main body where the dash is was also shifted, and the 2 front body mounts were ripped out. So the Jeep had seen some stuff. Though surprisingly there was no real rust to speak off, some of the floor boards, but thats really it. It had spent most of its life in NorCal (real NorCal) where rust isn't much of a problem.

One cool fact is the winch was off the bomb bay doors of a bomber, according to the previous owner. I looked up the company that produced the motor online and discovered it only really existed during WWII, then a couple years after that. That they also only really existed to support the war effort I believe. The nuts also have the holes going through them for safety wire, that leads further credence to them being government. But may never know for show, still know the motor had to be from the mid 40s to early 50s. Not bad, still runs like a champ.

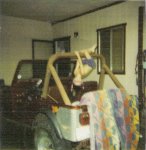
This is picture of me on the Jeep. I think I still even have that towel.
231065_4711347869_7196_n.jpg

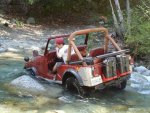
In this one I believe I was 17 at the time.
228245_4711337869_6571_n.jpg

I learned how to work on cars/trucks by getting the jeep running around my 15th birthday. The jeep sat for about 8 years in the barn. Gas tank rusted out and the carb had issues, so my dad lost interest until I gained interest with my driver's permit coming up. I drove it for about 6 years, but then it sat after I went off to college. After graduation I joined the United States Air Force as a 2Lt. I finally had a little time on my hands so decided to restore the Jeep.

I started at the end of June in 2013. At this point (May 2014) I'm basically considering the project complete. I have some odds and ends I'm finishing up. Like a switch for the winch, or my heater motor decided to die (or has loose connections inside) after I reinstalled it. So small stuff like that. But it drives down the road just fine.

Will take me some time to get this all typed up and I didn't expect to finish it in one sitting, I have a little over 100 pictures of the build. So I figured I'd start with a quick intro, show what I started with, a quick peek at how it finished.

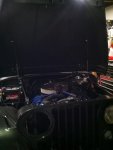
I got excited and took the hood off before I remembered to take a picture of the jeep as a whole to track the start.

2013-06-29_09-34-05_638.jpg

This shows a break in the fender, I discovered it broke in the first place because the body/frame were a bit off.

2013-06-29_09-34-14_281.jpg

The hood messed up. It flew up on me once during high school and cracked the windshield. Whoops, lesson learned. The bondo underneath told me it had happened before too. And later I'll mention bondo hiding more damage to the windshield frame.

2013-06-29_09-34-22_576.jpg

Interior, I guess I had already pulled out the big hand bolts holding the windshield frame in place.

2013-06-29_09-34-38_883.jpg

The seat "covers" were my Dad's idea one weekend when I was gone. I wasn't too impressed, was not a soft surface. He wanted to "help" because they were cracked. I would have taken the cracks, but he cemented those things down.

2013-06-29_09-34-51_147.jpg

My roommate took one look at my jeep and said my windshield was tilted farther back than he thought was normal. He and his dad had restored a CJ a number of years previous so he had some insight. A screw driver and hammer revealed the previous owner bondo'd over a crease along the windshield frame. From what I remember the windshield was bent back about 5" greater than what was normal, explaining why my soft top never fit right.

2013-06-29_09-35-02_814.jpg

2013-06-29_09-35-14_203.jpg

So that's how the jeep looked to start. Here are a couple sneak peeks of the finished product, I'll continue updating over the next few days to finish up the build.

2014-05-04_13-47-32_325.jpg

2014-05-04_13-50-56_387.jpg
 
Quick pic I took to remember how the winch solenoids were hooked up

2013-06-29_10-51-58_489.jpg

I was surprised how fast everything came apart. Took no time at all.

2013-06-29_14-55-15_867.jpg

Inside almost gutted

2013-06-29_14-55-30_203.jpg

I had planned on doing the hydraullic clutch conversion, and figured this was a good time to get everything mauked up

2013-07-07_12-21-09_687.jpg

My biggest surprise was how easy the body mounts came off. Only one or two of the nuts tried spinning on me, so I was able to put a couple tack welds on them luckily and the bolts came right out. My roommate helped me left the body off no problem, surprisingly light.

2013-07-12_16-10-16_212.jpg

I believe I was hitting a bolt with a small sledge hammer at an awkward angle, it managed to glance off, come back and hit me in the head. Lesson learned on that one, had a beer and took a break.

2013-08-03_21-50-52_340.jpg

There was a crack in the frame about an inch long, so I welded this plate over it. Always good to have some scrap around.

2013-08-04_17-30-31_373.jpg

Front end pulled out

2013-08-07_12-35-27_223.jpg

Next I used a wire brush wheel to get everything off the frame. Surprisingly very little rust, only a little surface rust. My dad had mentioned he used like 7 cans of under body spray on the frame when he first got the jeep. It took forever to get everything off.

2013-08-08_16-12-43_704.jpg

After I pressure washed it I brought the frame back in.

2013-08-08_18-55-57_735.jpg

I then used POR-15 on the frame, leaf springs, differentials, skid plates and etc.

2013-08-10_16-25-00_159.jpg

2013-08-10_16-25-17_313.jpg

2013-08-10_16-25-30_103.jpg

2013-08-14_15-02-45_428.jpg

Quick picture to remember how the steering brackets went

2013-08-18_11-39-18_716.jpg

Got the frame back on tires! I remember being relieved at this point. Moving the frame around by myself was a pita.

2013-08-20_14-00-17_818.jpg
 
At this point it was time to start on the engine. I did a compression check on it before I tore everything apart and I believe all the cylinders were around 155 to 160 psi. That was good enough for me. An engine rebuild really wasn't in my budget.

2013-08-21_11-09-11_665.jpg

This thing did like to leak oil

2013-08-21_11-45-02_235.jpg

The previous owner always sore this was an AMC 360, but he must have thought that based on the intake being 360 Offenhauser. This pic proves its a AMC 304

2013-08-24_18-03-51_993.jpg

Motor tore down, never had issues with missing coolant or over heating. So I really didn't want to take the heads off, so I let them be. Timing chain was still tight, I think the previous owner had mentioned it being replaced. So I left it alone.

2013-08-24_18-42-10_546.jpg

I found a crack in the oil pan up near one of the bolts. Explained one of my oil leaks. So I welded it closed, took my gloves off and stood up. But sadly pushed off the weld I just made. Wasn't a smart move on my part.

2013-08-25_22-10-38_342.png

I replaced basically all the gaskets I could get my hands on. Then painted everything up.

2013-08-28_19-51-47_584.jpg

I used nylon rope to lift the motor, less chances of scratching the paint compared with chains. The load rating was listed on the rope so I did the math. My setup could hold over x6 the weight of the motor. So it handled it no problem, just took it slow.

2013-08-30_13-45-44_618.jpg

When I was a teenager I didn't check the oil on the Transmission /Transfer Case . Well one day they blew up. I don't know all what happened, but long story short the Transfer Case and Transmission were rebuilt probably 15,000 miles previous to this restoration. So all I did was pressure wash them clean, change the oil, and reinstall. Clutch was replaced at the same as the rebuilds, and it looked good to me so I reused it.

2013-08-31_17-53-11_594.jpg
 
Time to start on the body. You can kind of see the discoloration where the batter was. Previous owner told us a battery blew up on him years ago. I used a baking soda/water mix on the area that looked effected.

2013-11-25_11-36-13_339.jpg

I used the wire wheel brush again on the under side/engine compartment area to get all the old oil, dirt, spray, and surface rust off. Then I used a combo of rustoleum rust convertor primer, under body spray, and truck bed liner.

2013-11-25_16-30-19_103.jpg

Time to address the body mounts that got ripped out. I didn't get the space right above it totally painted because I knew I'd be welding.

2013-11-26_09-16-52_799.jpg

2013-11-26_09-17-00_794.jpg

I used some plate that I had brought from back home during a visit to patch the body mounts. Got good penetration out of it. I waited to drill the holes for the mounts until I was read to install them.

2013-11-26_14-37-43_808.jpg

2013-11-26_14-37-50_212.jpg

The time then arrose to get going on new brake lines and gas lines. I ordered bulk lines of each from O'Reilly's. Used 5/16" brake lines and 3/8" fuel lines. For the fuel lines I figured it was better to go a little larger than too small.

Not picture but I took apart the prop valve and put in new o-rings. Cleaned that up good and re-used it. Best advice I can give on this section is get a good flaring tool, I broke the cheapo from harbor freight and ended up renting one from O'Reilly's to finish the job.

2013-12-30_15-18-12_830.jpg

2014-01-05_18-16-00_264.jpg

2014-01-05_18-16-36_824.jpg

2014-01-05_18-16-59_19.jpg

2014-01-05_18-17-48_151.jpg

2014-01-05_18-17-48_151.jpg

Ran into an issue with the body mounts. Even though Morris had these listed as working for my CJ5 , they didn't. Even Crown had them listed as working, after some more digging they said they messed up and they weren't the right size. The only alternatives didn't come with the front mount for the grille. I decided to drill out the holes to the correct sizes to use the mounts I already had. I used a stepper bit and lot and lots of cutting oil. By the time I was done that bit was finished. Luckily it was an extra my dad had from work, those are pricey.

2014-01-09_12-40-05_910.jpg
 
As I had mentioned before I was pretty positive the jeep had been rolled. The bare frame on the ground rocked a bit, and there were plate/welds on the front of the frame to strengthen everything back up. The passenger fender was broke at the grill and slanted down. So I knew I needed a new fender. From what I read online the replacements looked slightly different different, so I went ahead and replaced both fenders to keep them symmetrical. Also to save on some body work!

Anyway the first pair came with one of them crunched. Morris sent me out a replacement right away. Currently have the extra on craigslist to try and make something off of it.

2014-01-10_20-28-47_633.jpg

Got the exhaust back on, it was real pita since it was built in place. It took the sledge hammer to get it back on. I took it off without the skid plate being on. But put it back in with the skid plate in place. I was stubborn.

2014-01-11_17-53-03_425.jpg

2014-01-11_17-53-15_76.jpg

The body back on! I knew paint was looming now.

2014-01-11_18-00-08_773.jpg

I discovered how horrible the replacement Crown Windshield frame was. I definitely couldn't recommend it again. The lip was way too long, have some photos comparing stock vs crown. I had to use a cut-off tool to shorten the lip way down. The seal simply wouldn't work with the lip there. I read online the lip up top is too long as well for a hard top. But I left that one alone.

2014-01-14_19-17-13_818.jpg

2014-01-14_19-17-42_403.jpg

2014-01-14_19-18-35_81.jpg

2014-01-14_19-18-52_347.jpg

2014-01-14_19-19-17_698.jpg
 
Great build I really liked the pics of you as a kid with it :popcorn:
 
Well it was time to get onto the body. I decided I was going to Herculine inside of the tub. But I wanted to get as much of the old red paint off. It was flaking off anyway and spots so I wanted good adhesion.

2014-01-16_18-45-26_517.jpg

Always wear proper PPE, I was happy to not have all of that in my lungs.

2014-01-18_17-34-14_656.jpg

Grill

2014-01-19_15-12-59_858.jpg

Only rust to really speak of on the entire Jeep. I wire brushed it down, then used some rust remover stuff on it. Came out fairly well, I forgot to take an after pic. Was still really sturdy, no integrity issues.

2014-01-20_17-56-22_9.jpg

2014-01-20_17-56-29_195.jpg

After lots of sanding on the body, I got the garaged prepped for paint.

2014-02-14_20-47-53_285.jpg

2014-02-15_12-32-28_702.jpg

2014-02-15_12-32-34_971.jpg

2014-02-15_12-32-45_560.jpg

2014-02-15_12-32-53_677.jpg

2014-02-15_12-33-09_768.jpg

2014-02-15_12-42-02_860.jpg

I decided to go with an epoxy primer and for color went with a single stage urethane. Now here is where I messed up. I had used normal paint guns in the past, part of my senior project was painting an older truck. HVLP guns were new to me. I set the pressure at the recommended level, but not while holding the trigger. That was my biggest mistake of the project. The primer was fine, but the final paint came out with a lot of orange peel. But it actually grew on me, I surprisingly like the little bit of texture on the Jeep. To each their own, but I actually like the look. Flat paint makes it look too clean, its a Jeep! So yeah now the pics.

2014-02-15_16-19-45_343.jpg

2014-02-15_16-19-55_304.jpg

2014-02-15_20-15-46_579.jpg

2014-02-15_20-16-37_757.jpg

2014-02-15_20-18-07_178.jpg

Yet again didn't take pics while applying the Herculiner. I did it soon after the paint to get better adhesion between the epoxy primer and bedliner. Be careful of the open holes! I got lucky and some drips are behind the diamond plate. I also got lucky, my roommate was painting his new fenders on his jeep so shot my diamond plate while he was at it with his black. Came out awsome.

2014-02-16_18-47-48_808.jpg

At this point its worth saying I found a stainless steel bolt kit on Morris. Well worth it. Was around $AMC 150 but worth replacing all the old rusted bolts with stainless steel. Didn't come with quite everything, but between that and the hardware store I replaced almost everything with stainless.

2014-02-22_17-17-25_897.jpg

Not impressed with the replacement battery tray. The batter acid from the blown up battery ate the stock one so had to replace. The holes definitely didn't line up. And even with those 3 in it was warped and way not right. I ended up using the top 2 bolts and abandoning the bottom 2. Still didn't sit flat, but closer.

2014-03-01_12-51-05_544.jpg

2014-03-01_12-51-12_359.jpg

Was time to cut off the old stopper that was welded onto the clutch pedal as well as drill the hole for the new clutch master cylinder. Paint up the pedals/bracket and install.

2014-02-28_22-21-35_313.jpg

2014-03-01_18-51-33_485.jpg

New clutch master cylinder installed. Got it at Autozone, I really like the bolt on top.

2014-03-01_18-53-16_985.jpg

Stripping the steering column and primering it. I forgot to take a picture of it hanging after I finished painting it black.

2014-03-02_12-42-09_677.jpg

2014-03-02_13-29-32_649.jpg

I didn't picture it but my roommate had his own powder coating stuff so I powder coated the original windshield hinges, hood hinges, door hinges, and just about anything else I could get my hands on. Really neat and easy.

At this point I ran into a problem. It became apparent that my windshield hinges were bent. I had to put them in a vise and use a sledge hammer. After taking it on and off a few times I got the windshield sitting right. But then I had to re-powder coat them.

2014-03-02_16-27-28_870.jpg

2014-03-05_21-09-47_559.jpg

2014-03-05_21-10-01_265.jpg

I went with the Painless wiring harness. One big thing to note is to order the shifter deal in the steering column for a 77 or later CJ5 . The harness is for those, and the 76 version is double the price. I had to return the one I ordered and got the later model locally. Fit no problem. Only difference was the connector.

Old one
2014-03-09_13-37-59_102.jpg

I only needed one hot wire to the older fan switch.
2014-03-08_19-00-58_273.jpg

Looking more like a Jeep. I was super annoyed to discover the new dash didn't fit right. Because the jeep is tweaked I had to elongate some holes on the sides of the dash to get all the screws in. Pays to have a dremel in those situations. I ended up going with a different volt gauge then what is shown here. I also skipped over that I got a new air box, took apart and painted the heater box, and replaced the defroster duct and etc. Finding stuff for the '76 was tough but I finally tracked everything down.

2014-03-15_13-49-42_768.jpg

Refurbishing the center portion of the steering wheel. It was a little rusty. Also all the horn stuff was missing off the jeep, so I had to hunt down replacement parts on ebay. Luckily it wasn't that much. Finally a functioning horn, never had one.

2014-03-15_17-41-21_503.jpg

2014-03-15_17-41-29_590.jpg

2014-03-15_18-25-37_909.jpg

The carburetor I had on the Jeep was a Holley 750cfm de-jetted a bit. Was free and was on there for awhile. A buddy had an extra Holley 500cfm so I went with that. Stupid thing would not stop leaking gas at the butterfly valves on the base. From what I've read it happens.

2014-03-28_20-30-40_258.jpg

Got it fired up and was quite happy, minus the leaking gas at the rear buttery fly valves
2014-03-29_19-58-44_310.jpg

I ended up using the push rod off of the manual clutch linkage. Had to cut it down a bit. I believe my final adjustment was around 7" in length, but can't remember exactly.

2014-03-29_19-58-34_262.jpg

2014-03-29_19-58-20_3.jpg

I ran into another problem, the alternator was still overcharging. It did that as long as I've had the Jeep. Even replaced the regulator, alternator, checked the sensor wire for 12v all looked good. I thought with the new harness it would work. I was wrong. I ended up ditching the motorcraft charging BS and went with the Delco. Amazing idea. One problem was that the oil pressure sensor was hitting the housing. This was my solution.

2014-03-31_17-55-36_490.jpg

Took it for a quick spin around the block. I got some back firing, but I knew the timing was dead on. So more carburetor problems. I had rebuilt it, taken it apart again, soaked it, blew all the passages out again, and was still having an issue with leaking fuel and backfires. So I said screw it and ordered the Howell TBI unit. It was in the future anyway so thought why not now. I was surprised I only ended up needing to redo one flare on the brake lines. I was super lucky, brakes bled real easy and have worked well.

2014-04-05_17-46-19_607.jpg

I painted the front parking light housings black, and the inside white. I found the gaskets pictured below at Home depot. Worked great between the housing and the chrome piece. As well as cutting one down to fit between the housing and clear front piece. Almost every site I was on incorrectly stated the '76 uses a 2 screw front cover, the 76 actually came with the older style 3 screw.

2014-04-12_19-05-50_929.jpg

Throw the cardboard one away, just use the rubber one.
2014-04-12_18-59-21_268.jpg

I got my new best top seats. I wire brushed the seat frames and painted them up. I always ran into problems with bass in the jeep before. This time around I wanted to use an amplifier. I decided to mount it under the passenger seat. I had more scrap steel left over. So cut it to length, painted it up, and then drilled and tapped holes for the amp to use to secure it.

Plenty of clearance even when leaning the seat forward.

2014-04-13_14-52-56_307.jpg

So my dad always said there was no good way to use a hole saw if there was already a large hole in the spot you wanted. The new TBI harness needed a larger hole than what was already in the firewall. I got a smart idea to wrap the pilot bit with electrical tap at the front and back thick enough for a socket to go over. Then I found a socket that was the same size as the existing hole. Worked perfect. The socket became the pilot bit.

2014-04-14_20-31-37_110.jpg

I didn't get a pick with the actual part with the teeth on, but I think you get the idea.

2014-04-14_20-31-56_473.jpg

Even with the hole larger I had to pull pins on the TBI connectors to get some of them through the hole. I was disappointed you had to cut the grommet that came with the harness to use it. Would have made more sense for them to have put the grommet on while creating the harness. Oh well.

2014-04-14_21-05-48_84.jpg

2014-04-14_21-06-34_225.jpg

Came time to weld in the 02 bung into my exhaust. I chose the passenger side since the other side had all kinds of stuff in the way. Note to self, get a better welding jacket. I though I smelt something burning, then my arm got hot.

2014-04-16_17-40-12_89.jpg

ECU installed behind the glove box. I used foam padding that came on my hot water heater to help absorb the shock of the road.

2014-04-16_19-23-49_275.jpg

After
2014-04-16_19-25-57_477.jpg

2014-04-16_19-26-11_115.jpg

I sanded down and painted the roll bar black. I wasn't too concerned with it since I was putting a pad on it. Just wanted to protect against moisture/rust.

2014-04-18_21-42-48_403.jpg

2014-04-18_21-42-56_100.jpg

Installed
2014-04-19_12-49-08_671.jpg

I decided to install the hydraulic hood lift from Rugged Ridge. Directions pretty much suck, and the u-bolt deals that go on the support rods both had their bases break immediately. Still tightened up, but wasn't happy. They are the same clamps you use on steel cable, I've never seen a base break on those. Cheap Cheap.

2014-04-19_12-50-25_823.jpg

2014-04-19_12-51-17_211.jpg

Got the new TBI running, I did have to order a spacer for new air cleaner. I couldn't find a flat base air cleaner, so I had to use a spacer with it.

2014-04-19_12-51-53_767.jpg

I upgraded to 3 point seat belts. So I had to drill holes in the roll bar. Luckily I didn't need to cut the fabric on the pad, the bolts when it a natural intersection of different parts so the bolt wiggled through.

2014-04-20_18-57-46_410.jpg

Nearing Completion

2014-04-20_18-57-54_309.jpg

Painted up the tires, had to remove rust that was hiding under the paint. I had forgot that they were chrome rims. Rust came off pretty easy and the chrome got shiny. But I wanted black. I was also surprised at the life of the rubber on the tires. My dad got them for me for my 16th birthday, and the sidewalls are still in good shape with lots of tread. Glad I left it in the barn all of those years.

2014-04-23_15-39-38_112.jpg

2014-04-23_15-39-45_777.jpg

I somehow managed to throw away my first set of new lug nuts I ordered, so I ended up going with these

2014-04-24_23-19-42_881.jpg

That's all for now. I'll continue tomorrow.
 
I just got my son a 76 jeep CJ5 and it would be very beneficial to see the pics of your frame off restoration. However, I am unable to open the img links? Can you email them to me?
corr33@hotmail.com
Thanks
 
AWESOME! Looks really good. One day I'll buy my third CJ, it'll be a '76 CJ5 . I bought my first CJ in 1976 brand new. It was a CJ5 , Firecracker Red in color, white soft top, I6, Standard Transmission & TC. My dream is to go strictly stock and identical to my previous CJ5 . Got to finish up the Custom Truck build first. Now go out and have some more fun in your family's Jeep! :chug:
 
Last edited:
Did a great job! I have a 82' Scrambler that I have the body off of right now. I'm planning to swap the I6 it has for a AMC 304 or 360. Can't wait to start stripping the frame and do some repairing.
 
Incredible transformation… great job!

Very cool that you kept it, then brought it back.
 
Man thats sweet. Good work and good looking Jeep to boot
 

Jeep-CJ Donation Drive

Help support Jeep-CJ.com by making a contribution.

Help support Jeep-CJ.com by making a contribution.
Goal
$200.00
Earned
$25.00
This donation drive ends in
Back
Top Bottom