• Hello Guest, we are proud to now have our Wiki online that is completely compiled and written by our members. Feel free to browse our Jeep-CJ Wiki or click on any orange keyword when looking at posts in the forum.
    To dismiss this notice
    click the top right X.

Build Thread Happy wife, Happy life 77 CJ5 build :D

Build Thread Happy wife, Happy life 77 CJ5 build :D

RM77CJ5

Jeeper
Posts
105
Thanks
0
Location
Templeton, CA United States
Vehicle(s)
1977 CJ5, 3 spd, AMC 304, all stock so I've been told!
1968 Camaro
2005 Chevy Avalanche, 2500, 8.1 Beast
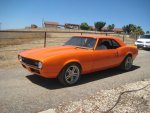
Hello Ladies and Gentlemen. This build is for my wife and her Christmas present that I bought her in 2013. She always wanted an "old school" Jeep like she had in High School. Well after meeting me, she had to have a 77! I have a 68 Camaro because of the year I was born! :)
The plans for the Jeep are to make her "pretty" and have her running well. She's going to be a summer cruiser, grocery getter, with an occasional trip through the local river bed.
After posting a few questions, we've decided on the Howell EFI kit. Here in California, we have o worry about the smog police. When I bought the Jeep, there were a few smog items missing. It will be in our best interest to install the EFI it.
This will be a "build" thread with a question asked here and there. I don't mind posting pics so I hope y'all like pics! :)
Let's get started...
I know nothing about Jeeps! I used o now nothing about 68 Camaros...
My 68 when I bought her
driveside.jpg

My 68 now, almost done! :D
orglffront.jpg

I have mechanical skills. This was all done in our 2 car garage!

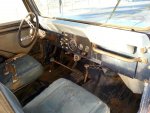
The wife's 77 Jeep CJ5
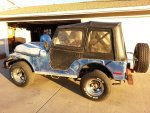
20131223_162734.jpg

20131223_162850.jpg

Levis edition
20131223_162831.jpg

She needs a lil' work
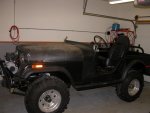
20131223_162950.jpg
 
It looks like you have done a very nice job on your Camaro and I'm sure the wifes Jeep will turn just as nice or nicer since your wife will be involved :D
 
It looks like you have done a very nice job on your Camaro and I'm sure the wifes Jeep will turn just as nice or nicer since your wife will be involved :D

Thank you! I wanted to post more last night, but after I hit the submit button, I was left waiting! :)

Plans for the Jeep....
Like I said above, Howell EFI kit
I need to paint it and make it puurdy
She would like a lift and run 33's
Need to make a bit more room for the driver, ie. cutting and patching the rear fender well.
A wee bit better feel with the steering. I owned a CJ5 before and hated it. Didn't own it long enough to work on it.
I'm sure I will have a few questions here but will try to ask them in the appropriate forum once I know where to go. :D I know nothing of Jeeps just like I knew nothing of Camaros. But after joining the Camaro forum, I had all the help I needed. Looking forward to the same here!
The wife is all excited and purchased some overalls, pink mechanic gloves, and even some pink shaded safety glasses! :eek: I've created a monster.
Here come the updates... and questions.
 
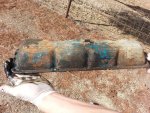
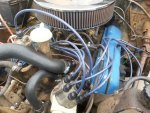
I decided to start with something easy. The valve covers were leaking so when I removed them to replace the gaskets, I painted them. Here are the before pics....
20140106_112616.jpg

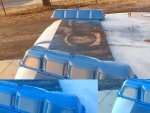
After pics...
20140106_165215.jpg

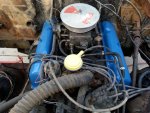
I also got the proper oil cap. No more sock! :)
20140107_165119.jpg
 
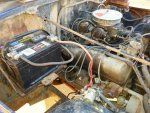
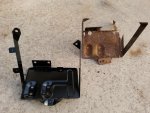
Here's a shot of the old battery tray and the new one. it needed replacing!
20140107_165053.jpg

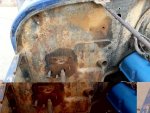
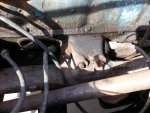
I will take care of this area when the engine gets removed and I paint the firewall. Any help with what I'm looking at? Obviously the smaller tubes are for the heater core. What about the larger one to the right? it's a rubber hose. :confused:
20140107_164941.jpg
 
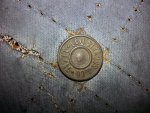
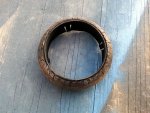
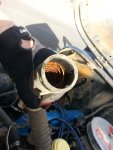
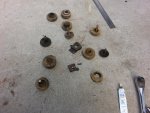
There was a "clicking" sound coming from the passenger side. Exhaust leak maybe? A valve? When I had the valve covers off, I started the engine and it didn't appear to be coming form the valve train. I got some new manifold gaskets and removed the manifolds. The gaskets appeared to be fine and there were no cracks in the manifold. Then this fell out!
20140107_164905.jpg
How do you tell if it's bad? I got new ones anyway. I've gone this far I might as well replace these things. :)
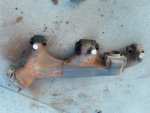
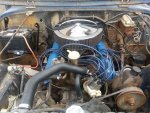
Since I'm going with the EFI, I decided to remove the heat shield, for the air cleaner, and stick with manifolds. You can see the tubes were already removed and blocked. The driver side has two broken off bolt heads on the middle two. I was ready to go with headers, but after some research on here, I decided to stick with the manifolds.
20140107_164917.jpg
20140106_113452.jpg

Updates to this project will be posted tomorrow. :D
 
By the way you guys look great :chug:
 
Any help with what I'm looking at? Obviously the smaller tubes are for the heater core. What about the larger one to the right? it's a rubber hose. :confused:
20140107_164941.jpg

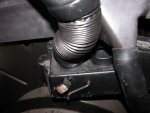
The larger hose coming out of the firewall to the right, is the drain hose for the fresh air plenum. The small tube below the two heater hose tubes, is in case you have a leak in the heater core. Keeps the hot fluid out of the tub and your passengers feet..

JeepDefroster006.jpg

Drain hose on the right in above picture.

Speaking of heaters: Do Not. I repeat: Do Not, toss anything away. The 76-77 heaters were unique. They had a few similarities to, IIRC, 72-75 models. But not the 78-86 models. The aftermarket has few parts, other than heater cores, for them. Also the 77 model had a unique fuel tank setup. The fuel hose into the tank is not available, so if your's needs replacing you will need to come up with a 'custom' solution.

Personally, I wouldn't go crazy with lift/wheel size. If the stock springs aren't shot, you can get 30-31" tires under it. Going with a larger size will create a few issues that may not suit the intended use of the vehicle.

Good Luck, and keep the pics coming!

Thanks for the useful information. I would have had no idea there were drain hoses!
As for the lift and tires, she wants the 33's! I'm thinking 2.5 suspension with 1 inch body. Not too much?
And I will have ore pics coming!!
 
...she wants the 33's! I'm thinking 2.5 suspension with 1 inch body. Not too much?

Here's a pic of my 76 CJ5 with 2.5" BDS lift, 3/4" ConFer Shackles, and Energy Suspension poly (no lift) mounts:

JeepCJ5002.jpg

Those are 32" TSL/SX tires on 8" rims. If I fill them up, they are about 31" loaded diameter.

I've measured and 'think' I can get a 33, 34 or 35 inch tire under it for street only use. Which I may do, as I've got 4.56 gearing. The problem I would have with 35's is I can't find any brands that are narrow. 12" wide 35" tires will cause some issues that may not be worth the effort to correct. Running 33's, other than needing to adjust the steering stops on the narrow track front, I don't see any other issues for street use.

As most tires don't measure their advertised diameter, I think you should be okay with 2.5" springs and 1" BL.
 
Replaced some hoses the other day. It's part of the clean up phase of the engine bay. The thing is covered in mud. Pressure washer will be used soon.
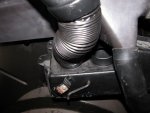
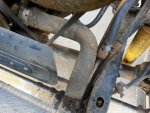
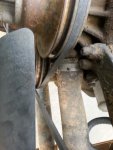
The lower hose was fun. Actually more fun to put back on than remove. While I was trying to remove it, the PO had installed the hose clamp and it was rubbing on the belt. Don't get me wrong, it's tight down there. Took me a while to get the new one back on. I had to install the hose clamp first, then the hose. Just to tight for both of them to go on together.
20140122_095137.jpg
20140122_095123.jpg

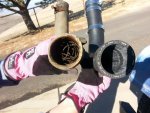
The rats nest that was inside. :eek: What in the world caused this? These are the wife's gloves, not mine. Her Jeep, I felt it was a good idea to get her out there and learn a thing or two. :) She's all excited.
20140122_105337.jpg

This was the upper hose. I replaced with a formed hose just for this reason. Stainless? I don't think so. :D
20140122_095215.jpg
 
WE also replaced the thermostat housing. Being it was bare metal and would rust overnight, I sprayed it with some Duplicolor black engine enamel. I almost went with the AMC blue but the wife wanted black. I like her decision. She didn't like the blue on the valve covers at first, but it's growing on her.
20140127_082550.jpg

After a phone call to Howell, I ordered the K&N 14" air cleaner housing. I already had the filter element from the Camaro. She thinks it's a little big. I do too. (okay, comments to follow :) )
20140127_082635.jpg

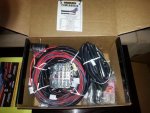
And here is the Painless wiring harness. I've installed one of these in my Camaro so hopefully all should go well. :D
20140127_082816.jpg

Where would one find pics of engine bays and the wiring? I'm looking to clean the wiring up as best I can, ie. hide it all! Or just some nice clean routing. I see this kit already has the plastic tubing covering it. I might replace it with the newer mesh type wrap I used in the Camaro.
 
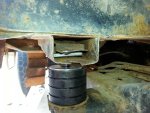
I decided to get the 1" body lift on the other day. What fun that was! I pre-soaked the bolts with PB blaster the night before knowing it was going to be fun. It was. I started with the driver side and did not use any impact wrenches for fear of breaking stuff. It didn't matter. Bolts were breaking and or the cage nuts were spinning.
Here's what I was working with...
20140204_092321.jpg

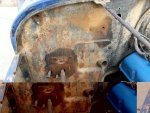
Here's one of the areas where the nut was just spinning. Here I had removed the so called nut.
20140204_102739.jpg

In the rear I had no access to it. I was going to cut the sheet metal but then decided to get the air chisel out. I will plug weld it back when done. did I mention this was FUN? :)
20140204_115754.jpg

The carnage. :eek:
20140204_115845.jpg
 
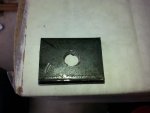
In the previous picture, you can see my copper anti-seize and flat stock to make my new cage nuts. I will definitely being using the anti-seize. :)
Here is my nut! (comments to follow)
20140204_124023.jpg

Here is my nut installed
20140204_124716.jpg

Thanks go out to Torx and IO who were helping over in the Chassis and Body section. I just stumbled across the Daystar thread and ran with it. ;) The passenger side was a breeze. No issues.
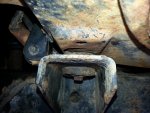
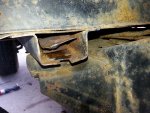
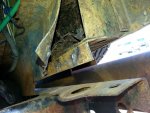
I do have an issue with the front mount. It appears the grill is pushed out from the inside. The piece that holds the cage nut is broken. There were three welds on it. I'll post a pic later. I'm clueless as to where this is suppose to be mounted.

Next are the brakes! Oh my. This just adds to the pounds of mud that were and still are underneath this thing. Pressure washer will be coming out soon.
20140204_144034.jpg
 
Here are some more pics of the brakes/mud debacle. Just a lil' hosing off would have gone a long way!
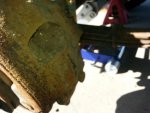
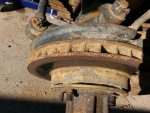
This is the front disc caliper
20140205_120553.jpg

The rotor fins are all filled with mud. So much for a cooling affect
20140205_120605.jpg

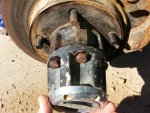
Here's the locking hub, just hanging on!
20140205_121238.jpg

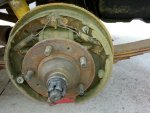
I'll be attacking the rear brakes today. All new drums, shoes, hardware kit, and wheel cylinders.
As for the front, I'll be doing those next. Any ideas as to the locking hub? Replace the entire thing? Rebuild if possible? I was planning on replacing the bearings and seals as well since everything will be coming off and being replaced. Sound good? Thank you.
 
Please fill out your profile so we know what we are looking at.:D
 
Any ideas as to the locking hub? Replace the entire thing? Rebuild if possible?
I would recommend breaking it down for cleaning along with new o-rings and gaskets. When you reassemble don't go heavy on the grease a light coating internally is all that is needed. You have the earlier 6 bolt hubs (77) appose to the later 5 bolt however, the bolt retainers don't look in good shape so you can either buy new retainers or swap to studs.
 

Jeep-CJ Donation Drive

Help support Jeep-CJ.com by making a contribution.

Help support Jeep-CJ.com by making a contribution.
Goal
$200.00
Earned
$25.00
This donation drive ends in
Back
Top Bottom