I now have power brakes
cjnut
Jeeper
- Posts
- 30
- Media
- 3
- Thanks
- 0
- Location
- Milliken CO
- Vehicle(s)
- 2000 Wrangler lifted w/33's work in progress
1985 CJ 350 Chevy auto trans bunch o stuff
1996 GC stock commuter car
Why I haven't done it sooner, I have no idea.. Easy swap, cheap to do and it works great. I have an 85 CJ w/chevy 350.
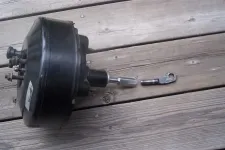
First I located the parts from a local fourm and got them at a fair price. Then I went about looking on the net for any tips on the swap and found these http://www.desertcj7. com/yj_brake_booster_upgrade.htm & Terrain Stompers :: View topic - Going from manual to power YJ brakes and indeed they did help.. Cutting and welding the brake rod was done by a friend (damn he's good) I almost hate to keep his work where it can't be seen, then I threaded the the other half that connects to the brake pedal.
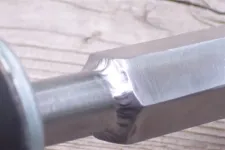
Nice looking weld!!!
I also found that the brake line adaptor part numbers that I got the ref. page were not correct so I had to change one of them. I will put a complete parts list at the bottom of this post.
To start the swap I disconnected the rod from the brake pedal then I unbolted the MC from the firewall
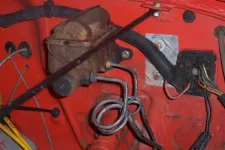
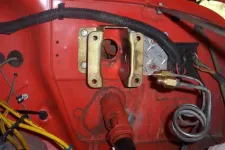
As you can see in the next pic there were 4 bolts around where the old MC was. I simply took those out and bolted up the power brake booster mounting bracket.
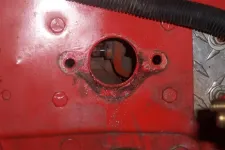
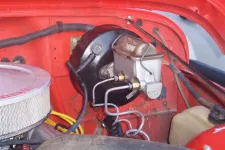
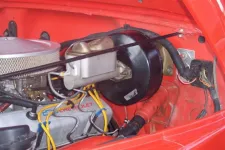
I then mounted the booster to the bracket, connecting the rod to the brake pedal on the inside. I bench bleed the MC and bolted it up to the booster. I connected the brake lines by first bending them so they will would mount on the opposite side of the MC. tightened everything up, Then hooking up the vaccum line from the carburater for me looks a bit getto, but I will work on that.. Going from small line to 3/8 on the booster. Bled the brakes, adjusted the coupler so the brakes lights don't stay on and your done.
Parts List:
(1) MC & Booster/mounting bracket (pre-1990) YJ
(1) 1/2"x 13 coupler
(1) Napa brake line adapter # 7912
(1) Napa brake line adapter # 7915
(2) bottles of brake fluid
small amount of vaccume line
Feel free to ask questions I left out some detail cuz it seems obvious to me..
Bill
First I located the parts from a local fourm and got them at a fair price. Then I went about looking on the net for any tips on the swap and found these http://www.desertcj7. com/yj_brake_booster_upgrade.htm & Terrain Stompers :: View topic - Going from manual to power YJ brakes and indeed they did help.. Cutting and welding the brake rod was done by a friend (damn he's good) I almost hate to keep his work where it can't be seen, then I threaded the the other half that connects to the brake pedal.

Nice looking weld!!!

I also found that the brake line adaptor part numbers that I got the ref. page were not correct so I had to change one of them. I will put a complete parts list at the bottom of this post.
To start the swap I disconnected the rod from the brake pedal then I unbolted the MC from the firewall

As you can see in the next pic there were 4 bolts around where the old MC was. I simply took those out and bolted up the power brake booster mounting bracket.


I then mounted the booster to the bracket, connecting the rod to the brake pedal on the inside. I bench bleed the MC and bolted it up to the booster. I connected the brake lines by first bending them so they will would mount on the opposite side of the MC. tightened everything up, Then hooking up the vaccum line from the carburater for me looks a bit getto, but I will work on that.. Going from small line to 3/8 on the booster. Bled the brakes, adjusted the coupler so the brakes lights don't stay on and your done.


Parts List:
(1) MC & Booster/mounting bracket (pre-1990) YJ
(1) 1/2"x 13 coupler
(1) Napa brake line adapter # 7912
(1) Napa brake line adapter # 7915
(2) bottles of brake fluid
small amount of vaccume line
Feel free to ask questions I left out some detail cuz it seems obvious to me..
Bill
