Jeep Cj5 steering column rebuild (tilt)
brownrxmd
Jeeper
- Posts
- 100
- Media
- 2
- Thanks
- 0
- Location
- Wittmann, Az
- Vehicle(s)
- 1980 Jeep Cj5.
5.3 Vortec
SM465 transmission
D300 Transfer
3.07 gears
When I did my conversion one thing I never liked was the fact that the steering wheel was never perfectly straight. Also there was a some up and down and side to side play in the column. So this write up is how I cured it. I'm not a steering expert by any means and out of fear of screwing up my steering column beyond usability I bought another column from a salvage yard in New Jersey, with shipping the total was about AMC 150 bucks. The following is my tear down and rebuild. You might notice the steering column mysteriously changes colors and in fact the red column has a column shifter on it. For clarity I googled some images I needed to fill in the blanks. To me this column is like taking apart a Chinese puzzle.
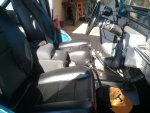
My steering column is a tilt column and I wanted to retain the tilt feature. So maybe I'm a little chubby, or a full blown fat*ss. But hey, it's my walking around weight.
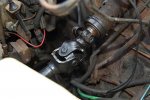
Though this isn't a pic from my jeep it's what you should see in most cj's. To remove the column you have to remove this nut and bolt on the intermediate shaft.
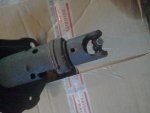
When I got my column the end of the shaft looked like this, it had a ujoint on it. I thought I was hosed. I used a cut off wheel to carefully cut this off. If you rebuild a column with this on it be very careful not to damage the splines on the intermediate shaft. To my pleasant surprise the intermediate shaft was "grooved" so that the coupler bolt and nut would go back on.
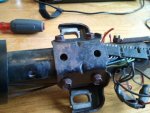
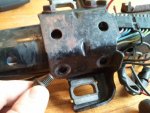
Once the column is on your dinner table you will remove these four bolts holding the mounting bracket to the column.
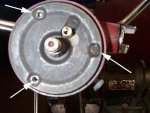
After removing the steering wheel you'll see this plate, it may not be exactly like this plate but there will be some facsimile of one here.
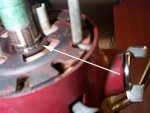
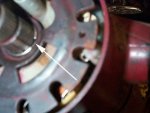
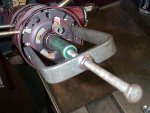
Under the plate you just removed will be this plate. It is held on by a metal clip. To remove this plate you have to remove the clip. To remove the clip you'll need a screw driver and a steering column tool.
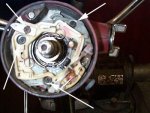
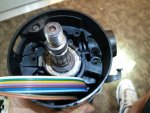
Once that is off you'll be at the turn signal switch. I replaced mine. The turn signal arm is screwed onto this. The plastic where the turn signal arm attaches is prone to breaking and gives a lot of play to the turn signal arm. My arm had some rust pitting on it so I ordered a new arm also. You should leave your arm screwed to the assembly as you'll have to move the arm to the left and to the right to get to two phillips screws underneath. You can only see one screw in the pic. Oh and on the right side of the column there is a small arm for the tilt feature, it simply unscrews by turning the arm like you're backing out a screw.
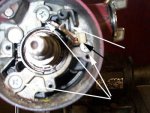
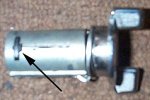
Once the turn signal is removed There are three large phillips screws to remove. Looking the key mechanicsm you'll see a small "tang" that when depressed and the key in run the key lock will slide out.

Just under the lock there sits this horn and key signal contact set.
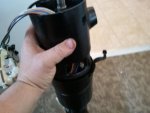
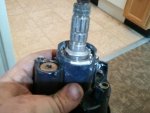
With the lock and three large phillips screws removed the upper cover should slide off.
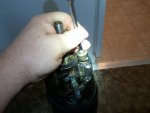
I used a phillips screw driver to remove the tilt column spring. You can see the small tab on the bottom of the spring cap. firmly press the cap into the column and turn and the spring will extend out.
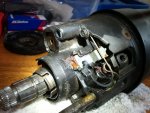
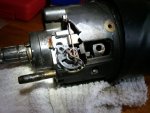
This shows the rack that engages the ignition switch. When you turn the key the black plastic piece engages the metal rack and that forces the rack to slide down the column pushing a rod that engages the contacts in the ignition switch midway down the column.
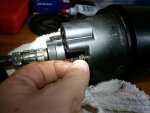
Remove the small bolt and spring.
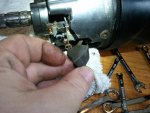

After removing the spring and small bolt the switch cam slide off and allows the rack to slide out. There is a small spring that sits on the face of the rack you are about to slide out. Be careful not to lose this spring.
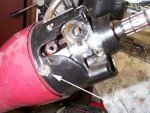
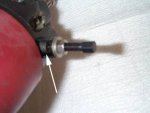
On the sides of the column is the bolts that hold the tilt mechanism in place. I didn't have a tool to remove these so I didn't tear the column down any further.
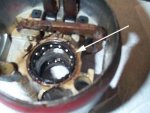
If your column is wobbly or makes odd noises then most likely this bearing is the culprit. There are two sets of these bearings in plastic retainers. The bearings will just fall out so be careful here. I replaced these bearings and made sure they were lubed with white grease.
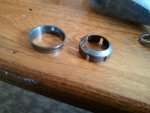
These two rings hold the upper bearing in place.
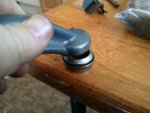
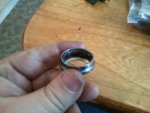
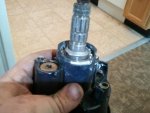
I used a clamp to press these two together. You can see I really clamped them together a little too much. The bottom picture shows I had to play with the fit a little to get it right.
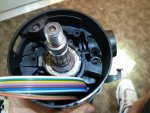
This is how that bearing and retainer look when reassembled. After lubing the bearings it was time to reverse engineer this and put it all back together. Reassembly is just reversing what I took apart.
Now lets look at the bottom end.
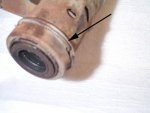
Looking at the bottom end of the column there is a retainer clip that needs to be removed. I used a small flat blade screwdriver.
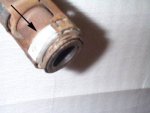
After removing the clip I used the same screw driver and a hammer to gently tap the bearing housing and bearing off the end of the shaft. In the end I completely destroyed these pieces but I had a replacement kit so no big deal.

This kit is what you will need to replace the lower bearing. These Saginaw columns were used in just about every Chevy Buick product from the 60's through the 80's.
The reassembly of the lower bearing is the same as removal. But be careful. Your steering column is designed to collapse in an impact. Inside the steering column is plastic that melted into the intermediate shaft. At the injection point the plastic formed pins. In a collision these plastic pins collapse. I would be careful banging on the ends of the column as you might break the plastic pins. I'm not sure how that would affect the column but I don't think it would be to the positive.
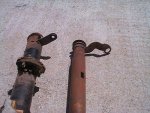
When shopping for a column I ran across this type of column, notice the lower part of the column has a lever on it. This is a lockout lever. It has a cable that runs to the Transmission and locks the Transmission in reverse when the key is removed and in park. Just an Fyi.

My steering column is a tilt column and I wanted to retain the tilt feature. So maybe I'm a little chubby, or a full blown fat*ss. But hey, it's my walking around weight.

Though this isn't a pic from my jeep it's what you should see in most cj's. To remove the column you have to remove this nut and bolt on the intermediate shaft.

When I got my column the end of the shaft looked like this, it had a ujoint on it. I thought I was hosed. I used a cut off wheel to carefully cut this off. If you rebuild a column with this on it be very careful not to damage the splines on the intermediate shaft. To my pleasant surprise the intermediate shaft was "grooved" so that the coupler bolt and nut would go back on.


Once the column is on your dinner table you will remove these four bolts holding the mounting bracket to the column.

After removing the steering wheel you'll see this plate, it may not be exactly like this plate but there will be some facsimile of one here.


Under the plate you just removed will be this plate. It is held on by a metal clip. To remove this plate you have to remove the clip. To remove the clip you'll need a screw driver and a steering column tool.


Once that is off you'll be at the turn signal switch. I replaced mine. The turn signal arm is screwed onto this. The plastic where the turn signal arm attaches is prone to breaking and gives a lot of play to the turn signal arm. My arm had some rust pitting on it so I ordered a new arm also. You should leave your arm screwed to the assembly as you'll have to move the arm to the left and to the right to get to two phillips screws underneath. You can only see one screw in the pic. Oh and on the right side of the column there is a small arm for the tilt feature, it simply unscrews by turning the arm like you're backing out a screw.


Once the turn signal is removed There are three large phillips screws to remove. Looking the key mechanicsm you'll see a small "tang" that when depressed and the key in run the key lock will slide out.

Just under the lock there sits this horn and key signal contact set.


With the lock and three large phillips screws removed the upper cover should slide off.

I used a phillips screw driver to remove the tilt column spring. You can see the small tab on the bottom of the spring cap. firmly press the cap into the column and turn and the spring will extend out.


This shows the rack that engages the ignition switch. When you turn the key the black plastic piece engages the metal rack and that forces the rack to slide down the column pushing a rod that engages the contacts in the ignition switch midway down the column.

Remove the small bolt and spring.


After removing the spring and small bolt the switch cam slide off and allows the rack to slide out. There is a small spring that sits on the face of the rack you are about to slide out. Be careful not to lose this spring.


On the sides of the column is the bolts that hold the tilt mechanism in place. I didn't have a tool to remove these so I didn't tear the column down any further.

If your column is wobbly or makes odd noises then most likely this bearing is the culprit. There are two sets of these bearings in plastic retainers. The bearings will just fall out so be careful here. I replaced these bearings and made sure they were lubed with white grease.

These two rings hold the upper bearing in place.


I used a clamp to press these two together. You can see I really clamped them together a little too much. The bottom picture shows I had to play with the fit a little to get it right.

This is how that bearing and retainer look when reassembled. After lubing the bearings it was time to reverse engineer this and put it all back together. Reassembly is just reversing what I took apart.
Now lets look at the bottom end.

Looking at the bottom end of the column there is a retainer clip that needs to be removed. I used a small flat blade screwdriver.

After removing the clip I used the same screw driver and a hammer to gently tap the bearing housing and bearing off the end of the shaft. In the end I completely destroyed these pieces but I had a replacement kit so no big deal.

This kit is what you will need to replace the lower bearing. These Saginaw columns were used in just about every Chevy Buick product from the 60's through the 80's.
The reassembly of the lower bearing is the same as removal. But be careful. Your steering column is designed to collapse in an impact. Inside the steering column is plastic that melted into the intermediate shaft. At the injection point the plastic formed pins. In a collision these plastic pins collapse. I would be careful banging on the ends of the column as you might break the plastic pins. I'm not sure how that would affect the column but I don't think it would be to the positive.

When shopping for a column I ran across this type of column, notice the lower part of the column has a lever on it. This is a lockout lever. It has a cable that runs to the Transmission and locks the Transmission in reverse when the key is removed and in park. Just an Fyi.

