Lift Upgrade

Lift Upgrade

t bone 347

Jeeper
Posts
133
Thanks
0
Location
GA
Vehicle(s)
1979 Cj-7 AMC 304 w/ 3 spd manual, Tremec T150, Dana 20. All stock, no mods
Decided it was time to get the new lift put on my CJ. I've had a Trail Master 2.5" sitting in the shop for awhile now. I know TM isn't top dollar, but we won't go down that rabbit hole!!! According to the directions (on my phone, lost the hard copy) it should only be about 4-6 hours, well....here's day 1.

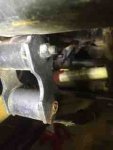
DAY 1- CJ jacked up and front shocks off with no issues. U bolts....now that's another story. No deep socket 3/4" socket for 1/2 drive or air tools so having to use box wrench and some other socket set that allows the bolt to pass through the socket. Neither provide very much leverage so lots of elbow grease, choice words, and laying on my back just staring at the bolts. Was able to get one u bolt off of the driver side. Everything soaking in PB Blaster and a trip to the store for a new socket tomorrow.

DAY 1 RECAP- Two hours and two shocks off and one u bolt. Leaves me 2-4 hours for the rest on the lift........


1979 CJ7
AMC 304 / 3 Spd
 
Words to the wise. Cut those U-bolts toss em in the trash and have new ones on hand. You will thank me. It is worth the extra expense.
 
Words to the wise. Cut those U-bolts toss em in the trash and have new ones on hand. You will thank me. It is worth the extra expense.

x2 u bolts are the worst part of the lift install and so not worth keeping :chug: and dont forget to show us pics :D
 
Appreciate the advice, that's the route I'll take for sure. You think angle grinder or reciprocating saw? Kinda concerned about sparks flying around under ole girl.


1979 CJ7
AMC 304 / 3 Spd
 
Appreciate the advice, that's the route I'll take for sure. You think angle grinder or reciprocating saw? Kinda concerned about sparks flying around under ole girl.


1979 CJ7
AMC 304 / 3 Spd

Either will get it done pretty quick, which ever you are more comfortable with, just remember the u bolts are stretched and will pop on you when they let go :chug:
 
I just realized that I started this in the wrong section, I poked around, but don't have the creds to move it. If a mod could move it to Suspension vs. Chassis/body. Thanks
 
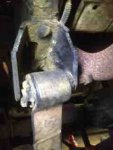
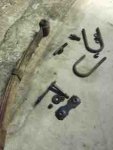
DAY 2- No good angle at the u bolts with sawz all, luckily the PB Blaster did its job and was able to get them off much easier. Other side had loosened up as well. To get the leaf off, had to cut the Crown Shackle off as one of the bolts sheared off, luckily these are only around $12, so I'll be going back to the same ones x 4. Again, not trying to start a shackle discussion, no off roading or wheeling , just around town and some dirt roads. Bolt won't come out of rear shackle due to it hitting the exhaust, after much twisting and turning, ended up chopping it, might as well put Grade 8 all around since I have to replace one already.

Hopefully mama will let me keep wrenching over the weekend.

IMG_6197.JPG
IMG_6200.JPG
IMG_6201.JPG

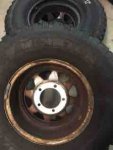
Turns out I'm still sitting on the original white wagon wheels too :-)
IMG_6204.JPG
 
Got the front finished....mostly. I somehow over looked the need for longer sway bar links. Going to be trendy and 'up cycle' the original ones, just cut and add required length to the middle. I don't have a pic of the front but I can tell that it sits slightly higher than the rear.

Difference between old and new front leaf springs. I'm able to flex the old ones by pushing down on them, new ones...not so much.
0ed05a2ebc83a8224a13c416de00b632.jpg


Is there a required amount of bolt/thread that needs to be visible once a bolt is tightened down? I put Grade 8 9/16 x 12 x 4 in the front main eye. The end of the bolt and nut are flush. Should I got to 4.5" bolt or is this fine? I have the same length for the rear leafs (leaves??? ) as well.

Thanks, Terry
 
I vaguely remember buying the 4.5 bolts for mine


Sent from my iPhone using Tapatalk
 
Thanks Gert, guess I need to dig another $8 out of the piggy bank.
 
So this is taking a lot longer than the estimated 4-6 hours, I'm having to fit the work in when I can. Got another few hours in today and the rear shocks and left leaf is off. Also got the leaf spring plate cleaned up with fresh coat of paint.

True to anything that has to do with CJ work, I now have gas dripping from the tank. No idea from where, but it's pooling up on the skid plate. I hate the thought of having to drop the tank again, but I don't know what other option I have.....
 
Ouch, hope you don't have a rusty tank like I did when I bought my jeep


Sent from my iPhone using Tapatalk
 
That's what gets me, I just had the tank off in Jan/Feb putting a new sending unit and running new lines.
 
T-Bone, I feel your pain. If you use the link below and go to my old build thread, you'll see I had a lot of the same problems. I purchased the 4" Trail Master lift. It came with everything I needed. I got new sway bar mounts, new u-bolts, etc. Surprised yours didn't. I think any suspension work should have a disclaimer on it. Something like, "This project may take a lot of extra work to install!" I haven't had a chance to drive mine yet as it is a complete rebuild. Goods luck with the rest and please keep us up todate. Would like to know what you think about the drive with your all new parts.
 
I just realized that I started this in the wrong section, I poked around, but don't have the creds to move it. If a mod could move it to Suspension vs. Chassis/body. Thanks

I'm a little late but it's moved :D:D

:chug:
 
No wrenching since last post, but a few updates. Fuel has stopped dripping from skid plate, not fixed, just means I siphoned enough out to address this after the suspension is done.

PB, I only have 2.5" vs 4" so no included links.

However.......I went to the shop to get a measurement of how much longer they need to be, was going to the parts store and tell them to bring me all their sway bar links!!! To my surprise, the links are exactly the right length this morning. Anyone care to take a stab at why I don't need that extra 2.5" in my links anymore?

I'll post up the answer this afternoon.
 
You removed the jacks
 
Yeah man, I was trying to put the links back on while it was at full droop.

Got everything out back together, quiet a bit of a difference from before.

BEFORE -Notice the board like flat leaf springs
9e1d9e9e0fafb3ab376e6473efa25a9a.jpg


AFTER- 31's seem a lot smaller now
fb71fd06b0983f24b2842e9616d17023.jpg


BEFORE- floor to fender well 34.75"
2c6fa9525d9423b364e727791e51af0c.jpg


AFTER-38.50" to fender well
04252155dcdd3075d21cc5d86b6469a0.jpg


Not too bad for only 2.5" lift. I didn't realize how worn out the old set up was. I'd like to take it around the block and make sure everything is good to go, BUT.......I have to drop the gas tank and find my mystery leak that started after jacking the rear up.
 
I though the jeep looked as if the rear driver side was sitting lower than the left, after measuring, I was right. The driver side is sitting 1/2 lower than passenger side. I only measured from right in front of each rear tire, didnt check the front.

I took a quick peak around to see what it could be, but didn't notice anything. Today is football and yard work, so I didn't climb under the jeep.... Gave it a good 5-6 rocks and them measured again, still the same.

I'm hoping it will sort itself out once I get back on the road. Everything is new on the rear except for the spring plates.

Anything ideas what it may be or
Just hasn't settled yet?
 

Jeep-CJ Donation Drive

Help support Jeep-CJ.com by making a contribution.

Help support Jeep-CJ.com by making a contribution.
Goal
$200.00
Earned
$25.00
This donation drive ends in
Back
Top Bottom