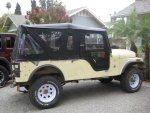
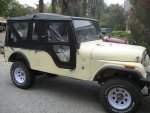
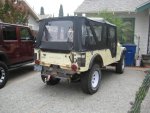
Tiger top on a CJ6
BajaEdition
Resident 'Old' Jeep Shaman
- Posts
- 5,488
- Media
- 136
- Resources
- 2
- Thanks
- 5
- Location
- Riverside Ca
- Vehicle(s)
- 67 cj5,225 Dauntless, D30,chrome molies, detroit, D44, full floating detroit, custom steering, disc all the way around,2 inch lift on 31s, armored up
70 cj6 4 inch lift
Got the new top in for my 70 CJ6 , looked pretty strait forward so I started out yesterday in the late morning to put it on
I have to admit that the instructions that Bestop puts out are a little to be desired. I think they are a little generic transferring stuff from one top to another along with the descriptions. I found myself finding parts in the list of parts that never were discussed in the instructions, such as rear bow extenders, I guess you just have to know to put them on and when.
Anyway after getting the bows on and the top installed on the windshield, I flipped it back and started to set up for installing all those snaps.
I have a 39 year old Jeep and it seems that over the years a few different tops were on it and there were a lot of holes where snaps had been installed.
Oh well seems it was welder time.
If you need to do this, hope you have not pained the thing yet, you are about to destroy your paint job. Mine is a work in progress so it did not matter.
I first got out the grinder and cleaned each place I need to plug a hole, I had around 20 or more on either side. OK now you do not need to grind much, around an inch is fine. OEM Jeep steel is thick so you do not need to be light touched.
Once cleaned on the outside get a wire brush and clean the insides of those holes. you do not need contamination in these welds, the insides will be holding the mettle as you will grind the outside off.
I used my mig with flux core for this, outside so shielding gas would not do, I would have preferred to gas weld this but I was out of gas, I like to do sheet mettle with gas as it does not deform the mettle from to much heat if you have to keep on it to long.
So properly cleaned and prepped, I got on the official James G Hennegan welding attire, Shorts and a pair of boat shoes, old tee shirt, welding apron with a set of leather sleeves and tig welding gloves. Add the bandanna I bought in Cabo from Sammy's club and I am a statement in fashion. I think my wife refuses even to be seen in the front yard with me dressed so.
I set the welder and off I go. I did each side by itself, and even with the prep work I had to go over a few weld again. I went back and ground everything till I was flat again and only the plugs were left, Like I said a few fell through so a second pass with the welder, and a third to touch up a few light areas.
Now for a quick coat of bondo to clean things up. work fast, very fast as you do not need to spend the afternoon with files smoothing bondo. wait till it is just hard enough and use a palm sander. Yes a carpenters palm sander so you can get in there, do not do a lot of spreading at a time and it will be quick work, spread too much and be sanding and filing for days.
Now once sanded go into the house for a quick beer. Actually you are letting the bondo finish setting.
Back outside to prime and a quick coat of color of your choice.
Another beer and it is time to get the drill out.
Now 3/32nd is a small bit so buy a 1/2 dozen or more, I broke 4. After the first decision on where to drill it gets easier and soon you are doing great. Remember to have a friend along for this section as you will need someone to pull down on the top to stretch it and help mark where to drill. You do a few snaps at a time, I had to pull down with a set of pliers to stretch it and set the snaps, so the opposite side and then do a few more.
I will be replacing all the screws Bestopp supplied, they are cheap and I want a harder grade, I broke a few just with hand pressure and a hand screwdriver but by now it was after 5 pm on Saturday and the hardware store was closed so I carried on using the cheap stuff.
I would say with a Jeep that needed no prep this would be a2 to 3 hour project, but I had holes from at leas 2 other style tops. A few 1/4 inch holes from whatever that needed filling so I had the afternoon at it. But inally the top was set.
A few more notes, the Tiger top by Bestop is the only top still made for a CJ6 . order it and you may have to wait a few weeks for them to sew it. also it seems to have very strange tolerances as it has to cover 20 years of CJ6s so be ready to fit and refit a few items. but after it is over a nice looking top is always a killer deal on the ol sixer.


