Build Thread 1977 CJ7 Rebuild and Conversion

Build Thread 1977 CJ7 Rebuild and Conversion
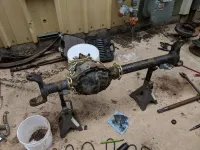
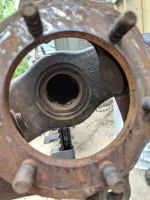
The deeper I get into this jeep, the more I'm learning about its history. The Jeep was, from the factory, a 1977 QuadraTrac CJ7 with the AMC 304 . I'm starting to think it has not been operational for quite some time, and was an incomplete project for at least two pervious owners. I don't think it has its factory front axle, or at least it was converted the the 5 bolt manual locking hubs, which I understand it would not have had with the QuadraTrac . It also doesn't seem to have the QuadraTrac AMC20 . Axle swaps and YJ springs -- somebody had big plans for this CJ, but never got around to it. I think it's past time this Jeep got finished.

Sent from my Pixel 2 using Tapatalk
 
I love the hanger design, as for the caliper if you wanna be cheap run a home through the bored and buy a seal kit they don’t look that bad, however the rebuilt caliper is not to expensive


Sent from my iPhone using Tapatalk
 
The rebuilt cylinder is about $10 each. The rebuild kit is about $5 each and you need to buy a hone if you don't have one. I always go with the ones already rebuilt.
 
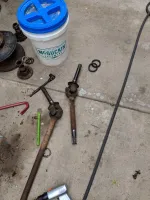
Today the spindles came off and the axle shafts came out. The spindles were a complete PITA to remove... I broke a harbor freight 3 jaw puller trying to pull them off. Eventually, the puller opened up a gap that chisels were able to widen until the spindle let go. There was still lots of grease in there, but the seals were shot and the bearings were sounding kinda rough.

The axle tubes are full of dirt, so that will need to go. The tubes look pretty thick. Don't some people sleeve these?

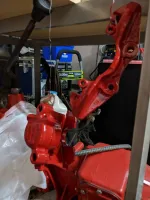
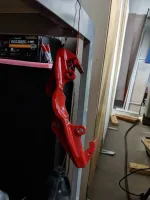
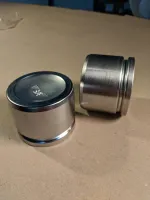
I also wire brushed the brake caliper brackets. Some more brushing, some water/brake cleaner, and scotch Brite, then the brackets and calipers should be ready for a good bath in Phosphoric Acid to convert the rust. The pistons cleaned up well and I have a brake hone I can borrow, so I think the Calipers are salvageable! d43a11604ffe3a58a3bde4c0c2485e27.jpgcc47bba1f06d1701a66573ec1caf4358.jpg305345ad6660f9870df7c34d5aec451a.jpg

Sent from my Pixel 2 using Tapatalk
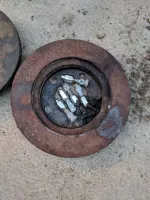
 
People do sleeve the Dana 30 axle tubes but I hear more of it from the later Jeeps, there is also grease seals that fit in the end of the tubes so you can pump that cavity full of grease instead of mud and dirt


Sent from Tapatalk
 
Some more developments:
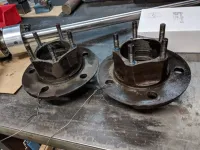
- I pressed the studs out of the rotors, hubs, and knuckles
- degreased the hubs, spindles, calipers
- cleaned the pistons with degreaser and plastic brush
- tried to knock the spindle bearing out using a homemade tool, gave up. Purchasing a puller tomorrow
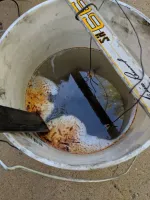
- started electrolysis on the hubs to remove the rust

Here's some pictures! f207109e9d62ef54678207ba315e96f5.jpg42726feeba2ecaa7844a694eb9efe9ec.jpg7161942fe2a7c12a66f3ffc3a055f776.jpg8e9290c26b11a20c48510b1ff323ff8c.jpg90fd50bec6804116f621c4df2acfc10c.jpgee6ad1e1e5dbbe644bcfe97f0bfc7784.jpge1df28d3cb97cad7a069a448e784a80d.jpg

Sent from my Pixel 2 using Tapatalk
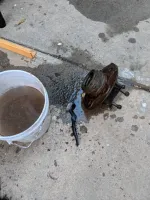
 
Lol dang those pistons look brand new, I’m interested to see how your cleaning goes, in the past I had used muriatic acid that stuff was seriously bad but absolutely 0 rust left when you were done


Sent from my iPhone using Tapatalk
 
Electrolysis is awsome. I have a small unit for cleaning rifle bores. I wish I had had the patience to do that for my derusting axle parts - but I didn’t......

Be sure an post “after” pics so we can be amazed at how well this is gonna work


Sent from my TV remote using Tapatalk.....
 
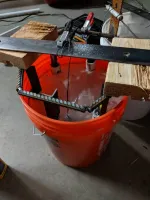
The hubs came out OK, but they need some more tank time. I determined that I needed a better electrolysis setup, so I went to home depot and got $25 in pvc and rebar. I cut the rebar in 12" pieces, then welded up a hexagon to mount the electrodes to. I welded some angle to the hexagon and just tacked the electrodes to the angle. I needed the electrodes to stick a bit further down, so that did the trick! This way, I can grind the tacks off and replace the electrodes as needed. I don't think I'll have that much more electrolysis to do though.

I cut the pvc to fit over the electrodes and drilled a bunch of holes in it. This way I don't have to worry about shorting the electrodes to the part. Now I have two tanks running in parallel. I need to repeat this for the first bucket, then I'll have two solid tanks for de-rusting.
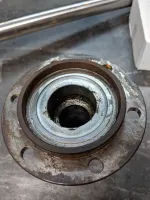
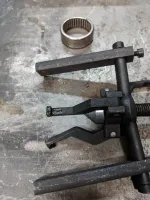
I also got the spindle bearings out. A modified harbor freight pilot bearing puller did the job. I ground the Jaws down so they would clear the lip behind the bearing (see picture). I put the spindle in the vise between two blocks of wood and cranked away. Worked great! e426c29ea7dfcf64de4e3e7bc41dc9b7.jpg6e21037ecadc22c3be223297873e4008.jpg8a6770af6b2e615f91df9b9f05ea2afb.jpg87cfafce7a77e2b385fb2961ed527a74.jpg

Sent from my Pixel 2 using Tapatalk
 
Nice job.... very nice


My dog just sent this for me using Tapatalk.....
 
Man I sure like that spindle bearing puller


Sent from my iPhone using Tapatalk
 
Man I sure like that spindle bearing puller


Sent from my iPhone using Tapatalk
$22 at harbor freight, 10 minutes on the grinder, one gnarly burn from forgetting that metal gets hot when you grind it. Worth every bit!

Sent from my Pixel 2 using Tapatalk
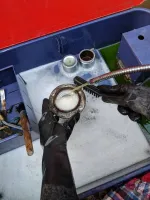
 
$22 at harbor freight, 10 minutes on the grinder, one gnarly burn from forgetting that metal gets hot when you grind it. Worth every bit!

Sent from my Pixel 2 using Tapatalk
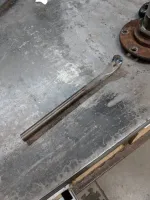


I somehow forget how hot metal gets when you grind it as well and I seem to never remember to wear my work gloves while grinding either


Sent from my iPhone using Tapatalk
 
Good - I’m not the only one!!


My dog just sent this for me using Tapatalk.....
 
Alright! Some more progress, mostly just electrolysis results. Turns out, having electrodes all the way around the bucket sure helps. As an electrical engineer, that shouldn't surprise me...

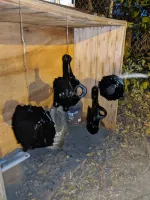
All in all, I'm pretty happy with how things have turned out. I gave everything a quick rub down with phosphoric acid (I feel like a chemist) to make sure it doesn't rust before I can paint it, and so far it's looking good!

Paint and parts come in this week. I need to figure out how to homebrew a diff housing spreader so I can clean out the housing and go through the LSD in the front. Also, one of the u-joint ears was a touch bent, so I can't get the joint out of the stub shaft. I'm tempted to heat it and bend it, but I don't want to compromise that part. Bad things happen when you break a U-Joint at speed...

The schedule is starting to take shape. I'm thinking front axle done end of June, rear axle end of July, brakes/fuel end of August, mount drivetrain end of september. Then the real work begins! That's when all of the interior/electrical work gets to happen. It's always the last 10% that takes 90% of the time...
 
Tonight was a brake bleeder saga. I had it in mind to paint the Calipers tonight, thinking it'd be a quick job. I thought wrong. Both bleeder screws were sized.
First, I tried leverage. No luck, so I moved on to penetrating oil. Also no luck, so I tried heat. That got the first one out. The second one got so destroyed (rounded, then crushed with vise grips) that I almost broke it completely off. Fortunately, I came across a YouTube video where the guy heats it red hot, then quenches it with a soaked rag. I tried it, but using a bucket of water. Heat with map gas torch for ~2 minutes, then dunk in water. Heat it for another minute for good measure and dunk again. It was comical how easily it came out after that!
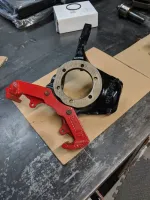
So, in short, I have two painted caliper brackets and one painted caliper. The second one will get paint later this week. After that, it's hone, install pistons and bleeder, and then I've got brakes!

In other news, what I hope is the remainder of the front axle parts came in today! 7179d4ff1634d7d4232077ebe24376e2.jpg

Sent from my Pixel 2 using Tapatalk
 
Sweet that’s gonna look nice


Sent from my iPhone using Tapatalk
 
Good job. Have I mentioned today how much I hate bleeding brakes?


I typed this with my feet using Tapatalk.....
 
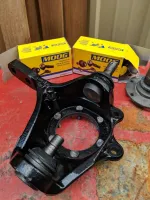
In the last couple of days, I've done some painting, test fitting, and pressing. I got studs and ball joints installed in the knuckles, but as I was pressing them in I got to thinking...
How are the ball joints retained? Some axles use snap rings, but this one doesn't. I guess it's just the weight of the vehicle and the press fit? I'm sure it's ok, but I'm having some trouble wrapping my mind around it...

Anywho, now I get to figure out how to remove the Diff carrier so I can clean everything out, then I'll get the housing painted and move on to reassembly! 3326c0648c1abf5697bac1fea0f4b59f.jpg13fc8ff79ce62277fa448b7c8c8ca80a.jpg95c94b465c72c07e1d84bbb1d94e5659.jpg

Sent from my Pixel 2 using Tapatalk
 

Jeep-CJ Donation Drive

Help support Jeep-CJ.com by making a contribution.

Help support Jeep-CJ.com by making a contribution.
Goal
$200.00
Earned
$25.00
This donation drive ends in
Back
Top Bottom