• Hello Guest, we are proud to now have our Wiki online that is completely compiled and written by our members. Feel free to browse our Jeep-CJ Wiki or click on any orange keyword when looking at posts in the forum.

creative brake system.

creative brake system.
Looks good, can't wait to here the review.
 
I still have to bleed the system but here is the mounted and plumbed power brake system.

Turns out I did not have room for the 9" Corvette booster and have just enough room for that pathetic little 7" K&N.:cool:

I used an adapter to mate the booster to the offset and had just enough room to use a 3/8" heim end bearing on the end of the booster shaft with out cutting any of it off.:cool:

The adapter did make things 1 1/2" longer but I think that bracing the master cylinder mount bolts down to the fender will keep vibration and being dropped a lot from breaking things off the firewall.:D

I think the plumbing looks pretty good.
I like the tube in a roll over the straight sticks, it is a lot easier to bend and flair.

I would like to try working with stainless steel but I have read it is a PITA to flair with out some $500 machine. I paid quite a bit for the flair set I have.:D


:)IO........Looks good ..........Lines look nice and yes you will have to brace that MC hanging out there. What bore size MC did you end up with?

No question it is definitely a bear getting a large booster tucked up under the hood without modifying things like the pedals and the location of the master and its ratio to the pedal assembly.

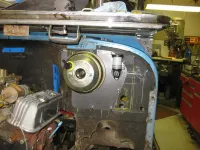
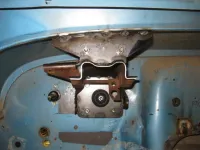
In the pictures attached I opted to take the adapter off the 8 inch dual booster and mount it direct to the firewall. I had to work backwards with the MC mount location and its correct ratio........if you notice in one picture I cut the center out of the pedal assembly and welded in a new one to change and correct that location. Also if you notice I added a vertical brace behind the dash to help that weight out front.............all things I would not suggest anyone doing.


104.webp

114.webp
 
So of course the master cylinder is FUBAR the rear cylinder won't pump, and can't have a replacement until tomorrow.

Just for the record the master cylinder is from a 1970 corvette with manual brakes. Yea I know it's a manual cylinder in a power brake set up. It is all about the cylinder bore the manual is 1" and the power is 1 1/8". I also had to turn a plug to go in the end of the cylinder. the manual has a pretty deep hole to hold the plunger and the power just has a "dimple".:cool:

:)Lots of ways to get there just have to find one that works for you and your system. For power they say 1" and larger so you should be fine..........stroke , volume & reservoir size can also come into play.

:D:D:D:D
 
:notworthy::notworthy::notworthy:


:)IO........Looks good ..........Lines look nice and yes you will have to brace that MC hanging out there. What bore size MC did you end up with?

No question it is definitely a bear getting a large booster tucked up under the hood without modifying things like the pedals and the location of the master and its ratio to the pedal assembly.

In the pictures attached I opted to take the adapter off the 8 inch dual booster and mount it direct to the firewall. I had to work backwards with the MC mount location and its correct ratio........if you notice in one picture I cut the center out of the pedal assembly and welded in a new one to change and correct that location. Also if you notice I added a vertical brace behind the dash to help that weight out front.............all things I would not suggest anyone doing.

 
I may have missed it but couldn't you have just ordered Jeep power brake parts?

My 73 has power brakes; it needed a new master when I bought and I just went to Nappy and got a new one and was rolling. Guess it was factory?
 
I have 4 wheel disks, complicates things just slightly, that's the reason for the Corvette MC. The booster that Jeep used is no longer manufactured. :cool:

other than that it would be a great idea.:D


I may have missed it but couldn't you have just ordered Jeep power brake parts?

My 73 has power brakes; it needed a new master when I bought and I just went to Nappy and got a new one and was rolling. Guess it was factory?
 
My bad; thought you had 4 wheel drum.
 
I am on my 2nd master cylinder and it, also, will not bench bleed the rear cylinder. It is a new, not rebuilt Brakebest 4 wheel disk master. I took it apart and did not see anything obviously backwards or missing. The front will bleed.:cool:


Will pick up another one tomorrow but if anybody has any thoughts, jump in!
 
All I have left to do is brace up the master cylinder and I can move on to the next project. The brakes are incredible, stops like never before. I think it was worth the head ache.

Now, for things I learned.
The MC was OK, it was mechanic error, if I had followed the instructions in the box things would have been better, isn't that always the way.:D I was trying to pump fluid through the MC to bleed it and what it required was to use plugs so the front cylinder primed first and then the rear would pump.

I always thought that the front and rear systems were independent of each other, if you broke a front hose the rear would still slow you down. not so! If you loose a hose you loose your brakes. Good to know.

GM rear disks do not self adjust, the e brake adjusts them. If you do not use the e brake they never adjust.

I had one heck of a time getting all the air out of the lines. I did the gravity bleed thing and about 4 quarts of fluid. I wish I had learned something about this part but I don't know what I could have done wrong. just hoping I do not have to do it again for a good long time. :cool:

I had to extend the peddle to adapter rod about 1/4 inch, I could have done a bit more but it is now level with the clutch peddle so I think this will work. 1/4" raised the peddle a little more than 1". It is kind of hard to measure peddle height.:D
 
:)IO, Cool..............glad to hear you got that all figured out.......How does the pedal feel?

On that brace I like to go from the two bolts at the Master Cylinder at an angle back to that area where the body and the body mount to the frame exist. Keeps the body and the Booster in the same moment.

:D:D:D:D
 
I was kind of thinking the fender well straight down from the MC bolts you mentioned. I will look at your idea. any further discussion is welcome.

Peddle feels good, no complaints. One day, if I have nothing better to do I may swap a 1 1/8" MC just to see how hard the peddle gets. right now I would describe it as normal travel with well controlled stopping. Does not seem to be locking up the rear first. I have not really climbed into it yet, just quick controlled stops from 20 or 30 mph, school yard at the end of the block.:D


:)IO, Cool..............glad to hear you got that all figured out.......How does the pedal feel?

On that brace I like to go from the two bolts at the Master Cylinder at an angle back to that area where the body and the body mount to the frame exist. Keeps the body and the Booster in the same moment.

:D:D:D:D
 
:notworthy: a cj with good brakes, kinda hard to believe. :notworthy:
 
I was kind of thinking the fender well straight down from the MC bolts you mentioned. I will look at your idea. any further discussion is welcome.

Peddle feels good, no complaints. One day, if I have nothing better to do I may swap a 1 1/8" MC just to see how hard the peddle gets. right now I would describe it as normal travel with well controlled stopping. Does not seem to be locking up the rear first. I have not really climbed into it yet, just quick controlled stops from 20 or 30 mph, school yard at the end of the block.:D

:)IO, That sounds like your peddle pressure is pretty close......you could either change the master to a larger bore or change the ratio at the push rod point on the pedal and get a similar result.

Check that suggestion out on the brace , I would think that the sheet metal on the fender well may be a little flexy?

:D:D:D:D
 
Fender is about same gauge as firewall + and I can get almost a straight shot down. Sheet metal and hardware pretty much in shear , not much chance of oilcan and/or metal fatigue. will have a little torque but not too bad.

Back to the firewall has all kinds of ugly stuff in the way, steering shaft, brake likes. had thought of the clutch outboard Pittman mount but can't see a straight shot.

Do you think it should have slight pre load or just static where it is??

:)It really does not need a pre-load but I would again stress the importance of keeping any Item that has a potential to move or flex in the same moment or attachment point as the Item your trying to cancel said movement. Basically trying to make the parts all one part and move together is what's critical.

Even a single tube off of one bolt going back would help or do an aluminum bracket broke at an angle that catches the two bolts at the MC and is hollow in the middle so your brake line and column can go through and hits the base of the firewall........just thinking out loud here!

Take a good look at it...........your good at making things work!

:D:D:D:D
 
I can get a half decent shot to the Pittman mount with about a 3-4 deg angle. I have to fine tune that linkage anyway so maybe I can make this happen. What do you think the week link is the fire wall or the booster. I am thinking booster but I have never heard of anybody cracking one.:cool:
 
I can get a half decent shot to the Pittman mount with about a 3-4 deg angle. I have to fine tune that linkage anyway so maybe I can make this happen. What do you think the week link is the fire wall or the booster. I am thinking booster but I have never heard of anybody cracking one.:cool:

:)IO, I really think the firewall is , the booster is pretty sturdy and so is the master and the adapter once there all bolted together.......I'm sure the firewall would have some flex in it with all that weight hanging out there 16 inches or so...........Notwithstanding the pedal motion to stop.
I think anything you do will be better than nothing!

:D:D:D:D
 
How about a quick summary of what you ended up with. What parts you used ect.:notworthy:
 
I've been watching this thread closely as I have disc/drum brakes in my Willys and no power at the moment. I just ordered an 8" power brake w/MC and the bracket to firewall setup. I have a question that I haven't seen addressed yet. Why do you "loop" the brake lines before they go to the proportioning valve? I see most vehicles do it but don't know why. Currently my manual brake setup doesn't do this.
My current setup is:
49 Willys CJ3a
Buick 231 V6
89 Mustang clutch pedal assy
79 CJ5 MC (changing to 8" 74-86 CJ booster/MC assy)


Similar threads

Jeep-CJ Donation Drive

Help support Jeep-CJ.com by making a contribution.

Help support Jeep-CJ.com by making a contribution.
Goal
$200.00
Earned
$25.00
This donation drive ends in
0 hours, 0 minutes, 0 seconds
  12.5%
Back
Top Bottom