Early CJ-5 clutch linkage retrofit
BajaEdition
Resident 'Old' Jeep Shaman
- Posts
- 5,486
- Featured
- 1
- Media
- 136
- Resources
- 2
- Thanks
- 7
- Location
- Riverside Ca
- Vehicle(s)
- 67 cj5,225 Dauntless, D30,chrome molies, detroit, D44, full floating detroit, custom steering, disc all the way around,2 inch lift on 31s, armored up
70 cj6 4 inch lift
Own an early CJ5 ?
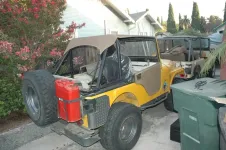
Well then you know how bad the clutch linkage is.
Design is bad, subject to a lot of wear

I just changed mine out. Takes about a hour and a half only because I took my time.
I used the Advanced Adapters roller chain kit.
 Super easy and cheap considering the Limited customer base it has.
Replaced these parts with the kit
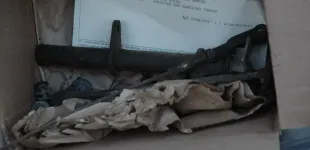
Actually the instructions are kinda good, if not generic.
You start out by taking a few carter pins out, but before doing that make someone depress the system while you are under there so you can see the parts move, my 67 has a PTO and the drive shaft is in the area and the brakes are right there also. You need to know what you are looking at. Once this is done you remove a few carter pins, ok the thrust tube side of the linkage had 1 and the pedal side had 2. so just because you pull a pin, look for another cause it isn’t coming off.
Once that is done take the cable from the clutch fork off, one side slips into a grove,, the other is bolted to the trust tube.
That cleared, I took off the thrust tube, 2 bolts in the frame and then you do a 3 minute dance with the tube till you get it out of there. Now that all that is gone and we are committed to the mod, time to get the assembly under the Jeep and fit it.
First you need to inspect the hole where you bolt to the pedal side, if there is wear you need to pull the assembly and weld the hole shut and redrill, Mine was fine. Low mileage Jeep. This is a important step however as a enlarged hole can cause some very negative effects, such as the bolt popping out and no way to disengage the clutch. So do not fudge here.
Ok so we were fine there and bolted the Heim joint on the Transmission side of the bracket. Be sure to put the bolt head on this side also as the bolt will not interfere with the brake linkage this way. Trust me here this is a pain to tighten up as the access to these parts is not very clear and you end up with a socket in the frame rail and a wrench in between a few things tightening 2 clicks at a time, but it gets done.
A note here, make sure the chain is on the frame side of the brake return spring. I positioned mine both ways before deciding the spring was on the bracket funny and moved it so it did not touch the chain. Anyway, we then put the cable end on the clutch fork and using a vise grip position the cam assembly onto the frame.
oh, you want 3/4 inch freeplay on the pedal so check it.
Check for free play and be amazed at how easy the clutch disengages now. Feels like a hydraulic system.
Once you decide make sure your bracket is set square on the frame mark the first hole , remove the assembly and drill it. Bolt up the assembly and check fit again marking the second hole. Pulling the assembly out of the way drill again and bolt the system down. A few jam nuts tightened and it is done.
Used 2 wrenches, ½ and 9/16 and the same in 3/8 ratchet, a pair of pliers and a vise grips. A cordless drill with a 3/8 bit was used also. Only busted 1 knuckle.
cam unit bolted to frame
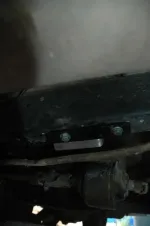
Area I had to squeeze into to hook up to the pedal
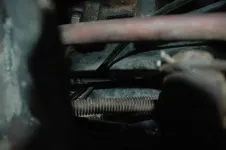
view of the chain running forward, you see both sides
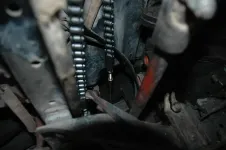
Sorry no picks of the action, but it was crowded under there

Well then you know how bad the clutch linkage is.
Design is bad, subject to a lot of wear

I just changed mine out. Takes about a hour and a half only because I took my time.
I used the Advanced Adapters roller chain kit.
 Super easy and cheap considering the Limited customer base it has.
Replaced these parts with the kit

Actually the instructions are kinda good, if not generic.
You start out by taking a few carter pins out, but before doing that make someone depress the system while you are under there so you can see the parts move, my 67 has a PTO and the drive shaft is in the area and the brakes are right there also. You need to know what you are looking at. Once this is done you remove a few carter pins, ok the thrust tube side of the linkage had 1 and the pedal side had 2. so just because you pull a pin, look for another cause it isn’t coming off.
Once that is done take the cable from the clutch fork off, one side slips into a grove,, the other is bolted to the trust tube.
That cleared, I took off the thrust tube, 2 bolts in the frame and then you do a 3 minute dance with the tube till you get it out of there. Now that all that is gone and we are committed to the mod, time to get the assembly under the Jeep and fit it.
First you need to inspect the hole where you bolt to the pedal side, if there is wear you need to pull the assembly and weld the hole shut and redrill, Mine was fine. Low mileage Jeep. This is a important step however as a enlarged hole can cause some very negative effects, such as the bolt popping out and no way to disengage the clutch. So do not fudge here.
Ok so we were fine there and bolted the Heim joint on the Transmission side of the bracket. Be sure to put the bolt head on this side also as the bolt will not interfere with the brake linkage this way. Trust me here this is a pain to tighten up as the access to these parts is not very clear and you end up with a socket in the frame rail and a wrench in between a few things tightening 2 clicks at a time, but it gets done.
A note here, make sure the chain is on the frame side of the brake return spring. I positioned mine both ways before deciding the spring was on the bracket funny and moved it so it did not touch the chain. Anyway, we then put the cable end on the clutch fork and using a vise grip position the cam assembly onto the frame.
oh, you want 3/4 inch freeplay on the pedal so check it.
Check for free play and be amazed at how easy the clutch disengages now. Feels like a hydraulic system.
Once you decide make sure your bracket is set square on the frame mark the first hole , remove the assembly and drill it. Bolt up the assembly and check fit again marking the second hole. Pulling the assembly out of the way drill again and bolt the system down. A few jam nuts tightened and it is done.
Used 2 wrenches, ½ and 9/16 and the same in 3/8 ratchet, a pair of pliers and a vise grips. A cordless drill with a 3/8 bit was used also. Only busted 1 knuckle.
cam unit bolted to frame

Area I had to squeeze into to hook up to the pedal

view of the chain running forward, you see both sides

Sorry no picks of the action, but it was crowded under there
Last edited:

