Fullsize axles on cj7

Fullsize axles on cj7

mattp1788

Jeeper
Posts
52
Thanks
0
Location
Glen Rose, TX
Vehicle(s)
79 cj7, 258, 3 speed
I am looking at replacing the axles on my narrow track 7 with fullsize ones from a j series truck.. Questions is can I just move the spring pads on the axle itself without outboard my springs? What will the problems be that I may see if it is possible?
 
Last edited:
You can move the spring perches on the rear, but you will have to outboard the front due to the cast in perch on the front axle.
They are about 14" wider than you current axles so your tires are going to be sticking out past the body.
 
yea i knew they would be sticking out i was going to get some fender flares since this is going to be a street driver also. What would be better to outboard the springs or cut down the axle?
 
What is the reasoning for going with extremely wide axles for your street/trail rig?
 
because i am getting them for a really great price... but if it is too hard to swap them out i will just have to spend more and get the wide track axles.
 
yea i knew they would be sticking out i was going to get some fender flares since this is going to be a street driver also. What would be better to outboard the springs or cut down the axle?
Since you would have to cut both the front and rear, it would be cheaper to outboard. You can either make the brackets or buy them. Than all you need is a welder.
I narrowed my front, but that was to match the 8.8 in the rear. I also didn't want my tires sticking out as far as full size would have been.
 
yea i meant to say that the rear axle is an 8.8 and the front is a fullsize from a j10 series truck... so if that is the case just like you olddog what is involved in cutting down the front? have to get the axles cut and resplined also huh?
 
I cut 4 1/2" out of the long side of mine,(that's what you have to take out to use the cast in pad and use the stock spring location) that makes it about 2" wider than the 8.8. (Most 4x4 front axles are wider than the rear.)
Since yours is a mostly street driver than yes I would just cut and respline the stock axle. Mine is an off roader so I bought new axles from Moser.
 
You are also going to run into some steering issues as the knuckles on the 44 only have a tierod end hole and no where for the draglink end to mount.
 
how would i go about cutting and resplining the axle i called every machine shop and performance place within 60 miles of me and no one does that. how do i go about doing that? and what do i do about the steering issue?
 
I just though of something else you need to think about. The j10 axle has a 6 on 5.5 lug pattern and the 8.8 has a 5 on 4.5 lug pattern. so you are either going to have to run 2 different wheels or change them both to the jeep (ford) 5 on 5.5 pattern. The rear is easy you can redrill it, but the front needs new spindles and hubs & rotors. Your looking a app. $500 to change the front over to 5 on 5.5
 
how would i go about cutting and resplining the axle i called every machine shop and performance place within 60 miles of me and no one does that. how do i go about doing that? and what do i do about the steering issue?
My buddy owns a horizontal mill and indexing head, that's how he does it.
A lot of shops that build jeeps,hot rods or race cars cut axles down
You can also send it to someone like Moser axle and have them do it.

Most people either cut and rethread the j10 tierod, reuse the 30 knuckle, or use a high steer knuckle and arm.
 
A quick review of the procedures I used to strip and cut down my FSJ front 44 (this is a wagon front that’s narrower then a J-10).

Remove the two calibers pins and caliber.

I removed the rotor hub cap screws and used a rubber mallet to pop off the cap. I then removed the two snap rings, one is on the end of the axle shaft and the other is recessed in the hub. You will need some type of pick set to pry up the hub ring. If your dental hygienist is digging you she would be more then happy to give you a couple.

Next removed would be the drive gear, pressure spring, and spring retainer. You can use the screws from the outer cap to aide in removing the drive gear. The axle is 30 years old so I had to lube and work the drive gear to persuade it to come out, typically they should come out with ease as the other side did for me.

There will be two lock nuts that you will need a special socket with prongs to remove they are inexpensive and you can find then at any FLAPS. There is a washer that’s best removed using a magnet as well. You can now slide off the hub.

To remove the spindle I re-installed the lock nut and tapped it on all side to loosen the spindle. When I had a gap between the spindle and knuckle I then used a screw driver and worked it around the spindle until it came off. The shafts can now be removed.

Next were the knuckles, there is a cotter pin in the castle nut but most times in these old axles their rusted and break off. I don’t fool with then much I just bend then over and use a gun to loosen the nut. Leave the castle nut flush with the top of the ball stub. Remove the jam nut on the lower ball joint. With the castle nut flash you now have a good base to give it a good whack with a 3 pound hammer and the knuckle will pop off. This may take more then a few whacks but it should come off.

To remove the diff gears loosen the bearing cap bolts but don’t take them completely off that way they will hold the diff case from accidentally falling to the ground. I used two pry bars to remove the case I also used some sheet metal under the bar as not to nick the machined surface. Once you pop the case loose then remove the bearing caps. If your reusing the bearings make sure you mark the bearing caps because they need to go back in the same place.

With sheet metal already removed.

DSCN1591.png

Next removed the pinion nut, using a puller makes short work of the yoke. Using a rubber mallet give the pinion a light blow and the pinion should pop out. Re-installing the diff cover is a good idea so the pinion doesn't land on the ground.

I removed the bearing cups with an awl by tapping around the cup. One cup will need to be removed from the diff cover side and the other from the pinion side.


DSCN1589.png

DSCN1590.png
 
Most websites have the front NT waggy width between 59”-60” I measured mine out at 61” wms to wms. Instead of cutting to match my rear 44 exactly I cut the front more so to balance it out. I measured from the middle of the spring pad on the short side to the right wms and then measured both center spring pads on a WT Dana 30 to get a balanced front end. I ended up cutting 4 1/8 off the long side.

I removed the long side spring pad and shock mount.

DSCN1608.png

DSCN1609.png

DSCN1610.png

I cut the inner knuckle first and made the cut close to the weld to aide in the tube removal.

DSCN1611.png

Final tube cut

DSCN1612.png

DSCN1613.png

I ground down the weld until I could see the separation between the tube and inner knuckle. You will see a definite separation I just wasn’t there yet when I took this pic.

DSCN1614.png

I made two 90 degree cuts then punched out one half at a time.

DSCN1615.png

DSCN1617.png

DSCN1618.png
 
I had the waggy long side shaft cut down 4 1/8” and the extra chevy shaft spare cut to match both done at a local shop for $125.

DSCN1633.png

DSCN1632.png

Primed with a couple coats of gloss black

DSCN1636.png

DSCN1906.png


Hope this helps
 
The steering, I installed the steering box to mock up the steering linkage. Particulars: YJ springs (moves axle up about and inch or so), wagon axle cut down 4 1/8”, after market diff cover.
I first drilled out the Dana 30 knuckles to 5/8” to see if the aftermarket TR and drag link flip (over steering arms) would work. I wasn’t able to get full swing with the steering box before the TR hit the diff cover.

I mocked up the thinner stock CJ TR and drag link over the steering arms, although it gave me more room between the TR and diff cover it also hit the cover on full swing.

I tried the Dana 44 knuckles with it's longer steering arms and the wagon inverted “T” steering. I was able to get full swing with the box without hitting the diff cover. I need to cut down the TR and drag link and re-thread both along with reaming out the pitman arm. Over all the wagon linkage is stronger with solid TR and drag link with beefy TRE’s.

The Dana 44 on the left has longer steering arms then a Dana 30 the TR is moved further away from the diff cover. The Dana 44 knuckles have one hole in each knuckle with inverted T steering while the Dana 30 has one hole in the driver side knuckle and two holes in the passenger side (TR/drag link) for cross over steering.
DSCN1935.png

DSCN1936.png
 
The 44 knuckle TRE arm hole is 1 1/2” longer then the 30 knuckle TRE arm hole, with yj springs the axle is moved forward an 1” this puts the steering linkage 2 1/2" closer to the steering box then stock. I also had an aftermarket diff cover that’s a bit thicker then stock. With using the 44 knuckles my concern was binding of the drag link and TR because the steering linkage being that much closer to the steering box.

Having cut down my axle to widetrack Dana 30 width I thought I could use a heavier TR and DL made for a Dana 30 along with heim joints so I drilled out the 30 knuckles to 5/8”. We now know the 30 knuckles with stock and aftermarket TR and DL won’t work in my situation because of binding on the diff cover whether the TR is under or over the steering arm.

Short of going flat top knuckles I made up 1 1/2” by going with a CJ dropped pitman arm. The wagon pitman arm is about 7” hole to hole and the stock CJ is about 6”, and the CJ dropped pitman arm is 5 1/2” ( because of the drop its shorter for added strength).
 
I cut and re-thread my TR and DL also reamed out the pitman arm for a larger drag link end joint.

DSCN1939.png

I installed the TR and there was plenty of clearance.

DSCN1947.png

However, the drop pitman arm didn’t give enough clearance so I’ll try the stock CJ arm on for size. I’m sure it will do the trick.

I picked up a couple items for my steering, a heavier steering bracket and a pitman arm.

I got this new bracket for half the price of a new one. Besides being a solid piece compared to the 2 piece stock bracket it moves the box forward an 1”.

DSCN1982.png

The pitman arm was mistakenly advertised as a CJ arm when in fact it was a FSJ arm. The FSJ arm is a shade longer and a lot stouter then a CJ arm. Turns out it saved me some work because I would have had to ream out the CJ arm to except the larger 44 drag link end.

Regardless which of the two arms I had they needed to be shortened. Usually when you see a pitman arm cut short the owner butt welds it back together. Butt welding on steering components is not a safe practice.

I cut and lap the arm. I needed the arm shortened by 1 ¾”

DSCN1983.png

Slicing and dicing

DSCN1984.png

Machined both ends for the lap joint.

DSCN1985.png

DSCN1986.png

DSCN1988.png

“V” grooved the edges

DSCN1990.png

Set up for tig welding
DSCN1991.png

DSCN1992.png

Light with the wire and high heat for penetration.

DSCN1993.png

A few minutes with an angle grinder to finish

DSCN1994.png
 
Last edited:
Between the bracket and arm the drag link was moved forward almost 3”. I get full sweep of the pitman arm in both directions and the 12.5 wide tires stops a hire before touching the springs. The steering will be a bit quicker as well.

Below are the shortened FSJ arm and a manual CJ arm.
Note: The FSJ and CJ PS pitman arm have the same diameter hole for the steering box the manual is smaller. Both the manual and PS CJ pitman arm has a smaller drag link end hole then the FSJ

DSCN1995.png
 
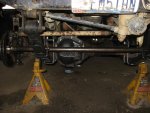
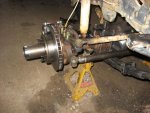
I went a different route on the steering. I used the stock 44 drivers side knuckle and a flat top and arm on the passenger side. This let me use the stock cj pitman arm and kept the cross over steering. I made a tie rod that used the stock location on the 44 knuckles. It's setting a little lower than I would like though so I might make some new steer arms and move it up top one of these days.

 

Attachments

  • IMG_2832_704x528.jpg
    IMG_2832_704x528.jpg
    65.3 KB · Views: 434
  • IMG_2831_704x528.jpg
    IMG_2831_704x528.jpg
    69.3 KB · Views: 570

Jeep-CJ Donation Drive

Help support Jeep-CJ.com by making a contribution.

Help support Jeep-CJ.com by making a contribution.
Goal
$200.00
Earned
$25.00
This donation drive ends in
Back
Top Bottom