• Hello Guest, we are proud to now have our Wiki online that is completely compiled and written by our members. Feel free to browse our Jeep-CJ Wiki or click on any orange keyword when looking at posts in the forum.

Need Pictures. This is what I'm working with. Twin stick

Need Pictures. This is what I'm working with. Twin stick
The big opening in Sam5038's jeep is actually almost the same as ours. I.E. a great big cover with the smaller ones we are working with bolted to it or on top of it. Look very closely at your floor and trace out the line of the pan you'll see what I mean. I had doubts too but sure enough we have almost, not exactly the same, but almost the very same pan. Ours is factory glued in, the older ones are bolted in. This is yours, look closely:

Lol, looked at mine and see exactly what your talking about. Might attempt this project myself. Have you started yours yet? :chug:

Thanks for pointing that out :D
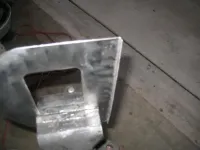
 
71-75 they had practically the same floor pan but it is glued in, but can be removed with an air chisel.

Guys it was never "glued" in but they used a body sealant that was soft to conform and squeeze out. I bought mine in 1976. It was easily removed then. I suppose it turned to cement now. :D

72-75 were the same floor pan cover as the earlier with the access cover for the brake.
 
73CJ - MY local Jeep guy at "Willy's Works", a guy that has been taking Jeeps apart for +40 years says the floor pan was glued in place from 71-75 and I hope you understand that I'm inclined to believe him on this one. Also MY floor pan doesn't have the brake access hole. One more thing, my Jeep came with poorly installed floors so the pan I've been talking about doesn't look like a stock pan. I don't mean to call you on this but well .........

Khass4010 - Started tonight.....

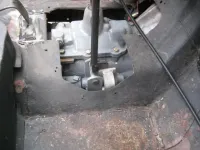
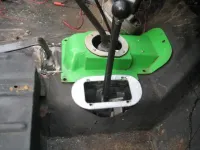
After installing a set of Twin Sticks from JB Fabrication in my 1975 Jeep CJ5 . I was surprised to see that the cover supplied with the kit does not fully cover the existing Transmission top cover hole in the floor board:

IMG_0001-1.webp

IMG_0002-2.webp

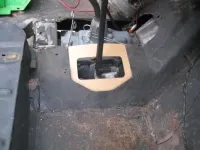
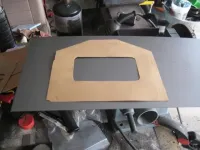
To do the job right a new cover is needed. After some thinking this is this how I proceeded. First I got a piece of card stock, cut the hole for the JB boot and put it in place:


IMG_0003-2.webp

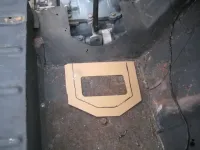
This is the template with overlay for the install screws.

IMG_0005.webp

As it turned out I don't have quite enough metal to cut out the cover. Besides it rained here tonight, it doesn't rain very often here in Arizona so I had to just watch the rain and breath the fresh air. Love it when it rains here in Tucson. Tomorrow night the story will continue.......................
 
Last edited:
Lol, i'm pissed:mad: I wanted to install the shifters tonight as well but yea I ordered the long ones instead of the short ones oh well. So are you not going to chisel out that big opening :D? I'll continue with mine in about two weeks. :(
 
Call JB Fabrication, he is known for helping out folks like you.
 
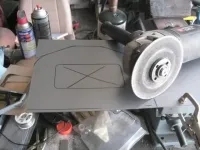
With new steel in hand:

IMG_0001-2.webp

and the template traced:

IMG_0004-2.webp

The cutting and trimming begins and it didn't take long:

IMG_0005-1.webp


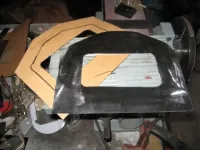
There are still a couple things to do. The edge toward the shifting tower needs a lip. This adds a lot od strength to the cover:

IMG_0006-1.webp

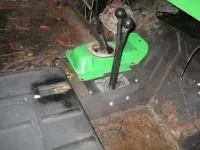
It took some fussing to get the bend right, then the holes and a coat of primer:

IMG_0008-1.webp


All in all I like the results. Would I do anything differently? Yes I would. One of the bolts are too close to the stick levers. As it is the bolt needs to be a little shorter. I used those slide on automotive sheet metal nuts. They will be replaced with good old nuts for a tighter fit to the floor.

Yes I know, some of you are thinking, "This is to easy a job to make a fuss about." It really was easy, but if you've never done this sort of thing getting started can be daunting for some guys. I hope this helped someone and it was enjoyable to do these posts.

Michael
 
Last edited:
That looks great man. Def. helped me out I am going to be taking off the cover to the main tran today and cleaning it up as well as pressure washing the under part of the Transfer Case and tran. then will be building me an exact replica of yours lol. It's amazing are jeeps look almost identical.

Thanks again for the pics in all and great build :chug:
 
They are close in many respects, but mine has a V8 which means I have a T-15 Transmission , since your's is an I-6 you have a T-14 Transmission . The T-15 and T-14 are close kissing cousins so they both look the same with somewhat different guts. The T-15 is supposed to be the stronger of the two. According to my local Jeep guy there are a few things that are 1975 only parts, but I have noticed that the 1974 falls into that catagory too, at least to a point. Several parts are listed as '74-'75 only while others are '75 only. Our body's are deffinately the same. To my eye the '71-'75 jeeps are the best looking of them all. I like the military notches and odd bends here and there with a longer hood. The older CJ5 's look a little short and stubby to me, the longer hood sort of balances out the over all look.

Michael
 
Maybe a little late but here is what I did.... Some 1" square tubing on the shifter side, then two 90 degree bends to cover the hole for the twinstick. Used the twinstick boots..
 
Yeah, I intend to use the boot as well. Yours look great, mine will look almost stock. I have to admit that aluminum diamond plate and I don't get along though.

Not intending to derail this thread, but who's bed liner did you use and would you recommend it to others? When all is said and done my jeep is getting the bed liner treatment too.

ES335, are you a Gibson fan?
 
Neighbor is a retired tin smith-can do amazing things with diamond plate-me not so much so agree with you re Dplate not working and playing well with others...

I used RAPTOR bed liner. Bought the gun to apply. Great product!!! I did have some lifting but it was due to not properly preparing the surface. It is EASY to repair so I just scrapped off the loose and re applied. Bumpers were prepped better -worked REALLY well on them. Word of advice-get the bumpers ROUGH blasted (steel not sand) and paint with good enamel THEN spray on the liner. I put the liner on bare metal. it stuck really well, but, I could see some rust coming through. I just hit it with rustoleum over the raptor-seemed to work fine. I am NOT a "body man" so if there are body "experts" on line, am sure they will chime in

Huge Gibson /Fender fan. Have a curly maple es335...
 
A little late but here are some pics in case someone else needs some ideas. My CJ5 has a SM420 w/JB fab twin sticks. Works good. It sits a little further forward than stock Transmission and has a short tower built on the hump to accomodate the taller SM420

DSCN7729_zpsa09c77c9.webp

DSCN9371_zps36222c6c.webp

DSCN9380_zps24afa712.webp
 
I'd cleanup the transmision plate with a new boot, and then make a new plate for the twin stick that used the plate and boots that came with the new setup. Should be the easiest and best looking. IMHO , Rod
 

Jeep-CJ Donation Drive

Help support Jeep-CJ.com by making a contribution.

Help support Jeep-CJ.com by making a contribution.
Goal
$200.00
Earned
$0.00
This donation drive ends in
0 hours, 0 minutes, 0 seconds
  0.0%
Back
Top Bottom