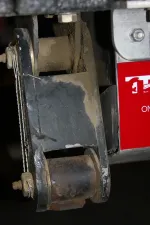
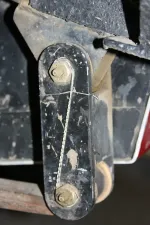
shackles

shackles
:)

Longer Shackles? Reduced Castor angle yes.........but no one mentioned Pinion Angle..........could also be adversely effected..........bars tying shackles together are OK especially for long ones , but if you want maximum articulation running them as the factory set them up is better..........High energy bushings do a good job, but not over tightened , they need to move.......grease fittings ,Yes or be prepared to take them apart often.

:D:D:D:D
 
Actually you get more articulation from longer shackles because your adding to the range of motion the springs can make. The bushings are the component that's there to allow some lateral movement, via their shoulders, but in a controlled way. If everything were solid it would ride rough and things would break. And I agree, lubrathane or a silicone grease is a must to keep things rotating. That's another benefit to shackles having center blocks, they keep spacing correct. 20-25 ftlbs is plenty for shackle bolt nuts and always use nylok nuts.
Yes pinion angle should be addressed with any lift. The front angle isn't as crucial because it's typically engaged only during slower speeds. You can't get a perfect front pinion angle with an axle that has positive caster unless you reposition the axle "C"'s when your modifying lift height.
 
Take a angle reading(magnetic 'bubble' angle indicator Irwin 1794488 Magnetic Angle Locator 6 30" x 7 48" | eBay) from the pinion area on both diffs. And when you done with the shackle install. Add steel angle shims under the axle's spring pads to return the angle to what you start'd with.
LG
 
Take a angle reading(magnetic 'bubble' angle indicator) from the pinion area on both diffs. And when you done with the shackle install. Add steel angle shims under the axle's spring pads to return the angle to what you start'd with.
LG

From everything I've read on here this is ok for the rear axle, but not the front, as it changes the caster angle which will effect the steering and return to center. Am I missing something here? :driving: Rod
 
^^ I believe that's what he's saying. To correct caster, and he's assuming it was ok prior to increasing shackles, you use caster shims to get it back into range that it was beforehand. The rear angles should be equal between the Transfer Case output yoke and the diff. yoke on a single u-joint shaft and shims can be used to do that.

Re-centering is a function of caster (think shopping cart front wheels). Too little caster won't force it to re-center itself. Steering WHEEL centering is simply a drag link adjustment
 
Thanks PaRenegade, suspension stuff has always been Greek to me, but I'm learning. :driving: Rod
 
^^ I believe that's what he's saying. To correct caster, and he's assuming it was ok prior to increasing shackles, you use caster shims to get it back into range that it was beforehand. The rear angles should be equal between the Transfer Case output yoke and the diff. yoke on a single u-joint shaft and shims can be used to do that.

Re-centering is a function of caster (think shopping cart front wheels). Too little caster won't force it to re-center itself. Steering WHEEL centering is simply a drag link adjustment

Yup and THX!:chug:
LG
 
These are the ones I built for my 3B-back in 1974. They're still on it 41 years later.
15972160353_15477fc1ea_b.jpg

16565954166_a07c053d7c_b.jpg

I don't disagree with Terry on much anything but this is one case where I will. I don't think the two piece design is better. It may be more flexible but there is all kinds of unwanted loading going on when those two plates are moving deferentially. Much more shear on the bolts and when displaced from perpendicular, the bolts are squezzing the bushings more. I originally ran the rubber/steel bushings but about 15 years back I started machining them from hard urethane rod and machined the bronze side thrust washers to eliminate the wear on both springs and mounting. The bolts are 1/2" grade 9 and the rears don't have nuts-just threaded into the opposite side of the shackle for more fuel tank clearance.
 
Last edited:
:)

bars tying shackles together are OK especially for long ones , but if you want maximum articulation running them as the factory set them up is better..........

:D:D:D:D

These are the ones I built for my 3B-back in 1974. They're still on it 41 years later.


I don't disagree with Terry on much anything but this is one case where I will. I don't think the two piece design is better. It may be more flexible but there is all kinds of unwanted loading going on when those two plates are moving deferentially. Much more shear on the bolts and when displaced from perpendicular, the bolts are squezzing the bushings more. I originally ran the rubber/steel bushings but about 15 years back I started machining them from hard urethane rod and machined the bronze side thrust washers to eliminate the wear on both springs and mounting. The bolts are 1/2" grade and the rears don't have nuts-just threaded into the opposite side of the shackle for more fuel tank clearance.

:)

Oh Heck, Common John old friend , we disagree all the time (LOL) ....My point was simply if you wanted maximum articulation the twin single bars will far out flex the shackles being tied together via a welded bar or bolt and tube.........been debated many times both on and off the trail..........are they loose? Absolutely! Just the way you want them on a flexy suspension.......

Do I run them? I have in the past , but I would rather run a set of Holbrook long leave springs and then use the tied together welded shackles.........best of both Worlds.

:D:D:D:D
 
anybody know if there is a approx distance between shackle plates or just test assembly, measure and weld in cross bar?
 
What I did when I made mine, and what I would believe would be the right way to do it is measure your specific application, cut to length (width) and weld in place.

Reason for the opinion? What works for me might not work for you because of custom modifications, bushing replacements, etc. You would want the inside width to match the bushing sleeve width to keep you from crushing the sides of the bushings.
 
Weld in place might seem to be the absolutely correct way to do things, but I've learned lately that welding does strange things to steel parts. What I did was set my caliper to the width of the bushings, welded up the shackles and invariably the gap would close a bit. Then I used my angle grinder with a big flap wheel on it to open the gap up to match the measurement set in the caliper. All in all it took longer to type this than it did to "Polish" out the shackles to fit.
 
Weld in place might seem to be the absolutely correct way to do things, but I've learned lately that welding does strange things to steel parts. What I did was set my caliper to the width of the bushings, welded up the shackles and invariably the gap would close a bit. Then I used my angle grinder with a big flap wheel on it to open the gap up to match the measurement set in the caliper. All in all it took longer to type this than it did to "Polish" out the shackles to fit.

You're absolutely correct, Hedge. Too much heat for too much time in any one area, and you're gonna "draw" the metal. Controlling your heat input and allowing for known variables (such as how heat moves metal), will help you avoid having to "cut to resemble, pound to fit & paint to match" :D.

Good tack welds on opposing sides, while "cheating" the angle on the first tack will usually stabilize metal pieces being joined. Skipping around, welding multiple short passes helps spread the heat evenly. It ain't as fun as burning a whole rod up going left to right in a single pass, but it sure make the finished product easier to live with.
 
I don't know how to make a good penetrating weld without making heat at the same time. Welding shackles are fairly short welds, too. I suppose the real point here is, heat moves metal to some degree.
 

Jeep-CJ Donation Drive

Help support Jeep-CJ.com by making a contribution.

Help support Jeep-CJ.com by making a contribution.
Goal
$200.00
Earned
$25.00
This donation drive ends in
Back
Top Bottom