Steering shaft gone bad

Steering shaft gone bad
How long have you been running the shaft? Thank you for taking time from your busy day to take a look under the hood.
 
A couple of years now, long enough to develop a light coat of rust and do a bunch of trails. I thought Tarry's input was quite informative about the testing that was done especially with the set screws.
 
Don't have it until Monday. There isn't anything written about grease fittings and I don't see any. Maybe someone that has one installed can tell us. From what I can see it looks like a sealed joint. I suppose that compared to a U-joint on a driveshaft a steering U-joint doesn't get much action and might last darned near for ever.

:)

The joints are sealed........there stuff is pricey but nice. I've used allot of it in the past.

:D:D:D:D
 
As FedEx is likely to do, they delivered the Lower a day early. Saturday rather that Monday. So, like a kid in a candy store the box was ripped open and work began. The first and only, "WHAT!", came when I noticed a 3/8" spacer sliding around loose on the new shaft. A quick check on the internet said that the spacer is to go between the firewall and the U-joint. No surprise, fact, a big plus. I've been trying to figure out how to make just such a spacer .....WINNER!

The old shaft came out, no problem. The new shaft had all the set screws removed and lock tited in place. For those that are nervous of the set screws. The firewall end set screw goes all the way through the main shaft. That bad boy ain't going anywhere. The splines were nice and tight and the tops set screw went right into the relief milled into the top shaft and the bottom went right into the divot machined in the power steering splined shaft. Almost done ..... OOPS the shaft touches the headers. The stock one did too, but this is worse. So what to do? Start the engine to heat the headers from the inside, grab the butane torch to heat from the outside. Fairly quickly there was a nice red hot spot on the header pipe. It only took a few taps with a steel bar to produce a proper sized dent in the header pipe. Actually easier than expected.

The CJ was buttoned up and we hit the road for a test drive. So far, I like it, I like it a lot. ...... Another fix to cross of the ol' list.
 
Nice when things go that easy!:) Our headers were hitting the frame. I have no idea why, that's the way we bought it. So, like you I decided that a little persuasion with the ol' smoke wrench with a rose bud tip would do the trick. I took the headers off, clamped them solidly to the bench and began heating. I could have used 3 more torches because by the time one tube was glowing nicely and I moved to the next one, the first one had begun to cool off. Ultimately, I did get all 4 tubes glowing. I leaned on it, put a pry bar on it and finally got the BFH and tried to threaten it into submission. No success, not even a little. Next I made relief cuts in each tube and heated the tubes and bent them into place. Success! I rewelded the tubes, painted the headers and set about reinstalling them. Perfect fit! However, although I now had about 3/4" of clearance at the frame, I just felt the headers were too close to the starter, more importantly, the electrical connection on the starter. The headers now reside in the scrap pile awaiting a trip to the recycle center. The new stock manifolds work great and only took about 20 minutes to install vs several hours of frustration trying to make some rusty old headers work. I don't know why these headers were such a poor fit, but we all know how it is when working on our beloved addictions, I mean Jeeps!:eek:
Glad you finally got your steering shaft figured out.
 
As FedEx is likely to do, they delivered the Lower a day early. Saturday rather that Monday. So, like a kid in a candy store the box was ripped open and work began. The first and only, "WHAT!", came when I noticed a 3/8" spacer sliding around loose on the new shaft. A quick check on the internet said that the spacer is to go between the firewall and the U-joint. No surprise, fact, a big plus. I've been trying to figure out how to make just such a spacer .....WINNER!

The old shaft came out, no problem. The new shaft had all the set screws removed and lock tited in place. For those that are nervous of the set screws. The firewall end set screw goes all the way through the main shaft. That bad boy ain't going anywhere. The splines were nice and tight and the tops set screw went right into the relief milled into the top shaft and the bottom went right into the divot machined in the power steering splined shaft. Almost done ..... OOPS the shaft touches the headers. The stock one did too, but this is worse. So what to do? Start the engine to heat the headers from the inside, grab the butane torch to heat from the outside. Fairly quickly there was a nice red hot spot on the header pipe. It only took a few taps with a steel bar to produce a proper sized dent in the header pipe. Actually easier than expected.

The CJ was buttoned up and we hit the road for a test drive. So far, I like it, I like it a lot. ...... Another fix to cross of the ol' list.


Did you have time to paint the shaft to prevent rust?

Oh and glad it all worked out for you.
 
HH-Some pictures are due here-:D
LG
 
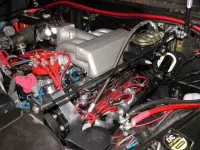
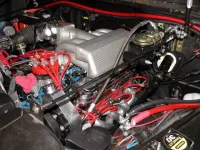
Pictures really wouldn't help much. Especially since with all the machinery and hoses in the way you can only see small bits of the shaft installed. As far as the uninstalled shaft goes, well it looks just like the pictures you can see on line. I did have some fun timing the steering wheel. Yes I know I can do it on the connecting rod, but if I can do it fairly easily from above, why not try. All in all it went very well indeed.

Confession .... I'm sorry to admit that I did not paint the shaft. We don't get a lot of water down here and the stock haft wasn't painted. Both are sorry excuses, but the truth of the matter.
 
When I did mine, I was more interested in getting the thing on rather that wait for paint to dry. Besides my CJ has other rusty spots it can blend in with. Another thing about that shaft is that it works better with the 1" body lift than the oem shaft did.
 
Mine is lifted a little, mostly to make the body mounts work at the front of the jeep. My old shaft proved to have a broken spring clip that holds the square nut like things in place. I thought I'd compensated for the body life by lowering the steering column some. Evidently the extra strain was to much. This a big improvement over the original shaft.
 
For those in need of a picture, here's one of my Borgenson (painted):

HydroboostInstall006.jpg
 
For those in need of a picture, here's one of my Borgenson (painted):

That's too purdy. Now no one else is going to want to put up a pic of theirs after seeing the holy grail.

I wound up installing the Omix-Ada 'HD' version after trying to find just the U-joint connection. Works great and has the same through-bolt connection. Not a fan of Omix but I figured if that stupid bell design held up through the senseless bashing of the PO then this thing should. Would always like to have the nicer version but couldn't justify it since majority of mine is DD and mall-crawlin'.
 
That's too purdy. Now no one else is going to want to put up a pic of theirs after seeing the holy grail.
Thanks. But it's just some blown on Rustoleum semi-gloss black. Nothing fancy. The really important thing is to make certain the shaft will collapse in the event of a front end collision.
 
See what I mean you really can't see much of the shaft. It actually looks stock in Hack's picture. There isn't much to gain from a picture. Mine would have been worse. Hack has a hydroboost on his brake system, mine id a conventional booster that completely covers most of the shaft.

On a side note. I think I'm going to have to make up one of those wire guide rails. Why I didn't think of doing one myself I don't know.
 
Nice ride there, Hack! :notworthy:
LG
 
Has anyone compared the Flaming River to the Borgeson? they are about equal in price....
 
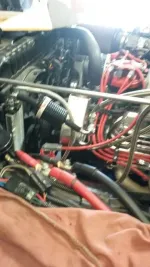
Did your shaft clear the headers? Did you turn or offset the steering wheel through the firewall to gain clearance? I ended up opening up the original header dent a little more than I wanted to Along with the slightly offset steering wheel shaft. My next battery will have both sets of terminals. I like the idea of having the winch on the top terminals and everything else on the bottom set. I'm not so sure about running a big long cable run around the engine compartment though. The rag sort'a ruins the over-all appearance though. I'm finding myself wondering what is under the rag. :)
 
Did your shaft clear the headers?
Did you turn or offset the steering wheel through the firewall to gain clearance?
I'm finding myself wondering what is under the rag. :)
Yes.
No.
Thermostat housing.

20150605_140952%20-%20Copy_zpsprclwhd4.jpg

The cables are more firmly attached to the firewall than in the previous picture. I was still mocking up the CJ at that point.
 
My next battery will have both sets of terminals. I like the idea of having the winch on the top terminals and everything else on the bottom set. I'm not so sure about running a big long cable run around the engine compartment though.
I ran my winch cables through the grill on the passenger side and hooked the hot lead to the front of the starter solenoid. Limits the amount of cable going into the engine compartment by a good foot.
 

Jeep-CJ Donation Drive

Help support Jeep-CJ.com by making a contribution.

Help support Jeep-CJ.com by making a contribution.
Goal
$200.00
Earned
$25.00
This donation drive ends in
Back
Top Bottom