• Hello Guest, we are proud to now have our Wiki online that is completely compiled and written by our members. Feel free to browse our Jeep-CJ Wiki or click on any orange keyword when looking at posts in the forum.
    To dismiss this notice
    click the top right X.

T-150 Trans & Dana 20 T-case Rebuild

T-150 Trans & Dana 20 T-case Rebuild

BrockGrimes

Jeep-CJ.com Archive Master
Posts
5,459
Media
102
Resources
1
Thanks
20
Location
Kathleen, GA
Vehicle(s)
ON THE HUNT AGAIN
Ok I've decided to rebuild the T-150 and Dana 20 Transfer Case . Been putting it off but no more. I'll post updates each day after I'm finished. I hope to get alot of pic's I know how you guys love pic's.

Day 1- I drained the fluids (metal shavings, yaaa) and removed the T-150 's shifter, easy easy. Unbolted the drive shafts from the Transfer Case and removed the speedo cable. I figured out why I had no backup lights (no wire to switch). I unbolted the Transfer Case and Transmission bolts from the skid plate (NOT A GOOD IDEA). I put a jack under the skid plate and removed the bolts, and slid the Transmission back and starter to lower it (balancing the Transfer Case /Transmission on the skid plate on the floor jack) hence the bad idea, I shoulda left it bolted to the skid plate. One of those why the hell did I do that moments, but long after the point of no return. So the skid, Transmission , and Transfer Case are out and on the garage floor. I placed the Transmission and Transfer Case on the floor jack and rolled them to a spot so I could begin cleaning.

Here's the Transmission and Transfer Case (somewhere) sitting on the jack ready to be cleaned up before disassembly.

dsc04738.jpg


A few hours later (a tiny screw driver, gunk, simplegreen, 2 brushes, WD-40 and some elbow grease) we have this.

dsc04743.jpg


I didn't know it was red/orange?!?!
I washed it off with a hose and cleaned up the garage floor. I sprayed a healthy coat of WD40 over the whole thing as to prevent rust, layed down a few towels to collect any remaining WD40 run off and called it a day.

Tomorrow brings Transmission /Transfer Case separation!
This ended DAY 1.
 
Ok I've decided to rebuild the T-150 and Dana 20 Transfer Case . Been putting it off but no more. I'll post updates each day after I'm finished. I hope to get alot of pic's I know how you guys love pic's.

Day 1- I drained the fluids (metal shavings, yaaa) and removed the T-150 's shifter, easy easy. Unbolted the drive shafts from the Transfer Case and removed the speedo cable. I figured out why I had no backup lights (no wire to switch). I unbolted the Transfer Case and Transmission bolts from the skid plate (NOT A GOOD IDEA). I put a jack under the skid plate and removed the bolts, and slid the Transmission back and starter to lower it (balancing the Transfer Case /Transmission on the skid plate on the floor jack) hence the bad idea, I shoulda left it bolted to the skid plate. One of those why the hell did I do that moments, but long after the point of no return. So the skid, Transmission , and Transfer Case are out and on the garage floor. I placed the Transmission and Transfer Case on the floor jack and rolled them to a spot so I could begin cleaning.

Here's the Transmission and Transfer Case (somewhere) sitting on the jack ready to be cleaned up before disassembly.

dsc04738.jpg


A few hours later (a tiny screw driver, gunk, simplegreen, 2 brushes, WD-40 and some elbow grease) we have this.

dsc04743.jpg


I didn't know it was red/orange?!?!
I washed it off with a hose and cleaned up the garage floor. I sprayed a healthy coat of WD40 over the whole thing as to prevent rust, layed down a few towels to collect any remaining WD40 run off and called it a day.

Tomorrow brings Transmission /Transfer Case separation!
This ended DAY 1.
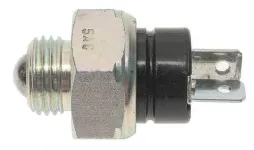
Can you tell me where the back-up switch is located?
 
NO!!! you are not going to make me want to pull my tranny/Transfer Case and clean it.... Well at least thinking about it now, Thanks Brock :D
Oh and looking good. you say just a hose and different cleaners w/no pressure washer?
 
Can you tell me where the back-up switch is located?


It's the top left corner above the red part of the Transmission in the pic's above.

NO!!! you are not going to make me want to pull my tranny/Transfer Case and clean it.... Well at least thinking about it now, Thanks Brock :D
Oh and looking good. you say just a hose and different cleaners w/no pressure washer?

I used a flat tip screw driver to remove as much of the heavy :dung: as I could to start with. Then a spray of degreaser, wait let it soak, then hosed it off. Any tuff stuff remaining will be cleaned off after disassembly.
Been busy with work so slow progress, I have seperated the Transmission and Transfer Case , and have started the Transfer Case tear down, pic's to come. I'll have the Transfer Case rebuilt today.
 
Getting to it, been fighting the Transfer Case today, stupid setscrews on the shift rods, they are 3/16 hex and are a PITA to get out, twisted a craftsman L allen wrench into a pretzel, and snapped off a socket with the 3/16 bit built in. Got one out but the other well we'll see tomorrow. Taking pic's at each step or when I can.
 
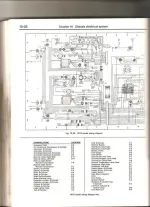
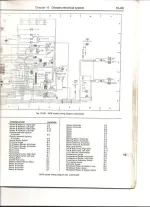
does anybody have the wiring diagram for the b/u switch?
the PO has removed all of that in my CJ. Thanks.
 
Thanks for the info!
Yes, we are waiting for your progress report and many pics :-)
 
Thanks GPER but PO ripped out all wiring and hardwired everything so i'll have to straight wire it., Brock looks good and look forward to the finished product, may do mine this winter.
 
Forgive spelling and miss-namings tired tired tired....ZZZzzzzzz.......
Aight updates:
Seperated the tranny and Transfer Case .
Pulled the rear out put off the case and removed all the gears.
Took out the shift rods well one of them the 3/16 set screw in the remaining one refuses to come out to play, so I'll just work around it.
Today is clean up and paint of the case then tomorrow re-assembly.
Now for the pic's:

dsc04784.jpg


The only wear I've seen:

dsc04786.jpg


In case you wondered what's inside:

dsc04788.jpg


Clean gear no wear or chips, plus I don't think it's even been rebuilt judgeing by gaskets and general appearance.

dsc04790.jpg


These look like all kinds of fun to get back in (rollers):

dsc04791.jpg


See the 3/16 set screw just below the gear? Those are not fun to get out. I got one out the other just isn't comeing out:

dsc04792.jpg


Intermediate shaft, make sure you remove this to the rear as it's bigger on that end, hammer it toward the front and your screwed. I used a piece of broom handle and a 2 lb hammer and it came right out.

dsc04793.jpg
 
Thoughts on the worn gear?

Will post more pic's and updates soon, I hope.
BTW, I'll post up a step by step per the Novak instructions, Chilton's, and experience.
Once the thing is completed.
 
Pic's of the case cleaned and painted.

Wet wrinkle paint:

dsc04795.jpg


A Couple dry wrinkle paint pic's, it came out great:

dsc04799.jpg

dsc04800.jpg


A Closeup of what it looks like:

dsc04802.jpg


Painting the front/rear part and shift linkage with appliance epoxy black (gloss black)
It's tough and wears well, plus I ran out of wrinkle paint. 3 coats 10min apart to get that look.

The Transmission will be a dark hammer coat it'll be different and it's what's in the garage.
I'm using good quality paint but just what I have available, most of the expense is going into quality parts.
I always say you can look ruff driving or look good sitting on the side of the road, not both. Well not without alot of time or deep pockets.

Updates to come.
 
Last edited:
Your Transfer Case looks good are you going to replace your worn gear? It has an odd wear pattern to it:eek: I am suprised that its mating gear isnt worn as well
 
Planning to, still have to inspect the mating gear. The worn one is the speedometer drive gear. I'm killing time awaiting money, by cleaning and painting. That and tracking down a replacement gear, the dealerships can't order it, and napa can't also.
I emailed novak adapters, and a couple others.
Rebuilding the Dana 20 and T-150 so far is easy, comes apart easy enough (knock on wood) the bad part is my jeep is a '79 and different clutch's was used during that year so I have to wait until I pull it to see which one I have, LOL. So ordering parts is delayed. Also during the rebuild/teardown you'll dicover bad parts that aren't in a master rebuild kit. The mounts for instance are shot so I'm gonna get som poly mounts. BTW, just a piece of advice, if your tearing it down and rebuilding it, replace parts that are worn now even if it means being on hold for a bit. I have a couple I could reuse but I'm not wanting to do this again for awhile.
 
The wrinkle paint looks pretty cool, But also looks like it will hold dirt making it harder to keep clean. Well if your into that clean thing.:D
 
Once it's rebuilt and under the jeep, it's all good. It'll probably be someone elses project next time it gets rebuilt, LOL.
 
These look like all kinds of fun to get back in (rollers):

A trick for installing the rollers is to get a wooden dowel or tube roughly the same diameter as the shaft. Cut it to the length of the gear. then install the rollers around the dowel, install the gear and use the shaft to press the dowel out through the case.
 
A trick for installing the rollers is to get a wooden dowel or tube roughly the same diameter as the shaft. Cut it to the length of the gear. then install the rollers around the dowel, install the gear and use the shaft to press the dowel out through the case.
Exactly - I use a socket with electrical tape wrapped around it. Here are a few pics of the cluster gear installation and bearing pack.
 

Jeep-CJ Donation Drive

Help support Jeep-CJ.com by making a contribution.

Help support Jeep-CJ.com by making a contribution.
Goal
$200.00
Earned
$40.00
This donation drive ends in
0 hours, 0 minutes, 0 seconds
  20.0%
Back
Top Bottom