• Hello Guest, we are proud to now have our Wiki online that is completely compiled and written by our members. Feel free to browse our Jeep-CJ Wiki or click on any orange keyword when looking at posts in the forum.

Taking A Stab At Upholstery… a dog seat

Taking A Stab At Upholstery… a dog seat

mdeluca

Full Time Jeeper
Posts
1,769
Solutions
2
Thanks
68
Location
Hickory, NC
Vehicle(s)
1986 CJ7, 258, T5, D30, D44, D300
Dog_Cushion_11.webp

*****************************************************************

Taking the dog with us is a passion for both us and Cooper. Unfortunately, in the CJ, there was no safe place for him. Decided to make and upholster a cushion. Watched a couple of great videos by Cechaflo on YouTube and got started.
Dog_Cushion_01.webp
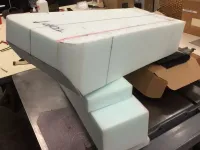
Found some high density foam at the local auto upholstery supply. They actually had a foam graveyard with all types of foam... for cheap. This piece cost $10. It is 6" thick and just fits my bandsaw which cut the sides and the curves very well. Used an electric carving knife for the bevel.

To get the perfect size, I spray glued several pieces together. Then marked reference points at midpoints on the sides and midpoints on the curves. This will allow registration marks on the pattern to help keep panels from shifting while sewing.
Dog_Cushion_02.webp
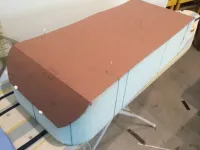
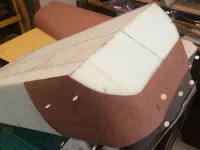
Used rosin paper from the hardware store to cut patterns of the sides, pinned to foam to check fit and fine tune the curved sections. Be sure to transfer all of the registration points to the paper.
Dog_Cushion_03.webp
It is important to pin all of the patterns on the foam together to make sure all of the seam lines meet.
Dog_Cushion_04.webp
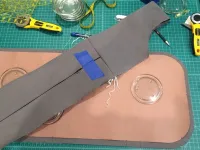
Used weights to keep the pattern from shifting on the fabric, marked the reference points, then added 5/8" seam allowance. Here you can see the zipper placket sewn to the head piece to form the band.
Dog_Cushion_05.webp
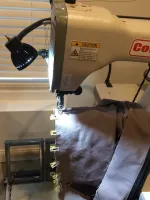
Used spring clips to hold the material together being careful to align guide marks. Using a walking foot commercial sewing machine is helpful in keeping the material from shifting. The cylinder arm also aids in sewing the curved and square corners.
Dog_Cushion_06.webp
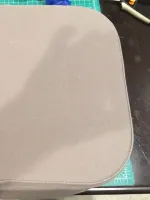
Traced the actual pattern on the fabric, then added the 5/8" seam allowance. It is then possible to sew right on the intended seam line rather than trying to follow the edge of the seam allowance.
Dog_Cushion_07.webp
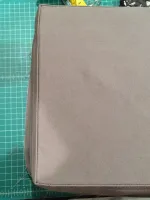
The square corners were more challenging. Sewing one side of each corner at a time allows more control rather than trying to continue around the corner in one sewing pass.
Dog_Cushion_08.webp
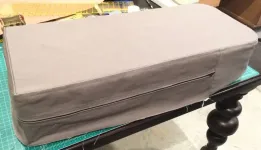
Decided to sew in one long zipper on three sides to make the cover easier to get on the foam. Also checking fit prior to sewing on the bottom panel.
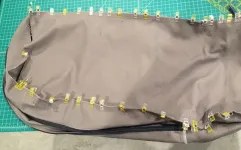
Dog_Cushion_09.webp
The clips are so much easier than pins.
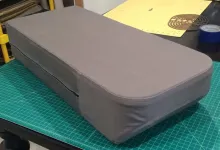
Dog_Cushion_10.webp
For a first attempt, I'm happy with the fit.
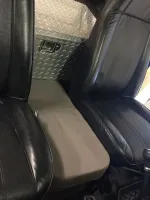
Dog_Cushion_11.webp
Here is the cushion installed in the Jeep. Overall size of the cushion is 6" x 12" x 26". The back of the cushion rests against the step of the bed, snug fit between seats, and allows the seat belts to be fastened easily. Next will be the harness.
Dog_Cushion_12.webp
Cooper approves this post.

Hope this helps you get your pal comfortably situated for those beautiful mountain rides together.
 
Nice. The trick is having a sewing machine that can handle the heavy material. I find this funny. For me cutting down a tree with a chain saw or running a skill saw or most anything else that the ladys consider to be dangerous or scary is no problem at all, but a sewing machine absolutely scares me to death. Too much gong on far too quickly. Up Down, up down = stab, stab a thousand times before it stops. Scares me to death! Most lady's seem to think nothing of it.
 
Dude that’s cool


Sent from my iPhone using Tapatalk
 
Our mini-Aussie loves to ride.:chug:
We do have her in a harness for her protection, when on the road/trail.
LG
 
Great job on your sewing project! I have a few questions.
What type and weight of fabric did you use? Some type of canvas or sunbrella? What thread and needle types and sizes? I have an Adler 267 gk 363 and several home machines. Plan on reupholstering the seats from our 67 CJ5 , and making a soft top for our 59 CJ5 from what's left of what came on the 67. Have a hard top for the 67. Again thanks and great job!
 
Thanks... I've designed a custom harness and permanent tether point that I'm working on now.

Until then, we have a jury rigged system that keeps him where we want him.

PLZ-post up pictures of this harness set up when done.
I'm sure I will be able to improve on ours, with your ideas. :notworthy:
LG
 
Great job on your sewing project! I have a few questions.
What type and weight of fabric did you use? Some type of canvas or sunbrella? What thread and needle types and sizes? I have an Adler 267 gk 363 and several home machines. Plan on reupholstering the seats from our 67 CJ5 , and making a soft top for our 59 CJ5 from what's left of what came on the 67. Have a hard top for the 67. Again thanks and great job!

Thanks...
  • Got the upholstery fabric from Habitat. Looks like what would be used on a sofa. It is pretty robust.
  • Seam thread is bonded nylon #92 with #20 round point needle.
  • Visible felled seam and zipper stitch is 100% polyester heavy duty residential sewing machine thread with #14 universal needle.

I plan on using Sunbrella to make a cab cover before spring. Found some good patterning techniques for a bimini cover on sailrite.com.

The best auto upholstery videos I've seen are from Cechaflo
 
PLZ-post up pictures of this harness set up when done.
I'm sure I will be able to improve on ours, with your ideas. :notworthy:
LG

I will. Hunted all over and finally found anchor brackets for the seat pedestal bolts that accommodate 1" webbing. I'm hoping they will work.

C101B15mm_1024x1024.jpg


Found stainless O-rings on ebay.

Found quality 1" webbing, heavy duty plastic hardware, and stainless D-rings on jontay.com

I'll post up a parts list when I get it together and know it works.
 
Thanks for the info and links. I have watched many of the Sailrite videos. Always looking for more to further my skills. I also do leatherwork and some saddle and tack repairs. Thanks again!
 
Thanks for the info and links. I have watched many of the Sailrite videos. Always looking for more to further my skills. I also do leatherwork and some saddle and tack repairs. Thanks again!

I checked out your machine… very nice!!! I've got a simpler Cowboy 3200.
 

Jeep-CJ Donation Drive

Help support Jeep-CJ.com by making a contribution.

Help support Jeep-CJ.com by making a contribution.
Goal
$200.00
Earned
$0.00
This donation drive ends in
0 hours, 0 minutes, 0 seconds
  0.0%
Back
Top Bottom