• Hello Guest, we are proud to now have our Wiki online that is completely compiled and written by our members. Feel free to browse our Jeep-CJ Wiki or click on any orange keyword when looking at posts in the forum.

Valve Cover Gasket Install....Tips?

Valve Cover Gasket Install....Tips?

Coach

Active Jeeper
Posts
355
Thanks
0
Location
Dallas, TX
Vehicle(s)
1986 CJ7 / 4.2 I-6 / Auto / Dana 30 / Dana 300 / AMC 20 / Hard Top
I'm installing my valve cover gasket tomorrow, the old cork one appears to be one of the leak sources under my hood. I'm wondering if there are any tips or tricks to the process, seems pretty straight forward, but better to know hazards ahead of time, than after.

Thanks
 
One thing I have noticed is if you have the original plastic valve cover, throw it as far away as you can. I have gone rounds with them several times and they seem to win. I bought an after market aluminum cover for just under $100 with the gasket and hardware. It does require you to drill and tap 2 holes on the drivers side but it does cure the factories half <-BAD WORD-> way of mounting.
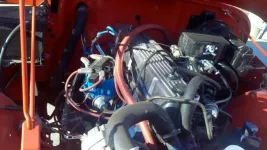
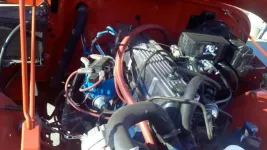
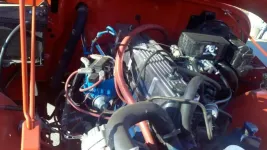
And I think they look pretty good. Here is mine, polished with the AMC 258 i6 / 4.2l logo on top.

2011-12-04_11-07-27_190.webp

I have that some cover, but my opening by the fire wall has a breather in it, unlike yours. I think that opening is another source of oil as well.

Also, is there a secret for getting the oil plug out? That thing is a beast to remove on mine.
 
Mine does have a PCV port at the rear also just hard to see in the pic. I don't have any issues with my oil cap so far, it pops in and out with no issues.
Since you have the valve cover then the big problem is solved. The 2 holes on the drivers side of the gasket will need to be enlarged to fit the larger diameter of the bolts required with cover. Don't just force them though it will just cause a leak, guess how I know?
I usually put a thin film of black RVT on the valve cover and let it sit for a few minutes with the gasket on, that will help keep the gasket in place as you lower the cover on. After that tighten the bolts in a criss cross order, I don't have a torque spec, so just be careful not to over tighten. After I run it I go back and recheck the bolts. If you do over tighten it will split the gasket against the head. Just snug and a bit more.
 
That is the standard square air cleaner that comes with Webers.
 
That is the standard square air cleaner that comes with Webers.

That explains it, I have the Motorcraft from the PO.

I splurged for the non-cork gasket and I'm hoping that helps seal better. I have some black rvt to use too.

I think I read somewhere to finger-tighten everything down, then go a little past that.

Also, glad to know to look for the two bolts on the drivers side, I might have just forced it through. Do I just enlarge with a razor blade or something?

Thanks,
Coach
 
I use a drill bit.
 
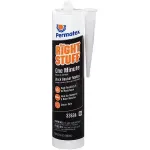
If for some reason that doesn't work I use a product called "the Right Stuff" sold by NAPA that forms its own gasket. I have the original, leaky plastic cover. I used this stuff instead of a gasket and have had no leaks for two years now. It goes on like RTV and fills in all the imperfections on the head and valve cover. You put it on the head and put the valve cover on within 5 minutes, tighten down to specifications and you are done. Like I said, try this if the other doesn't work.

Tommy

Thanks, I will try that if this rubber gasket doesn't work.
 
I agree with Tommy, "the Right Stuff" by Permatex is some good stuff. I used it on my valve cover, rear diff and Transmission top cover, no leaks. It's a serious PITA to remove, but it's not going to leak.


7160140_ptx_33694_pri_larg.webp
 
Good evening gentlemen :chug:

I would just say be cautious about tapping the two holes out on the drivers side. There are water jackets below. I have that same one as you guys and when I did research I came across threads about trying to seal the hole that was drilled into the jacket, not fun. Made me a bit nervous. And probably you now too. :D

The valve cover is pretty thick and the bolt does not have to go that far in.
 
I did slip on mine and went deep on one hole. I Teflon taped the bolt and all is good.
 
It's not hard to do and kind of odd to guage because there are those two holes already there.

I would suggest setting the valve cover on with the gasket (also thick) and get an idea of the screw depth.
 
The Jeep already had the aluminum cover on it. The PO used a cork seal and it doesn't seem to be seated wry well. I will look at the two holes and see if there is anything not looking quite right tomorrow.

Hopefully the guy didn't do anything when he put the cover on. Should be interesting.
 
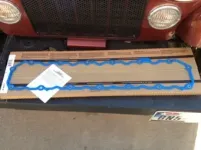
Alright, I finally opened the Felpro box and the gasket has a lot more holes than the cover has bolts. Do I have the wrong gasket? It has holes where it needs them, just about twice as money as it needs.

ImageUploadedByTapatalk1325707753.870131.webp
 
I am not sure why the 1981 onward Alum. valve cover doesn't fit the pre-81 engines that have the steel valve cover? I have a 79 engine (steel cover) and want to put an alum. cover on it. Above it is stated that one must "drill and tap" 2 holes. IN what? Where? drilling (and tapping??) 2 holes in the alum. cover i snot a problem as I can do that, BUT into the heard --i don't want to to do that if frequired. I'll leave wellenough alone. Please explain. thanks. the Judge
 

Jeep-CJ Donation Drive

Help support Jeep-CJ.com by making a contribution.

Help support Jeep-CJ.com by making a contribution.
Goal
$200.00
Earned
$0.00
This donation drive ends in
0 hours, 0 minutes, 0 seconds
  0.0%
Back
Top Bottom