• Hello Guest, we are proud to now have our Wiki online that is completely compiled and written by our members. Feel free to browse our Jeep-CJ Wiki or click on any orange keyword when looking at posts in the forum.

Water Temp Guage

Water Temp Guage

RedDog

Jeeper
Posts
100
Media
11
Thanks
0
Location
Canton, TX
Vehicle(s)
1982 CJ7 - Stock until my pocket gets bigger!
258 I6, T4 Trans, D300 Transfer, AMC 20, Dana 30.
Hello Everybody,

ya guys are going to have to bare with me... I am kind of new to this Fourm Posting stuff... I usually just read them.

I have recently aquired a real nice 82 CJ7 , It is all oringial and Stock. Has 51K miles on it. The guy I bought from did some trading and ending up with it, so he doesnt know too much about the history of it... he did tell me that the guy he got it from said it had been sitting for a while.

I have been driving the wheels off of it since I got it a couple of weeks ago, everything seems fine, I did a tune up and changed the oil...etc. I noticed the Ignition Module was melting the backing off of it... so I put a new one on. I think the carb may need to be rebuilt... it kind of acts funny sometimes.

But to get to my Question: The factory TEMP Gauge doesnt move around alot.
it is on C when I crank the jeep... and it moves up to about a 1/4 way once it is warmed up... but then never moves past that, I am wanting to install a aftermarket gauge so I can see what the temp is... is there anyway to leave the factory on installed and install a aftermarket under the dash... is there another port on the motor to install the other gauge. and will any aftermarket gauge work? I had somebody tell me you had to get a particular gauge because of the sensor length, said it was too long on most aftermarket gauges.

Anyway I know there is a lot of Rambling here, but bare with me I will get better after a few post!

Thank you for any information you guys may have regarding this... plus any other tips or tricks you can think of for me to check out on the Jeep.

Thanks- Ronnie
 
Last edited:
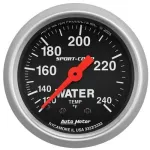
Yes you can install an after market coolant temp sensor. I prefer a mechanical sensor. Like this Auto Meter 3332
Auto Meter 3332 - Auto Meter Sport-Comp Analog Gauges - Suggested Parts - SummitRacing.com
atm-3332.webp
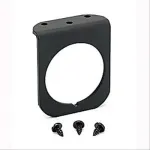
Then get a panel to install it under the dash. Auto Meter 2236 - Auto Meter Gauge Panels - Overview - SummitRacing.com
ATM-2236_OH.webp
I have an aftermarket mechanical gauge under my dash but I have a 302 V8. I used to have a CJ7 with a AMC 258 i6 / 4.2l . I think the sensor can be installed up at the top of the engine at the front.
 
Thank you... That's a good looking gauge too, I am going to order it today.
So it should fit right into the port on the motor with no problem...
doesnt matter about the length of the sensor like I was told?

Thanks again, RM
 
doesnt matter about the length of the sensor like I was told?

Thanks again, RM
Those sensors have to stick a little way into the water but I have never heard of anyone having trouble with it being too long.
 
Good Deal, I wasnt sure on it... but it was a parts guy @ the Auto Store that had told me that, I wanted to make sure b4 just trying one myself.

Thanks Again
 
I have recently aquired a real nice 82 CJ7 , It is all oringial and Stock. Has 51K miles on it. The guy I bought from did some trading and ending up with it, so he doesnt know too much about the history of it... he did tell me that the guy he got it from said it had been sitting for a while.

I have been driving the wheels off of it since I got it a couple of weeks ago, everything seems fine, I did a tune up and changed the oil...etc. I noticed the Ignition Module was melting the backing off of it... so I put a new one on. I think the carb may need to be rebuilt... it kind of acts funny sometimes.

But to get to my Question: The factory TEMP Gauge doesnt move around alot. it is on C when I crank the jeep... and it moves up to about a 1/4 way once it is warmed up... but then never moves past that, I am wanting to install a aftermarket gauge so I can see what the temp is... is there anyway to leave the factory on installed and install a aftermarket under the dash... is there another port on the motor to install the other gauge. and will any aftermarket gauge work? I had somebody tell me you had to get a particular gauge because of the sensor length, said it was too long on most aftermarket gauges.


The Ignition Modual....
Jeep uses the Ford Duraspark Igntion Modual..... Two things will over heat the modual and cause the black potting compound to melt and oooose over the drivers fender... #1 Leave ignition key on the RUN position with the engine not running......... this willl keep the igntion modual in the ready to fire and no release of the energy..... it gets hot and not made to run that way. #2 POOR GROUNDS can kill the jeep ignition modual makes it work too hard and causes it to get hot, and you can see the black ooose or just a failure... Solution for the poor ground is to cut the black wire going into the Jeep/Ford Duraspark Igntion modual on the HARNESS SIDE and solder in a black ground wire, 14 awg, and run to battery or use the firewall right there.. Cover the solder connection with heat shrink and split tubing to protect. I used the firewall ground location but I have a aux ground to the the firewall. I also ran a ground wire to the firewall, dash, engine block, alternator, grill, frame, ENGINE HEAD.. All parts of CJs are pooor grounds and need aux grounds and will make your jeep run better. The Engine HEAD also needs a good ground........ I used the threaded hole on the coil mount and ran a aux ground to that.... So the modual needs a good ground supply and good head ground so the energy can get back to the battery.... Igntion is a DC Circuite and needs a complet loop.... battery out and back.


I ran into the same problem on my 1978 CJ7 the temp gauge read but barely reached the green when at temp. When I looked at the TEMP sensor range in the Jeep FSM it did not match the sensors installed, mine looked fairly new, and did not match what I purchased at Napa...... So I went looking and this will solve your problem if you want to use the stock stuff...


I wrote this a few years ago...
TEMP SENDERS are also a issue. I purched 3-4 inexpensive units and the temp/reistance range was not correct. I ordered Napa's premium unit, ,Elchin? Brand, double the price, and boiled it in water prior to install to test, can also be returned as new if does not pass test, and the boil waster is 212 Deg F or very close and will have a resistance value about 35 ohms. Take it out of boiling water FAST put on paper towel, something that is not a heat sink, and measure the resistance with a multimeter. This needs to be done FAST you will see the resistance change in seconds. Thought I would throw this into the conversation about CJ gauge solutions.

My Temp gauge was bairly reading with PO set up. That temp sender and 3-4 more all failed till I tried the Napa Elchin premium version for the CJ Temp Sender. That one measured correctly.

I have seen the pressure and temp issues dozens of times.

Hope that helps.

Do those two things never leave key on run w/o engine running and make sure the modual and head both have good grounds...
 
I read some of jeephammer ground post.
What did you use to run all the detected grounds?
He talked about using welding wire?
Also where exactly did you mount the grounds on the grill, tub, frame... Etc?
Do I need to run one to the back of the tub too or is the firewall good enough?
Sorry to bother with these questions, but after reading the 10 rules of grounding he had on a post I am totally blown away. Never thought of the power and ground that in-depth.

Any extra info on the wiring and location for the grounds would be great.
Also I would like to clean up under my hood like the black jeep in that post... What hoses and wires can I eliminate to acquire tidyness?
Just brain storming again on the under the hood stuff.

Thanks for all the information.
I still have alot of reshearch ahead of me... Thanks for the jeephammer hookup.


Glad the info helped and that you looked up the JeepHammer info. JeepHammer has taught me a lot and he is kinda a ignition god.... if you read his stuff its right on. His tricks got me from 19 mpg to 23mpg highway, better starts, just run like new...

Grounds...
I did much of what JeepHammer said but did a bit simplier and did not ground the starter as a primary ground location (yet). I will be adding some electrical devices in the next yr and will make some mods then. I want a electric fan, aux off road lights, winch, mod the stock lights, electric fuel pump, some safety devices/relays.

Behind the stock coil location in the fire wall direction is a empty threaded hole. I used this for a ground stud location..... I used copper antiseize on the ground stud locations and the spark plug theads to help with ground and stop corrosions. At this close to coil threaded hole I ran a battery ground, short 3" jumper to the coil mount bolt that grounds the head, a wire to the dash thru the fire wall hole, ground the firewall, and ran a ground to the frame. Under fuel pump there is a second threaded hole I used this for a ground stud location also.... So a battery ground wire to this stud, jumper to ground the grill, jumper to alternator, and could use a jumper to the starter mount stud. This also take into consideration the black wire going to the DuraSpark Ignition Modual on the Harness Side is cut, spliced with aux ground wire with solder, heat shrink, and split tubeing and run to the fire wall or battery directly...

Front Lights use grill for their ground, Gauges use the dash for ground, Rear lights use the body for ground, starter uses the block/bell housing, mounting for ground and is the biggest and largest amp usage on the CJ and you need it every time.... (winch would be more amps)

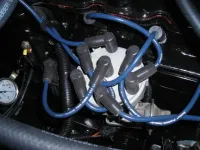
Here is a pic of the stud behind the coil... The TeamRush cap is larger adn can be compaired to the stock cap picture below. I also suggest the plug wires be run with out touching each other or any possible metal that is possible ground. Large voltage in the 45,000 V range is hard to control.... That is why we use the larger cap, better wires, and aux grounds and any trick we can to make sure the energy gets to the spark plug gap and lights off the fuel... In this picture the plug wires are touching.... so rout them better than this pic...

The 3" jumper to the HEAD is missing in this pic.. This stud ground location will ground the block. So I took a 3" jumper to the stock coil mount stud and that grounded the head...

Not perfect yet..... close to what jeephammer wanted us to do, very clean, easy to do... AND it works very very well

DSCN1058.webp


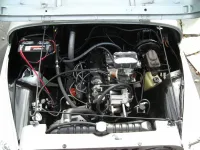
The late 1970s Jeep CJ s did not have much on them like the 80s CJs. I still removed stuff.. For vac all I have is the PCV, Brake Boost, Vac Advance Distributor. Maybe this will give you some ideas on how to simplify the engine...


DSCN0651.webp


DSCN0636.webp
 
Ok, this weekend I am going to run the grounds and do the TeamRush Upgrade.

On the Grounds, What wire do I need to get, I am guessing a longer Battery Cable to run from the batt to the "Ground Post" like the bolt JH talked about through the fender... but what about to the Grill, Module, Head, Tub... etc.
Do I need Battery Cables for them as well or just grab a roll of Wire 12g or something?

I'm starting to sound stupid arent I?

Thanks again for all your help... I am excited about doing these upgrades and see how much better the jeep runs!


Hate that bunch typed and poof all of it gone...

Glad you are excited to do the work on your CJ... they run pretty well if set up right...

TeamRush
Oriley has the Borgwarner Select cap, adapter, rotar with brass terminals and lifetime warranty... Last set you will buy for this CJ

JH likes the MSD cut to fit wires and they are best.... I have been using the NAPA dark navy blue beldin wires they have LIFETIME warranty and are a decent wire.... OHM out each wire longest to shortest and record on your paper work... all with be 100-300ohms if I remember right. If you ever have issue the wire will be open or high OHMs... Napa replace one set for me arked out after 4 yrs... New set no charge and still covered..

CABLES and wire.....
JH has shown us many store wires are not that good and close to failure out of box... so if you read his stuff he is not fan... If you cables look good, clean, no corrosion, and turns over strong use them... If issue then use his suggestion of premium high strand count wire and premium terminals.. The cables should have 1-2 extra wires comming off them for aux grounds and such...

I did not use the fender as a ground location.. I use two threaded holes in the AMC 258 i6 / 4.2l block one by coil, the other is below the fuel pump.... Close to battery and solenoid... Can use a brass bolt..... and brass washer.... fastenal has the brass studs... I may do this next time I do electrical work... Copper penny, old one, can be drilled and be your copper washer, they are high quality and stiff/will not bend.. This makes for clean install and I do notlike to drill unnecessary holes and use current holes when ever I can

Aux ground to block, 2 locations 8 awg black
Block to frame use a 6 or 4 awg, this one runs low on frame and could get riped off so stronger is better
Other grounds I used 10-12-14 awg black would all be ok... more power to area the larger the wire, 10 bigger than 14
High strand count better than lower, flex is better, better current/amp carry,
Crimp, solder, cover with heat shrink with sealant if you can, more resislent and keeps moisture and corrosion out
Copper wire only
Farm Stores will have terminals and wire at a decent price..
Heat shrink with sealant hard to find.... Fastenal has it and the small size is not too much $6.00


That should get you going.... Read the JeepHammer TeamRush write up so you understand it... Use the parts stores I mention above... competive and life time warranty...
 
Last edited:
Just put lockers ft/rear in my CJ with new 3.73 gears so wanted to play... This wk end took 2 different guy to a offroad event.... Over 2 days drove 350 miles at 65-70 mph, wheeled some very wild stuff for a stock type CJ with 33" street radials. Steep sand hills, logs, water, and up/downs.... banged my undercarriage 12 times or so hard..... not too happy about that...

NOT a single hick up worked perfect.... More power than I have traction. Checked hwy mileage, there, back, and there back with a day wheeling..... 22-23 mpg hwy..... with my wheeling buds watching... and riding...

That is pretty cool
 
That is REAL COOL..... mine is sucking on gas mileage right now.
I have to put gas in it everytime I drive it, but let's not get into that yet (not sure if my gas gauge is working right) I'll see if the gounds fix it. but its not going all the way to full, but drops to almost empty with very little driving, I thought at first I only had a 10gal tank or something.... but I am sure the mileage is just sucking. The old jeep is all orignal with only 51k on it... still has the plastic valve cover, hell even the factory floormats and carpet. Has set for a long time too, so I know non of these upgrades have been done.

But we are going to do these baby steps first, then dig a little deeper, I want to get it running top notch, before I start on a lift and tires and other goodies.

I have a feeling I am going to be wearing this Fourm out for awhile to come!
Thanks RM
 
Just to let you know....... Gas Gauges are a issue with the CJs... Seems like the new senders are not made very well..

I fixed my OEM orginal one recently... It works but like yours...

I AM ON THE HUNT..... for a good quality fuel sender that will last more than 6 mo or a year. I have cked with a few guys that know there stuff and this is not a simple solution...

Bud out in NYS has installed many and they do not hold up. the new senders are junk from what I hear... So we need to find a good one that fits the top of tank even if it needs electrical mods.... The Impedance range is listed in the FSM, just for info, FYI


So anyone reading this that has found a good solution let us know....
 
Ok, I got all the stuff for the TR upgrade, I am a little confused on the ground for the module... I have read and read different post, everything says to splice on the Harness side of the plug. but not very detailed.

The Harness side of the plug is the part coming from the Jeep, not the side from the Module... I get that, but do I cut the wire there by the plug, or do I trace it back close to the dist? That is where the black wire goes is to the dist correct? and when I cut the wire... do I leave it attached to the plug... to where it still goes to the dist... or do I cut it and not worry about the wire left on the harness going back to the dist.. and just run the dedicated ground from where I cut it striaght to the batt/grounding post.

Thank you,
RedDog


OK got your message... I do not use the messages much and prefer to stay on the forums... This way others can use the help and learn if interested in same topic... my pm box is pretty much full and have not used them much for help and would prefer not to

The Ford DuarSpark Ignition used in the Jeep CJs is a pretty good ignition and if you do the tricks we discussed and you are starting I think you will be impressed..... So keep up the good work, you are getting there...

The DuraSpark Needs 12 V + and -...... the - or grounding is a weak link. The ground comes from the distributor that is aluminum that sits on a cast steel block with a gasket and lots of oil varnish... The distributor does not get used much or moved to adj the time, has galvonic corrosion (steel/aluminum), has rust on the block mount, and uses the rusty hold down bolt to make the ground path... Poor at best and its 35 years old dor so... The ignition modual gets ground this way from the distributor mount and the distributor electronic needs ground to develop the hall effect fire signal that tells the ignition modual to fire... So do not cut off the distributor from the aux ground path... they both need good ground..

Add the AUX GROUND...
Cut the Harness side wire and a 12 - 14 awg black wire to direct battery neg ground or it can be ground to the firewall right there by drivers fender(what I did) if use firewall will also need/have a aux battery neg ground to the firewall like we discussed above... Cut the Duraspark Ignition Black ground wire wire 6" back from the connector, slide on heat shrink and solder splice in your aux ground wire... Cover with the heat shrink and split tubing.. Use tie wraps to support your wire changes so they do not get broken or damaged. Mate all connectors 10 times to clean the contacts... IF DIRTY, clean with contact cleaner or alcohol first, then mate/unmate 10 times to clean contact. Fill with dielectric grease and mate them for he last time...... Do this for every connector you work on the jeep cj, from front lamps to igntion. Keeps water/moisture and keeps the new mate surface from corroding..

The signal wire from dist is a low level signal... meaning it has low voltage and current.. Contacts much be clean and mated/unmated to clean the surface platings. Furhter these wires are twisted 2to3 turns per inch to cut down on cross talk and its needed. DO NOT untwist the dist fire wires and twist them if not twisted. These wires should be run by themself along the firewall and fender so they act like a shield. DO NOT run low lever fire signal wires with the coil wires, spark plug wires, or ignition wires... Keep away from High voltage and quickly changing on/off wires... These have lots of NOISE and will mess up the fire signal wires... Do not second guess me just understand me on this one.... this a EE type theory and is how motors, coils, transformers, generators work... google magnetic flux if you want more...... and can also look at wire cross talk ..... or induced currents

still waiting on the pics of what you are working on
 
Ok, so I just tie my aux ground into the existing ground. Makes since that the dist still needs that ground to communicate back to module.
I think I've got it figured out.
Saturday morning I am goi g to do the TR and at least run the module ground. Hopefully before all the honeydos start rolling in.
I have a few pics of the jeep now.. But I will take some more Saturday.
(I'll need to know how to post them though..lol)
Thank you for everything.
I was thinking about sending that question to the JH but was intimidated.
Thanks again


Good plan the ignition ground and the head ground are part of the path to better running... Keep chipping away at it... I know the threads I gave you have the teamrush and grounds so you can ck me there if you like?


JH is a good guy, I learned a lot from him as many have... He is very busy with personal stuff so not sure about his online time... I have done a fair amount of CJ Corrections on my own, or my own orginals... He sends the Weber Needs to me.

Pictures...
Post them to photobucket.com............ set up a account and can upload pic and video there. Then you take the link on the photobucket page and use the Mtn Pic Box on the tool bar above...... that button will insert the picture. That is what I do and is the esiest way to manage your pictures... On Photobucket can leave the file open and others can see the other pics or videos. Nice if you have a group of for sale stuff, visitor will see all the pics, titles, or videos.
 
Cool, thanks.. Well hope ur on line Saturday morning, in case I need ya.
But once I take everything ive been reading all week and actually get under the hood it should all come together. I'm not really has dumb as I sound.
Thanks again
 
TeamRush UpGrade, Aux Grounds, Temp Sensor Correction, DuraSpark Ignition

I am sure everone thinks you are doing fine, including me. Go easy on yourself

Internet Help is not easy, we ask for info to get the big picture and look/suggest a plan of correction...

good luck, let us know your results


PS
Search uses titles ..... may want to update your title to something a little closer to what you work/effort has turned out to be
 
Re: Water Temp / Teamrush / Grounds...etc

OK,
I am pumped... I have been reading post all week, havent gotten anything done at work, But I got everything in order to do the TR and do some dedicated grounds. I am excieted to see the difference in the "Blue Buzzard".


Everybody wish me luck, and hopefully the talk we have, I'll have some postive reports and some Pics to share!

Have a great weekend,
:)
 
Re: TR, grounds, upgrades

TeamRush upgrade, super simple and amazing upgrade.
I ran grounds: module, head, block, alt, firewall, starter, I still need to run the frame & grill. But this was an amazing upgrade as well.
I did the grounds Friday night... And cranked it up and the bad idle was gone just like that! I ran it down the road and it was like driving a total different jeep. Saturday morning I completed the TR and all I can say is Wow!
I didn't know a AMC 258 i6 / 4.2l could run so good. Thank you so much for all the advice.

Next on the list:
I'm thinking about a new radiator, and maybe weber carb?

Some issues I need to address: oil leaks... And I put an aftermarket temp gauge on, I used the port om the driver side block, how much difference is in the temp from head to block?
 

Jeep-CJ Donation Drive

Help support Jeep-CJ.com by making a contribution.

Help support Jeep-CJ.com by making a contribution.
Goal
$200.00
Earned
$0.00
This donation drive ends in
0 hours, 0 minutes, 0 seconds
  0.0%
Back
Top Bottom