Weather pack connections
Jimbos76cj
Full Time Jeeper
- Posts
- 2,223
- Thanks
- 1
- Location
- St.Cloud FL
- Vehicle(s)
- 83 CJ-7.. 4" YJ springs front rear, J-10 44 front/AMC 20 rear,6 cy auto dana 300 35' bfg Done and gone!!
Ask me about my head light upgrade harness!!!
I decided with all the switches, lights and wires going to my dash to simplify future removal and istallation I would wire all my senders and wires out to weather pack connectors. While a little more pricey then the standard crimp butt connectors I can remove and reinstall as many times as id like.
Heres what Ill be using
Tools - Picked up a set of these

The blue handled ones are the crumpets and the yellow is the terminal removal tool.
Delphi Packard Five-cavity Wide-range Crimping Tool 22-12 AWG / 24-14 AWG : Amazon.com : Automotive
Amazon.com: Delphi Packard Weatherpack Terminal Release Tool: Automotive
And for connections these
Weather Pack 16 to 14 Gauge Terminal Pins - 30 pack Delphi Weatherpack : Amazon.com : Automotive
For connectors I went into my box of old wiring harnesses (I keep them for replacing burned up stock plugs if any one needs something) and was able to quickly dig up 1 - 6 bay, 2 - 4 bay and 1 - 3 bay connector pairs yess they are dirty but nothing a little dish soap, warm water and a tooth brush wont clean up. You can grab new ones from ebay, amazon, napa and a few other online retailers but Id rather reuse the ones I have as long as they are not broken or melted. I think one day next week Im going to take my sone to the JY and have a weatehr pack connector/relay scavenger hunt.

The open em you undo the clips and open the rear flap, with out the flap open you can not removed the wires.

Then use the yellow little tool to remove the old wires.. simply slide the opening over the connectors and push in. Once the tool bottoms out pull the wire from the back.

IF your lucky you will find some plugs in the un used bays of your connectors. Clean em up and keep em so that if you end up with any open spots you can use them to keep the plug water tight.


Heres the new terminals Sorry for the silver parts on my gray counter top

Next up is crimping the new wires. I stripped 1/4" of the insullation off

Place the insulator on the wire

Then place the connector on the wire making sure the big set of prongs is around the insulator plug. First crimp the wire.. with these crimpers I used the "D" slot..


then crimp the insulator I used the A slot.

Insert the terminals into the connectors

make sure the green seal is installed

If you have any open slots besure to fill em on bother sides with the plugs.

then make your connection

Make sure you give your wires a good firm tub to make sure they are seated well
If you ever need to change the wiring in the plug all you have to do is use the yellow tool to remove the terminal then add your new terminal and wire.
This is very easy to do, makes high quality connections and looks great almost pro type of install. For the few extra dollars it costs for the ternimals to me its worth it.
Heres what Ill be using
Tools - Picked up a set of these
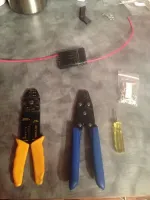
The blue handled ones are the crumpets and the yellow is the terminal removal tool.
Delphi Packard Five-cavity Wide-range Crimping Tool 22-12 AWG / 24-14 AWG : Amazon.com : Automotive
Amazon.com: Delphi Packard Weatherpack Terminal Release Tool: Automotive
And for connections these
Weather Pack 16 to 14 Gauge Terminal Pins - 30 pack Delphi Weatherpack : Amazon.com : Automotive
For connectors I went into my box of old wiring harnesses (I keep them for replacing burned up stock plugs if any one needs something) and was able to quickly dig up 1 - 6 bay, 2 - 4 bay and 1 - 3 bay connector pairs yess they are dirty but nothing a little dish soap, warm water and a tooth brush wont clean up. You can grab new ones from ebay, amazon, napa and a few other online retailers but Id rather reuse the ones I have as long as they are not broken or melted. I think one day next week Im going to take my sone to the JY and have a weatehr pack connector/relay scavenger hunt.
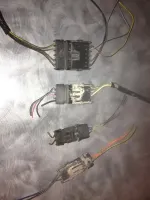
The open em you undo the clips and open the rear flap, with out the flap open you can not removed the wires.
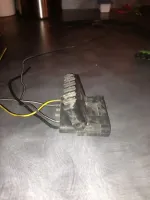
Then use the yellow little tool to remove the old wires.. simply slide the opening over the connectors and push in. Once the tool bottoms out pull the wire from the back.
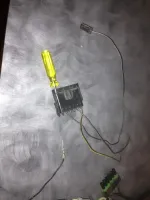
IF your lucky you will find some plugs in the un used bays of your connectors. Clean em up and keep em so that if you end up with any open spots you can use them to keep the plug water tight.
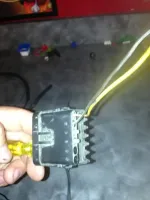
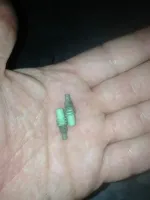
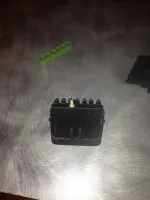
Heres the new terminals Sorry for the silver parts on my gray counter top
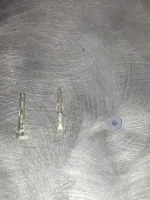
Next up is crimping the new wires. I stripped 1/4" of the insullation off
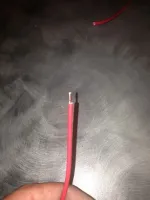
Place the insulator on the wire
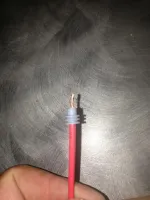
Then place the connector on the wire making sure the big set of prongs is around the insulator plug. First crimp the wire.. with these crimpers I used the "D" slot..
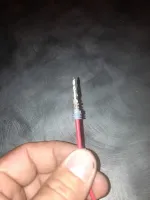
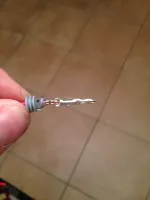
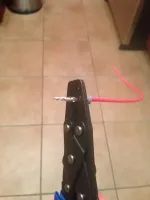
then crimp the insulator I used the A slot.
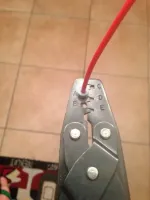
Insert the terminals into the connectors
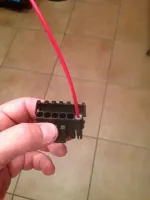
make sure the green seal is installed
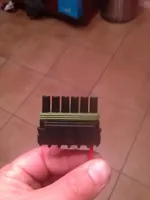
If you have any open slots besure to fill em on bother sides with the plugs.

then make your connection
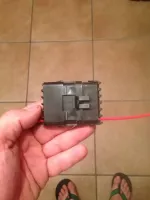
Make sure you give your wires a good firm tub to make sure they are seated well
If you ever need to change the wiring in the plug all you have to do is use the yellow tool to remove the terminal then add your new terminal and wire.
This is very easy to do, makes high quality connections and looks great almost pro type of install. For the few extra dollars it costs for the ternimals to me its worth it.
Last edited:


 . While looking over a Camaro harness for plugs I noticed it had 2 4 bay plugs that only 4 wires going in but the other part of the connection had just the green plugs in it to make "plugs" for the connections. So if I were to go that route if I ever need to add wiring all i have to do is unplug the "plug", remove the rubber plug, insert my new wire and hook it back up.. Sounds like a very good solution.