Build Thread 1986 CJ-7 Renegade : Memories

Build Thread 1986 CJ-7 Renegade : Memories
yes you got it :chug:
 
Yeah that's it !
 
Little things done recently. 79K miles

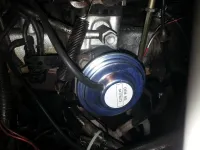
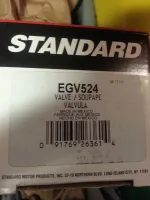
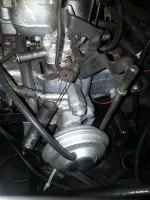
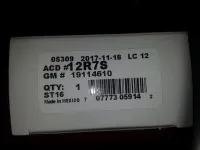
New EGR valve. I think the old one was original. Some say you should keep one on and some say block it off. I see no harm in having one on in regards to engine performance/reliability so........ Got the one for California Emissions. What's a couple more dollars right? And that is a new vac hose for it too. Never-Seez on bolts. Might have been the source of a small vac leak. Bolts were not that tight upon removal. /shrug

New One

glRMPcj.jpg

Box

vERVdMG.jpg

Old One

ebfO8uO.jpg
 
Last edited:
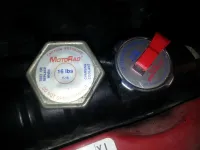
New radiator cap. 79K miles. Old one might be original? Don't know. Edit: I don't think it is after researching the brand.

Extremely minor I know but I'm killing time waiting on getting last parts for a pretty extensive brake system job comming soon! Hope I'm not boring you guys!

NOTE: I don't think the part matches the box. Not the cap I wanted but not worth hassle to return. Get a lot of parts from rockauto.

Old one on left.

s5c36pT.jpg

Box

ypVzcTO.jpg
 
Some notes on various fluid topics after doing extensive research and all this applies for the most part to original equipment recommendations and for my Jeep specs. Not going into detailed reasons why unless someone asks:

Engine Oil:

Shell Rotella T-4 Conventional 15W-40 Heavy Duty Diesel. Do NOT use synthetic for oil changes. And of course use quality filters.

Coolant:

ZEREX G-05 50/50. ONLY use HOAT coolant and not recommended to add anything to it.

Differential Oil:

Valvoline 80W-90 Conventional Gear Oil w/ Limited Slip GL-5 #VV831. Do NOT use synthetic for oil changes. My rear is a Dana 44 .

Transfer Case Oil:

Same as differential. Valvoline 80W-90 Conventional Gear Oil w/ Limited Slip GL-5 #VV831. Do NOT use synthetic for oil changes. My Transfer Case is a Dana 300 . My drain plug was all routed out and was hard to remove. I removed it by slightly tapping on a socket and luckily it bit into it enough for removal. Don't bang on it too hard. Don't want to mess up threads on Transfer Case ! Took some research to finally find the specs on it. Replaced it with a Dorman plug #090-026 1/4" 18 NPT however it does not have the magnet on it to trap metal bits on it. I can live with that for now.

Power Steering Fluid:

Use ONLY Dextron II or III compatible fluid. Do NOT use any Dextron compatible fluid higher than III. Something different about it. Do NOT use synthetic either. Because of all this I could only found locally CarQuest ATF #CQ420 that fit the bill.

Transmission Fluid:

Redline MT-90 75W90. GL-4. No one locally carried this or anything just GL-4 rated. Had to order. Only use GL-4 rated. Something about sulphur compounds in GL-5 not being good for brass parts on these older transmissions. I have a T177 4 speed manual transmisstion.

Belts: (manual Transmission , manual brakes, power steering, no A/C)

GATES 7430XL for alternator.
GATES 9465XL for power steering.
 
Transmission Fluid:

Redline MT-90 75W90. GL-4. No one locally carried this or anything just GL-4 rated. Had to order. Only use GL-4 rated. Something about sulphur compounds in GL-5 not being good for brass parts on these older transmissions. I have a T177 4 speed manual transmisstion.

Interesting you have a T177 - I have one in mine as well. According to Novak's website, they were used in the J series trucks, not the CJ's..... but who knows. Since mine was assembled from innumerable vehicles, I would have no idea whether it was factory or not. I always default to "not original" regarding anything on mine...... Good info here - Thanks!!
 
Interesting you have a T177 - I have one in mine as well. According to Novak's website, they were used in the J series trucks, not the CJ's..... but who knows. Since mine was assembled from innumerable vehicles, I would have no idea whether it was factory or not. I always default to "not original" regarding anything on mine...... Good info here - Thanks!!

Yes, I saw that in Novak's website when I was looking at more closely and researching exactly what was on it after the Jeep was in my driveway. Confused me too because I have also found some info that said it was available on CJ's. Mine is very factory. I think the only thing I found NOT factory so far (other than very minor minor things) was the carb. When I bought it it had a Carter BBD w/o the stepper motor and it most definitely has wiring for one and given its year it would have had one.

So I would say a CJ could definitely have a factory T177 Transmission .

But for some reason I have the urge to check again on mine! LOL
 
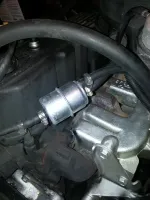
New fuel filter was put on 8/3/17 at 77100 miles.

CarQuest #86040

PO had a clear plastic fuel filter on with no return line, Return line was plugged off.

I put on a new filter with the return line reconnected. Seemed to run better but may have been my imagination!

Remember to put the return line on top!

New hoses for fuel and return line after the filter. Going to put new ones on before fuel filter soon.

Fuel - 5/16"
Return - 1/4"

q3M6PZi.jpg
 
Now this is interesting.....

saKekcY.jpg

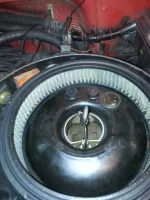
Focus on the two black rubber plugs. Those are plugging the pulse air system holes in the air cleaner. If you have done the Nutter bypass (which was done in mine but no components/wires ever removed from the bay) then the pulse air system is dead without the computer and no air goes down these holes.

All fine and dandy UNLESS the check valves on the pulse air system don't hold! Then you have exhaust blow back into the air cleaner housing and into your carb. NOT good. Water vapor, crud, etc into your carb. Notice the air filter can't stop that because the holes are inside the ring.

With the engine running you could tell the air was pulsing INTO the air cleaner housing and especially hard on one of them. That means bad check valve. Since the pulse air system won't work anyway once the nutter is done, then I just put rubber plugs in them. It's dead anyway without the computer. You could just remove the whole pulse air system but I figured no harm in letting it just sit there. Besides, if I ever wanted to totally restore it, computer and all, then it's there to do so and not have to hunt for parts/what it looks like, etc.

Who made me investigate into all this? I once removed my air cleaner shortly after I changed the air filter and there was water droplets and crud between the air filter and carb. I said what the heck? How did this get past the new filter? Did some digging.

Doing this might help with clogged idle tubes issue but that's for another post.
 
In case yall think I'm some kinda guru with years of experience, I'm not and don't! LOL

I just know how to surf the internet real well. Wife calls me "Master Searcher" Haha

Got a lot of good info here: Table of Contents
 
Team Rush ignition upgrade post:

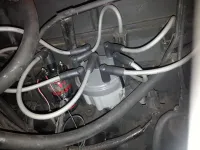
Wires #WR4050
Dist Cap #F2104G
Rotor #F953
Adaptor #F960
Spark Plugs Autolite 985 gapped to .045 using copper anti-seize.

Also installed MSD Blaster High-Vibration Ignition Coils 8222

Couldn't really tell if it ran better, but it couldn't hurt and felt good putting these upgraded items on. Everyone swears by it so who am I to question doing it?

agL1Lpj.jpg
 
Installed new master cylinder. No issues. Make sure that cotter pin in on connecting push rod to linkage!

Use only DOT 3. Do NOT use synthetic.

tzp5HsL.jpg

4dSJDFG.jpg
 
Here is a pic of the brake light switch. It's the ribbed object with the white looking disc. When messing with linkage you may push the switch back and causing it to stay on when when pedal is in rest position. Switch out and the brake lights come on. Switch in and they go off. This happened to me.

You fix it by just pushing the whole assembly towards the linkage tab when pedal is at rest. Those ribs are flexible plastic and the assembly is just held in position by friction. I just used a needle nose pliers to squeeze the assembly forward and bring it close to the linkage tab.

Bki5chq.jpg
 
Changed out fuel and fuel return hoses (just before fuel pump and right after fuel filter)

Fuel Line - 5/16"
Fuel Return Line - 1/4"

Might install filter before fuel pump but that is for another day.
 
This will interest some of you.

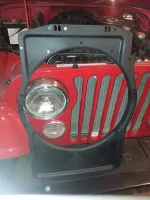
Installed radiator fan shroud w/o heavy duty cooling (HD). My temp would go slightly up at a stop so I decided to install one. It was a little pricey IMO (90$+) but figured it was worth it to lessen the chance to overheat the engine in stop and go traffic. Where I live traffic sucks.

How did I know that I don't have HD cooling? Only have 4 blades on the fan.

Fit perfect. Didn't even have to take off the upper radiator hose but took me a few minutes to figure out how to slide it in. Only 4 bolts and I did one side at a time to prevent an accident with the radiator if I completely unbolted it.

SCpyNrx.jpg

GOLJBiD.jpg

After install:
hDn3yvc.jpg
 
Last edited:
PLZ move your fuel filter from it's OEM location. This was a known source for engine fires.

4 blade fan is not OEM. 7 blade and a fan clutch was OEM.
How many rows does the radiator have? 2 row=STD-3 row=HD
LG
 
Thanks for fuel filter location tip! Any suggestion on where to put it?

This chart says having 4 blades can be OEM. I have a standard cooling package. AMC 258 i6 / 4.2l , manual, no AC, 4 blade fan, no clutch, and no shroud. Well now I have a shroud! LOL And there is no 3 rows of tubes as OEM. Am I not reading it right?

cooling.jpg
 
Finally finished replacing all vac hoses! Working on and off during holidays.

Used zip ties on all connections on the advice of Lumpy Grits (Thank you). Every single one!

Also installed, in strategic locations, plugs to prevent any vac leaks on dead systems that resulted from doing the Nutter bypass. I used small pieces of cut metal rods that were just slightly bigger than the tubing and I filed any sharp edges off from the cutting so it wouldn't damage the rubber. You can find these rods in all sizes at Lowes/Home Depot.

For those that want to fool visual inspections, you can't tell they are in there at all. You almost can't even feel that it's something other than the plastic connectors/barbs because they are right next to them. I only needed 3 plugs to kill everything relating to the computer on a stock system.

I also put new tubing/zip ties on these dead systems to make everything look the same. LOL OCD I know!

Slightly re-routed some of them to make access easier/neatness/easier to trace. Took my time. Looks good and I am very satisfied with how it turned out.

Feels good getting this done and eliminating potential sources of future vac leaks.
 
Last edited:
Thanks for fuel filter location tip! Any suggestion on where to put it?

This chart says having 4 blades can be OEM. I have a standard cooling package. AMC 258 i6 / 4.2l , manual, no AC, 4 blade fan, no clutch, and no shroud. Well now I have a shroud! LOL And there is no 3 rows of tubes as OEM. Am I not reading it right?

cooling.jpg

never really gave much thought to the position of the fuel filter til Lumpy said something but it sure is a bad one. I would move the filter close to the fuel pump so that it is not on top of the exhaust manifold. just use some rubber hose to make up for the missing filter.

not sure about what was factory or not with the fan, a seven blade thermostatic would keep you cooler, looking at the pictures I cannot tell but you want the edges of the fan blades in the shroud and the fan should be 1 inch away from the radiator for maximum efficiency, you can buy shims and spacers from the parts store to move the fan blades closer to the radiator so it will draw air through the radiator better.

I like the plugs in the air cleaner but make sure they are in the holes really good, one of them coming out could make for a bad day

keep on sharing I am loving the thoroughness you are gong into
 
Yes, I have been thinking about how/where the best place is to move the fuel filter because of info from Lumpy Grits about the fire hazard (thank you). I will probably use hard fuel line and some brackets to keep it level and firmly out of the way.

I didn't measure how far the blades are from the radiator. I'll have to do that. Thanks for the tip of shims/spacers to move the radiator closer.

The plugs in the air cleaner are in there really good! I check them. I might just put plugs in the inlet tubes where the hoses go over to avoid them going down the carb like you said! So instead of the risk of them blowing out, it will be impossible for them to blow in. In fact I'm sure that's what I'm going to do. Thank you for the advice.

Thank you for your kind words. I'm sure it is mundane and old hat for some of you more seasoned Jeep CJ owners but I hope I am helping some others somewhat in sharing.

And please, everyone keep posting advice/tips on what I'm doing. I really appreciate it.
 

Jeep-CJ Donation Drive

Help support Jeep-CJ.com by making a contribution.

Help support Jeep-CJ.com by making a contribution.
Goal
$200.00
Earned
$25.00
This donation drive ends in
Back
Top Bottom