Build Thread 1986 CJ7 Rebuild - Chasing my youth

Build Thread 1986 CJ7 Rebuild - Chasing my youth
So after the joys of getting her fired up, now time to take 2 or 5 steps backwards.

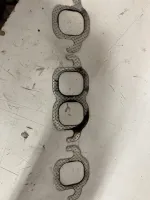
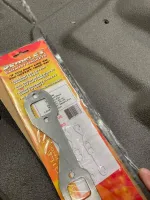
First, definitely had a bad exhaust leak on cylinder 4, some new Remflex gaskets on order.
ba0b5c83a56ab974d5069bd38f7917a7.jpg

No pics needed, but replaced my alternator cause either mine was bad from the start or it was when the bracket that I made to hold my fuel lines on the alternator mount slipped down and stopped the alternator pulley from spinning cooked it . Bracket ground down to avoid this again and alternator replaced.

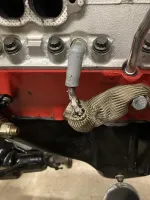
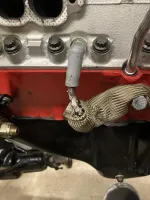
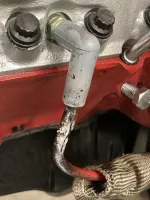
Knew my plug wire was super close to my header on cylinder 5, but when I pulled the header found this
782169cd3f19385224bf7cb5489343ff.jpg

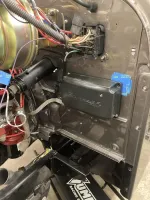
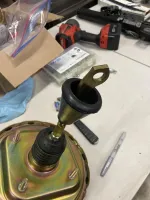
No pics cause just didn’t want to, but was over engineering mounting my Sniper ECU on my fire wall and snapped of a tap flush on my perfectly pained firewall . No idea how I’m going to get that one out.

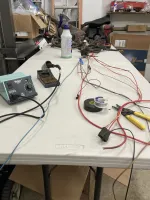
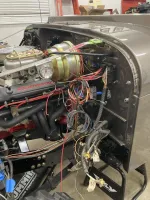
Lastly, got my replacement harness from UltraRunner and it’s in great shape, so began prepping that to swap in, so that’s a plus, but have to undo the wiring already done (but that at least was planned).
2c4e86faa5ea4695675c1c280f74bfec.jpg
b1209f8eb13e2610069af5d4583973a4.jpg


Sent from my iPhone using Tapatalk
 
Been wonder where I'm going to mount my Sniper ECU when I do it.
 
Yeah, a lot of folks were saying inside the cab, but I didn’t see a lot of easy places without significant fabrication of brackets. Fits good here, I just got ahead of myself. First was going to through bolt it with 10-32’s. But didn’t like how it was a little behind the ebrake assembly, but easily could have gotten an open end on a nut. Then said I’d tap them and make it a cleaner look from the inside, well at that point the hole was too big for a 10-32 tap, didn’t want to do what I feel is weird 12-24 size, so in a moment of let’s over complicate it, I tried to tap 1/4-20. Hole was just a size too small and snap! So now once I figure out how to get the tap out, just going to through bolt the 10-32’s abs send it.

8c65482b8b31c2f966c486ae87d5c835.jpg


Sent from my iPhone using Tapatalk
 
Man, what a bunch of forward and backwards in the last couple of weeks. Got my new exhaust gaskets, way thicker! Haven’t tested yet, but their installed. Also replaced #5 plug wire and ran a different way, hopefully this works. So tight with the header.

8ecd2fb6b2f9937fbfc09320bf480c05.jpg
1ede229979737d911197830740b7b1b0.jpg

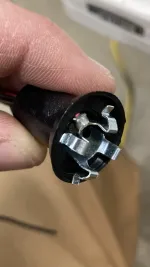
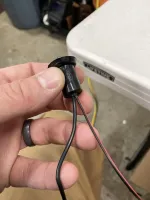
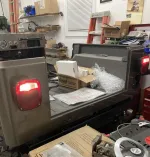
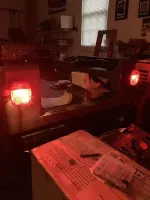
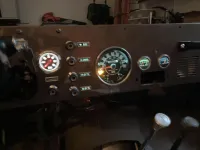
Replaced my headlight switch as the dimmer spring was all tore up and causing dash light issues. Replaced the remainder of my bulb sockets and noticed that they grounded terrible against the gauge housings, flickering at the slightest touch. So got some real thin wire, heated up the sockets to make them stretch so could pull ground wire through same hole and then soldered dedicated grounds right to the sockets.

f2e11dd9def98e3c70ae6691a0bc68c7.png


8c02e2b26af40d4628835a31397891a8.jpg

Pulled the column in and out three times cause didn’t realize I was moving the firewall grommet. So found place online, same grommet as advertised for an older Chevy. Then find the ignition plugs on top of the column are binding with the brake pedal (don’t think this is a correct CJ pedal and assembly, came with Jeep). So after tons of shifting, bolt length changes, and then spacers, free pedal and we have all lights!

3938e148e380d3d371d282f22a3aa720.jpg


c3c7bb8308d959d77bc0c4d52a485b4b.jpg
62b2bf5ca0261089e40078db7893a036.jpg
aca0a6c6cf2ed771b6b382fcfff71ec7.jpg

Was looking at the exhaust as I was tightening back up after changing gaskets and noticed what looked like a pin hole at the O2 bung. Grabbed some .30 welding wire and wire enough, my exhaust guy didn’t get a full seal, so of course real mother to get my welder nozzle in there, but laid some good bird poop and sealed it up.

Now the bad, the Transmission pan is leaking super expensive Amsoil fluid out of the gasket, the new In-line Tubing master cylinder brake lines are no where close to fitting, and made up some spacers to drop the tcase an inch for drive shaft angle and only netted 3 degrees, so now at 27 degrees vs 30, still I think too steep. Even with cardan shaft, looks sketchy and that’s with 6 degree shims in the rear.


Sent from my iPhone using Tapatalk
 
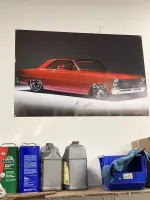
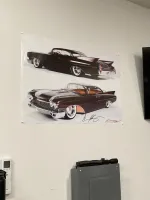
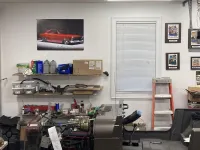
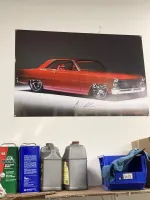
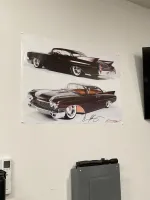
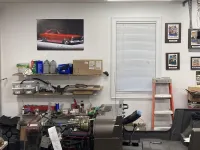
The biggest success of the weekend was hanging up some new garage swag and it only took 1 time.

1b40394459f3bc30d9ea9381008b1889.jpg
b2842c28938d6edcda3106a8a3387cbe.jpg
9fce4262583a0e728dc38c30a72c9d86.jpg


Sent from my iPhone using Tapatalk
 
I can see how that wire got roasted.
 
Beautiful work, sure looks like your gauge cluster is way brighter than mine


Sent from my iPhone using Tapatalk
 
I can see how that wire got roasted.

Yeah, I originally ran it behind the header. The problem is that there was no way to snug the wire real tight back against the block. There was a 1/2” threaded hole by the back by the dip stick. so I drilled out a big bolt so that I could thread a smaller one into it and use a p clamp to hold the plug wire back toward block, but because the hole was not directly behind the plug it didn’t really work.
05f38aa3c611a8ac475a8fc9abb628c7.jpg

be2fe7bd4db2fbf56c32c9703f21d36e.jpg


Sent from my iPhone using Tapatalk
 
Beautiful work, sure looks like your gauge cluster is way brighter than mine


Sent from my iPhone using Tapatalk
Thanks Gert, your build was awesome and I read every single post. You killed a lot of work productivity for me!

I did LED bulbs as well as new sockets.


Sent from my iPhone using Tapatalk
 
Thanks Gert, your build was awesome and I read every single post. You killed a lot of work productivity for me!

I did LED bulbs as well as new sockets.


Sent from my iPhone using Tapatalk
It was a good entertaining read.
 
Wow, one thing I thought about as I read all the epic build posts of the past, I wondered what my biggest break away from the project was going to be. I feel like 8 weeks has to the longest.
So after I got the garage cleaned back up and ready for wrenching, I needed to do something on the Jeep.
I needed to fit my new Borgenson shaft and drill my new set dimples.

81253bc93c0e9fef95b7fe6c2a2725d6.jpg
ca99bce0cac3417453c05ab926c40785.jpg

1ef3d3f279d32ecf9200cbd4affeec23.jpg
1ddb997993f0d1f0997f190454df508f.jpg


Sent from my iPhone using Tapatalk
 
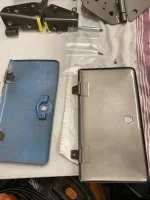
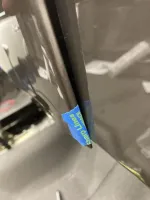
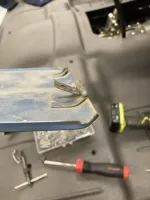
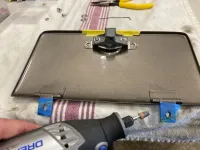
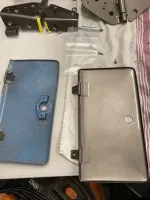
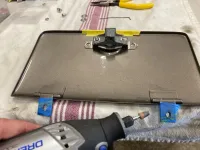
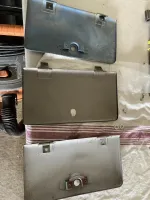
Maybe one of the most frustrating experiences so far, who would have thought doing a glove box would take a couple weeks. Heads up to those using after market glove boxes, if you want to use the OEM lock, make sure you get one that has the mounting tabs, ask me how I know. Two painted doors later.

0dc5c4a8b6eff0d27c9dbc08518c9120.jpg

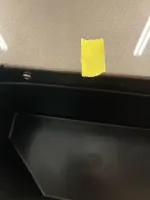
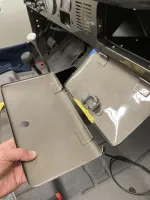
Then it seems that I’ve looked at two OEM glove boxes and they are either notched or were ground by previous owners because my new ones were hitting my new dash. So don’t know if the DD dash holes are too far back or if it’s the aftermarket doors.

78883b9d9f0cec0d4d37301aaf65fe74.jpg
92eb93c716d0d01fecea3fa35fbeb996.jpg

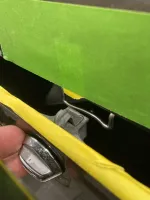
So I ended up having to oblong the freshly painted mounting holes and then of course the latch holes didn’t line up.

0dea9cb9d1deb0aaecbda33980022253.jpg

3915f38ede34e8463d919e3fae004b4f.jpg

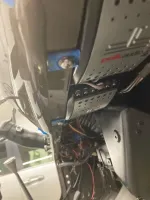
The middle of the tape is the center of the lock. Holes are way off. So had to drill a new hole and then finesse the bracket with a hammer.
c5aeee1d6a1bd210f60f924982da61a3.jpg
30b28568f4a1f0f32ef1a6422d231699.jpg

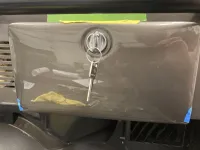
Finally after all the fighting, getting new keys made for the lock, it’s finally all in.

5d72b7b5dc1b886f831f6dc441429cf8.jpg


Sent from my iPhone using Tapatalk
 
What did you use for the box/container part ? Not the door.
 
Belizean, if remember correctly, it’s a plastic Crown one. Both my cardboard ones were shot.


Sent from my iPhone using Tapatalk
 
Yea that’s what I used about 30 years ago.
 
0dc5c4a8b6eff0d27c9dbc08518c9120.jpg

Then it seems that I’ve looked at two OEM glove boxes and they are either notched or were ground by previous owners because my new ones were hitting my new dash. So don’t know if the DD dash holes are too far back.
3915f38ede34e8463d919e3fae004b4f.jpg

The middle of the tape is the center of the lock. Holes are way off. So had to drill a new hole and then finesse the bracket with a hammer.

Sent from my iPhone using Tapatalk
Weird, I've got an '86 and my OEM glove box door looks like the one on the left in your first photo (blue) and the painted one in your second photo. I used the Crown plastic insert box.

IMG_5974.jpg
 
Mine 84 original is like that blue. Wondering if the other is older of after market
 
The biggest success of the weekend was hanging up some new garage swag and it only took 1 time.

1b40394459f3bc30d9ea9381008b1889.jpg
b2842c28938d6edcda3106a8a3387cbe.jpg
9fce4262583a0e728dc38c30a72c9d86.jpg


Sent from my iPhone using Tapatalk
That 1960 copper clad Cadillac from Kindig It is my favorite restomod.
 
The tan one is a recent Kentrol. What I was trying to say was be aware if you buy and want to use your or any other original lock. Otherwise you need to get the Kentrol or someone else’s after market button, which I don’t think lock.

I bought the Kentrol because it was cheaper than a couple hours of body work on my two OEM ones. But it in the end it was cheaper. But the jokes on me because painted the first a Kentrol and didn’t realize my mistake till when I went to put the lock in. Then I looked at buttons, didn’t like the looks, so I paid attention and bought another Kentrol with the bracket (very subtle in part description, not in title) and then had that painted.
Of well, did the same with tailgate hinges, painted and didn’t realize that someone had used aftermarket and they weren’t the countersunk OEM hinges. So found some OEM ones and paying to pint those now.

eac21481f8edb65dbf37322a028b6c60.jpg


ee210c81e6a7587e2fafd0976c14a02a.jpg


Sent from my iPhone using Tapatalk
 
So it’s been summer time and life so my days have been Limited to maybe an hour a week. When the wife wants to go out on the boat, you take her.

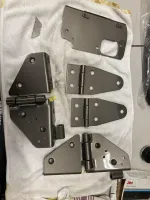
So got a bunch more hardware back from the painter.
88abc188291936082e842f41e0016459.jpg
dca5a338e71c74b4ed26174b69d94533.jpg

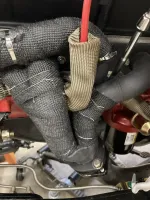
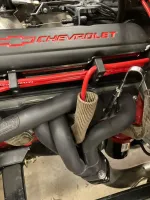
Also got my header wrap on trying to fight the melting plug wire. I am upset that fishing all the safety wore through the tubes must have scratched some of the ceramic coat off. Been super humid here last two weeks and got some rust starting, but oh well, not a show rig.

7abfa7af5e8b9cc41eb28cc34eebcfa3.jpg

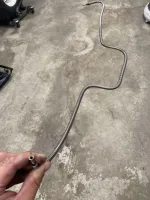
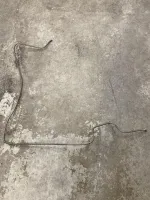
Next big task was getting the brake system bled. Pro tip, don’t start this at 7:00 at night if your not sure on your flares. Bench bled my mc and mounted on the Jeep. Cracked the bleeders and went inside took a shower and waited to see what happened on a gravity bleed. Returned 30 min later and oh yeah, it’s gravity bleeding super corrosive brake fluid out of all my flare fittings! 2 hours of spraying simple green and trying to reflare ends, I disconnected lines and tried to plug them. Over the next two weeks, went through 3 different tools before I got one that I could make work. Had to take several steps backwards and remove the grill, radiator, and steering shaft to make a new passenger side front line.

Grrrrr, after crappy tools and learning curves, finally got some decent flares.
97bbee5d67504a937edca59834678f55.jpg
182053075462dc5323666edcd4c976a7.jpg
b6e3d4b49e3dc6c4c2408e6b06bba92b.jpg

Borrowed a vacuum bleeder and got a friend over and got a really nice pedal, very quick. Adjusted the ebrake and that is one step closer.

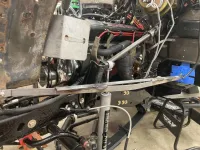
Tonight, decided to fab up some brackets to temporarily hold the mock up grill in place to get a first ride. Man, with all the finish work and frustration of fit and finish, I forgot how much fun it is to just cut, drill, bend, and weld metal.

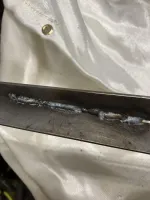
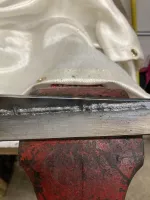
Also forgot how much practice I need with the welder. Some crappy bird poop to start, turn up the heat, slow the feed and some snail trails that are a little better. Again, just temp brackets to get her rolling and shake down before mounting the fenders permanently.

7f4db05df6b5f8a7e078457fccceb969.jpg
f467e753129453f310699b6e4ef0e9df.jpg
990f1c281cc3c1b952629fa7a5076c1b.jpg


Sent from my iPhone using Tapatalk
 

Jeep-CJ Donation Drive

Help support Jeep-CJ.com by making a contribution.

Help support Jeep-CJ.com by making a contribution.
Goal
$200.00
Earned
$25.00
This donation drive ends in
Back
Top Bottom