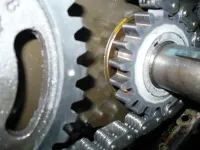
232 still wont run in my 77 CJ7 ???

232 still wont run in my 77 CJ7 ???
It can happen, especially when the new cap is in the hand and the old cap is still on the distributor. Accidentally turn the new cap 180 degrees in your hand & you've started a whole new ballgame that looks just like this.

Not a prob. All we gotta' do is figure out which tower really belongs to the #1 spark plug and plug that one in. From there, just follow the standard firing order all the way around & it'll come up right.
 
When you get to it , please check all the wires and see if they go to the plugs in the proper sequence even though 6 is now 1.:cool:
 
Nothin' at all half-axed about moving the plug wires to get it right... turn the distributor and which way will the vacuum advance point? It SHOULD point toward the front of the motor. You can pretty much pick the position of the distributor according to your whim, long's the wires all go to the right towers on the cap.

The vacuum advance right now its pointing towards the front of the motor, so before i put the timing cover back on should i turn the crankshaft sprocket from where it right now 2 full turns and then see where the dizzy is sitting then?
 
Nothin' at all half-axed about moving the plug wires to get it right... turn the distributor and which way will the vacuum advance point? It SHOULD point toward the front of the motor. You can pretty much pick the position of the distributor according to your whim, long's the wires all go to the right towers on the cap.
I am thinking about the next guy that has the misguided idea that the little 1 on the top of the cap has some meaning.
 
I am thinking about the next guy that has the misguided idea that the little 1 on the top of the cap has some meaning.

You guys have started to confuse me ha, and i thought the little 1 on the top of the cap did have a meaning, so what do you guys think i should do right now while i have timing cover off and the new timing set on? Like Tim said, while the two timing marks are pointing at each other it is on the COMPRESSION STROKE, because thats the only way the CAMSHAFT sprocket will go on correctly, and it is on correct right now and tight along with the crankshaft sprocket, if you want i can always snap a picture, to show you the dizzy with the timing marks lined up and the timing gears to, but the picture in my previous post is the old gears lined up and that comes back to Tim's comment as they only go on one way and i took them off and put the new ones on the same way as the picture shows in the diagram and the picture i took. So at this point what should i do? Rotate the camshaft sprocket two full turns and see where the dizzy is? or put it back together and move the dizzy itself? or what?
 
Please take us some good quality pic's. from close up to a farther away view. I think it will help us, it will help me anyway.
 
If you turn the camshaft one full turn, it'll turn the distributor one full turn, too, and wind up exactly where it is now - the distributor is always in agreement with the camshaft, while the camshaft always turns exactly half as fast as the crankshaft.

I've seen all sortsa' goofy markings on distributor caps, some of which bore some connection to reality & some of which didn't. I've also seen LOTS of distributor caps with no markings at all. I'm thinkin'... if we rotate the distributor 180, won't the vacuum advance bang into the side of the motor?

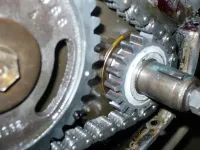
Just for just-in-case, let's look at one photo of the two sprockets with chain, complete view so we can see the whole picture. I'm pretty sure it's right, though.

Then... I vote we pick the distributor tower that the rotor points towards and put #1 spark plug wire on that tower, then work around the firing order from there. If it makes anyone feel better, we can scrape the "1" off the distributor & put a new one on with a White-Out pen. :)

EDIT: For reference' sake, I've also got two I6s out here I can line up to TDC1 and pop the distributor caps off & take pictures of where the rotor points.

EDIT II: Oh, for beans sake. If we rotate NOT the WHOLE distributor, but only the SHAFT, 180 degrees... it'll plug right back in & engage the oil pump and point toward #1 tower, won't it?
 
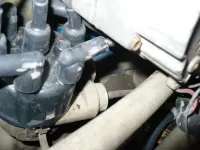
I would like to see where the vac. adv. is pointing now.
 
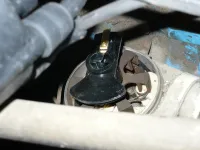
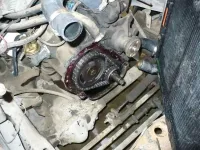
Here are some of the 5 best pictures i took, let me know what you guys think i should do? should i start putting the engine back together? then turn the distributor 180 degree's and try to start it? there is a picture of the vacuum advance and it is pointing towards the front of the engine.
 

Attachments

  • Imported Photos 00001.jpg
    Imported Photos 00001.jpg
    90.5 KB · Views: 337
  • Imported Photos 00002.jpg
    Imported Photos 00002.jpg
    85.1 KB · Views: 301
  • Imported Photos 00003.jpg
    Imported Photos 00003.jpg
    91.5 KB · Views: 311
  • Imported Photos 00004.jpg
    Imported Photos 00004.jpg
    100.6 KB · Views: 355
  • Imported Photos 00006.jpg
    Imported Photos 00006.jpg
    87.2 KB · Views: 272
EDIT II: Oh, for beans sake. If we rotate NOT the WHOLE distributor, but only the SHAFT, 180 degrees... it'll plug right back in & engage the oil pump and point toward #1 tower, won't it?
Bingo!!

Corey, I have one more question just to confirm what I think I know?
Is the plug wire that is attached to the spark plug in the #1 cylinder in the tower that is in the #1 position on the dizzy cap? Or is the #1 plug wire attached to the tower in the #6 position on the cap?
 
It looks like the small gear should have the mark at 12:00 and the large gear should be at 6:00 and the picture looks like it is at 6 and 6 is this right??

Quote:
Originally Posted by TDHofstetter
You won't need to disturb the water pump.

When you get the timing cover off with the motor at TDC compression stroke, here's exactly what your timing chain & sprockets should look like:

wol_error.gif
This image has been resized. Click this bar to view the full image. The original image is sized 698x582 and weights 81KB.
2mre4q9.jpg

Now... if you're at TDC between the exhaust & intake strokes, the smaller crankshaft sprocket's timing mark will still be at the same position, but the camshaft sprocket's timing mark will be diametrically opposite - it'll be pointing up to the 8:00 position instead. You'll want to roll the crankshaft over 360 degrees (one full turn) if that's the case - then the camshaft sprocket will be lined up correctly again.

If the chain has jumped one tooth, it'll be impossible to get it all lined up as in the picture - the camshaft sprocket will have rotated 10 degrees per tooth jumped. It's REALLY UNLIKELY that it'll have jumped more than one tooth, 'cause once it jumps a tooth it starts running like hammered :dung:.

So... your goal will be to get the timing mark on the smaller CRANKSHAFT sprocket to be exactly in a straight line drawn between the center of the crankshaft and the center of the camshaft. That is absolutely, positively, the position you want, regardless of anything else - camshaft, distributor, damper, anything.

At that point, the timing mark on the larger camshaft sprocket should be ALSO on that line, the straight line between the center of the crankshaft & the center of the camshaft. If it's not, the chain has jumped a tooth... but that's why we're here, and after we get the chain off we can rotate the camshaft to where it NEEDS to be if it's not there already.

So... now that we've got the camshaft positioned & the chain & sprockets off, we hang the new chain around the new sprockets as best we can so that the timing marks are pointed towards each other just like in the picture again. We put the whole rig together on the crank & camshaft ends, verifying once more as soon as they'll hang there by themselves. If we're a tooth off, it'll be pretty obvious. If we're not, we finish putting 'em on.

Once they're fully in place, we can relax about not disturbing the engine and rotate the crankshaft around to this position:

wol_error.gif
This image has been resized. Click this bar to view the full image. The original image is sized 729x594 and weights 82KB.
2usud80.jpg

That's where we can count the chain teeth. Go ahead, count 'em in the picture - there's 15. That's exactly what yours needs to look like. If it's anything else, we've gotta' do it again... but that's what it's gonna' look like 'cause you pay attention to detail, right? :)

Now that it's there & verified, it won't hurt to squirt some clean motor oil all over the chain with an oil can so it gets a good start on life. It's probably already lubed when it arrives, which accounts for the condition of your hands right now... but it can't hurt to add a little more good wet oil.

That's it - chain's replaced, valve train's timed. Time to get the timing cover & fan back on.


Read more: http://www.jeep-cj.com/forums/f2/232-still-wont-run-my-77-cj7-3934/index10.html#ixzz0j2pHaFui
 
The plug wire that is attached to the #1 spark plug from the number one spot is attached to the cap on the number one spot also, so yes it is.

Mine looks identicle to the diagram posted above, its just very hard to see the timing mark on the smaller crankshaft gear because it isnt white, my camshaft sprocket is pointing at 6 and my crankshaft sprocket is pointing at 12 so it is 100% identicle to the picture. But if you look at the pictures that i posted my Dizzy is pointing 180 degree's opposite of the way it should be, because my engine is timed like the picture and description says and the dizzy is pointing away from #1.
 
Last edited:
I am going to suggest that you do as Tim suggested and pretend that the #6 tower is the #1 tower and wire the plugs accordingly, make the engine run and we will reset the dizzy another day, like tomorrow , maybe.

The #1 on the dizzy cap is what is called a “convention”. This is like a red traffic light you know to stop and when you lift the turn signal switch you can expect that the passenger’s side turn signal will flash. The convention was ignored some where along the way and you got caught by it. The #1 wire lines up with the #1 tower and the #1 on the cap so the mechanic, in this case you, won’t have to find top dead center compression just to do a tune up and check the timing. I bet it is interesting to put timing light on the #6 cylinder and expect to get a valid reading. You have done well with this project. Ataboy.:cool:
 
It looks to me like your valve timing (sprockets, chain) is exactly as it should be, and the front of the motor's ready to be buttoned back up.

Now - as to the distributor - your choice. Either (a) swap each pair of plug wires at the distributor cap or (b) pull the distributor, rotate the shaft 180 degrees & plug it back in, then retime the ignition. Just to triple-verify, you could hook up your trusty timing light after you get the front of the engine buttoned back up and "try" to time it... as the ignition now is, you shouldn't be able to see the timing mark at all with the timing light connected to #1 plug wire, but if it's connected to #6 plug it'll appear to time correctly.

WHILE WE'RE HERE & TALKING ALL THIS THROUGH... let's verify one more thing. #1 spark plug is the FRONTMOST one, nearest the radiator. The REARMOST one, nearest the passenger compartment, is #6. Just so everyone's dead sure. :)
 
Well all looks good in the chain world.
I just want to know COREY, is how did it ever run like this to begain with.
Is IO right about the UFO's :eek:
I do have to agree with IO on turning the dist. so #1 is where #1 belongs.
 
I am going to suggest that you do as Tim suggested and pretend that the #6 tower is the #1 tower and wire the plugs accordingly, make the engine run and we will reset the dizzy another day, like tomorrow , maybe.

The #1 on the dizzy cap is what is called a “convention”. This is like a red traffic light you know to stop and when you lift the turn signal switch you can expect that the passenger’s side turn signal will flash. The convention was ignored some where along the way and you got caught by it. The #1 wire lines up with the #1 tower and the #1 on the cap so the mechanic, in this case you, won’t have to find top dead center compression just to do a tune up and check the timing. I bet it is interesting to put timing light on the #6 cylinder and expect to get a valid reading. You have done well with this project. Ataboy.:cool:

Well ok then thats all i was waiting for was one conformation from a few of the many guys i know can give me a dead straight answer :) especially after looking at my pictures, time to go put everything back together then grab my chiltons and start switching all the plugs across from each other.

Tomorrow would be a good day to do the Dizzy, my so lucky week takes a turn for me on thursday, i have to go get my other two wisdom teeth pulled :mad: because the navy didnt pull those ones. But i got a job today at a landscape place and could get another job at a warehouse till i start school this fall for diesel technology :)
 
Well all looks good in the chain world.
I just want to know COREY, is how did it ever run like this to begain with.
Is IO right about the UFO's :eek:
I do have to agree with IO on turning the dist. so #1 is where #1 belongs.

It ran great before all this stuff, i could not tell you how the rotor turned 180 degree's :confused: my dad took the old one off and put the new one on, so it could be possible that the rotor wasnt down tight enough?:confused: i didnt take if off so.. it isnt my operator error
and Tim how would I retime the ignition after moving the dizzy?
 
Last edited:
It ran great before all this stuff, i could not tell you how the rotor turned 180 degree's :confused: my dad took the old one off and put the new one on, so it could be possible that the rotor wasnt down tight enough?:confused: i didnt take if off so.. it isnt my operator error
and Tim how would I retime the ignition after moving the dizzy?

Lets have a really good look at that rotor!!:cool:
 
It ran great before all this stuff, i could not tell you how the rotor turned 180 degree's :confused: my dad took the old one off and put the new one on, so it could be possible that the rotor wasnt down tight enough?:confused: i didnt take if off so.. it isnt my operator error
and Tim how would I retime the ignition after moving the dizzy?

Once we get it confirmed running, here's whatcha' do: Loosen (actually remove) the bolt holding the distributor in place. Note which direction the distributor is pointing. Unplug the vacuum advance hose, pop off the distributor cap.

Lift up on the distributor, slowly. The rotor will rotate as it lifts, as the gears disengage at the camshaft. At a certain point, the rotor will stop rotating - the gears have cleared each other. Stop there.

Now hold the distributor at that height with one hand while you turn the rotor 180 degrees (either way) with your other hand.

Lower the distributor again with the rotor pointing the new direction. It'll smoothly engage the gears again, and the oil pump's drive. When it's fully bottomed, bolt it back down again, just tight enough to adjust it for timing. Plug the vacuum advance line back in, snap the distributor cap back on.

Don't forget to NOW have the plug wires plugged back in according to the "1" mark on the cap. That'd be correct now.

From there on out, time it with a timing light, just like reg'lar. Clip the light onto the battery, snap the snap oil onto the #1 plug wire, disconnect the vacuum advance hose, crank the engine. Under the strobing timing light, the mark on the balancer should line up nicely with the "8" mark (8 degrees BTDC). Twist the distributor to get that to happen. Tighten it back down again, reconnect the vacuum advance hose.
 
It ran great before all this stuff, i could not tell you how the rotor turned 180 degree's :confused:

Lets have a really good look at that rotor!!:cool:

I really don't think the rotor got turned, not this time around. It may have BEEN turned for a long time, but the plug wires plugged in to match it. THIS time around, the wires may've just gotten plugged in "right", which was wrong. :)
 

Jeep-CJ Donation Drive

Help support Jeep-CJ.com by making a donation.

Help support Jeep-CJ.com by making a donation.
Goal
$200.00
Earned
$0.00
This donation drive ends in
Back
Top Bottom