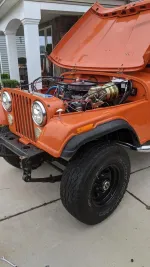
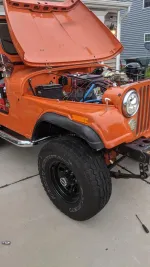
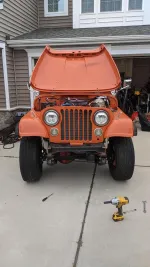
Build Thread '76 CJ5 351w Swap

Build Thread '76 CJ5 351w Swap
Looking shhweet!

What was the final Line-X bill?

Up here, you’re looking at $600-$750 for straight black over the rails. I was kind of in the same boat, thinking about what Raptor would cost, plus masking materials, tape, some drop tarps, scuffing cups and and adhesion promoter and my own labor versus the cost of someone else shooting.

I did a couple Rhino liners years ago that we’re $525 over the rails and then I did a Bullet liner 3 years ago and it was $500 under the rails. Now it’s like I said, $600-$750. So now I’m thinking of trying to do the Raptor because you can tint the white color.

And you’re flying with what you’re getting down in the time short time frame.


Sent from my iPhone using Tapatalk
 
I was quoted $600...that was for the premium UV resistant coating and inside all 4 fenders.

They spent 3 or 4 days grinding down whatever epoxy the PO had laid down in it, so it was another $300 for that labor. They said they burned through so many grinding discs, that they almost busted out the sand blaster.

It was pricey, but absolutely worth it.

Sent from my Pixel 2 using Tapatalk
 
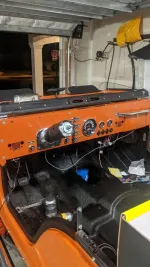
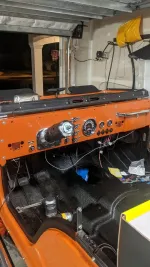
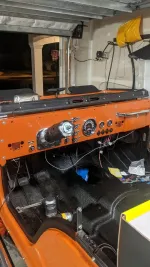
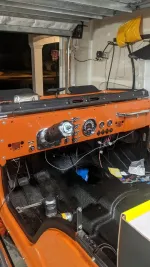
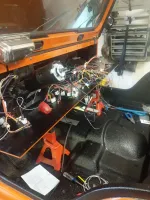
Been busy with the wiring and taking my time with the Painless harness #10150.

It was a little challenging to hook up the Speedhut gauges since the Painless harness was designed for a stock setup. Speedhut includes a small inverter to power the dial needles since they're very low power. The Speedhut instructions aren't the best, but they're sufficient if you know how to read and trace wires.

I added a row of 2 dual USB chargers, a lighter socket and a switch below the voltmeter and oil pressure gauge. I powered it with the clock circuit. It's on the HORN 20a circuit, so that'll be plenty. There is a separate ACC circuit, but I didn't want to use that because I may want to use it for something else at some point later.

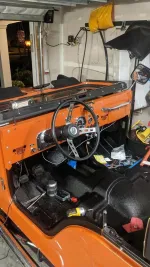
Dash is back on, but it was a PITA to get right. I bought new heater control cables from MTS. They all fit well except for the cable going to the fresh air box. It's a touch long, so it doesn't seat all the way. I'll live with it.

All that's left for the interior is to clean up the dangling wires and hook up the stereo when I get the center console installed again. 2c13a690bb4bdd10351d9d0aab71ffad.jpg2974e5a3240d7ed233719fd2ef8bac01.jpg80f0c884eaadc7afac35f94b801b0d70.jpg

Sent from my Pixel 2 using Tapatalk
 
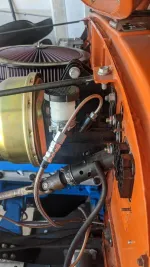
Also installed the hydraulic line from the master to the slave. This is the kit from Novak. No fuss. 804cb9e0c238a0d668096e1299d9809e.jpg

Sent from my Pixel 2 using Tapatalk
 
Been busy with the wiring and taking my time with the Painless harness #10150.

It was a little challenging to hook up the Speedhut gauges since the Painless harness was designed for a stock setup. Speedhut includes a small inverter to power the dial needles since they're very low power. The Speedhut instructions aren't the best, but they're sufficient if you know how to read and trace wires.

I added a row of 2 dual USB chargers, a lighter socket and a switch below the voltmeter and oil pressure gauge. I powered it with the clock circuit. It's on the HORN 20a circuit, so that'll be plenty. There is a separate ACC circuit, but I didn't want to use that because I may want to use it for something else at some point later.

Dash is back on, but it was a PITA to get right. I bought new heater control cables from MTS. They all fit well except for the cable going to the fresh air box. It's a touch long, so it doesn't seat all the way. I'll live with it.

All that's left for the interior is to clean up the dangling wires and hook up the stereo when I get the center console installed again. 2c13a690bb4bdd10351d9d0aab71ffad.jpg2974e5a3240d7ed233719fd2ef8bac01.jpg80f0c884eaadc7afac35f94b801b0d70.jpg

Sent from my Pixel 2 using Tapatalk
That looks great! :)
 
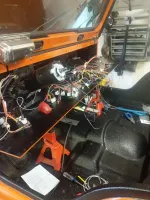
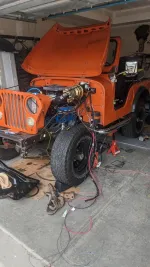
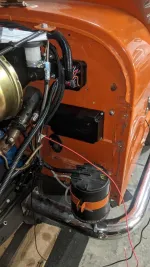
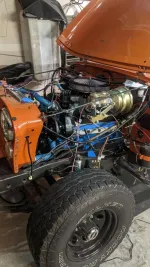
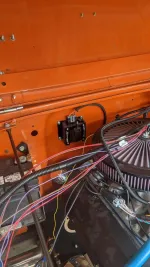
The wiring piece continues...on to the engine compartment.

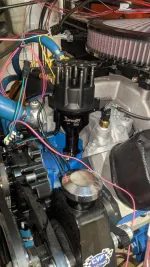
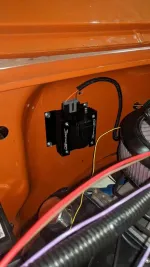
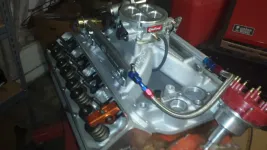
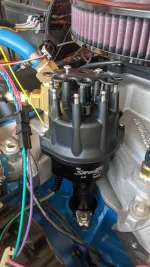
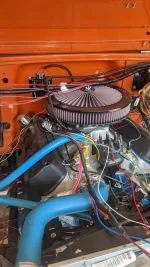
Installed and hooked up the Sniper Hyperspark ignition box, coil and distributor. Phasing the distributor is about as easy as it gets. Set #1 cylinder to TDC, push in the distributor, put on the phasing cap, turn the distributor until it seats properly and it's all set.

Sensors are all tied in to the Sniper and gauges.

Headlights and parking lights are in and wired up.

Still a lot to do under the hood, but I'm making good progress. 79f3063f25b98e97d9cb922657fad5d2.jpge7fdd6dd163296b1e3de5991d880b258.jpg7505b1582e80b6f82ba091909235504b.jpg4890d114dd83827fa8e3266a89949e1e.jpg042ca58ed23ee2e384debc768f301d0b.jpga13469edc181ff0631ad47743590b448.jpg

Sent from my Pixel 2 using Tapatalk
 
Did you start it?
Not even close. Still needs headers...they're at Jet Hot right now getting coated. The Sniper needs an O2 sensor in the exhaust, so I'm not there yet I won't get them back until the end of the month. Fuel tank isn't in yet either.

My hope is to get it running by mid October.

Sent from my Pixel 2 using Tapatalk
 
Is that similar to a MSD 6 Digital and MSD distributor ?
 
Is that similar to a MSD 6 Digital and MSD distributor ?
Not sure...I'm not familiar with it. It allows you to control timing from the Sniper. Gives me the ability to make timing curves in addition to fuel curves for better tuning.

Sent from my Pixel 2 using Tapatalk
 
Yes I believe so. I believe Holley & MSD are a joined ownership
 
Looking good, nice to have a new wiring harness to work with. I been thinking of going that route when I go to EFI to place of my 750 Holley. It would nice to have updated harness to carry the new loads.
 
Looking good, nice to have a new wiring harness to work with. I been thinking of going that route when I go to EFI to place of my 750 Holley. It would nice to have updated harness to carry the new loads.
750? The 350 chev? That is huge? Vacuum secs, double pumper, no choke... Please elaborate.
 
750? The 350 chev? That is huge? Vacuum secs, double pumper, no choke... Please elaborate.
Yes it's a 350 ZZ4 crate motor, but has reworked AL heads, bigger hyd roller cam, 10.5 comp. The carb is 3310, 4160 with a manual choke. It runs very well, plugs all look good, but would be nice to move past carburetion and into better fuel control.
 
That is stout! 10.5 is not regular pump gas. Damn proud though... Yea, have to go to EFI. Did you see my AMC 401 bumped up to 430? (people don't know is that the 401 is a nodular block, forged rods and a forged crank.) Mainly Scouts.

I did a Sequential FI and over 700 (on the dyno) without the shot. Old pic but you get the jest.

20160920_192048 (1).jpg
 
That is one sweet 401 (430), I'm sure that surprises more that a few of the wantabe jeeps.
 
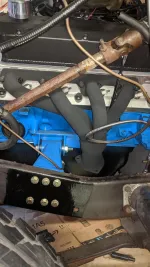
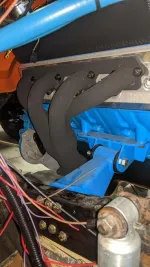
Got a little more work done the last few days. Headers came back from Jet-Hot for the second time and I installed them.

After the headers went in, the fenders went back on and I got back into wiring under the hood. Wired up the horn, a few grounds, two fan relays, and routed wires to prep for wiring up the alternator and solenoid.

Went to install new 3/8" fuel line (NiCopp) but I couldn't find my pipe cutter. I'll be making a trip to Tractor Supply in the morning.

I also got the correct adapter plate for my T-18 /Dana 20 from Herm on Friday. I might take care of that tomorrow too.

Getting closer to the finish line!f36c2cce352c0202e3ec7c570cb3e0bc.jpgca9bbb29ae09137ca9b4c37d313999d6.jpg9e7a677767510341fea338a99c0bf09d.jpg6df9bf3421ba1c28e7f1643a32403d5e.jpg13dc1bb7ae6ba925d6f55fbe9ba85bf8.jpg0b500de35d603f5578c48dd8be190731.jpg2fff59e8dfbd7504dd1a93276e25c7d4.jpgfa611589811d5bf059e4532363364149.jpg

Sent from my Pixel 2 using Tapatalk
 
Looking good. I was looking yesterday at a Ryobi 3/8 impact wrench at HD. Might see if they go on sale. Have an air one. Battery one I think is160 ft lbs.
 
Looking good. I was looking yesterday at a Ryobi 3/8 impact wrench at HD. Might see if they go on sale. Have an air one. Battery one I think is160 ft lbs.
My Dewalt has saved my butt so may times. I have a pneumatic one, but it pales in comparison to the cordless. They're pricey as hell, but worth every penny.

Sent from my Pixel 2 using Tapatalk
 
Yea Dewalt is pricey. I have had good service from Ryobi items $120 not bad
 

Jeep-CJ Donation Drive

Help support Jeep-CJ.com by making a contribution.

Help support Jeep-CJ.com by making a contribution.
Goal
$200.00
Earned
$25.00
This donation drive ends in
Back
Top Bottom