Build Thread 79 CJ7 "They’re coming to take me away aha"

Build Thread 79 CJ7 "They’re coming to take me away aha"

mriplaybass

Full Time Jeeper
Posts
2,345
Media
1
Solutions
1
Thanks
3
Location
Wisconsin
Vehicle(s)
1979 CJ7 304 T18 w/6.32 lo d20 w/3.15 TeraLo D44 rear & D30 Front w/4.56 Eaton Elockers front and rear,
1959 CJ5,
1954 CJ3B,
1967 CJ5,
1947 IHC KB1,
1947 IHC KB2,
1947 IHC KS5,
1967 Mustang Coupe,
[FONT=&quot]OK, We have temporarily had to admit defeat on our “One Piece at a Time” 59 CJ5 build. No way will we have “RJ” ready for the Ouray trail ride.:( Sooooo……………Welcome to our new,…….. next,……… additional,………. or what have you, build thread. The title of this build is somewhat difficult to choose. We tend to give names to our project vehicles, and a few of the candidates are: Julius, Junior, or maybe just Julius junior, perhaps JJ for short. This is kind of the 9th project vehicle from all the vehicles awaiting new life in our barn, so for those of you old enough to remember Star Trek Voyager, since this is a CJ “7” maybe “7 of 9”? Sometimes I do feel that these Jeeps are trying to assimilate me!:D (Borg joke!) I do believe though, that the best name for this project has to be taken from the 1966 song by Napoleon XIV “They're Coming to Take me Away". You will all see why very soon![/FONT]
[FONT=&quot]After carefully examining the Jeep 2 weeks ago, we fell in love with it, and we decided to purchase it.[/FONT]
[FONT=&quot]Allow me to step aside here for a moment and mention that the gentleman from whom we purchased this Jeep was very straight forward with us. He told us everything he knew that was wrong with the Jeep, and allowed us full access to inspect it. He had purchased it 4 years ago, and had never taken it off road. He just liked the CJ7s, and I believe he purchased it from far away and had it shipped to him. I truly believe that he had no idea what he was really selling us, so we just decided to make the best of a bad situation. [/FONT]
[FONT=&quot]So! On with the build!??[/FONT]
[FONT=&quot]What we knew about this Jeep: AMC 304 engine, T-18 Transmission , Dana 20 with a Tera low, Dana 30 front axle and an AMC20 with one piece Moser axle shafts in the rear. Tires were fair, but needed replacing. It needed new spring bushings and shackles, and a front sway bar (all included) We knew that the exhaust needed to be replaced, and the fuel gauge did not work. The AMC20 had the spiders welded, so we knew the rear axle would need a complete rebuild. It also came with 2 bikini tops and a full soft top. We picked the CJ7 up 2 weeks ago, and were really looking forward to a few quick fix ups, and a lot of fun.[/FONT]
[FONT=&quot]During our inspection, I noticed that the left rear shackle was very thin and bent. The Jeep was also very loud and given that it had a full belly pan, I could not tell where the exhaust leak was coming from. We decided to come back the next day and pick it up with a trailer to be safe.[/FONT]
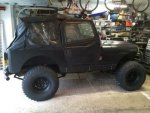
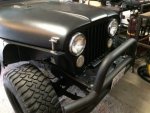
00000_fCQliHlJiT8_600x450%20Custom_zpsuveemv4t.jpg


00O0O_hkhv077ib8D_600x450%20Custom_zpsqoqczrmm.jpg


00z0z_a5Xybh152do_600x450%20Custom_zpsrsr6xpbt.jpg


00606_h3gUoXS7nRT_600x450%20Custom_zpsgdzcqey0.jpg


[FONT=&quot]Nice rig! I already felt like I was crawling the rocks in Colorado just driving it up the ramps and onto the trailer![/FONT]
[FONT=&quot]Got er’ home and off the trailer……….[/FONT]

WP_20150410_001%20Custom_zps6wb9ivg3.jpg

WP_20150410_002%20Custom_zpsy1bbbuzf.jpg

WP_20150410_003%20Custom_zps5erill2j.jpg

WP_20150410_004%20Custom_zpstbkxbwht.jpg
 
[FONT=&quot]Taking it off the trailer, I heard a whining sound. Got to be either the throw out bearing or pilot bearing. No big deal. I was planning on putting a new clutch in before any serious off roading anyway, so now is as good a time as any. Even though it was only about 38 degrees out, we just had to take a short ride. I could really feel the welded spiders when making turns. That would have to be number 1 priority. We parked it in the now vacant shop, and there it sat until the following weekend when I got home from work.[/FONT]
[FONT=&quot]Got home Friday morning, and dove right in. I was really looking forward to getting the Jeep fixed up and on the road in a few weeks.[/FONT]
[FONT=&quot]But...................slowly we began to realize that we had gotten into way more than we anticipated. :eek:
[/FONT]
[FONT=&quot]In all fairness, I have to start this build thread as an “un-build” thread first. As I said before, the PO only drove this Jeep on paved roads, never off road, but given the welded spiders and the Tera low that the owner before him had put in , (PPO?) I was kind of hoping that the front axle might have a locker in it. The PO did not know, so I assumed an open differential. Curiosity dictated that this would be the first thing we would look at. The diff cover bolts were partially rusted in indicating that the cover had not been off in a long time. Off with the cover. Almost nothing ran out :eek:…………almost no oil…………..what did come out was a lot of ring gear teeth! The inside of the diff cover was heavily rusted indicating that this front axle had not been engaged for years! The gears still meshed, and there was no noise when we took it out and engaged the 4x4 prior to purchase, but obviously the diff is junk.[/FONT]
[FONT=&quot]
[/FONT]
[FONT=&quot]This is actually the good side of the gear![/FONT]


WP_20150410_017%20Custom_zpsujrb73yo.jpg

[FONT=&quot]A little sludge, and a lot of gear teeth. You can see some of the teeth laying just below the ring gear.[/FONT]


WP_20150411_008%20Custom_zpsqqsjz4xd.jpg

[FONT=&quot]No, oldjeeplady did not take one look at the ground up gears and get sick on a paper towel!:barf: These are what is left of the teeth she cleaned out of the diff..[/FONT]
[FONT=&quot]OK, we were going to put a locker in anyway, and the gears turned out to be 3.54s, so no prob., we would have gotten different gears anyway……….maybe………..[/FONT]
[FONT=&quot]So we now are able to jack the Jeep up and really give it a good going over…………..Ever get a song in your head, and it just won’t go away?? They’re coming to take me away aha ho ho he he!! kept playing over and over in my mind. We can’t believe what we have gotten ourselves into! I know there are a lot of people who do unkind things to the beloved CJs, but really! Here is what we have found so far. [/FONT]
[FONT=&quot]Front axle is pretty much shot. :( Housing and brakes seem alright, but we won’t know for sure if there is any damage to the race bores due to the absence of oil until we get it up on the bench.[/FONT]
[FONT=&quot]The steering linkage is bent, and the steering stabilizer was installed wrong so that it was rubbing the differential cover.[/FONT]
[FONT=&quot]
[/FONT]
WP_20150410_012%20Custom_zps2bfrkvmf.jpg


[FONT=&quot]We thought that the skid plate was really nice, until we realized that it was nothing but 2 pieces of un-reinforced diamond plate welded together. This also served as the Transmission cross member. However, it was not properly spaced from the frame resulting in squeezing the Transfer Case pan from the bottom, and forcing the Transfer Case and the Transmission against the body floor.:mad:[/FONT]


WP_20150410_011%20Custom_zpslnijzktl.jpg


[FONT=&quot]Transfer Case pan resting on diamond plate cross member.[/FONT]


WP_20150411_005%20Custom_zpsc4cakhum.jpg

[FONT=&quot]Transfer Case top wedged against bottom of tub.[/FONT]


WP_20150411_004%20Custom_zpsbxcfmtah.jpg

[FONT=&quot]I was initially pleased to see that someone had used a double cardan joint for the rear shaft. Problem that I was not able to see until I began taking things apart was that the joint was actually hitting the bottom of the tub.[/FONT]


WP_20150411_003%20Custom_zpsg4nrxqgv.jpg

[FONT=&quot]I should have caught this during our initial inspection, but, can only notice so many things when you’re as new to the hobby as we are. Because of the cobbled in Transmission cross member, the engine was tilted too far forward.[/FONT]

WP_20150414_002%20Custom_zpst739u86m.jpg

[FONT=&quot]We began to worry that maybe there was not even a Tera low in the Transfer Case , or the T-18 would be the close ratio version, so that had to come out next to find out for sure. Good news!! Finally! There is a 3.15 Tera low in the Transfer Case , and when I drained the oil prior to pulling it out the oil was nice and clean!:D..............End of good news.:( Pulled the plug on the Transmission and the oil was black and full of metal shavings. I stuck my finger into the drain hole and felt a lot more metal. [/FONT]:pissed:

WP_20150418_009%20Custom_zpsfcjoaqih.jpg

[FONT=&quot]After getting the tranny up on the bench, things were not as bad as I expected. 1st gear, the reverse idler gear, and the small gear on the lower cluster were pretty rounded. Also the rear bearing had lost its cage and all the ball bearings were at the bottom of the bearing.:mad:[/FONT]

WP_20150418_010%20Custom_zpsfodnbvdq.jpg

WP_20150418_011%20Custom_zpsovijim9y.jpg

WP_20150414_006%20Custom_zps4fbwaays.jpg

[FONT=&quot]Hopefully the gears will be OK to run for awhile because we really don’t want to drop in the neighborhood of $500 to replace all these gears. We do plan to replace the bearings, seals, gaskets, etc.[/FONT]
[FONT=&quot]Someone, at sometime, for who knows what reason decided to beat up on the Transmission . The dent does not appear to have any stress cracks, and does not interfere with any of the internal rotating assembly, so we will leave well enough alone.[/FONT]

WP_20150414_008%20Custom_zpsmn2pfwf8.jpg


[FONT=&quot]The steel diamond plate will get us a few pennies at the scrap yard, and a better cross member will be fabricated.[/FONT]
[FONT=&quot]We now move on to the rear axle. I already knew about the welded spider gears and anticipated replacing everything with new ring and pinion and a locker, but things went sideways again. When I crawled underneath to remove the rear axle I noticed something that still has me baffled.:dunno: At first glance, I thought I was looking at a pinion angle shim. Closer inspection revealed that there was no tapper to it. Not only that, but there was only a shim on the passenger side, nothing at all on the driver’s side, and the spring centering pin was actually pressing against the axle tube.[/FONT]

[FONT=&quot]Shim[/FONT]​
WP_20150418_003%20Custom_zpsci5er0u2.jpg
[FONT=&quot]
[/FONT]
[FONT=&quot]No shim[/FONT]​
WP_20150418_004%20Custom_zpse4oidjoe.jpg

[FONT=&quot]The front axle is worse! There are 2 shims on the passenger side and nothing on the driver’s side. With these shims in place, the Jeep sits level. Remove them and the whole vehicle will lean toward the driver’s side. The frame does not look bent, there is no obvious collision damage, the spring arches are all equal, all spring attachment points are even. Anyone have any ideas, please PM me and give me your thoughts.[/FONT]​
[FONT=&quot]Got the axle out and up on the bench.[/FONT]

WP_20150418_014%20Custom_zpsakvgrmom.jpg


WP_20150418_016%20Custom_zpskwlt7xlp.jpg

[FONT=&quot]Welded spiders[/FONT]​
WP_20150418_018%20Custom_zpstn2tgsqp.jpg

WP_20150418_017%20Custom_zpsewurtx3j.jpg

[FONT=&quot]I can’t believe that the carrier did not crack when the welds contracted after cooling. What a mess![/FONT]​
[FONT=&quot]I could not figure out how the pinion angle was right without tapered shims, but eureka! I found out. Whoever created this disaster, cut the spring saddles off and re-welded them to achieve proper pinion angle. I know this is an acceptable way of doing it, but………….[/FONT]

WP_20150418_019%20Custom_zps9ombysak.jpg

WP_20150418_020%20Custom_zpsswey2mwi.jpg

[FONT=&quot]The pictures don’t really show the damage very well. I don’t know how the axle never spun. The welds were some of the worst chicken track welding I have ever seen, and for some reason the axle tube at both saddles had been beaten to death probably with a BFH. I know that the AMC20 tubes are not all that thick to begin with, and are more prone to bending, we planned on trussing it, but with all this damage, the entire axle is little more than a boat anchor.:dung:[/FONT]​
[FONT=&quot]Just before calling it a day today, we noticed something else. The header on the passenger side is touching the frame at the collector. The motor mounts look home made, and are probably in the wrong place. I will figure it out later.[/FONT]​
[FONT=&quot]I guess our beautiful Jeep that we thought was such a great deal has turned to be one of the worse nightmares ever……………But this is what we all live for……….right??.............. They’re coming to take me away ha ha ho ho he he!!:pissed:[/FONT]​


That lean is common and and come from a couple different sources some are bad some just "the way it is."

I'd still trade the RJ problems for the JJ ones. This is standard PO :dung: whereas the RJ began as a Heinz 57 vehicle. You might find that 7 can be everything you need. ;-)


Sent from my iPhone using Tapatalk
 
007, you have no idea just how glad I am to hear that! The shims look to be factory, not something someone cobbled together from what ever was laying around, plenty of other places for that! We were actually considering a new suspension, but now I think we will stay with what is on there, and just reinstall the shims.
 
007, you have no idea just how glad I am to hear that! The shims look to be factory, not something someone cobbled together from what ever was laying around, plenty of other places for that! We were actually considering a new suspension, but now I think we will stay with what is on there, and just reinstall the shims.


I think if you search the Suspension forum for "Jeep lean" you'll find the list of the usual suspects for this phenomenon. I think in most cases it just is what it is, but there can be some serious reasons for it but either way you are more capable than most to fix those. You should have no worries.


Sent from my iPad using Tapatalk
 
Thanks Torxhead, we're goin like crazy, but I think we should make it.
 
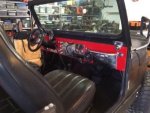
We repositioned the engine today by putting the motor mounts "back" in their correct position. Why this was wrong, well my husband will explain as he tells a better story and this one is good. :eek: During this process we unbolted the front clip as in the fenders and grill to get a little more room to move the radiator clear of the fan as the engine was lowered into place. It seems that where it was apart what I believe to be the original paint color showed and it was RED. The dash is red, but the rest has been painted a matte black. Can I tell the original color from the VIN or was there a paint code tag like in our '67 CJ5 ?

007 - I think we really have a red 7... (but not the cool blue Levis seats - I had those and a blue soft top in my original 79 CJ7 in my avatar.) Our seats and tops are black. There was a place in our top where the seams came loose, but I have already repaired that. :)
 
Can I tell the original color from the VIN or was there a paint code tag like in our '67 CJ5 ?
The 71 and down had a stand alone paint code tag, your 79 has the paint code on the same tag as the vin, it's located just above the vin (second row). It will be one number and one letter, post up the paint code for the correct original color.
 
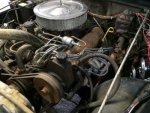
[FONT=&quot]Beautiful day here on Sunday, nice enough to leave the shop door open and enjoy the nice weather. Also gives us more light. Do we really want that? We might find more things wrong! Better knowing than not I guess. :( The plan for the day was to find out why the header collector was so tight against the frame rail on the right side. Got the flash light and creeper, and away we go. It seemed odd to me that the collector came out right next to the frame rail, and not below it. A bit of contorting myself around the jack holding the back of the engine up made things pretty clear, the frame mounts for the motor mounts just didn’t look right to me. So I went into the house and goggled CJ7 AMC 304 motor mount images. I was right. The PO, in order to make the POS skid plate/Transmission mount fit, had to also raise the engine up almost 3”. I wondered why the hood barely closed. I thought it was because of the aftermarket air cleaner and spacer under the carburetor.[/FONT]
[FONT=&quot]Pieces of plate steel used to raise motor mounts.[/FONT]​

WP_20150419_002%20Custom_zpsyzwuajf2.jpg

WP_20150419_001%20Custom_zpslr0whtbp.jpg


WP_20150419_003%20Custom_zps4cgo1iq7.jpg

WP_20150419_004%20Custom_zps3mdczw6o.jpg


WP_20150419_008%20Custom_zpsdsyupgv4.jpg

[FONT=&quot]Right side header tight against the frame rail.[/FONT]

WP_20150419_007%20Custom_zpsx1ze16jf.jpg

[FONT=&quot]I wondered why the exhaust pipe that was attached to this collector was so beaten. That’s how the PO made the exhaust fit. At least I take some comfort knowing that the pipe was stainless, so it made the PO sweat while trying to beat it into submission! Dare I hope, maybe a few bloody knuckles too??:rolleyes:
[/FONT]

WP_20150411_006%20Custom_zpsrrdxutmy.jpg

[FONT=&quot]As you can see, the top of the air cleaner is almost at the top of the cowl. The wing nut bolt is right at that point.[/FONT]

WP_20150419_006%20Custom_zpspuqkxlfw.jpg

[FONT=&quot]Several hours, and a lot of bloody knuckles later, the engine is now tucked in nice and sound.[/FONT]

WP_20150419_009%20Custom_zps3p7x5inb.jpg

[FONT=&quot]The right side header will not fit at all now. They are Hedman headers, and after doing a bit of research, it seems this is a common problem on the AMC 304 CJ7s. From what I have read, the right side header needs to be “tweaked” to make it fit. Maybe next weekend we will get "tweaky".[/FONT]
[FONT=&quot]I wasn’t sure how the clutch bell crank was actually straight with the engine being 3” too high, but all one has to do is open one’s eyes and sigh, (groan?) OK, more steel for the scrap pile! Morris sells the right bracket for $9.99. Probably not even worth making one myself.[/FONT]


WP_20150419_012%20Custom_zpsxn6wekvz.jpg


[FONT=&quot]Well, that’s about it from the insanity in Wisconsin for today, and maybe the week. Things are actually starting to look up! We are going to look for a different rear axle because of the damage done by the PO, but when I put it on the bench, and set it on the spring saddles, all the drive line problems became obvious.[/FONT]
[FONT=&quot]This is the actual pinion angle when it was in the Jeep![/FONT]


WP_20150419_014%20Custom_zpsjuryqszk.jpg
[FONT=&quot]
[/FONT]
[FONT=&quot]28 degree pinion angle for a 2” lift!! Maybe a future 24” lift??[/FONT]


WP_20150419_015%20Custom_zpsckoolreq.jpg
[FONT=&quot]
[/FONT]

[FONT=&quot]All I could do was laugh! I now see why the PO cut and repositioned the saddles! I would love to see 28 degree shims!! Until next time……….. Ha ha, ho, ho, he, he![/FONT]
 
The 71 and down had a stand alone paint code tag, your 79 has the paint code on the same tag as the vin, it's located just above the vin (second row). It will be one number and one letter, post up the paint code for the correct original color.

Well here is what is above the vin

9J ICE CC

If 9J is the paint code then looking at paintref.com the jeep was originally Arrowhead Silver and not red...I don't know why I wanted it to be red, but I did. :dunno: Unless I am looking it up wrong... I guess we could paint it any color we want at some time in the future. There are many other things to do first. Thanks again Posi!
 
Yes, Arrowhead Silver Metallic is the original color.
 
Well Alright now, you finally grabbed a Cj that's "new" enough for me to be of some help. :) First off you have the Holy Grail of Cj drivetrains right there. With the Tera lol in the Dana 20 your in a great spot. The T-18 1st gear isn't synchronized and is probably why you have the metal in the Transfer Case . I know you want to trailer it to Colorado but what are your plans for this Cj? Trailer it everywhere? Weekend warrior ? What do you want out of it?
 
Well Alright now, you finally grabbed a Cj that's "new" enough for me to be of some help. :) First off you have the Holy Grail of Cj drivetrains right there. With the Tera lol in the Dana 20 your in a great spot. The T-18 1st gear isn't synchronized and is probably why you have the metal in the Transfer Case . I know you want to trailer it to Colorado but what are your plans for this Cj? Trailer it everywhere? Weekend warrior ? What do you want out of it?

This CJ will see Limited highway use. We plan to trailer it to CO, but then drive it when we are out there. Are far as other places to wheel it would be trailered. It seems as though previous drivers have started out or shifted down into 1st gear without coming to a complete stop. With the gears we have I think we would always want to start out in 2nd and never gear lower coming to a stop. First gear should only be used for off road needs. The caged rear bearing has already been replaced. And with the exception of some wear on the shift fork "pads" which don't seem to be replaceable on this T-18 it's good to go. (more on this from the guy that knows... :rolleyes:)

The AMC20 has so many problems, we have been looking and think we have found another narrow track Dana 44 for the rear. The Moser 1 pc axles and maybe some brake parts are all thats worth anything. It's not even worth trying to truss with the tube damage from the relocated chicken welded spring perches.

I have pulled the tube bumpers off front and rear. They are like new, but mainly for show and not what we need. The front is a Smittybuilt and the rear I think a Rampage. The guy we are getting the Dana 44 from is interested in them so maybe we can do some trading. More pics coming soon. :)
 
I was going to say something about the bumpers but I figured Id leave it go. :D If you get the Dana 44 pull the 1 piece axles and put them on Craigslist. Sounds like the rest is scrap. Did the earlier dana 44s have a centered differential? Just make sure you get something thatll work with what you have. I have a list of things for MrIplaybass to check before you take that trip to Colorado. Im sure he does too. :rolleyes: Tire size staying at 33 in. or less or going bigger ?

This CJ will see Limited highway use. We plan to trailer it to CO, but then drive it when we are out there. Are far as other places to wheel it would be trailered. It seems as though previous drivers have started out or shifted down into 1st gear without coming to a complete stop. With the gears we have I think we would always want to start out in 2nd and never gear lower coming to a stop. First gear should only be used for off road needs. The caged rear bearing has already been replaced. And with the exception of some wear on the shift fork "pads" which don't seem to be replaceable on this T-18 it's good to go. (more on this from the guy that knows... :rolleyes:)

The AMC20 has so many problems, we have been looking and think we have found another narrow track Dana 44 for the rear. The Moser 1 pc axles and maybe some brake parts are all thats worth anything. It's not even worth trying to truss with the tube damage from the relocated chicken welded spring perches.

I have pulled the tube bumpers off front and rear. They are like new, but mainly for show and not what we need. The front is a Smittybuilt and the rear I think a Rampage. The guy we are getting the Dana 44 from is interested in them so maybe we can do some trading. More pics coming soon. :)
 
The Dana 44 is from a 72 CJ5 and we discussed "centered or not" with the owner. This should be the same (75 CJ) as we got for our '59 build. They are not perfectly centered are far as lining up with the Dana 20 output, but my understanding is they are "considered centered" as opposed to the Dana 44 we have in our 67 CJ5 which lines up with the offset Dana 18.

The Moser 1 pc axles have been pulled, they look fine and we will try to sell them.

On tires: We are getting MT 33x12.5x15 Baja MTZ. No bigger than 33's

Lists of things to check would be appreciated! :D

On another note:
I have been trying to get the wiper motor to function properly (it was not installed). Doing a bench test with a battery I could get it to run both speeds, stop but not park. After ignoring wire color and just going by the schematic I finally got it to park correctly. :banana: I posted some ?? in electrical, but figured it out. The wiper switch has contacts for a washer funtion, but none on this CJ. A hand spray bottle will work for now. :) We have a 4 wire wiper motor which I think is from a later model Jeep. This CJ has a replacement windshield frame. So there is no hole for the wires that lines up with the hole in the top of the dash when you tilt the windshield forward. Have you had to drill this hole? If you don't then the wires are easily pinched in the windshield when brought back up. I found a pic of this that Old Dog posted a while back. The replacement windshield seems lightweight compared to everything else. I'll try and get a picture of this up. Thanks all!!
 
[FONT=&quot]And away we go again. Did not get much done last weekend because of the Jefferson swap meet. (Can’t miss that!) Turns out going to the swap meet was a very good idea. As oldjeeplady said, we may have found a Dana 44 narrow track axle, we did, and that is where we found it. We picked it up Saturday night but have not had time to take it apart yet. As a matter of fact, it is still in the back of our truck, and will probably stay there until next weekend. Turns out, we knew the guy selling the axle, we just didn’t recognize him at the swap meet. We purchased a 54 3B from him 3 or 4 years ago. Real honest guy, so we didn’t bother to take the cover off the Dana 44 to inspect it, he stands behind what he sells. I suggested an even up trade for the mall crawler bumpers that the CJ7 came with, and he agreed. Everyone’s happy, and we can finally go forward with our drive train build.[/FONT]
[FONT=&quot]
[/FONT]
[FONT=&quot]The parts came for the Transmission , so we put that back together. The rear bearing definitely had to be replaced.[/FONT]


WP_20150420_001%20Custom_zpszklc9vfd.jpg

[FONT=&quot]The shift forks are not the usual T-18 forks with the replaceable pads, these look like they were dipped in something like liquid Teflon, and no one seems to know how to fix this problem.[/FONT]

WP_20150428_001%20Custom_zpsb51nzvro.jpg

[FONT=&quot]Some of the coating is still there so even though I thought to myself “this probably won’t work”, what the heck, anything is worth a try. We tried to use electrical shrink tube in the hope of at least preventing any further deterioration of the original coating. I know this won’t last, but even if it comes off, it’s unlikely to cause any damage. Well, it shrunk down and fit like a glove. Problem is, even the thinnest of shrink tube was too thick to allow the forks to fit into the channel. Time is getting short for our trip so it’s time to move on. I put the Transmission back together. Next winter with the trip behind us, we will pull the Transmission out and readdress the problem. I have a few ideas, but no time to explore them right now. Even Novak’s told me that if I figure something out, to let them know! And the insanity continues![/FONT]

[FONT=&quot]We know the front axle is going to need a full rebuild, so, out with the Dana 30 .[/FONT]

WP_20150421_001%20Custom_zps68d3xytv.jpg

WP_20150421_002%20Custom_zpsr2utgpos.jpg

[FONT=&quot]Wait a minute! I thought we bought this jeep because we were not going to be able to finish our 59 CJ5 in time for the trip! All we were supposed to have to do to the CJ7 was rebuild the rear axle! We now have a body setting on a frame with an engine in it (sort of)! Sigh! On to the front axle.[/FONT]
[FONT=&quot]With the axle up on the bench we proceeded to disassemble the axle. I can see that I am in trouble from the start! I don’t have the right tools to remove the hubs and bearings. The PO had the right tools,........... the necessary SAE torque chisel. Groan, all I have is a metric torque chisel!;)[/FONT]


WP_20150425_002%20Custom_zpsmycxqvyi.jpg

WP_20150425_003%20Custom_zpsu59gp4a4.jpg

[FONT=&quot]Yep! Rather than go and buy a $10 spindle socket, the PO used a hammer and chisel to put the spindle nuts on. I was just kidding, I did fortunately have an SAE torque chisel in my tool box to remove the nuts since the socket would no longer fit the hacked up nuts.[/FONT]

[FONT=&quot]Here is a slightly better picture of the chewed up ring gear.[/FONT]


WP_20150425_004%20Custom_zpszetgg7cr.jpg

[FONT=&quot]Once the carrier was removed, I could see that it had been years since this differential had been engaged. What I thought was caked on ancient grease inside the housing turned out to be grease covered rust. When the bearing caps were removed and carrier lifted out, yes, lifted out. I set up my pry bars and prepared for the usual battle of removing a carrier without the use of a case spreader, the carrier literally just lifted out. I used my finger, no, my index finger, though Lord knows we certainly have justification to use the, shall I say……….driving finger??:pissed: To spin the pinion like a child’s pinwheel. No preload on anything![/FONT]
[FONT=&quot]
[/FONT]
[FONT=&quot]Carrier out and here is what we found.[/FONT]


WP_20150425_007%20Custom_zps88shoqqz.jpg

[FONT=&quot]I can’t believe that there was no rust on the mating surfaces of the bearing caps. What looks like gray cast iron is actually oil covered rust. You can see just to the left of the top cap bolt hole where we chipped some of the rust away. [/FONT]
[FONT=&quot]Oldjeeplady worked for quite awhile, but finally produced what I consider to be still usable axle housing.[/FONT]


WP_20150503_002%20Custom_zpsaguqj2cv.jpg

WP_20150503_003%20Custom_zpsfoluvilo.jpg

[FONT=&quot]A few more PO disasters, and I think we might be able to end our “unbuild” and start our build.[/FONT]
[FONT=&quot]
[/FONT]
[FONT=&quot]I didn’t really look at the clutch fork when I pulled the bell housing, but, [/FONT]

WP_20150428_003%20Custom_zpsgu6olldt.jpg
[FONT=&quot]Really? The forks only cost about $15, why booger one together like this?[/FONT]
[FONT=&quot]
[/FONT]
[FONT=&quot]Had to remove the distributor to make way for the chains used to lift the engine to correct the motor mount problem, and all the wires broke due to brittleness. Ordered a new HEI distributor.[/FONT]
[FONT=&quot]
[/FONT]
[FONT=&quot] I knew that the passenger side header was going to have to be “massaged” in order to get it away from the frame, (apparently a common problem with Headman headers on AMC 304 CJ7 ’s according to several sources) so now the dreaded task of removing the header bolts, especially that dreaded one against the fire wall. Well! How considerate of the PO, no bolt there to worry about! Hmm, the cap on the spark plug is loose, no problem, just turn it with my fingers until tight…………..wait…………is the spark plug turning?? Great!!.....better pull it out to see if the threads are starting to strip. Wow! The gasket on the spark plug has not even been compressed yet! Well……….at least the other 7 match! All 8 plugs not even in finger tight. :bang: Sure am glad we decided to trailer this disaster home instead of driving it 100 miles.[/FONT]

[FONT=&quot]On to the suspension. The jeep came with new spring bushings, so we decided to do that today. Oldjeeplady was working on some electrical items inside the cab, so I decided to remove the fuel tank to see why the gauge does not work. Hey looks like our luck is finally starting to change! As I begin to lower it, I can see that the tank has been recently replaced. The paint is still shiny............ Ya, too good to be true.[/FONT]


WP_20150501_007%20Custom_zps4xvvbrbu.jpg

[FONT=&quot]Looks like someone used a screwdriver to line something[/FONT][FONT=&quot][FONT=&quot] up[/FONT] from above in the tub and when it wouldn’t go, no proplemo! Get the BFH and make it go! There is a perfect slot in the tank where the screwdriver was driven through. I guess the Lord does watch out for idiots though, (me). Sure glad I dropped the tank before using the smoke wrench to remove the old spring hanger and shackle bolts! If the tank were all rusty, we would have just ordered a new one, but this tank still has the paint on it. Well, there is already a hole in the tank, so I used my slide hammer with a screw end threaded into the hole to at least pull some of the dent out before fixing the hole. (Figured it was probably not a good idea to use the stud welder and slide hammer to pull the dent)[/FONT]


[FONT=&quot]I made a cork gasket and using a sheet metal screw inserted it into the hole provided by the PO, I then covered a large area around the screw and a few areas that were deeply scratched with a fuel proof epoxy. Still need to figure out the fuel gauge problem, but that should be minor. Just to play safe, we will wait to reinstall the fuel tank until all the smoke wrench work is done.[/FONT]

WP_20150503_001%20Custom_zpsl1xezn89.jpg


[FONT=&quot]Decided to pull the Dana 44 out of the truck and take a look at it.[/FONT]

WP_20150503_005%20Custom_zpsgiv0bnwu.jpg

WP_20150503_004%20Custom_zpszzv75dnc.jpg

[FONT=&quot]Looks like we finally caught a break! The axle is in pretty good shape. The brakes and brake drums are shot, but that was expected. I am pretty sure that the drums from the AMC20 will fit. The Dana 44 drum edges extend inside the brake backing plate, and the AMC20 drums extend over the backing plate, but other than this, the friction surfaces appear to be the same, and I see no interference anywhere. At least we save a few bucks there. Anyone with experience with this not working, let us know.[/FONT]
 
Hey there folks - glad to see it's all moving in the right direction...

I will throw out a caution flag though...without starting another religious discussion on AMC 304 ignitions, be very wary of any HEI you ordered, you can have distributor gear vs. cam gear battle royale...

I would get a stock distributor from NAPA for your year/model Jeep (has appropriate cam gear), then add the cap adaptor and MSD cap like I have. You already have a Motorcraft ignition unless the PO removed it for an HEI. If you're still Motorcraft, then get what I have (or BusaDave has) and get some high-end MSD wires and be done. Myself, TeamRush or Dave have some experience with this. TeamRush lives here near me and he can call you if need be.
 
Your definitely catching a bad break here. I'm stripping the Limited this weekend to make room for the Scrambler. I have a gas tank and a power brake system id gladly donate to the cause. Just have to figure out how to get it there
 

Jeep-CJ Donation Drive

Help support Jeep-CJ.com by making a contribution.

Help support Jeep-CJ.com by making a contribution.
Goal
$200.00
Earned
$25.00
This donation drive ends in
Back
Top Bottom