• Hello Guest, we are proud to now have our Wiki online that is completely compiled and written by our members. Feel free to browse our Jeep-CJ Wiki or click on any orange keyword when looking at posts in the forum.
    To dismiss this notice
    click the top right X.

Build Thread '81 CJ-7 Laredo build

Build Thread '81 CJ-7 Laredo build
I'll probably do it at my brothers since he has more fun tools than I do. :D

That's what I do :D

We have his garage set up! lol

:chug:
~ Jr
 
This is a great thread, wanted to let you know that my 79 came stock with power brakes it's almost luxury co paired to the 80 I have that came with standard brakes. So I will retrofitting a set of 79 power brakes to the 80.
Been putting off all of the work needed for a bit, so the thread has been inspiring.
Thanks

Thanks for the kind words. :chug: I had thought about canniblizing the power brakes from my 83 Limited but Ive been able to resist the urge. We've gotten so much snow since Ive gotten the brakes better Vicki has yet to try it out.
 
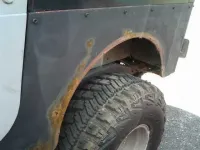
Well this Winter was pretty brutal here. We had just shy of 70 in of snow so its nice to see grass again finally. With all that snow come a bunch of salt on the roads here also. I want to replace both side panels on the tub with new sheetmetal in late August. That said I just cant leave it look like it does all Summer. Driver side got the worst of it. Maybe I can get that welded area smoothed out a bit as well.

Wintercleanup2_zpsf74bda53.jpg


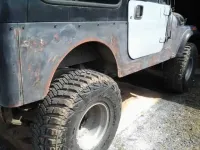
Heres the passenger side after I started cleaning it up a little. I'll clean up the rust the best I can and fill some small holes. Then some primer and gloss black and to make her look decent again. I'll even do the doors so its "kinda" one color. :D

Wintercleanup_zps0984d903.jpg
 
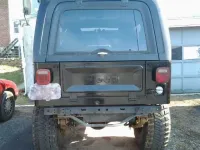
This tub is wavier than the Atlantic in a Hurricane. Its going to look better cleaned up for sure , but straight isnt gonna happen. I did manage to get enough time to clean up the rear sheetmetal.

Wintercleanup3_zps7c2d7aee.jpg
 
Last edited:
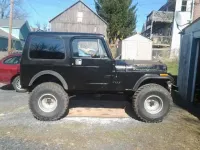
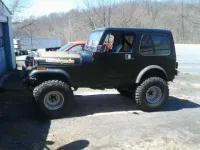
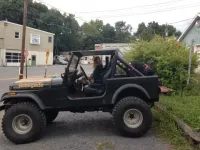
Well the "15 foot paint job" is finished. I hated to rattle can it but itll protect it for now. Vicki doesnt care for the hood patina so I may do that another day. Heres how she looks now:


81Cj-715footer_zps764ea43c.jpg
 
Last edited:
Looks good, and won't rust anymore (hopefully)!
 
Looks good, and won't rust anymore (hopefully)!

Yeah I was supposed to get this done before Winter , unfortunately I ran out of time. Then we had to have one of the top 4 heaviest Winters we've ever had. Im still hoping for completely new sheetmetal on both sides by early Fall. For now the black will protect it better than the primer. :)


81Cj-715footer2_zps17bddadb.jpg
 
Some times I get a new part for the Cj and it just seems to sit around forever. Take for instance that steering box bracket I picked up so many months ago. Well on my way home from work the other day my steering got a bit darty and I knew something was wrong. After having Vicki cycle the steering a few times I saw the steering box and bracket flexing all over. No better time than now to install the heavy duty bracket.

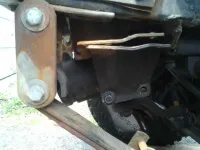
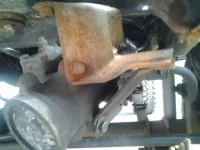
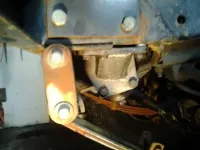
The first thing I did was remove the 5 bolts that hold the first piece of the bracket on. 3 go into the frame and 2 go into the bottom of the steering box itself. In the pic only one is left.

bracket2_zpse6257261.jpg

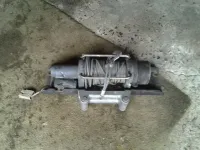
The next step for me was to remove my winch and plate. Some of you will be able to skip this step. I had to to get at ...

bracket4_zpsda0997f2.jpg

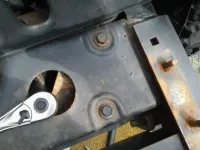
these. These two bolts hold the 2nd piece of the bracket in. Removing these lets the steering box down. Be careful , that steering box can fall pretty quick if you had the drag link disconnected like I did.

bracket1_zpsf6729cb5.jpg
 
That will expose the last 2 bolts that hold the 2nd pice of the bracket on. These are reverse Torx bolts so you'll need a E14 socket to remove them. Theres no real way to get at these without taking the box down and they were the ones that loosened up on me.

bracket3_zpsd39f164a.jpg

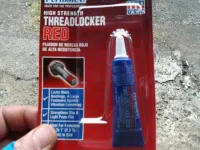
I wasn't going to let those loose bolts get me again so I headed out for some red lock tite. I also used hex bolts when I put it back together.

bracket5_zpseb0a9191.jpg

When I started this job I was intent on not taking the box out. This was a mistake. I got the new bracket bolted in and realized that it didnt mount flush to the steering box without some spacers. I dropped the bracket and removed the power steering lines so I could take the box out. You also need to remove the joint on the lower steering shaft from the box itself. Then it was to the vise for assembly.

bracket6_zps1e7b9842.jpg
 
Now it was time for re assembly. After cussing and fussing with the power steering lines I connected the steering shaft and drag link , then bolted it all in. In this pic you can see how I had to use some thick U-bolt washers I had for 3 of the 4 bolts that go into the steering box. Im sure the company supplied spacers but I bought this used without hardware or instructions.

bracket8_zps0cc3a5ab.jpg

Overall it turned out good and will help me breathe a little easier running those 35 in Goodyears. A bonus is it flat out looks beefier than the flimsy stock set up. Somehow I managed to damage some threads on my drag link end so I ordered a new one. Anyhow after months of procrastination the new bracket is in. :)

bracket7_zps32828011.jpg
 
Got the new drag link end today and swapped it in. I had Vicki cycle through the steering again while I watched everything. No steering box / mount flex. :) Ive gotta find some time to bring the Laredo to my brothers. Id like to stop the procrastinating on the rear bumper.

bracket9_zps9ba30b95.jpg
 
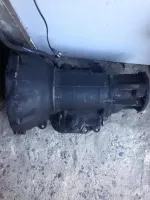
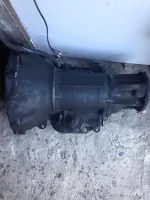
Ever since I did the Transmission swap Ive had a leak from the torque converter seal. I took the Transmission down once to see if I could fix it by replacing the seal. Unfortunately the tourqe converter had some slight pitting that slowly ruined the seal again. I knew this was going to happen but I just couldnt find a torque converter at a reasonable price.

Here I am a few months later and I grabbed a TF999 with a good torque converter to swap in. With the old one slipping at times in 1st gear I decided on a total swap. It probably just needed the bands adjusted but I figured Im best off keeping everything together. I'll get it all together again in August when I have time off.

TF-999_zps1111220a.jpg

And you're going to do a VERY detailed write-up when you swap it in, right?

I have a TF999 to go in my green Jeep one of these days. T-176 in there now is going in the tan Jeep, T-5 in the tan Jeep will be gone.
 
And you're going to do a VERY detailed write-up when you swap it in, right?

I have a TF999 to go in my green Jeep one of these days. T-176 in there now is going in the tan Jeep, T-5 in the tan Jeep will be gone.

Well mines a pretty straight foreward swap. TF999 for TF999 . Ive dropped and installed a few T-176s and this will be the 3rd time on the auto. :D My auto has a aftermarket floor shifter even though it had a auto Transmission from the factory. The Cj linkage is pretty hard to find complete. This TF999 came out of Erics (Jersey Jeeps) white Scrambler. Hes swapping to a T-176 . All it needs is a new O-ring for the dipstick tube and a good cleaning. I can help you through the manual to auto swap. First thing I'll tell you is get a Transmission jack that has tilting base. ;)
 
I'm actually considering going full retard and pulling the tub. I've got a little rust around the drivers side front roll bar support and I figure I can pull the tub, have it blasted/new metal welded in, and do my tranny swap on a bare frame.

My TF999 came with a floor shifter, but I want it on the column so am going to probably use an ididit cable (pricey).
 
Nice build, Pete. Reminds me of my '83. Throughly enjoyed reading, and can't wait for you to get back to it. 🍻
 
I was kinda suprised to see this thread bumped. Ive been doing some little things here and there but havent been too good at updating the thread. The hood finally matches. The radiator , steering box , power steering pump and lines have all been replaced. Next up is wheel bearings , a new clutch for the fan and water pump. I'll try and fire off some pics and update a little this week. Right now I have Scrambler on the brain with the dog that wont stop growing.:D

riverdog2_zps6524b366.jpg
 
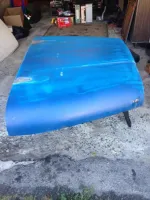
Since we've been looking for a Scrambler the Limited has become a parts Jeep. I stole the hood of it for the Laredo .

hood1_zpse4ff2d76.jpg

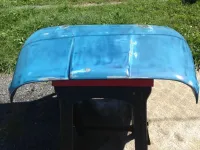
hood2_zps31173f57.jpg

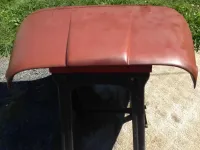
After sanding a bit so the paint would bite I shot it with a couple coats of primer.

hood3_zpsb9d30700.jpg

I'll have to get some shots of it finished and on the Cj. for some reason I never did.
 
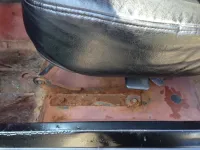
I also decided to finally do something about the rusty seat risers. I'll ad a pic of them cleaned up and painted tomorrow.

rustbracket_zps659c72fa.jpg
 

Jeep-CJ Donation Drive

Help support Jeep-CJ.com by making a contribution.

Help support Jeep-CJ.com by making a contribution.
Goal
$200.00
Earned
$25.00
This donation drive ends in
Back
Top Bottom