• Hello Guest, we are proud to now have our Wiki online that is completely compiled and written by our members. Feel free to browse our Jeep-CJ Wiki or click on any orange keyword when looking at posts in the forum.
    To dismiss this notice
    click the top right X.

Build Thread '83 Camping Scrambler, trailer build

Build Thread '83 Camping Scrambler, trailer build
Looks good Pete! :popcorn:

You all are going to have a great time with this! I always wanted a scrambler, but with 4 CJ's already I doubt it will happen.

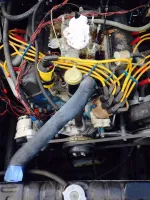
The wiring mess will be fun. I have been trying to trace and fix some of the cobbled wiring on our 7. I have never seen so many different size wires used in one hot lead all with yellow (10-12) connectors. Some of them pull apart just moving them... :( I had to extend the wires from the wiper motor to the switch but I silver soldered them and then shrink wrapped. So much fun. :rolleyes:
 
I was just joshing with ya. :chug: I'll be watching this one, though. I've always loved the Scramblers. And those seats are nice! Why would someone cover them? ...I suppose to keep them nice lol. Good find!

That tow strap is going to come in handy tomorrow. I need to move the Scrambler to the other side of the driveway where it will stay till it moves under its own power.:chug:

Not bad lookin' seats. I'm looking at what's on the floor ..... carpet = floor pan death .... How is the floor.

Why so many wires? What did he add? Computers? Fuel injection? Team Rush MSD ignition? That is a lot of wiring to deal with. I bet the original harness is still there under all the added on wiring.

Your right on the carpet. I don't think it's the home carpet that's in it now that caused it but the floor pans will need some attention. The camping Scrambler will not have carpet. :) As far as the wiring a few gauges were added but not much else.

Looks good Pete! :popcorn:

You all are going to have a great time with this! I always wanted a scrambler, but with 4 CJ's already I doubt it will happen.

The wiring mess will be fun. I have been trying to trace and fix some of the cobbled wiring on our 7. I have never seen so many different size wires used in one hot lead all with yellow (10-12) connectors. Some of them pull apart just moving them... :( I had to extend the wires from the wiper motor to the switch but I silver soldered them and then shrink wrapped. So much fun. :rolleyes:

Well as far as an adventure this one will take me places I haven't been yet. That's not a bad thing, I like to learn. I just hope it doesn't try to teach me too much.:D
 
Those wire nuts must be an electrician fixation.
The Jeep I bought from a genuine career professional electrician has its share of them too.
I will say that everything works though.
 
I spent some time undoing wiring like that. The wirenuts held for most, but still replaced them all. And the wiring under my dash still needs work. And I cannot blame all of it on the PO. One day I will clean it up.
 
Well wiring issues aside I hope to get it to fire with the current harness in there. The 1st three purchases should be a battery, carb and DUI dizzy. Hopefully those pieces will be enough to bring the AMC 304 to life.
 
Your fourth purchase should be a big ABC rated fire extinguisher :D :poke:
That wir'n is some scary c'it. :eek:
Best of luck :notworthy:
LG
 
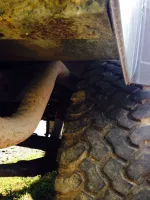
Other than being closer to the tires, what is the reason the exhaust should not be routed outside of the frame. This picture looks like it's up against the gas tank skid plate, but maybe just the pic angle. Does it also interfere with the shocks or a problem when flexing on rough terrain with wider tires? (if this is a stupid question, forgive me - I have so much to learn) I think we are going to need to route at least one of our current "builds" that way if not both.

Another thing I'm not very fond of. The exhaust was routed between the frame and rear tires. Why they didn't go inside the frame rail is beyond me.

Cj8%2012_zpshnfohpsm.jpg
 
Other than being closer to the tires, what is the reason the exhaust should not be routed outside of the frame. This picture looks like it's up against the gas tank skid plate, but maybe just the pic angle. Does it also interfere with the shocks or a problem when flexing on rough terrain with wider tires? (if this is a stupid question, forgive me - I have so much to learn) I think we are going to need to route at least one of our current "builds" that way if not both.

The two major things for me are flex and how close it runs to the tire. I can't run my hand between the exhaust and tire without touching. The Scrambler is going to be taken on some longer trips and I don't feel comfortable with its current configuration. The tires on it are 32x10.5. No way a 12.5 wide would fit. Flex is the other reason. Not that the Scrambler is going out and hitting the rocks or anything. :)
 
Very cool! subscribed.

:popcorn:
 
I'm surprised there's this much interest in this. Two of my build threads ended in a part out and I ended up selling my other Scrambler to CJ. :D guess everyone likes a good horror story. :rolleyes: Honestly though previous failures have helped me with this one already. This project is going to be about patience. It's not something I need to drive to work on a daily basis.

That said I had my first real drama with it yesterday. The previous owner said the AMC 304 in the bed was pulled cause it had all sorts of leaks and the current one was rebuilt. A little more communication between us revealed this was done 4 years ago. I immediately go down stairs and try and turn the little 8cyl in the bed over. SIEZED! :mad: Now I'm really worried about the one that currently rests between the frame rails. I didn't even pull a plug and just gave the ratchet a little muscle. Resistance like one would expect but she turns freely. :cool:
 
Pull the plugs on the extra engine and add some Marvel Mystery Oil to each cylinder. Are there manifolds on the spare engine? If not, remember there is at LEAST one cylinder open to the environment (open exhaust and intake valve). Then plug the exhaust and intake ports to keep any more contamination.

I realized this with my pulled AMC 304 . After pulling the AMC 304 I cleaned the engine and rinsed her down with a hose, then realized my mistake. So, I sprayed a bunch of WD40 in the cylinders, then turned the engine over with a wrench, then poured in some Marvel Mystery Oil. Luckily I sold the engine on Craigs List a couple days later. I did warn the new owner that there was MMO in the cylinders and she WILL smoke until she is cleaned out. Not knowing when the engine was going to be installed I did the very same thing to my 360. She fired right up and ran for a few minutes before the MMO burned out. Man, it was ugly there for a while, awful smelling smoke. When she cleared up a new set of spark plugs went in.
 
I was just going to post a thread after work about adding MMO to the cylinders. Now I don't have to. ;)
 
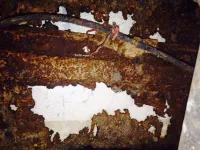
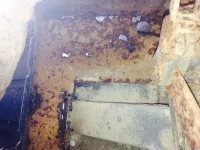
I'll get around to treating both engines to the MMO this weekend. The seized engine in the bed doesn't have manifolds on it . The engine that's in it has some long tube headers with a full exhaust system.. Hedge had asked about the floors of the Jeep. This is definitely the Scramblers weak spot. The worst spot is in the bed floor. Classic Enterprises sells the complete floor with all the braces and I believe that's the best way for me to repair that section. You can see it below. This is from under the Jeep and there's a sheet of diamond plate over it.


rear%20bed%20rust_zpswqiyhlz4.jpg
 
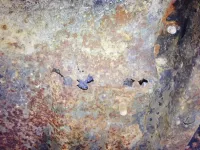
The rear floor behind the seats has some small holes to patch. The front floor pans will also need replaced on both sides

floor%20rust_zps1ljpf9pn.jpg

floor%20rust%202_zpsvbly420z.jpg
 
Last edited:
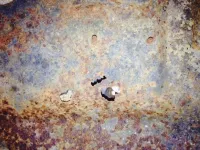
There are 4 small square panels in the bed of the Scrambler. Two of them are shot.

floor%20rust%203_zps0ho955vf.jpg
 
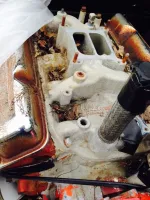
I was pretty angry with my seized spare engine last not. Today I'm a little better. Took the plastic off to find an Edelbrock performer manifold and a pair of dog leg port heads. :D. Pretty nice find that'll help towards the parts I need.
 
Well, if the block is good and if the bottom end is good not all is lost. Bore the cylinders out to the next size and You might have a decent runner there. As I think on it, I'd try a dose of WD40 to take up what ever water is there, then hit her with MMO and let the old girl soak. More than one engine has been brought back from the dead with a healthy dose of MMO.

Sorry about the condition of the floors. I think you are on the right track, it would be easier to replace than it would be to patch ..... hey what about that welder :chug:

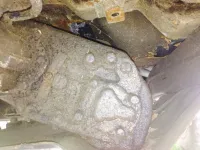
I'm just going to try and make a couple bucks off of it to put towards the Scrambler. So far I've saved a whopping $75 towards parts. At that rate it'll never run. I've got to start going through the parts stash and see what will make me some money. The welder is definitely something I want to add to the arsenal. On a side note who installs a painted engine and Transmission while leaving the Transfer Case like this:


oily%20dana%20300_zpsskmfuhzx.jpg
 
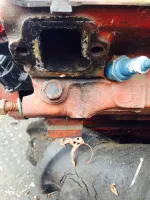
Well it's getting closer to Labor Day so I figured it's time to come up with a game plan. Supposedly low spark is the only thing keeping this baby from firing. Well that and a couple missing pieces. First I'll pull that intake and get it cleaned up. Then I'll drop a new carb on it and most likely stab in a DUI distributer. I had hoped to have $1500 to throw at it by this time but I ran across the same distributer set up for the Laredo and had to grab it. Hopefully I can get it running for the $1100 I managed to save.


image_zps899egbfh.jpg
 

Jeep-CJ Donation Drive

Help support Jeep-CJ.com by making a contribution.

Help support Jeep-CJ.com by making a contribution.
Goal
$200.00
Earned
$25.00
This donation drive ends in
Back
Top Bottom