Build Thread 84 CJ7 coming full circle

Build Thread 84 CJ7 coming full circle
Been a little busy here lately. Last week I was doing some work on my truck, and today I've got enough time to post up my progress from the week before. Hopefully tomorrow or the next day I'll have more time to get some more work done. Anyway, on to the progress.

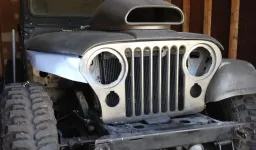
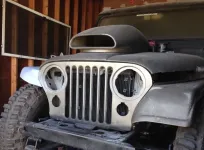
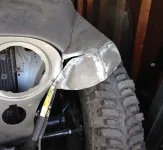
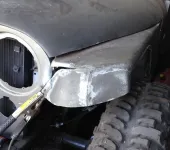
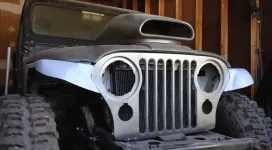
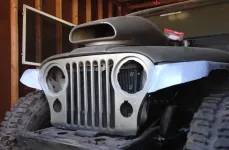
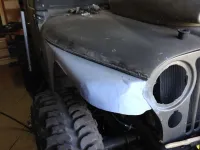
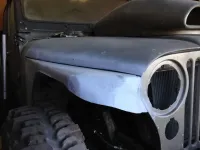
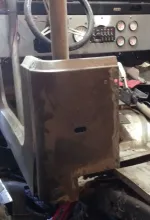
Finished filling in that corner that was bugging me. I ended up slitting the fender, pulling out the sheet metal to butt up against the side of the grille, then snipping out a filler piece and welding it in. Did a little bit more metal filling with the welder, sanded things smooth, and a little more hammering. I put on a coat of primer to see where things sat once I bolted the made-over fender back on.

image_zpszpaamipd.jpg
image_zpscwqkmswu.jpg

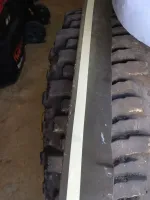
I'm pretty happy with how this is shaping up. I'll need to skim on a little body filler once I get done with everything just to make it perfectly smooth. Still got a trick up my sleeve to cover those tires for Johnny Law.

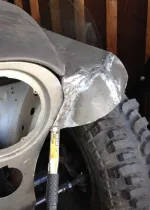
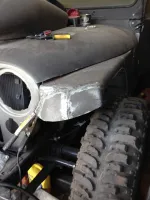
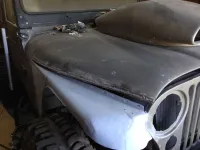
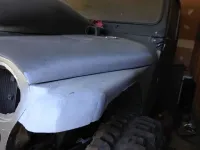
Started work on the other fender, too. I removed the inner fender, re-drilled the mounting holes, and slit the mounting flange between the fender and grille in the same fashion that the first one was done. Drilled a mounting hole in the side of the hood, and re-drilled a hole in the flange, then re-installed the fender.

image_zpscw9qqepz.jpg
image_zpsmxuryobb.jpg

Since I took these pics, I have cut this fender profile similar to that of the first one, sliced off the front of the fender, and am working on re-shaping the pieces to match what I had done on the other. Remember the prediction that repeating the blind beating I was laying down the first time would be painful? Yeah... It's a pain, alright. But at least we're having fun!
 
Hey having fun is what's it all about. :popcorn:
 
Yes it is. Looking forward to seeing pics of both fenders completed.
 
I was able to get outside and get a couple more hours worth of work done again today. I had gotten about halfway into this fender before I had to call it quits a couple weeks ago. Today I was able to nearly finish things up.

Where we had left off, and then some:
image_zpso9zaqjwv.jpg

Some steps omitted...
image_zpsga6iwixk.jpg

Little bit more.
image_zpsu0vgzbps.jpg

Another view:
image_zpsmluu7x45.jpg

Sanded down the welds, and sprayed some color on to see what we've got.
image_zpsvn6yloiv.jpg
image_zpsikbvrkhf.jpg
image_zpshs39i6as.jpg

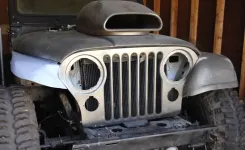
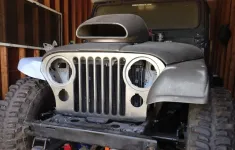
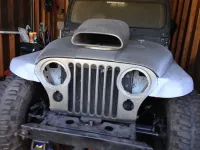
There we have it, so far. Two (nearly) complete one-off CJ fenders! I kinda am starting to dig the look. The reason I say nearly complete is there is still some finish work to do - still need a little dab of body filler to straighten out some of the imperfections, I need to finish the edges so they're not so sharp and to add some stiffness back in, and I've still got to finish covering the tires.

I'm going to take a short pause from the fenders to tackle the hood. I need to finish the edges of the hood for same reason stated above, as well as do something with that hood scoop. Hope y'all are liking the progress so far!

Then once I get done with the years of work I have left, Pete and Peanut Butter have been giving me some bad ideas again... Thanks, y'all! :rolleyes: I've been wanting to make a CJ truck for years... I'll have to exercise some willpower and try not to take my sawzall to the frame...yet. :cool:
 
Started working on the hood today. Got one side nearly done. My initial plan for finishing the edges was going to be stitching on some 1/4" round bar... But after seeing that I apparently was slightly overzealous with the sawzall when taking the initial cut to hiline the fenders... :eek: I found that it would probably be best to cut the bottom off of what was chopped from the hood and graft it back into place. So here we go...

I measured what I needed, marked it on the drop, and masked a line to cut.
image_zpsazynowbx.jpg

After a while of tap, tap, tap, ... Tack, tack, tack... "Wow, that's hot!" ... "@&!$ that's sharp..." *scratches head, shrugs*
image_zpsyf1nydfd.jpg

Closed the hood to see if it fit AFTER I made it permanent... :eek: I got lucky...
image_zpseg0asj3j.jpg

Little grinder action for a while, and some primer to keep the rust at bay. At least keep it covered until all the metal work is done.

image_zpsdjcqt9yw.jpg

Hopefully tomorrow, I'll get to finish the other side. One of these weeks, I'll get some sheet metal to fill in the gaping hole where the hood scoop currently sits. Once all that is done, I'll start slinging some mud (plastic filler, that is) and straighten all the panels. Slowly but surely, progress is being made! :chug:
 
A Wyllis style pick up bed is going to look awesome on that once you stretch the wheel base some. :poke:
 
A Wyllis style pick up bed is going to look awesome on that once you stretch the wheel base some. :poke:
:D :chug:

That's right Pete stoke the fire :D

First they start talking about it in other threads... Now I get the encouragement in mine... Thanks, y'all! My list of to-do's just grew a couple pages!
 
I finished the other side of the hood today. I didn't take as many pics, because it's pretty much a repeat of the first side. There was just a little more fit-up needed before making it permanent.

image_zpscw1axwtu.jpg

image_zpsqjc3j9sv.jpg

Unfortunately, you can still see a bit of the weld under the primer. My flap disk was just about flapped out...:rolleyes: I'll have to do some more metal finishing before I get to the filler. Still need to ditch that scoop, though.

In other news... Just putting this here for future reference so I don't forget (I'm useless when it comes to writing things down, so I'll put it here).

Adding 14" to my frame will bring the wheelbase to 110". I think I'm settling on 66" bed length. 6 feet looks like it might be a little long, and 5 feet looks a little short. I'll have to take some more measurements, but it appears I'll have to add ~6" to the back of the frame behind the shackles for proper bed support.

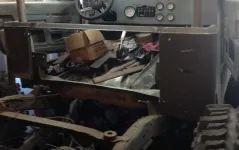
Now to empty the junk out of the jeep so I can crank up the sawzall... :lpopcorn:
I think I'm going to dive head first into this before I chicken out... I'll finish my fenders after I do the cab.
 
So... Did you do it? ;)

Well, I'm not done yet... But I did get started. :D It all kinda went like this.

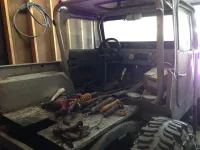
Yesterday, I was clearing all (well, most) of the :dung: out of the jeep. It really unfortunately became a junk box over the last several years. I filled up one 55 gallon trash can, and I'm out to fill another... :eek: Then I started taking a few rough measurements, then was trying to line out the logistics of how im going to attack this thing. When I was realizing the magnitude of what I'm committing to, I almost started back pedaling. The funny thing was if anyone was in my garage with me, you would have heard a one-man recount of Back to the Future:
To view this content we will need your consent to set third party cookies.
For more detailed information, see our cookies page.

So then I slept on it. This morning, I thought some more, then decided to perform a nu.... Er, gut check... Found everything intact. Aw, what the heck... It's only steel and a little fiberglass, right? ;)

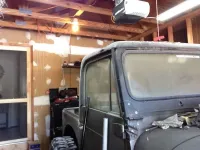
I started by destroying the side glass seals.
image_zpsyectly7o.jpg

Followed by popping out the side glass on both sides. Almost committed at this point.

image_zpsgmtck5tp.jpg

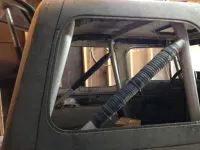
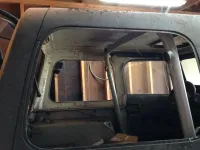
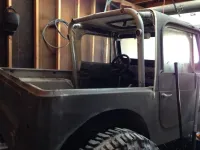
Then we brought out the sawzall. No turning back now! I lopped off the back half of the roll cage.

image_zps5efofgti.jpg

Unbolted the back hatch, reminded myself that it's only fiberglass... What's the worst I could do? Hahaha
image_zps2cjrenqk.jpg

Took a couple measurements, followed by some copious eyeballing... Taped out a line so things would stay straight(ish)... Then took another swipe with the sawzall.

image_zpsgzhfjxia.jpg

image_zpsb2bat01w.jpg

image_zpsqk8ggtrx.jpg

So there we have it, so far. Tomorrow, the plan is to drain the years-old gas that's still left in the fuel cell, remove that, and see how far I get hacking apart the back of the tub. I might be going about this a little backward, but I have to pick and choose what order I do things in, because I have to work inside the garage, I can't leave any parts outside, and it's obviously only a single car space... So it's a little tight in there sometimes! I don't suppose I'm technically at the point of no return yet, but as far as I'm concerned, this snowball is already full steam ahead!

We'll see how far we get tomorrow. My aim is to have at least the back end of the tub (well, cab at this point) closed off by the July 4th weekend. Would be nice to already be working on the cage and top by that point as well.
 
Excellent. I was in the garage last night poking around with a tape measure a bit myself. I was looking after the door area mainly where I would cut. I don't want to compromise the door area at all since I do plan on running doors once in awhile. The pillars for the door striker seem to be angled back into the bed area. Not a deal breaker it's just going to make fabbing the cab a little more fun. :chug::chug::chug:
 
That was exactly the same area of my concern. But my doors, as you can see, are the pre-78 (or is it 76? Can't remember) that have the different latch. I removed the original striker pin, but the b-pillar and everything is still there. I was trying to figure out how to save it.
The handle/latch on the drivers side is broken, so I was going to just replace them all together with mini bear claw latches, and put in the normal paddle handles on the door. Of course, it would probably be much cheaper and easier if I just replace the door handle itself, but... I wouldn't mind being able to actually lock the door sometimes. And if I put in the bear claw latches, they come with their own striker pin, and I'd probably have to fab some sort of mount/support for it anyway.
 
Seeing you cut the back of that hard top off almost made me cry. I'm thinking this my be hard to watch but let the force be with you Luke.
 
Seeing you cut the back of that hard top off almost made me cry. I'm thinking this my be hard to watch but let the force be with you Luke.

I'm really sorry to hear that. I'm sorry to put you through some visual discomfort as well. I figured that there may be at least a few that would be shaking their fist at me, with "what are you doing!?" ringing through their minds. Quite honestly, I'm not sure if I know what I'm doing... Lol I suppose we'll all find out when we get there. :eek:

I had a similar situation with a friend of mine when I lived in North Carolina... He called me blasphemous when I pulled the AMC 360 out after it breathed it's last and replaced it with a Chevy 383 stroker.

On with today's destruction... I took one quick swipe across the back end with the sawzall to get things moving. Fortunately, I was careful to cut the sides right down the seam where the spot welds hold the back corner panels on. From there, I measured up to the trailing flange on the b-pillar, figured that would be a good place to start.

That measured out at 35.5", so I taped a line off at that dimension on both sides, and cranked up the sawzall again.

image_zpsaolrngku.jpg

image_zpsro7awafd.jpg

Please pay no mind to my piles of :dung:... :eek:

Repeated the same for the other side, then connected the dots and sliced across the floor.
image_zpszeluvwtm.jpg

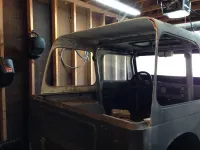
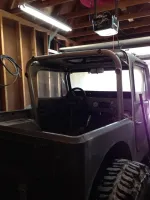
And from the front. We can already start to picture the truck cab now! (Good thing I've got some imagination, feeble as it may be)
image_zps9dqspf4v.jpg

So the saga continues... I'm on track so far for getting the cab closed off soon. Hopefully tomorrow I'll go start dissecting the back corner panels and the lower panel, drilling out the spot welds for the remnants of what I chopped today. I just wanted to get the back off quickly so I could start the fab work. More to follow soon!
 
Seeing you cut the back of that hard top off almost made me cry. I'm thinking this my be hard to watch but let the force be with you Luke.

It's going to be fine , in the end your gonna like it. ;)
 
I'm really sorry to hear that. I'm sorry to put you through some visual discomfort as well. I figured that there may be at least a few that would be shaking their fist at me, with "what are you doing!?" ringing through their minds. Quite honestly, I'm not sure if I know what I'm doing... Lol I suppose we'll all find out when we get there

And from the front. We can already start to picture the truck cab now! (Good thing I've got some imagination, feeble as it may be)
image_zps9dqspf4v.jpg

So the saga continues... I'm on track so far for getting the cab closed off soon. Hopefully tomorrow I'll go start dissecting the back corner panels and the lower panel, drilling out the spot welds for the remnants of what I chopped today. I just wanted to get the back off quickly so I could start the fab work. More to follow soon!

All hail the Sawzall King! :notworthy: It's almost exactly how I pictured it. The great thing about these truck builds is that everyone has their own ideas and they'll all end up different. I'm going to use a Scrambler top. I'd like to grab one with no rear window and then put a slider in it. Are you going to use the rear lift gate for your rear window? Great job removing the corners to create your cab. I'm going to use replacements so I can still keep my Cj trailer dream alive. :D
 
All hail the Sawzall King! :notworthy: It's almost exactly how I pictured it. The great thing about these truck builds is that everyone has their own ideas and they'll all end up different. I'm going to use a Scrambler top. I'd like to grab one with no rear window and then put a slider in it. Are you going to use the rear lift gate for your rear window? Great job removing the corners to create your cab. I'm going to use replacements so I can still keep my Cj trailer dream alive. :D
I'm considering a couple options for the rear window. The easy one will be to use the rear lift gate, which I think I might do. Of course I'd remove the latches and handle, fill that all in. The only thing that makes me hesitate from it is the little "hump" right above the handle. Not sure how that would look. I was just going to cut the glass and build the top to fit, but the glass is tempered... No cutting that!

The other option I was thinking was reusing one of the side glass panels and putting that in. I always thought just glancing at them that they were some irregular, non-symmetric shape. Turns out after I popped them out that they are in fact vertically symmetric. I'm just afraid that it might be small. But old pickups had a small back window, so... Dunno. I'm just trying to avoid buying a new rear window at all. Starting to see my cheapness? Lol

But thanks for the props on the sawzall lol! :chug: I definitely went through a few blades over the past couple days... Lol
 
Houston, we've got a problem.

We're going to have a little detour here... Delay of game, due to rain, I suppose. I knew I had a little rust spot in the bottom corner of the b-pillar, so I was going to patch that real quick today before I started fitting the corner on the back of the cab.

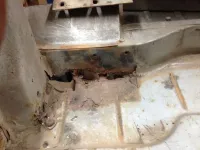
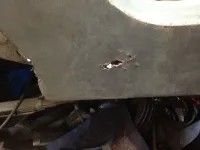
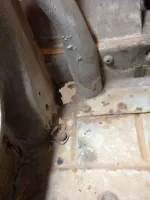
Rewind here for a minute -- I'm beginning to see why people hate mud. Don't get me wrong, I used to love it. I'd still love to race, or go watch. But the cleanup is pure h-e-double-hockey-sticks. As I was cleaning up my mess I made years ago, I started poking at the floor with the screwdriver I was scraping up mud clods with. Rather, I started poking THROUGH the floor...

image_zps0drpoqkp.jpg

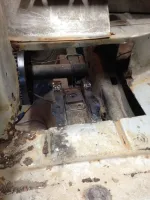
Started chipping away at the back side...
image_zpscjdnejrd.jpg
I got nailed by the dreaded PO fubar... The whole back side there was caked in seam sealer, foam, and filler... :censored::mad:

So, the roll cage had to get out of the way.
image_zpsosf5ndap.jpg

:eek: :( :mad:

But wait! There's more! Act now, and get two for the price of one!
image_zps224oxns3.jpg

There was the same foam :dung: sprayed in behind the cage foot on the other side too. Turns out, I found the same brushed on seam sealer in the back of that panel as well... Only silver lining is its "not AS bad..."

Oh well... Better I find it now and take care of it, rather than find out later when my foot goes through the floor. Or the seat. Or cage mount.

Like the great Ron White once said... "When life gives you lemons, make lemonade... Then find someone whose life gave them vodka... And have a party!"

Until next time... Stay thirsty, my friends.
 
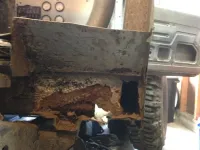
Well, I was poking around in the jeep again... Started cutting out some of the floor on the passenger side where it was rusting away under the roll cage foot. I found the bottom of the b-pillar rusted out.

image_zpsa7gl6fvv.jpg

That was motivating... So I poked at the bubbles on the side of the body just outside the b-pillar.

image_zps0uafvfru.jpg

This just keeps getting better... Well, I needed to cut the floor a little bigger since I found a little more rot.

image_zpse26amhgf.jpg

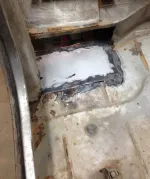
Then snipped out a piece of sheet metal to fit the gaping hole in the floor.

image_zpsfbfleitp.jpg

I still need to weld that in, cut the rust from the bottom of the b-pillar and form a piece to fit, and apparently cut some of the rocker panel out to replace it as well. Finally, I'll need to fill the back of the kick panel in just above the floor. But I was losing some motivation, because it's looking like I'll have to repeat all this on the other side. I wanted to see some forward progress.

I might be painting myself into a corner here, but it looks like I'll still have the room to work inside. I really hope so anyway... I mocked up one of the corners, decided I liked the way it looked, and tacked it into place.

image_zpshwahqqrf.jpg

Figured I'd try the same on the other side.

image_zps3onz3cjz.jpg

Yep -- that's a good sized notch cut out of the lower corner of the drivers side rear. You guessed it -- more rust. :rolleyes:

Then measured the width between the corners, and cut the top of the rear panels that I cut off last time to make the top edge of the back of the cab.

image_zpsci4hrw7s.jpg

So, despite a few holes, it's starting to take some shape. I still need to clean the rest of my :dung: out of the cab floor so I've got room to work... By the time I'm done, it may be a bit like a patchwork quilt, but hey, I'm having fun trying to do this on the low-buck and use everything I've got on hand before buying more.

I'll keep posting progress as I make any. My original aim was to have the back of the cab closed in by the July 4th weekend... Well, that's closing in fast!
 

Jeep-CJ Donation Drive

Help support Jeep-CJ.com by making a contribution.

Help support Jeep-CJ.com by making a contribution.
Goal
$200.00
Earned
$25.00
This donation drive ends in
Back
Top Bottom