• Hello Guest, we are proud to now have our Wiki online that is completely compiled and written by our members. Feel free to browse our Jeep-CJ Wiki or click on any orange keyword when looking at posts in the forum.

Best engine and transmission placement? Cj7 engine swap 4.3 v6

Best engine and transmission placement? Cj7 engine swap 4.3 v6

76cj7chick

Old Time Jeeper
Posts
1,235
Solutions
1
Thanks
8
Location
WA
Vehicle(s)
1976 CJ7 Jeep with a engine/tranny/wiring harness out of a 1988 s10 blazer 4.3l v6 with th700r4 automatic tranny and a cj7 Dana 300 transfer case with Novak adapter.
Complete wiring harness from the s10 blazer. Painted with HOT PINK Pearl paint with standard sized metallic halographic pink flakes. Painted by me -a newb. New rear, front and side three wire LED lights, New parts, new custom dash-by me And a lot of guidance from fellow jeepers and lots of prayers etc.... :p
Hey everyone,
I'm just sending out this thread to get feedback on what is the best engine placement for my 4.3 swap into the CJ7 is.

Would love to hear from people who have swapped the 4.3 GM engine and th700r4 into their cj7s.

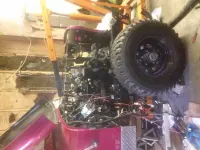
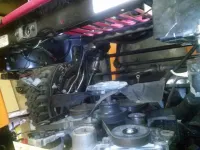
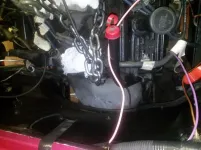
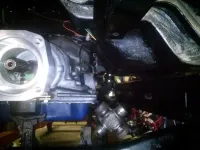
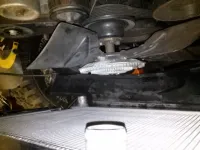
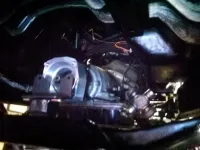
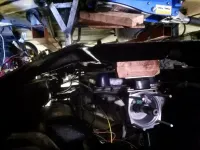
I installed the engine mounts however it looks like the engine sit still too high. However the only way to lower the engine anymore is to drill another hole back further in the frame but that would bring the entire drivetrain back.
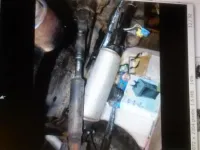
Where the engine sits-my rear driveshaft is 20" long.

Also does the engine mount need to be straigh(as seen in the picture) or does it need to be tilted a little bit back?

Is it better to have the engine will further forward or is it better and the longer rear drive shaft or is it better to have a shorter drive rear drive shaft and push the engine for the back? Would I need to drill an additional hole in the frame to set the engine further back and lower or what is the best way because as it sits now it looks like the Transmission is too high and the angle from the Transfer Case to the rear axle might be a little too steep.

PHOTO_20150820_170816.webp

PHOTO_20150820_170755.webp

PHOTO_20150820_170710.webp

PHOTO_20150820_170742.webp

PHOTO_20150820_170900.webp
 
Last edited:
I have never done this swap, but I will try to at least give you some food for thought. I see in your pictures that the grill assembly is already in place. For the swaps that I have done, I find the approximate engine location by putting the grill, radiator, fan shroud, etc. in place.

The next thing I do is to lower the engine, with fan attached, into the engine bay and place the fan inside the shroud. Make sure you have adequate space between the fan and radiator, and that the fan blades are parallel to the radiator core.

Once I have my rough placement set, I use C clamps, or some other clamping device to temporarily hold the motor mounts/engine in place.

Next, I put the tranny in and line it up with the cross member. If everything looks good, I tack weld the motor mounts to the frame. (Naturally, I am referring to the frame half of the motor mount.) Once everything looks good, you can bolt the mounts to the frame. The mounts should be as "non-stressed" as possible when you set the motor down on them. A little bit angled won't hurt, but I would try to keep them as straight with the engine as possible. A slight backward tilt to the engine is OK, but that makes your Transmission lower.

A longer drive shaft is better. At 20", the shaft is really short. You will have to make sure you rear pinion angle is appropriate. You will probably need to go with a double cardan joint. You don't want to have more than a 17 degree drive shaft slope. This is a pushed limit according to Tom Woods for a single U joint drive shaft.

From your pictures, things look pretty close. I don't know how low your Transfer Case will be. Will you still be able to use the stock Transmission cross member? If so, sounds like your main problem is the rear drive shaft. Knowing if the cross member fits would be nice to know to better help you with your project.
 
Haven't done it either but placement isn't really drive train specific. If you haven't done it you need to mount your Transfer Case . Then you really know what you are working with. After that I'd do as mriplaybass wrote. Install the radiator and fan shroud. I would center the fan as much as possible in the shroud, then move everything forward as much as possible without endangering the radiator/fan. This works with all your restrictions. Then I'd worry about setting the mounts in place. You need as much rear driveshaft as you can, if possible try to keep the stock drive shaft lengths. Here's a suggestion, you could cut the Transmission propeller shaft an inch or so .......... :) just kidding. I am thinking that you might be understanding better the need to make things as short as possible in a CJ. At mriplaybass's suggestion of tacking the motor mounts in place you might be going WHAT!, but he is right. Tacking them, drilling the holes (if necessary) only when the engine location is established.

When I did my swap my motor mounts were weld on/drill and bolt on mounts. With no welder available then, using the stock frame holes, I drilled them, didn't like the engine location, moved then drilled them again. The result, Swiss cheese. After having them repaired at a welding shop the final engine location was established.
 
Thanks guys for the suggestions!

I'll go ahead and try to piece everything together in the front of the engine like the grille, radiator and shroud and then take some more pictures and measurements.

Would anyone know if it is typical to have to drill new holes and move the engine further back on the frame with the particular engine Transmission swap?


Thanks again for the help... please keep sharing the wisdom. :notworthy:
 
Haven't done it either but placement isn't really drive train specific. If you haven't done it you need to mount your Transfer Case . Then you really know what you are working with. After that I'd do as mriplaybass wrote. Install the radiator and fan shroud. I would center the fan as much as possible in the shroud, then move everything forward as much as possible without endangering the radiator/fan. This works with all your restrictions. Then I'd worry about setting the mounts in place. You need as much rear driveshaft as you can, if possible try to keep the stock drive shaft lengths. Here's a suggestion, you could cut the Transmission propeller shaft an inch or so .......... :) just kidding. I am thinking that you might be understanding better the need to make things as short as possible in a CJ. At mriplaybass's suggestion of tacking the motor mounts in place you might be going WHAT!, but he is right. Tacking them, drilling the holes (if necessary) only when the engine location is established.

When I did my swap my motor mounts were weld on/drill and bolt on mounts. With no welder available then, using the stock frame holes, I drilled them, didn't like the engine location, moved then drilled them again. The result, Swiss cheese. After having them repaired at a welding shop the final engine location was established.

Thanks for the help only problem about mounting the Transfer Case (to see where sits) is that the aftermarket adapter I bought doesn't have a Transfer Case to cross member mounting bracket. And so I was mostly going by the locations and previous driveshaft length.

:confused:
Thanks for the help!
 
Are your motor mounts supposed to be specific to the adaptor and specific application you have? If so they "should" fit, but even the adaptor you have isn't specific anymore due to the modified or additional adaptor plate you had them make. Sometimes you simply have to drill. There is another option, but it would take some skill to accomplish. I also hate the idea of modifying the frame. My dad pounded in my head that you should never touch your frame. If it were me I'd modify the frame side motor mounts with a very heavy, essentially blank plate on the frame side that is long enough to cover the existing mounting holes in the frame. Then I would put the engine where it needs to go, meaning it lines up with the shroud opening with radiator clearance (remember you might/will need to pull the fan for water pump maintenance someday). Then make sure you have the rear mounting system figured out. Not to high, not to low and centered in the frame as well as possible or since some drive trains are NOT centered in the frame with the drive train parallel to the frame rails. When you are satisfied with the drivetrain location use the exiting holes as guides and drill the holes in the blank. then clean things up and paint for a professional look. .....Remember you have o get an exhaust system in there somewhere too. ..... :eek: .. easy right. :) don't think about everything all at once, do each, one at a time then move on the next quicker than you think the job list will be done and you can call the drive train mounted.
 
Hey guys!
I 'mock' installed the radiator and grille. And am trying to see if I can modify the plastic shroud that came out of the blazer donor for my engine and tranny swap.
Looks like I'll have a lot of room to spare. And could pull everything forward if needed. :D

So the main issue would be making everything at the right level and angle. If i pull the engine forward in the vehicle, I will have to get my rear driveshaft lengthened.

When I was pulling parts if the 88 s10 blazer, I managed to pull the driveshaft. It looks close to my cj driveshaft and wonder if I could use it on the jeep. as it is longer? And just have it cut to length if needed? Or are they totally different and would require the same joints and shaft 'balance?'

Please continue to share your experience and knowledge with me as I feel like a fish out of water on figuring out where everything is supposed to go.

Thanks!!!:notworthy:
 
Here are some pictures of the front assembled.

I may need to get another cross member as the po cut it to half its size and drilled so many holes that it looks like a pin cushion.:(
Any suggestions on a good aftermarket or universal crossmember with removable skidplate preferably???:o

The last picture is where the rear driveshaft was originally before I pulled the AMC 258 i6 / 4.2l engine and GM Turbo 400 amc tranny... looks kind of steep to me.. pro must not have cared about it being to high?

CAM01081.webp

CAM01083.webp

CAM01057.webp

CAM01045.webp

CAM01008.webp
 
Are your motor mounts supposed to be specific to the adaptor and specific application you have? If so they "should" fit, but even the adaptor you have isn't specific anymore due to the modified or additional adaptor plate you had them make. Sometimes you simply have to drill. There is another option, but it would take some skill to accomplish. I also hate the idea of modifying the frame. My dad pounded in my head that you should never touch your frame. If it were me I'd modify the frame side motor mounts with a very heavy, essentially blank plate on the frame side that is long enough to cover the existing mounting holes in the frame. Then I would put the engine where it needs to go, meaning it lines up with the shroud opening with radiator clearance (remember you might/will need to pull the fan for water pump maintenance someday). Then make sure you have the rear mounting system figured out. Not to high, not to low and centered in the frame as well as possible or since some drive trains are NOT centered in the frame with the drive train parallel to the frame rails. When you are satisfied with the drivetrain location use the exiting holes as guides and drill the holes in the blank. then clean things up and paint for a professional look. .....Remember you have o get an exhaust system in there somewhere too. ..... :eek: .. easy right. :) don't think about everything all at once, do each, one at a time then move on the next quicker than you think the job list will be done and you can call the drive train mounted.

Hey hedgehog thanks for the response. :p
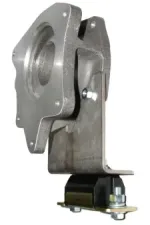
I bought advance adapter motor mounts they are specific for my jeep. Only thing is they were for wekd on but meaning that I'm not a welder I just drilled holes into them.:o.

I guess I did get a adapter mounting bracket along with it. :rolleyes: Here is a picture... I'm still confused on where everything should go.

However, I do know that the drive shaft should be as level and straight as possible and that the engine itself can be 6 to 8 degrees angled but that the Transmission pan has to be level. I also retrofited all the parts to see it works.....And that's about all I know...

Please let me know of any and all important install instructions!
:notworthy:

rm103_under_103.webp
 
Sweet .... If your original driveshaft is stock, no brainer, keep it stock length. If it was good enough for AMC it's good enough for you. Also if the driveshaft is in good working condition it will save you an lot of money in the end. There will be some elevation difference between the front and the back of your propeller. Again, if you set the output shaft at the same height and side to side location as it was stock you are good to go. I've heard that a perfectly straight driveline is not desirable. Also, level is a relative thing in a vehicle. Exactly when is it level? When it's unloaded ... when it's got a load in it ..... and exactly when are you NOT going either up hill or down hill. No you probably don't want your drivetrain pointing too far up in the air or I suppose down. In a vehicle close really does count. As I wrote above, center your fan in the shroud and set the output shaft at factory height and you will or should be good to go. Follow that advice and most of your decisions are already made. When I set my Buick 231 v6 that is what I ended up doing and it worked great until having my first child forced me to sell. Until then I worried just the same way you are doing right now. If you have a bunch of holes in your cross member, weld'em closed and grind'em smooth then paint, nobody will know they were there.
 
What Hedgehog said.:agree:
I am looking at everything on my phone, so it's hard to see your pictures, but I will add a few footnotes. I assume you can't weld, so you want to bolt as many things as you can. Nothing wrong with that. I like Hedges idea of the plate behind the motor mounts. Just don't go too heavy with the plate. Remember, you are effectively moving the motor mounts closer to the engine. Too much and you may discover the holes won't line up when you lower the engine down onto them. Someone used 1" plate on our 59 CJ5 , lots of cutting and grinding to fix it. If you plan to bolt through the frame, some words of caution. Factory bolt throughs have a tube welded inside the frame to prevent the frame from collapsing when the bolts are tightened. You won't be able to do that, so either use grade 8 washers on the other side of the frame, or make 2 of the plates Hedge suggested. One on each side of the frame. I will assume your weld on motor mounts are stamped light gauge metal. This type of mount gets it's strength from the bend's, and the full perimeter weld. Make sure you use a sufficient number of bolts for this. 3/8" Grade 8 recommended. Don't over tighten! 33 ft.lbs. For 3/8 Grade 8 coarse.
This just took me 1/2 hour to type on my phone. :eek: I'll try to address the drive shaft when I get home from work tomorrow.
 
Thanks mriplaybass, It's not easy to write, but I'd definitely modify the frame motor mounts to make sure they end up being the same width as they would have been stock. Hmmm, maybe the visual would be to shave the mounts the same thickness as the blank plate I suggested using so the mount is the same size after adding the plate as it was in stock form. Does that make things any clearer or does it muddy the waters even more?

Question: Why do some I-phones send pictures upside down? Or is it too easy to make the mistake of taking pictures upside down? Now that's a possibility, anyways it seems like we get quite a few pictures of jeeps defying gravity lately.

I think Mriplaybass and I are attempting to encourage you to stop worrying and glue the drivetrain down. There are lots of new and interesting things to worry about in your project. .... radiator hoses, ignition, hooking up the EFI, exhaust systems, shift linkages..... lots of fun indeed.
 
What Hedgehog said.:agree:
I am looking at everything on my phone, so it's hard to see your pictures, but I will add a few footnotes. I assume you can't weld, so you want to bolt as many things as you can. Nothing wrong with that. I like Hedges idea of the plate behind the motor mounts. Just don't go too heavy with the plate. Remember, you are effectively moving the motor mounts closer to the engine. Too much and you may discover the holes won't line up when you lower the engine down onto them. Someone used 1" plate on our 59 CJ5 , lots of cutting and grinding to fix it. If you plan to bolt through the frame, some words of caution. Factory bolt throughs have a tube welded inside the frame to prevent the frame from collapsing when the bolts are tightened. You won't be able to do that, so either use grade 8 washers on the other side of the frame, or make 2 of the plates Hedge suggested. One on each side of the frame. I will assume your weld on motor mounts are stamped light gauge metal. This type of mount gets it's strength from the bend's, and the full perimeter weld. Make sure you use a sufficient number of bolts for this. 3/8" Grade 8 recommended. Don't over tighten! 33 ft.lbs. For 3/8 Grade 8 coarse.
This just took me 1/2 hour to type on my phone. :eek: I'll try to address the drive shaft when I get home from work tomorrow.

Thanks mriplaybass, ;)

You are correct that I am trying to just keep it to bolting in the motor mouns. I've only welded twice in my life and at this point I would just like to try to keep it that way. :o

Sounds more complicated to try to move the motor mounts. I was hoping to move the engine or more for but I really don't really have to.

I've also checked other people on YouTube and pictures of other people swaps, and they vary greatly, as some of the vehicles have engines forward in the engine compartment some have it for their back and these are for CJ7 and YJ. So I'm just going to see how everything fits as it is now with a radiator in it and the fan, as well as the exhaust pipes that come off of the headers. Hope I don't have any issues with them because they were the stock ones in the blazer. Then once I get everything in the front figured out the drive shaft in the exhaust pipe at least partially and then I can angle everything to an thinking I might drop C engine mounts just tilt it back a little bit as I put them in completely straight and everyone else online I've seen the bulb holder pearl to each other therefore it should drop back slightly to the rear . And then perhaps I go from there and make sure that the Transmission adapter and Transfer Case line up as well and then probably will have to extend the rear drive shaft.

Also the Transmission skid plate and cross member I was hoping to get fell through. I'll still try it with the stock Transfer Case crossmember.
unless something else comes up.

Thanks again for your suggestions and help hopefully I can get this done one day... Soon.::rolleyes:

I'm definitely using grade 8 bolts and washers and nuts. :)


It however I do need to move the engine forward I will definitely use some heavy duty plates.

By the way, so you don't have to type everything out slowly on the phone you should get a phone app that allows you to speak what you wanted to say and it types it out for you as you speak. That's what I did otherwise I'd probably take a couple of hours typing my response. :)
 
Thanks mriplaybass, It's not easy to write, but I'd definitely modify the frame motor mounts to make sure they end up being the same width as they would have been stock. Hmmm, maybe the visual would be to shave the mounts the same thickness as the blank plate I suggested using so the mount is the same size after adding the plate as it was in stock form. Does that make things any clearer or does it muddy the waters even more?

Question: Why do some I-phones send pictures upside down? Or is it too easy to make the mistake of taking pictures upside down? Now that's a possibility, anyways it seems like we get quite a few pictures of jeeps defying gravity lately.

I think Mriplaybass and I are attempting to encourage you to stop worrying and glue the drivetrain down. There are lots of new and interesting things to worry about in your project. .... radiator hoses, ignition, hooking up the EFI, exhaust systems, shift linkages..... lots of fun indeed.

Thanks hedgehog, you made me laugh.:D

If you have any pictures of these plates you are talking about for the motor mounts as to what they should look like or drawings that might help me out a little bit if I do decide to move the engine forward into the engine bay.:o

I asked my Brainiac brother about why some of the pictures endup upside when uploaded. He responded by saying "I dont know some cameras just do that. People should just flip them over. " ROFL. He is a crazy one. :rolleyes:

Thanks again for all your help!!!!! :notworthy:
 
Glad you are taking the bull by the horns. Giter done! Just a moment to clarify things between Hedge and myself. The way I understood the method of installing the motor mounts was to use a plate maybe a few inches longer than the motor mount and bolt that to the inside of the frame. Then, bolt the frame portion of the motor mount to the plate? Sound right?

76cj7chick, if you could post a picture of the motor mount, it would help a lot. I am trying to comprehend where you were able to drill holes in the motor mount that is supposed to be a welded mount. I know that the frame portion of the mounts on my 231 V6 in our 59 CJ5 would not have had enough flange to facilitate bolting. Just want to make sure your mounts are secure. Nothing worse than having a motor mount let go under power:(

As far as your drive shaft, just make sure you have the right slope. 17 degrees is considered the max for a single U joint shaft. More than 17 degrees and you will have a lot of vibration, or worse. The joints could bind. Bad things happen if this happens.
Keep posting, we will both continue to help as much as we can.

I'll have to research the voice to text app for my phone. I never heard of that.
 
I hear it all the time, a friend of mine uses that feature when sending messages to his family. Honestly I can't believe it is quicker than just typing.

mriplaybase - My Advanced Adaptor Buick 231 had weld on/bolt on motor mounts, Back in 1987 (or so, can't remember the exact year) were relatively crude. Essentially an angle iron with a bolt through the middle rubber disk ... can't remember the part on the motor though. Back then I didn't have a welder so I chose to drill and bolt the mounts on. I honestly don't know what her mounts look like. I can imagine what I'm talking about, but without pictures I'm having trouble?????

I believe in keeping things as close to stock as is possible, so I will always preach, if it is possible to keep the output in the stock location relative to the differential pinion input, do it.

76cjchick - remember, if you have to modify one drive shaft, you have to modify two drive shafts. There's no getting around it, longer rear shaft, shorter front shaft. When I got my CJ both shafts were sloppy warn out, so I got a used set, both a little long. Then had them modified to fit @ well over $100 each. It was worth the effort, but the savings was fairly small.
 
I did the 4.3 swap in my CJ5 before I went to the AMC 258 i6 / 4.2l . You want the engine as far forward in the engine bay as you can get it. I put mine at the back of the engine bay to keep the stock drive shaft length and it made it WAY unstable. With the engine all the way back and a hard top, it was just too tail heavy and wanted to swap ends on ice or just a bumpy gravel road. The 7 may not be as bad since it is a little longer wheel base.
The other mistake I made was centering the engine between the frame rails to leave more room for the driver side exhaust. I should have off set it 1.5 inches to the drivers side like the stock engine placement. The compound angle caused some u joint problems.
 
Glad you are taking the bull by the horns. Giter done! Just a moment to clarify things between Hedge and myself. The way I understood the method of installing the motor mounts was to use a plate maybe a few inches longer than the motor mount and bolt that to the inside of the frame. Then, bolt the frame portion of the motor mount to the plate? Sound right?

76cj7chick, if you could post a picture of the motor mount, it would help a lot. I am trying to comprehend where you were able to drill holes in the motor mount that is supposed to be a welded mount. I know that the frame portion of the mounts on my 231 V6 in our 59 CJ5 would not have had enough flange to facilitate bolting. Just want to make sure your mounts are secure. Nothing worse than having a motor mount let go under power:(

As far as your drive shaft, just make sure you have the right slope. 17 degrees is considered the max for a single U joint shaft. More than 17 degrees and you will have a lot of vibration, or worse. The joints could bind. Bad things happen if this happens.
Keep posting, we will both continue to help as much as we can.

I'll have to research the voice to text app for my phone. I never heard of that.

Thanks for your suggestions and warnings.. Im not having much success with the swap... Perhaps too much worry and too little experience. However, here is a picture of the mount. I may. Leave the engine where it is now. But could use advice from experienced people...
Also, the cross member was originally to mount the case however with the engine/tranny swap doesn't have a built in mount on the adapter.. I did buy the case adapter mount but don't know if the weight and fitment will work...
Q1) Should I leave the engine where I placed it?
Q2) Should I mount the Transmission or case on the cross member? Or does it matter?
Sorry guys for this long and dragging on ordeal but I am scared I'll do it wrong... :notworthy:

Okay, so my phone is not letting me upload pics yet.. I will have to try later... :(
 
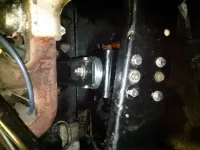
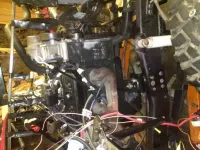
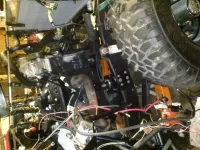
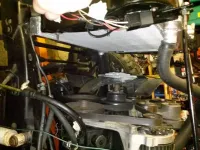
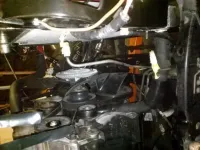
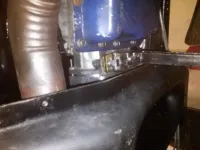
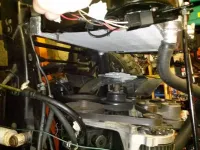
Here are some pics of the motor mounts installed. I ended up drilling additional holes in the bracket to make for a stronger hold. I will upload pictures of the mounts by myself later and also the with the Transmission look like at this position..
:notworthy:

PHOTO_20150829_112723.webp

PHOTO_20150829_111438.webp

PHOTO_20150829_111106.webp

PHOTO_20150829_112932.webp
 
I did the 4.3 swap in my CJ5 before I went to the AMC 258 i6 / 4.2l . You want the engine as far forward in the engine bay as you can get it. I put mine at the back of the engine bay to keep the stock drive shaft length and it made it WAY unstable. With the engine all the way back and a hard top, it was just too tail heavy and wanted to swap ends on ice or just a bumpy gravel road. The 7 may not be as bad since it is a little longer wheel base.
The other mistake I made was centering the engine between the frame rails to leave more room for the driver side exhaust. I should have off set it 1.5 inches to the drivers side like the stock engine placement. The compound angle caused some u joint problems.

Hey Bent, Thanks for your help. Would you suggest drilling additional holes to move the engine further forward or does it look good in the picture as it sits?
I off-set the engine toward the right side just as it was originally. The only issue Im running into with the exhaust is the brake proportion valve hits into the driverside pipe... (Ill try to include pics..Sorry if they are sideways) My front driveshaft runs on the passenger side of the vehicle unless the exhaust will get in the way.... I will include pics soon.
Thanks for the pointers..:notworthy:

CAM01312.webp

CAM01299.webp

CAM01316.webp

PHOTO_20150829_112932.webp

CAM01321.webp
 

Jeep-CJ Donation Drive

Help support Jeep-CJ.com by making a contribution.

Help support Jeep-CJ.com by making a contribution.
Goal
$200.00
Earned
$0.00
This donation drive ends in
0 hours, 0 minutes, 0 seconds
  0.0%
Back
Top Bottom