• Hello Guest, we are proud to now have our Wiki online that is completely compiled and written by our members. Feel free to browse our Jeep-CJ Wiki or click on any orange keyword when looking at posts in the forum.
    To dismiss this notice
    click the top right X.

Build Thread Deerejeep's '81 CJ7 Iowa

Build Thread Deerejeep's '81 CJ7 Iowa
Nice work Deerejeep. You're only a little ahead of me so I appreciate the encouragement of things to come. I noticed you left the windshield and tailgate on. I've been wondering about whether to paint them separately. Any wisdom on that? Once again, nice work.

:popcorn:


There was no real logic in the windshield and tailgate left on , other than space is at a premium in the garage and I thought it would be easier to transport. I'm having the same debate however. The hood to cowl hardware and door hardware will be the concern. They're painted to color along with the hardware. I'm going to bring the topic up with my body guy soon and will report back on how he thinks we can do it. I think he told me in the past he could shoot them all separate, I reassemble and he could shoot those areas again prior to any clear. Don't take my word on that.


Sent from my iPad using Tapatalk
 
I think you should remove them because I bet you have surface rust under the hinges.
 
Yep thats what I'm talking about you wouldn't want to paint it without taking care if that.
 
Here's what it looked like under my hinges.


Wow! Good point. We're going to pull them off make sure they're clean and paint. I just talked through this with the body guy. We're going to fit everything before spraying it too. This should be a fun couple of weeks(hopefully not months) working through it. Finally saw a real color chip book for the 81 CJ colors. Definitely going chestnut mtn. Brown. By the way clear is within that mix.


Sent from my iPad using Tapatalk
 
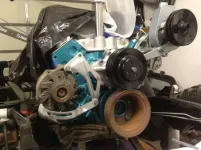
You know how everyone says "take lots of pictures." I say take them and don't loss them. I've been unable to find them so I've been flying a bit blind on mocking up all the bracket and accessories on the front of the engine. Here is what I have so far. I've only made 2 trips for hardware, but will need at least another to figure it out. d3a8970c28c3b618400ff8c13755b6b7_zpsb0b474cb.jpg

I'll of course be replacing or restoring that pulley and the alternator. I thankfully decided to mock up the water pump before installing and realized I was missing some hardware and then thought it would be good get it all mocked up before moving forward.

I think the power steering looks correct, but I'm not completely sure on the alternator. The 360 had A/C but i'm not going with AC for the CJ, so I know there is perhaps a spacer or bolt that will be different. thoughts?

2108f06e8ec03e475cd61611a81cbc86_zps1f4e6ae1.jpg
th_bce1f0ac97832835c3df986570a77fa1_zpsdd0cee6e.jpg

Most efforts are centered putting together what I have. The T-18 /Dana 300 mating should happen hopefully in the next 2 weeks. I may have to transport the rolling chassis to the shop to do it, and then I might just get all the axle, suspension work done too.. Still hoping to drive this bad boy this summer...... but not holding my breath.


Sent from my iPad using Tapatalk
 
Little more progress tonight.. blasted the pulley, primed and painting. Also, pressed the alternator pulley back on. We'll see how that works out, I'm not sure its on straight or it maybe bent a little.

1cbc330b9d1d57d8be845e818a449083_zps067f1b48.jpg

I think I have it pressed in all the way, we'll see once I get a little further down the road to fit up the belts.

ffc7b6cf4fdba0d7efb546ae34da8f18_zpsa9fe479f.jpg
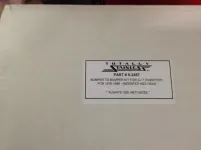
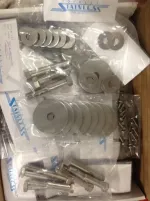
In addition, I'm about 99% sure I'm going to pick up the Totally Stainless Hard Top Body Kit 6-2487. It's the Original Style- Indented hex. My only question is that there has to be a mix of "heads" in the kit, not all indented hex. Dash etc. have to be a button head, right?
Heading to the hardware store for the 3rd time to finish the engine indicated to me that my time is better spent having all the hardware in my hands rather than running around looking for it. Plus once the body is painted up, I'll have to fit everything up quick to get it back and finished, running around looking for hardware may not help.


Sent from my iPad using Tapatalk
 
Ordered the totally stainless body kit late last week. Also, put in a decent size order to get the engine finished up. Alternator, thermostat housing etc. Now I'm debating lift kits.. There is a 4" Rough Country on from the PO, tires are 35" but they will be replaced too and I think i'm going down to 33" on a 4" lift no body lift. Rubicon Express looks to be the cadillac for CJ lifts? Recall this will be 99% street Jeep and I'm reading that skyjacker has a nice soft road ride. So what lift?


Sent from my iPad using Tapatalk
 
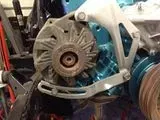
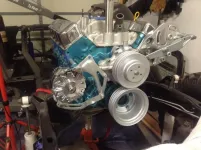
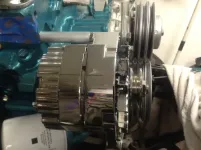
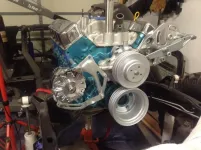
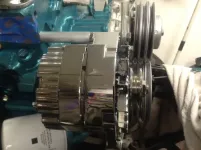
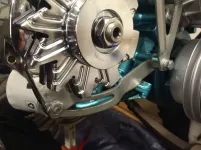
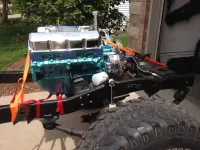
Bling Bling Bling . Proform 80amp GM style alternator showed up today. I fit it up and it looks like it like up with the water pump pulley despite having only a single pulley vs. the stock two pulley. The 360 had A/C so the brackets are for an A/C setup and I won't have it. If anyone has done this before I would be curious if this is true. I guess I'll find out when I get some belts. Some Glamour shots

265f0313c9458c61cd2c0caa4da3ec62_zpsde11d602.jpg

e07fff3b2908eca7e87756c2e2477879_zps3f045f82.jpg


Sent from my iPad using Tapatalk
 
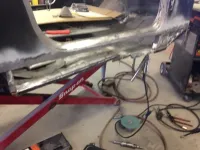
Cancer is getting cut out.. 5daa18b3224c0e2a89b792f0b67a370c_zps37c89198.jpg


Sent from my iPad using Tapatalk
 
Ordered the totally stainless body kit late last week. Also, put in a decent size order to get the engine finished up. Alternator, thermostat housing etc. Now I'm debating lift kits.. There is a 4" Rough Country on from the PO, tires are 35" but they will be replaced too and I think i'm going down to 33" on a 4" lift no body lift. Rubicon Express looks to be the cadillac for CJ lifts? Recall this will be 99% street Jeep and I'm reading that skyjacker has a nice soft road ride. So what lift?


Sent from my iPad using Tapatalk


141da1d031632444c120cdc351149606_zps3ed3b148.jpg

38e0c49366204ab84dc19699d621f233_zps392b629f.jpg

hardware arrived


Sent from my iPad using Tapatalk
 
The 360 had A/C so the brackets are for an A/C setup and I won't have it. If anyone has done this before I would be curious if this is true.

265f0313c9458c61cd2c0caa4da3ec62_zpsde11d602.jpg

e07fff3b2908eca7e87756c2e2477879_zps3f045f82.jpg


Sent from my iPad using Tapatalk

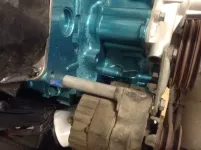
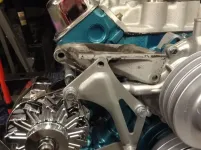
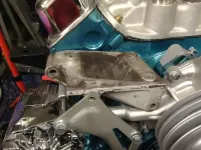
Your missing 2 brackets that moves the alternator forward. The adjustment bar should go in the rear of the alternator not in the front. Your missing the bracket that goes behind the spacer and attaches to the rear of the alternator. Your also missing a bracket that goes in front of the spacer as well. The bracket in the front of the spacer is flat on non-ac units and attaches to the top bolt on the front bracket. The ac units have a Z shaped bracket and attaches in the same spot.

DSCN3081.png

Hope this helps

Edit: correction, the Z bracket (w/ac) and flat bracket wo/ac attaches to the front of the spacer to the block by the bolt closest o the fan pulley. The top bolt isn't used with non ac units.

Nice looking build!
 
Last edited:
Posi, Thanks for taking the time to help out. I made some changes

85f83e783d63d55bd5c6547adcdf9d35_zps2f2ce3b7.jpg

2d52545a14e574864b007a293f395091_zpsfadb1f1b.jpg

aaeee8b43a330d96f74e8690c79fd5d0_zps6ea9be82.jpg

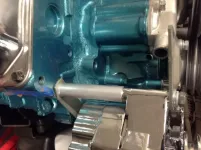
I added the rear bracket

0fb83a718c8ba22f3d7672421eec2d62_zps4cd2d86a.jpg

I have the A/C unit/ backet so I'll dig it out and see if its better to just install that bracket without the compressor.

Does it look like I have it correct now?


Sent from my iPad using Tapatalk
 
Much better!

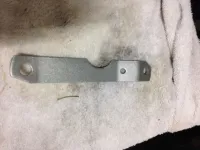
What I would do is search around for the correct non-ac Z bracket that goes in front of the spacer and attaches to the block. I'd also look around for the front 3-hole bracket as well to replace the ac 4 hole bracket. You can find them on 76 and up AMC 304 /360 at the boneyard. If I couldn't find the 3 hole bracket I'd trim and round off the corner to delete the top 4th hole.
 
I grabbed the A/C compressor detached it and cleaned up the bracket enough to fit it up. Might be overkill as I don't know how much another bolt is going to matter. Looks like I'll need a couple more bolts and a spacer where it attached to the H20 pump.

Also thinking i could get a piece of aluminum or something nice and flat with some engraving to make the top surface flat. might look cool.
125e145f234c53ce7791bf68a2b47ac7_zps155d1822.jpg

unfortunately "bone yards" seems to be far and few between here. I'd need to go the ebay route more than likely. I'm not opposed but I might just have to make it with what I have.


139d518dd4d0cc9da152edd48bd8e6f6_zpsb6d8a431.jpg


Sent from my iPad using Tapatalk
 
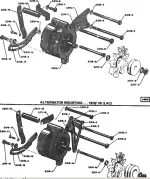
Little late, but found this to help ID the brackets (top with/o AC, bottom w/AC)


626d1310590873-pic-amc-360-alternator-mount-alt555.jpg
 
Looks great. You should be proud. This is what I envision for mine whenever I get around to it again. Your build is :cool:
 
Looks great. You should be proud. This is what I envision for mine whenever I get around to it again. Your build is :cool:


Thanks Pete. Could not do it without the help here. I'm having a great Memorial Day weekend, enjoying my Freedom, have to put my flags back out this morning. Thanks to all who serve.

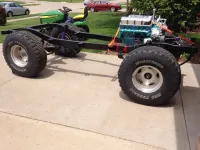
Pulled or I should say pushed the CJ out yesterday. Its not moved in over a year and a half. She looks good sun bathing in the drive.

ffe9e73d8f4c0a18c31ef97eea98f2b6_zpse4792693.jpg

f8f488f1a18f6c8add4863c9ac7e41a7_zps35bb22f9.jpg

Also, I did it to make sure I have the engine tied down good with the straps. I'm taking the chassis, over to my 4wd shop in a couple weeks to get the drivetrain fit up and if we're going to do that I figured I might as well get the suspension lift done so we can measure for driveshafts and 2 piece the rear and possibly do the rear disc brake conversion and and and and and and and #itsonlymoney:)


Sent from my iPad using Tapatalk
 
Lots of progress to report. Made the decision on the lift 2.5" BDS with the standard Kit shocks. I originally wanted to run Nitto Trail Grapplers as I have on my JK but unfortunately they only come in 33" in a 15" rim. We'll make the final call later on tire size but I do want to go with White Wagon Wheels like a procomp series 82 so with 3.75" of backspace I maybe better of with the 11.50 vs. the 12.50 of a 33".

Also ordered up a Warn I piece axle shaft for the AMC20 and the SSBC rear disc conversion kit. I sure was fun trying to figure out what Centerforce ii clutch to by. 2 calls Centerforce, 2 to a local dealer, 1 quadratec and a measure of the output shaft and I think I got it right. Actually ordered it from Quadratec as they're the only ones who have it kited up. Oh and while I was at it I ordered the energy poly body mount kit too. I've fallen behind on recording my cost spreadsheet, but maybe that's a good things at this point.


Sent from my iPad using Tapatalk
 
Some actual get your hands dirty work done today.

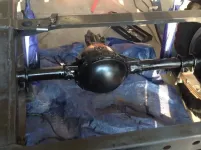
Rear axle cleaned up and painted.

56b84faab90e771b3510c6bff4a2e691_zps2f3f45f5.jpg

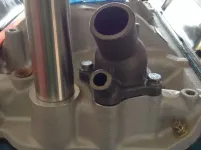
Thermostat and housing

7578e1848db01d5b91f0f9d8de85ba87_zps0d610fe2.jpg

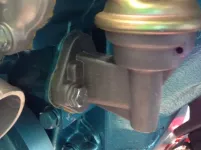
Fuel Pump
5662d33f2aebb866a72f895d3997897d_zps3eb32d1f.jpg

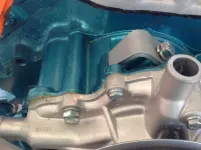
Water Pump

4fc69bf69dddcec365434de8d4bda0df_zpse0be8958.jpg

I went a little over board with the sealant... live and learn.

Took a loook at the headers and how they would fit... Easier once the drivetrain is in. Also, read that the header paint is not high heat and that its suggested to strip it and repaint... might be another project headmann inframe headers.


Sent from my iPad using Tapatalk
 

Jeep-CJ Donation Drive

Help support Jeep-CJ.com by making a contribution.

Help support Jeep-CJ.com by making a contribution.
Goal
$200.00
Earned
$25.00
This donation drive ends in
Back
Top Bottom