Build Thread My Daisy Jane

Build Thread My Daisy Jane
Also have a Borgeson steering shaft sitting off to the side waiting on me. Then maybe get back to doing my drive train

Well good deal, hopefully we can wheel together sometime!


Sent from my iPhone using Tapatalk
 
Well good deal, hopefully we can wheel together sometime!


Sent from my iPhone using Tapatalk
Yes i am going to get out there to do some wheeling in Colorado, Moab and maybe even the Rubicon on some of those rides, plus i'm hoping to do some overlanding trips. See you on the trails for sure
 
Agreed. They are indeed good cases. I have mixed emotions about the part-time kit. I guess I’ll know soon enough. Fundamentally it’s no different than any other Transfer Case at that point, but having a quadratec does not prevent you from having a locker upfront, it just narrows your choices.


Sent from my iPhone using Tapatalk
I use mine on the road alot. Thats why I wouldnt like a locker up front without the part time kit.
 
And all I’m saying is that a selectable locker would be OK regardless where a lunchbox would not.


Sent from my iPhone using Tapatalk
 
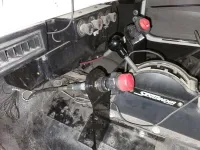
Little more progress last night. The PO in this Transfer Case had a mechanical shifter mechanism setup as opposed to the OE vacuum type. When I bought it, it came with a new vacuum shifter and I had a spare as well.

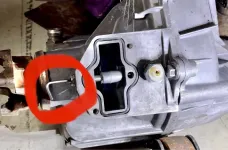
I figured that while I had it out still, I would replace what was left of his mechanical shifter with the new vacuum unit. Somehow though he managed to get the sleeve portion of the vacuum shifter inserted in such a way that it will not come out.

519114ad9000ea3e7626839379687cb8.jpg

You can see in the photo above where it appears threaded, but it is not. Nonetheless that’s the part that would not come out of the case.

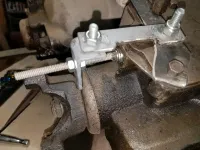
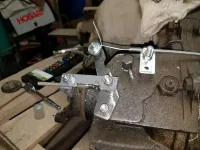
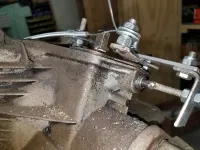
Spending all night trying to get there now, possibly losing something down inside the case, I decided to sacrifice a metric Allen wrench and make a handle to pop it in and out of gear. Little tack weld and it’s good to go...

a7fd0d883e8a57caaf2409a13a188f57.jpg

Here’s a video of it working (with my preferred Yacht Rock Radio from SiriusXM in the background ;-)

To view this content we will need your consent to set third party cookies.
For more detailed information, see our cookies page.


Sent from my iPhone using Tapatalk
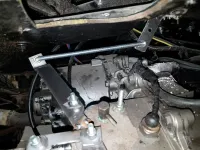
 
Why would you get rid of the mechanical shifter. If done correct that solves the problems with the vac diaphragm and the vacuum switch. On the rod, were you able to pull the ball out of the hole (with a spring on top of it). Don't loose or break the spring (can't get anymore). Can't remember but I think there's E clips on either side of the shift fork (clipped to the rod). If so carefully remove and the rod should pull out. My shop manuals at my shop so can't swear to it. The switch for on/off (to the speedo 4x4 light rides on the end of the shaft, don't think you need to remove it but I did). If you insist on going vacuum I didn't have success with Bj's vacuum switch. Bought 2 and both leaked. Best switch I found is a fort Thunderbird head light switch (I believe in the 60's when they used the vacuum headlight doors. They were made to hold up.
 
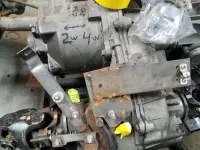
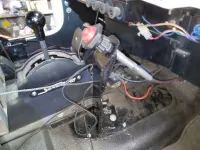
Here's a updated setup with stronger metal and heavier cable. Only difference I now have over this is i raised the mount in the cab for a better angle. No lag (that I would get with the vac unit) when shifting in and out of 4wd.20180416_160623_resized_1.jpg20180416_160628_resized_1.jpg20180416_163210_resized_1.jpg20181116_144411_resized.jpg20181116_144416_resized.jpg
 
  • Thanks for the Post!
Reactions: 007
All of this is because I'm trying to avoid a time crunch... I'm going to Moab this spring and I have some things I'd like to do, but I'm not doing any of them until I get it back to where it was the last time I headed that way. Once that all gets done, I have some gears and a front locker I want to install then this Jeep is DONE until the other one is on the road.

I've never had any problems with the vacuum mechanism - even the one I just took out of a chunk of my old case tested fine and still holds (which leads me to believe there was a bind in the disengagement - but that doesn't matter now). That said - I do like the look of your new setup, looks to be plenty durable...

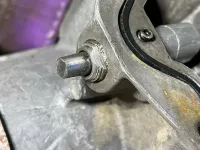
I had this one completely out, but the PO has done something to keep the circled part (not the rod) lodged in the case, and it wasn't worth spending the time or taking the risk of getting it out. I tacked on this handle and I'm good to go - it only takes one more knee than hubs or airing down.
 
If you pull the clips off the shaft (before and after the shift fork), the rod should slide out (make sure the detect ball is removed). The fork should slide on the shaft. Could there be a burr on the shaft next to the e-clip that won't pull through? Makes sense to not open too many projects before the trip. I have a fiberglass body so I made a access hatch above the case for easy access. Also helped with setting up the cable and lever. Good luck with it and the trip.
 
Forgot to mention, raised the cable mount brackets (did for 4wd engagement and for low range). Better leverage and access.20201215_123103.jpg20201215_135830.jpg
 
If you pull the clips off the shaft (before and after the shift fork), the rod should slide out (make sure the detect ball is removed). The fork should slide on the shaft. Could there be a burr on the shaft next to the e-clip that won't pull through? Makes sense to not open too many projects before the trip. I have a fiberglass body so I made a access hatch above the case for easy access. Also helped with setting up the cable and lever. Good luck with it and the trip.

You’re missing me here... I had it apart. ALL apart. I had the clips off the rod out the fork out. Everything. What has happened is that the PO has cut up a vacuum diaphragm and made what I have. The old base of the diaphragm is lodged in the case in a manner that makes it difficult to impossible to remove.


Sent from my iPhone using Tapatalk
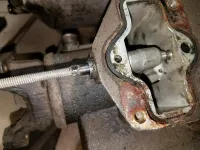
 
I missed that. If I remember correct I used the original vacuum diaphragm (cut the chamber off). This could be interesting (at a latter time). Glad you are able to get it to work manually.
 
  • Thanks for the Post!
Reactions: 007
So the Transmission and case are installed. I left it loose on the mount and skid as I needed to get a new mount. Measuring for u-joints today as it’s somehow difficult to find the right ones with any degree of certainty.

Exhaust next week then it’s back to pre-accident.

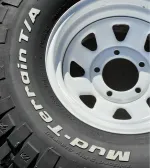
I’ll put the 33s on afterwards once I figure out best way to clean them.


Sent from my iPhone using Tapatalk
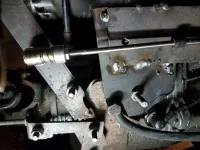
 
Just got it back from the exhaust shop. New from the manifolds back. Got my 33’s cleaned up and mounted on refreshed rims.

ed5120dee1cb7a6cb0c06341be52e578.jpg

Now it’s back to the garage to go from my 3.54s to 4.10s. I’d go higher but I’m swiping these from the Laredo / Texas Hooker so they’re as free as you can get.

For the front I’ll just swap complete axles so theres no ring and pinion install. I have a Spartan locker for that axle too.

My rear is offset so I’ll move ring and pinions there. I have sourced a Detroit for the locker there.

I also want to swap radiators and I still need to re-plumb my Transmission cooler.

I have some help here locally so I’ll have the axles done by the end of March / or Easter weekend so I can wheel a bit locally before heading to Moab.

This “should” make a platform I can wheel with about anywhere while I get the other project started in earnest.


Sent from my iPhone using Tapatalk
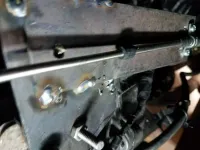
 
Good progress keep it rolling! See you in Moab in 36 days.
 
Sweet


Sent from my iPhone using Tapatalk
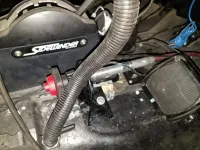
 
Yeah long story short...I scrapped the 4.10 idea. Sounded neat/cheap/free but I also remembered that this Jeep came with 4.10s and due to my stupidity and desire for highway speed I went to 2.73s then back to 3.54s and I decided I wasn’t gonna change gears for the third time and go back to where I started. So I got a set of 4.88s. This gives me options in the future and with all the hills and trails here in NW Nevada they’ll be fine.

Tonight I got the rear torn down completely and the front torn down as much as necessary.

Got the brake backing plates off and cleaned the outer shields. The new axles, brakes, bearings and seals are all ready to be pressed together.

I ordered a carrier for the front. Not worth tearing into the other Jeep. It’s a Yukon and it’ll be here Friday. I’ll put the locker in and have the bearings pressed on.

Won’t be able to hit it again until Saturday or Monday but should be ready to driven next Weds.


Sent from my iPhone using Tapatalk
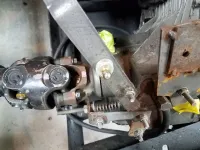
 
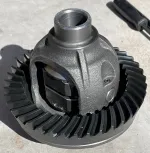
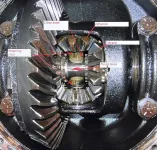
The Yukon front carrier wouldn't take the stock cross pin OR the one that came with my Auburn Max locker so I had to get a head porting kit and open it up .002 so the pin would go in nice and snug with gentle taps. Naturally I put the locker together without the two cupped washer/retainers that go in the center, so I had to remove it and add those like a moron. One of many things I did twice in this project.

Dana30Locked (2).jpg

My next moron move was putting in the one-piece axles without removing the thrust block. The instructions explicitly state to remove it. Not me. Charge ahead in the wrong direction and do it twice...

TrackLok.jpg

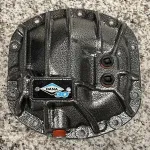
Still making progress, I have the axles done, finishing up the new brakes and radiator swap tonight. Also adding my snazzy new Dana 30 diff cover...

Dana30Cover.jpg
 
I have an ARB locker for a Dana 30 with 4.88 gears if your interested.
 

Jeep-CJ Donation Drive

Help support Jeep-CJ.com by making a contribution.

Help support Jeep-CJ.com by making a contribution.
Goal
$200.00
Earned
$25.00
This donation drive ends in
Back
Top Bottom