Build Thread Project PJ

Build Thread Project PJ

cerial

Jeeper
Posts
18
Thanks
0
Location
Middleville, MI
Vehicle(s)
1969 cj5 Stock right now
Well I might as well get everyone caught up if I am going to make this a good build thread.
I am staying out on the road for the next 2-3 years saving a good amount of my income towards buying a house outright when I return. About 5% goes to the jeep and 80% goes to the house.

The whole idea with this jeep is to have something that will last and be safe. Once finished(going slow with this as I am on the road a lot working) this will be my daily driver and will see a good amount of salt and such of real world conditions(and some off road conditions) in Michigan that will rust out a steel tub within 10 years.
Now you seen those guys putting 3/16 or even 1/8 thick steel body protection on there jeeps over the years. This got my gears spinning why not make a entire tub out of 1/8 steel. It would super tough and would never rust through. Simple problem it would be super heavy also.

That's where the HDPE idea came in. People have been using it for years as a replacement of steel barrels that can rust. It can take a beating leaving only scratches. The 1/8 inch HDPE is relatively light compared to 1/16 steel but will be able to take a door ding(or tree branch) laughing.

I have been planning this for over 5 years and plan it will take me another 5 to actually build it.

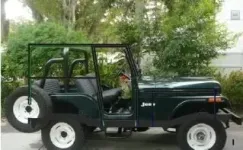
Here is what I started with right off the trailer.

08161235.png

08161236a.png

It might look good from a distance but there is actually like 1/8 of bondo in spots. I figured the tub would be gone the frame is cherry and that's all that matters.

Put a new battery and starter in it cranked it over and the motor turns over but need to pour gas down the carb to keep it running(note the cracked bondo on the fender)
08161237b-1.png

It might have a Dauntless Buick 225 V6 and the distributor is just from a 76 skylark in it now the rest of the jeep is stock

08161237d.png

Tossed a YJ top on it and some things to keep Then I put it up until I would return for thanksgiving.

08161612a.png

Came back for thanksgiving and had a myers top and doors waiting for me(that I bought online and had delivered)
11251013192.png

0212111020a.png

Got some FJ-62 axles(ps drop) before I left(pictures were taken around Christmas)
1218101540b.png
1218101540a.png

While out on the road I picked up a T-18

11251008212.png

1125100819-1.png

Ford input shaft on a cj Transmission so I am told.
1125100821a2.png

1125100822.png

Came back for christmas and started taking measurments.

0212111005.png

0212111021.png

Measured as much of the jeep i could in the cold before leaving.

I am using a combination of Studio max and Bend tech to give a idea what this will look like.

Here is what I have so far in max.

buildingthepjinmax2.png

Lots to go was expecting to be back THIS weekend to start disassembly. But the place I work tossed me a offer for more cash if I was to jump on this loop. I will just build the bank roll (while saving to buy a house outright) until it festers down then I will ask for some time off.
 
The PJ idea was just something that sounded right. The only thing left of the stock CJ will be the frame and part of the firewall so I can hardly call it a CJ.

I have been out since Christmas and am getting a bit tired of writing about this and doing nothing. I have designed a great tank and have all the cage down on paper to be put into the computer. They tossed me another crazy offer centering out of Indianapolis that's once again paid by the day. This one is 7 days a week instead of 6, it should wrap up in about 5 weeks. Pending another "crazy to turn down contract" I will ask for a entire week off when this one expires. Maybe I can get to tearing down this thing and bending some of the tub this year.
 
Here is the tank design by the way.

It uses plates in the lower portion that extent leaving a 1" gap at the end.
These plates are staggered so that if the tank has 1/4 of fuel or so it can still run on its side.

I don't see myself running on my side but I don't want to be starving of fuel at crazy angles either. The "fuel level sensor" is something I am doing cause I always wanted to do it.

If the jeep is on its nose I would only need a minimum of fuel in the lowest chamber to keep it running.

If the jeep was laying on its rear I would need the lower 2 chambers of fuel.

If it was on laying on the drivers side I would only need the lower 2 chambers of fuel.

If it was on the passenger side I would only need the lower 3 chambers
side
tankside.png
rear
tankrear.png

There are baffles in the upper portion that simply strengthen the tank.
tankquarterviewshowingbaff.png


Here is what it would look like in the frame
tankinframe.png

Because the plates will not allow flow between them I could not have a float that ran up between them. The solution was simple I plan on making these(or buying if I can find some that are threaded at the ends).

fluidlevelindicatiorflat.png

The design is simple the plastic ball(white). Pushes against a cylinder(green) that makes contact with a connection(yellow in the back) there is a spring(not pictured) that keeps the ball from pushing back unless there is fluid pushing on the ball.
fluidlevelindicatiorwire.png

Once the cylinder makes a connection a LED on the dash will lite up showing that level of fuel.

These would screw into the back(of the tank so they could be easily removed if they fail or if I need to flush out the tank).

I plan on using the FATS system. FATS (Fuel Air Trap System) - Pirate4x4.Com Bulletin Board


Having the tank be sealed and the vapor tube be at the highest point in the filler neck before going up and along the tube frame before coming down into this little canister.
fatsstsyemwindicatiorflat.png
It would sit inside the frame rails held in via a strap and have a fluid in line indicator(same design as in the tank) that would let me know if there was fluid in the line. At which point I would simply turn the little screw at the bottom and drain the Fats canister.
fatsoverflowcanisterwindicatior.png
After the canister I have the vapor line going to a charcoal canister (located where the battery is now) and then the manifold.
 
Update: Been out since Christmas so no progress on the jeep.

What I have done is get a pile of tools around. Air/hyd bender, notcher, portaband, various, saws and fab tools.

I have streamlined the cage making it so that all the exterior panels can be removed. By doing this I can use uhmwpe instead of hdpe. The uhmwpe sheds water, mud, etc a lot better then the hdpe. The down side is that it only really comes in white and currently there is no way to glue it together like with the hdpe. So, I had to change things around. The benifit would be that it is basically cutting board and any scratches will be a lot less noticeable.

I have also dropped the leafs in favor of a custom tri link(not 3 link) air ride suspension.

But, for right now I am still getting stuff around. I need to order the break system that is a 90 degree system that will hide the breaks under the dash.

In about a month I plan on taking a entire week off of work. Cutting the jeeps tub into shreds leaving the firewall/dash and grill to serve as reference. I will fish plate most of the frame and reinforce the inside leaving the stock drive train in place to serve as a reference. Once the frame is stiffened I can build the inner and outer cage off of it further stiffing it. Hopefully have the interior and most of the exterior skeleton built before I leave.

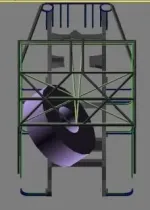
Originally I was going to have the tire lay down on top of the tank. But after looking at it in max I found that it blocks most of the rear view. So the tire will sit on a slide-able base on a angle behind the driver. This will give a practically un obstructed view out the back. This means I need to have a smaller 15 gallon tank that will be under the tire and behind the driver. That will help a bit with weight distribution while giving me better flex as I will not need to widen the wheel wells to fit the tire.

Really want to work on this but work comes first.
 
Well it is weird how things work out. I was susposto return 8/1 and tear this thing down to the frame. I had a entire week planned off from 8-1 to 8-6. For the last 2 months I have been on a buying spree. Getting the a protools air/hydro bender, tube notcher, I bought a Millermatic 221, and tons of various tools. Everything to get this down to the frame and start building this Dual cage ready so when I returned I would just need to get some steel and a couple other local items like the seats that made no sense to ship. I have over $3,000 in tools now sitting at the house and well My boss tosses me a contract back on 7/30 that pays 3 times what I normally make and I could not respectively turn it down. It runs for a entire year which means that it will most likely run for a year and a half. But, the chance of me getting a entire week off to work on this while on this contract is not going to happen.
So I have been out a week on this contract and I really regret taking it but guess it is better. I'm out here saving for a house and while I would love to actually start this build instead of just getting parts around and talking and planning.

Couple of things have changed with the extra time. Originally I planned on using the 225 Dauntless Buick 225 V6 but the lack of support in aftermarket parts is just to much for me to see using in this. For the same amount of money as a professional rebuild I can buy a crate motor and so a high torque 383 will sit under the hood. The T-18 will remain the Transmission and at this point I'm still planning on using the dana 18 Transfer Case .

The Toyota axles will remain. But the biggest change is the fuel. The tank is out all together and in its place will reside 4 vertically mounted 20 gallon propane tanks. So the floor once again gets raised. The 35" spare will sit atop of the "floor"as planned with the tank above and will fit with the only rubbing of the rear tires against the inner wheel wells being at crazy angles.

There are tons of reasons for propane cost being the greatest. I am guessing even with the Overdrive this will get around 13 city 18 highway because of the weight. At just over a dollar a gallon for propane(roughly $2 at a high places) and the additional benefits like higher octane rating and efi running angles I would be crazy not to go the path. I am using the 20 gallon tanks over say a 8 gallon tank because of the availability. A 20 gallon (bbq) tank can be found anywhere at any time of the day or night so I will not need to worry about fueling issues. I plan on a rack that is on rails that will slide out the back once unlocked for easy tank exchange. This rack will be between(but above) the frame rails inside the inner cage and inside the outer cage with the tail gate acting as rear protection. It is well protected only second to the driver compartment. I am building this to take a multiple roll without issue and/or a side impact of up to 38 mph at the expense of weight. The ability to turn on/off the tanks as needed so I could run all day while keeping a extra tank in reserve is also another reason I wanted the 4 tanks. With 4 20 gallon tanks filled to the standard 80% for expansion gives me 64 galllons to run around with.

So that's where this project pj sits. I still have a long shopping List but it is more of the drive train 383 stated above., 90 degree under dash double booster with mc, and shock wave air ride suspension. Will be getting them over the next year in prep for when I do finally return. I need to send Herm some emails and see what he can do about a Dana 18. With the gearing of the T-18 and the almost 400lb of torque the stroker will be making the Transfer Case becomes the weak link. I really want to keep the over drive feature. But if I am advised against it by Herm I can go with a atlas. Although the idea of the replacement of high dollar Transfer Case like that in say 10 years does give me a bit of a concern.

Will get more advise and move along in shipping/tossing things into the parts pile. For a while though this project will just collect dust. I'm not a quitter though, Most builds end because of lack of money or interest. I have set aside enough for this build and have planned for years to build a jeep from the complete ground up of my own design and doing. I hate to keep delaying this due to work but the point is staying out so I can buy a house outright and then go local. I will not rush things despite how much I want to play with this project. Good things take time I just need to keep focusing on putting money in the kitty towards buying the house while tossing a bit at this from time to time.
 
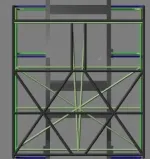
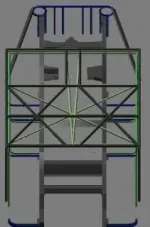
For a while I have been working on the cage focusing on the side and rear dimensions making sure everything is accurate(excuse the grill it is just a reference for now). Found a big fail though when I tried to fit the rear tire inside. The height was off by 18 inches I fixed the height but now the upright angles are off.
cage2.jpg
pjcageoppsprerefine.jpg


Also the upright center pillars angle seemed wrong so I used a picture off goggle as a comparison and found another huge fail. The bottom is in the correct position the top will need to be moved back to where the cross member comes up. This will change the cage greatly.

pjbackgroundcomparsion.jpg

Also I have slightly changed the top to have the top rear panel (it is a 2 piece roof)slide out the front(once the main windshield bar and the front roof section is removed) so the outer cage(black) will drop down into the inner cage(green) having the inner weaving x bracing dropping under the inner frame and onto the uprights in spots.

cage1.jpg

Coming together little at a time I am going with the 4 propane tanks in the back and they will fit without question. But I am a bit unsure about where to put the 10.5x35"spare at this point. I am trying to fit it inside if at all possible but I think the high back seats may hit the tire. For now I will focus on fixing the cage dimensions cage and toss the tire into the later pile.

The dual 1.75 dom cage may seem a bit excessive but the outer cage is more of a body then a cage as you will see later. It has removable bars on the upper windshield(holding the windshield sliding up and roof sliding forward), the rear outer quarter uprights(holding in the side glass sliding out the rear), the bottom of the doors and tailgate(holding in the glass and side door panels sliding down). The point of the dual cage is to have the security of a hardtop with the convertibility of a soft top. The goal is to design it so that I can remove all the glass, the doors, and roof sections under 20 minutes and place them in the back of the jeep.
 
When you are old and grey the last thing you are going to say is "man I wish I did more work for my employer". Just saying.
 

Jeep-CJ Donation Drive

Help support Jeep-CJ.com by making a donation.

Help support Jeep-CJ.com by making a donation.
Goal
$200.00
Earned
$0.00
This donation drive ends in
Back
Top Bottom