TeamRush Ignition Upgrade
BusaDave9
Always Off-Roading Jeeper
- Posts
- 8,248
- Featured
- 3
- Media
- 361
- Resources
- 2
- Thanks
- 88
- Location
- Durango, Crawlarado
- Vehicle(s)
- 1979 Jeep CJ5 with 304 V8, T18 Transmission, Dana 20 Transfer case with TeraLow 3:1 gears, 4.88 axle gears, Detroit Locker up front and Ox Locker in back with 1 piece axle shafts, 36" SuperSwamper SX Tires, Shackle reversal, MileMarker Hydraulic winch, MSD 6A ignition.
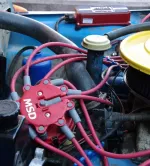
I finally upgraded my ignition. Actually I did it a week ago. I decided to go with the TeamRush upgrade. I'm glad I did. It consists of upgrading the distributor cap and spark plug wires. This upgrade makes sure the spark energy goes where it is intended, to the spark plugs. With the smaller OEM distributor it is possible to get cross fire in the distributor where a spark goes to the wrong cylinder or a spark going down to a ground. Once the distributor was upgraded I installed a MSD series 6 ignition module. DO NOT install a high performance ignition module without upgrading the distributor. The OEM distributor has a hard enough time getting the spark to the correct spark plug.
Coil
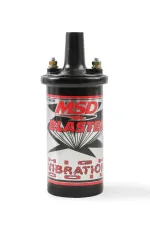
Replacing the coil is optional. The TeamRush upgrade allows you to either keep the stock coil or replace it with an after-market. I already have a MSD Blaster High Vibration coil. My last coil shorted out and it may have been from getting bumped around off-road. Most coils are oil filled. It is possible for the wires inside the coil to bump around and short out. The MSD Blaster High Vibration coil is epoxy resin filled and can handle more banging around. Also it doesn't need to be mounted upright.
I prefer canister coils. They offer stronger, high current sparks at low rpm.
Distributor Cap
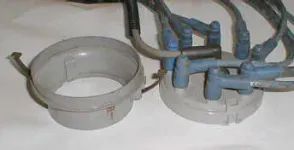
As long as your CJ was made after 1977 you have a Motorcraft Distributor. These distributors can benefit from a larger distributor cap intended for a ford.
I bought the MSD Ford V8 Cap-Adapt kit for $36. (MSD Part 8414)
If you want to save a few dollars and get an OEM distributor cap just make sure it's good quality with brass terminals. You can get a distributor cap, rotor and cap adapter for a stock 1980 Ford F150 with a V8. The cap adapter fits over the distributor but flairs out big enough for the larger cap to fit on.
If you have a strait six in your Jeep you can look up the parts for the same year Ford F150 but with a 300 strait six.
To install this Ford Distributor Cap, it just snaps on like it was meant for your Jeep. No instructions necessary. (Actually it is a Ford Motorcraft Distributor in your Jeep)
These distributor caps have different terminals so you will need new wires.
Wires
I already had nice MSD wires for my OEM distributor but now I had to replace the wire ends at the distributor end. I bought the MSD crimp on ends. I cut the end off my wires and crimped on the new ends. The ends I got were MSD part 3330. These come with 2 in a package so I bought 5. (8 spark plug wires and one coil wire) This left me with one extra connector.
For everyone else that doesn't already have MSD wires you will need MSD part 5551 if you have a V8 or if you have a strait 6 you can get Motorcraft spark plug wires (part WR4050). These Motorcraft wires are ready to be installed.
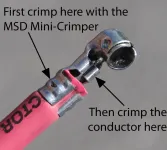
These MSD wires (PN 5551) require you to crimp the ends on yourself. Trust me, it is very easy to do this right. The MSD wires already come with the MSD Mini-Crimper. The new style connectors use what MSD calls a Dual-Crimp. The connector has one section that crimps onto the insulation to physically hold the connector on. Then there is a smaller crimp section that only crimps onto the conductor part in the center of the wire. This part is crimped on with needle nose pliers. When I first realized I needed to use needle nose pliers I regretted not buying an expensive crimping tool. The first rule for crimping connectors is to use the right tool and never use needle nose pliers. Well, in this case needle nose pliers are the right tool. These connectors were meant to be used with needle nose.
.
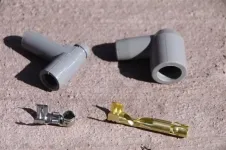
On the left is the new style Dual-Crimp Connector. On the right is the old style.
The first step is to cut the wire to the correct length. I then use the MSD Mini-Crimper to strip the wire. Put the wire into the correct hole on the Mini-Crimper/stripper. There are 2 holes: one for 8 mm wires and one for 8.5 mm wires.
I put the wire up to a marking for Dual-Crimp connectors. Then I use a razor blade to cut off through the insulation. This small section of insulation then twists off.
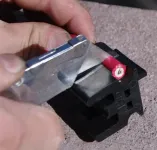
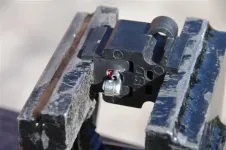
Next I crimpped the connector onto the wire. If you have the newer style Dual-Crimp connectors you will crimp in two steps. First crimp the connector to the insulation. To do this you will use a vise to do the crimping.
Pull on the connector to make sure you have a good crimp. Next use needle nose pliers to crimp the conductor.
Once the connector is on the wire apply dielectric grease to the connector and press it into the boot.
Timing Advance Springs
This part is completely optional. These advance springs are in the distributor. They hold the advance weights. I put in lighter springs to allow the timing to advance at lower RPM. I used Mr.Gasket #925D springs following the advice on JunkYardGenius.com.
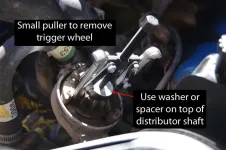
To get down to the advance springs remove the distributor cap. Next you have to remove the reluctor (trigger wheel) from the distributor. Some pry it off with 2 screw drivers but I found it very easy to remove with a small 2 arm puller.
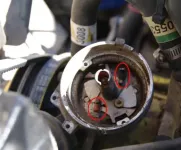
Next the pickup assembly will be removed. Now you can see the advance springs.
These springs do not have to match. You can have one firm spring and one medium spring or any other combination. The springs work together to try to keep the weights from swinging outward at low rpm. When the weights are outward the timing is fully advanced.
The inside of the distributor can be cleaned with a spray can of electrical contact cleaner.
CDI Ignition Module
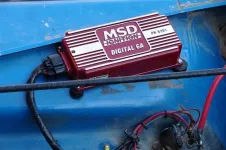
The stock ignition system uses the inductance of the coil to produce the high voltage spark. To get the next big jump in ignition performance you can install a CDI ignition module. CDI stands for Capacitor Discharge Ignition. MSD makes some of the best selling CDI modules. You will want to get an MSD series 6 ignition module such as the Digital 6A, 6AL or the 6 Off Road. I got the 6A (MSD part # 6201). The 6AL is similar except it also has a built in rev limiter. The 6 Off-Road is water proofed.
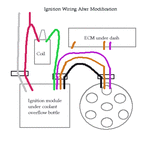
I mounted my MSD ignition module on the passenger front inner fender. All the wires are plenty long. In most cases too long. I shortened the wires and re-crimped ends back on. If you are not comfortable crimping the wire ends just keep them full length and tie wrap up the extra. The MSD ignition module I got included an extension for the wires to distributor.
Others that have done this modification have recommended you keep the OEM distributor connector and not cut the wires in case the MSD module fails. That sounded like a good idea to me since I do a lot of four-wheeling on remote mountain trails but you will also have to reconnect the coil back up with the OEM wires. To do this you should also keep the wiring diagram in your Jeep so you will know how to uninstall the MSD ignition.
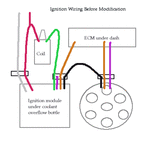
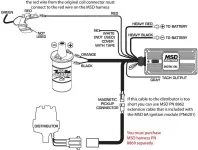
I couldn't find an MSD wiring diagram for this application so I made one based on one of their other diagrams. The JunkYardGenius (JeepHammer) gets credit for the design.
The heavy gauge black and the red wires need to go directly to the battery or to the end of the battery cable. For example the positive battery cable connects to the starter solenoid on the inner fender. This is where I connected the large red wire in the MSD harness.
I use dielectric grease on all connections.
Spark Plugs
With the ignition system upgraded you can now run your spark plugs with a wider gap. I used Autolite Copper Core spark plugs. It's part number 65 for my V8. If you have a strait 6 get Autolite part number 985. These are the regular spark plugs intended for the AMC engines. Champion also makes good spark plugs.
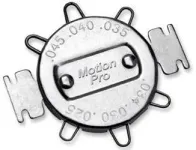
The plugs can be gapped to .045 to .050. Use the correct gapping tool. Don't use a gap measuring coin to pry open the gap.
When installing the spark plugs use copper anti-seize. Then when you install the spark plug wires use dielectric grease.
Next check the timing.
That's it! Now you've got better performance, gas mileage and easier starting especially in the cold. These mods don't have to be done all at once. You can do the distributor cap and spark plug wires alone.
Credits: Once again I have to thank the JunkYardGenius (JeepHammer) for the idea.

 Always liked this upgrade. It really helped my


