• Hello Guest, we are proud to now have our Wiki online that is completely compiled and written by our members. Feel free to browse our Jeep-CJ Wiki or click on any orange keyword when looking at posts in the forum.
    To dismiss this notice
    click the top right X.

Build Thread YUKON007's '82 CJ7 Build.

Build Thread YUKON007's '82 CJ7 Build.
:lpopcorn:
 
Good work! I'm looking forward to the rest.
 
So with moving out of a rental and trying to close on a house, I'm left with little to no time right now to play. Luckily Frumples is a dedicated friend and has been plinking away on cleaning the Transmission and Transfer Case without me. I dropped off an engine hoist and engine stand last night and had a chance to look at what he had unearthed.

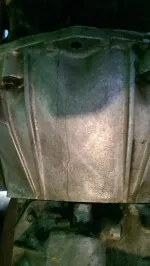
We found what looks like a crack along the top casing on the Transmission ... The entire surface looks almost like the "crazing" you see in headlights sometimes and I think this is normal but the below picture definitely looks like a legitimate crack. Is this something to worry about? Or do we just keep an eye on it?

IMAG0024_zpsrnwrnktm.jpg
 
I believe I seen the exact same thing on my bellhousing. They are casting imperfections and not cracks. But only you can be the judge.
 
But only you can be the judge.

+1 - Time for a very close inspection of that area. It's tough to resolve with a smallish computer screen and my 50 year old eyes.
 
Between Friday evening and Saturday we finally got some quality time in on the jeep. We didn't really do a good job staying on task and what started as an organized timeline quickly turned into a engine teardown free for all.
C469DB39-A9E6-44D7-AC0B-EA0E38FB92D0_zpsgo5xsov0.jpg
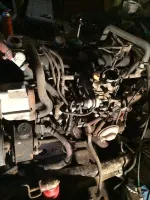
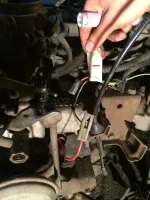
We started by trying to remove the exhaust, thinking that this would make getting to the drivetrain a little easier. Well when we got to the manifold we found that it would be easier with the carburetor removed. But it would be easier to remove the carb if all those pesky wires weren't there.....
2047519D-0020-4948-A5D3-CFF990A3098C_zps9f0m7jjn.jpg
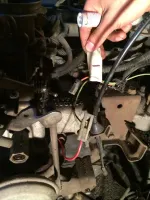
So we refocused. We started labeling the wiring so that we could remember where everything goes.
C469DB39-A9E6-44D7-AC0B-EA0E38FB92D0_zpsgo5xsov0.jpg
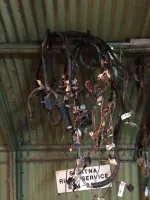
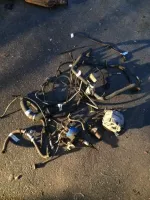
After a couple gnarly looking wires Yukon decided that he would probably just replace them all when it comes time for it.
4D527C62-2AC6-440F-A806-4A407E660B32_zpsr072vk4j.jpg
27CE41F5-9AB6-4906-B2F9-C43D40470394_zps2dcflvi6.jpg
(That'll give a guy nightmares)
We then started working on hoses and lines. Yukon started drawing a diagram to keep track of these but we eventually gave up after I didn't recognize a few components and labeled them as I saw fit. About the time that the "flux capacitor" hose connected to the "double sided blinker fluid reservoir" we gave up on that too.
B42B0ACE-D92F-46BF-820D-7C812144F2C6_zpsbqldlewo.jpg
We did get most of the hoses labeled accurately and all removed. The carburetor, intake, and exhaust manifold all came off without too much trouble.
9F60C4CB-37E8-4622-952C-564442CD31B0_zpsvfa6o52c.jpg
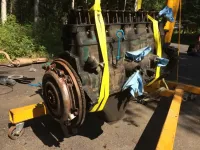
We had wanted to remove the Transmission and tcase prior to removing the engine but we ran into trouble with the tiny bolts on the u-joint yokes. We'll either find the right size sockets or find a way to pull them off later. Stuck on that for the moment we decided to pull the engine first.
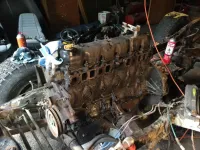
FA902CD8-95BF-4213-B802-FBAD3C9D213A_zpsoiug3g3c.jpg
1C0B8433-5B96-498E-A766-73F8AA4252DC_zpstsphlh3e.jpg
6D6BC772-E9CB-4919-B0C4-F6F40DB09370_zpsa0gzzgus.jpg
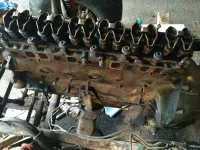
This is where our inexperience comes into play. We aren't sure how to tell what kind of shape this engine is in. There is a fair amount of sludge on the rockers and pushrods. But it's all just sludge, no metal or chunky stuff.
(I'll post some pictures of that later)
The cylinders and pistons had very little carbon build up. The spark plugs all look similar and were in pretty good shape.
We also drained the Transmission which I didn't expect to look like pancake batter.
FBE2FD3F-6BF8-4CC1-A703-9E9B3A639974_zpsuc3nn1su.jpg
Lots of new and exciting stuff for two new mechanics. The phrase "What does this do?" has probably reached its quota for this year already.
 
Last edited:
The best way I can help you tell what kind of shape it's in is at the top of the cylinder how much of a ridge do you have? The rings wear on the cylinders and they don't go all the way to the top so you can tell how much wear they have by they size of the lip at the top. And I would pull a couple of rod caps and main caps and look at the bearings. Hope this helps.
 
I have trouble staying on track, should be researching engine specs but instead I found this: 1987 jeep grand wagoneer

If I do some investigating and they're in fact D44s is this a good donor for an axle swap? Is there anything specific I should look out for? Anything model year specific? Are they direct swap, or will the parts list grow? I'm going to continue my googling but I figured I'd pose thequestion to experts in the mean time...
 
Me and Frumples are in the middle of a Long-Tube Header install on my 2006 F150 and I have to say I miss the jeep. Never in my life have I busted more knuckles and invented more cuss words than trying to break a rusted nut loose with a combo of swivels and extensions that would make Mouse Trap proud... Ready to get that project over with so we can continue along with the Jeep.

In Jeep related news, I got a replacement rear crossmember from Omix-Ada, that thing is stout! Also should be receiving POR15 materials in the mail shortly. The Alaskan winter is fast approaching and we'd really like to be headed towards suspension and frame reassembly before it gets too chilly out! :chug:
 
Just a quick caution on the POR. Follow the directions, prep is key. Don't get any drops of sweat or water in the paint but humidity in the air is actually better. As long as your above 60 degrees. And WEAR GLOVES! It will literally take more than a week to wear off the skin. So get yourself a jug of their solvent or keep the paint thinner rag handy. Time is of the essence.
 
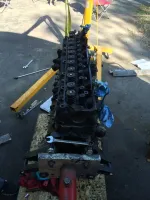
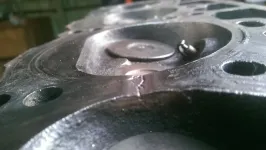
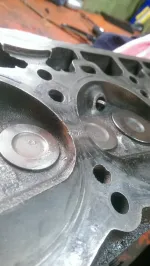
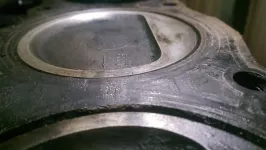
ITS ALIVE! Well not the jeep... at least not yet... but it is in a nice clean garage, out of the elements. We've rededicated our time to the jeep and getting the torn down engine back together. We came across some corrosion between cylinders 3+4, apparently somewhat common. Looks like the gasket had been chewed away as well. We've found mixed reviews on the severity of this. Maybe a few trained eyes can give us their opinion.

Heres the spot on the Head:
IMAG0110_zps7pxneswz.jpg

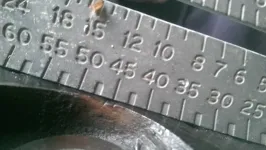
Another showing how deep it is:
IMAG0109_zpset7mwc36.jpg

One more of the head:
IMAG0108_zpsyhob4vmb.jpg

Here it is mirrored on the block:
IMAG0112_zpsxsis5up0.jpg
 
I would say both need a trip to the machine shop for a resurfacing for sure, but can't comment as to the severity of it.
 
Official word from the mechanic at work is the Head is trash, the block is a big "maybe" and I'm out a running AMC 258 i6 / 4.2l ... Little bummed but we've got options. 1.) A fellow jeeper is selling a AMC 258 i6 / 4.2l through a local page. 2.) Theres an abundance of Gen III Chevy small block V8s. I've been reading Novak Conversions page and bolstering my confidence. But its a big step up for rookie mechanics

Ideas? Theres a ton of info out there on a v8 swap, and they all make it look SOOO simple but I'm not that naive. Decisions...Decisions....
 
If your apprehensive about the Chevy swap can you get ahold of a Amc 360? Look for Wagoneers , J-trucks , Cherokees in a junkyard. Its a pretty easy swap considering all the external stuff is identical to the AMC 304 that came stock in earlier models. Makes ordering parts easier and no exspensive adapters.
 
YUKON007, That does appear to be a welded up crack. Another option would be to adapt a 4.0 head, which many CJ guys seem to be quite happy with.
 

Jeep-CJ Donation Drive

Help support Jeep-CJ.com by making a contribution.

Help support Jeep-CJ.com by making a contribution.
Goal
$200.00
Earned
$25.00
This donation drive ends in
Back
Top Bottom