• Hello Guest, we are proud to now have our Wiki online that is completely compiled and written by our members. Feel free to browse our Jeep-CJ Wiki or click on any orange keyword when looking at posts in the forum.

Build Thread 1955 CJ 3B 53 year odyssey

Build Thread 1955 CJ 3B 53 year odyssey

duffer

Active Jeeper
Posts
480
Media
9
Thanks
44
Location
Bozeman, MT
Vehicle(s)
1955 CJ3B: Dart/AFR aluminum 441 sbc, AGE M22W trans, "super" D18 w/ TeraLows & Warn OD, FF44 ARB/Dutchman Rear, D44 front-ARB/Reid/Dutchman, 4 wheel discs, York OBA, PP welder, 8274 w/ 9.5 XP motor/Zeon 12 contactor, glass/aluminum body, 33-12.5's;

1968 CJ5: all stock (V6/T86/D18/D27/D44) except 4bbl & headers and rear aux tank, HD rear 44 housing, Warn OD, Belleview winch, Whitco top (New Blue)

1968 CJ5: mostly stock (V6/T90/D18/D27/D44), unknown make 3" lift springs, 11" Bendix brakes, Warn OD, unknown electric winch, Kayline tire/jerry can carrier, Bestop Super Top (Old Blue)


1947 2A and 49 3A that may or may not get built, and several FC/wagon derelicts
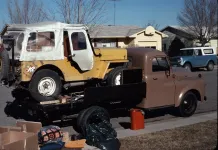
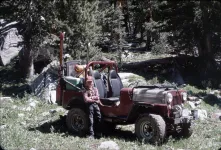
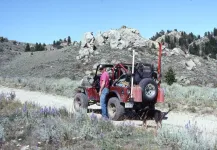
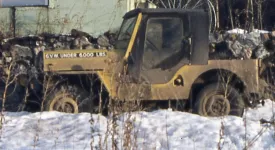
Where to start? I purchased this 3B in 1972 from a welding/machine shop where it had been their plow Jeep and local delivery vehicle. It was completely stock except for the shop built snowplow with a Meyers lift. As part of that plow mounting, there was a 6x10x1/2" thick angle iron plug welded over the original bumper, 1/4" fish plates welded to the outside of the horizontal portions of the front frame rails extending past the front spring frame hangers, boxed frame horns, and "sleeves" welded to the front spring plates through which the blade supports ran back to 1/2" plates bolted to the rear fish plates. Clear as mud? It actually was well engineered plow lift and allowed for full spring articulation, granted with the heavy duty flat fender springs, that was barely perceptible. It sported the factory canvas half cab and still had the factory NDT for a spare tire. Accessorys included the placebo Harrison heater, manual right side wiper, and passenger seat. It had 26k on the odometer. I only found two photos of it as received.
16074478863_9281277953_b.webp

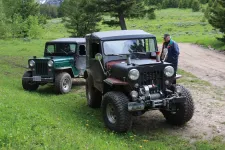
And it sort of managed to make an appearance in this scene.
54359611592_a1f3911045_b.webp

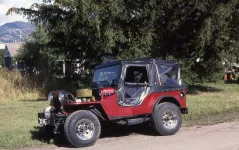
The tub had typical rust: the hat channels were gone as was most of the tool box enclosure and the tub mounts. I used it in that state for about a year and a half until I managed to burn the F head 2-3 exhaust valves trying to pull a tiny U-Haul trailer 650 miles. Enter version 2.0. At that point it was pushed off that proverbial modification cliff and a 1962 327 sbc found its way under that high hood, the rest of it remaining stock except for the original tires and wheels from my 68 CJ5 ,a patched up Whitco top from the same, and a swing-out rear tire/jerry can/ski rack carrier I built. The sbc was the 11:1 CR version with solid lifers, big heads, 302 Winters intake, Holley 650 cfm carb, and Hooker 9810 headers. As would be expected that left something to be desired in the rocks but it was an order of magnitude better than the F head. It was a pretty wild ride on the pavement with that engine the 5.38 gears. Only one photo survived of that version from 1974.
50836231501_13af4a1a82_b.webp

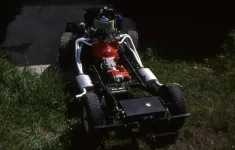
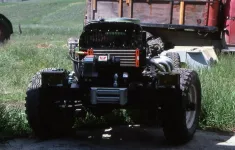
Alas, that 327 scummed to a crack in the rear side of the No 5 cylinder about a year and a half after the install, not an uncommon occurrence with those first year 4" blocks bored 0.030 over. At that point, the fall off that proverbial modification cliff much accelerated, perhaps not yet at terminal velocity but close. I did a frame off which became a little protracted with a job/state change in the middle of it. Changes with Ver 3.0 included a boxed frame, Con-Fer rear fuel tank, battery relocated beneath bed, new cross member under the radiator, 16:1 Saginaw steering box from a C3 Corvette, full float 19 spline Powr-Lok rear Dana 44 , 11" Bendix brakes, Muncie M20 Transmission , Warn Overdrive , 1970 350 LT1 engine (yep, slow learner), Chevy truck vertical style radiator, fiberglass tub and fenders, and a number of other changes. Initially it still sported the stock springs but those were swapped out for Rancho 2 1/2" lift springs almost as soon as those hit the market-remember this is still 1970's. I probably should have installed a NT Dana 30 at that point but those were still relatively new and expensive. The D25 persisted.
A few photos of Ver 3.0
51886349028_33d520442a_b.webp

51886920245_69eabfa15c_b.webp

13063181554_d7301377eb_b.webp

13062924423_78838f552b_b.webp

The glass tub was actually a 12'/foot plastic car kit. Separate pieces for the shell, floor and firewall and the only one I could find was for a 2A/3A so the cowl and firewall required that 4.5" extension and while I was assembling it, I made an inch and a half larger indent for distributor clearance.. I fabricated a subframe under the seat area to which the seat support frame bolted to and it provided sill support for the "sliders". The exhaust was also hung from that framework.
33795970038_3db14090dc_b.webp

My original intent was to use an aftermarket steel hood, no doubt an early MD Juan product. It was painted with the rest of it, including the original grill, with catalyzed acrylic enamel but you can guess where that went. VERY poor fit and I couldn't use it.
This was the B at that point:
12526901564_fe40083fa2_b.webp

The LT1 was more than a wild ride with the remaining 5.38 gears and as one would expect, it didn't care too much about crawling over rock gardens. It was dumbed down with a set of 194 truck heads and a Performer cam not long after getting it back on the road but I had already started on a replacement-a 381 build using all GM parts (there weren't any 383 kits yet at that point). Along with the 381 swap, it received a Modine 3 row cross flow radiator and a number of other small changes, including a Saturday night special home brew hood consisting of an aluminum framework with a sheet fiberglass cover. The 381 proved to be just an excellent Jeep engine that would idle down to 300 rpms and still crawl over just about any obstacle without feathering the clutch.
The 381 era:
12526099473_78f80eb92c_b.webp

10424431706_d05b418c70_b.webp

That version soldiered on for 3 1/2 decades with relatively minor further modifications. The 381 eventually got ProFlo2, aluminum heads, and a hydraulic roller cam.
9124429647_a8dcd3f4d8_b.webp

39409889025_07fb02c210_b.webp

Along the way, the original D18 was replaced with a "super" D18 utilizing a Dana 20 case and the TeraLow 3.15:1 gear set, the drum brakes replaced with discs, the M20 replaced with an AutoGear M22W, and the Willys went on a bit of a diet. The skid protection was all replaced with aluminum versions, and an aluminum radiator installed. The hood was rebuilt and aluminum skinned. Added accessories included a York engine driven OBA set up and a Premier Power Welder.
53923012814_9692a196b7_b.webp

With that 4 1/2 decades down, we will get to the last iteration of this Willys, not a frame off, but maybe more severe.
 
Very interesting Jeep story. I’ve had mine more than 4 decades, easy to tell you are a motor guy ! I will be waiting for more of the story.
 
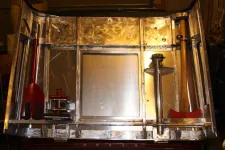
Before we venture on to something more in the present tense, I should detail a few other features previously applied to this Willys. While assembling that plastic car kit, I laminated a sheet of 1/4" marine plywood under the bed area and extended it into the wheel wells. The remainder of the wheelwells was boxed in with aluminum, again sandwiched in fiberglass. The end results being wheelwell tool boxes on each side, similar to the MB/GPW's but of much larger volume.
9257162440_f2c4260f8d_b.webp

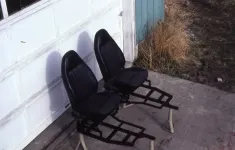
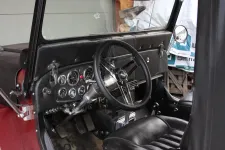
The dash, which was a blank sheet of paper at that point, was built to incorporate a defrost duct system similar to an early CJ5 with the lower inside of the windshield also enclosed. That enclosure also contains the wiper linkage. The instrument panel and glove box door were made from 1/8" aluminum and anodized black. Instrumentation was/is all Stewart Warner. A heater from an early 70's Datsun was used along with a Subaru steering wheel/column and Subaru seats. This is a later photo after the Subaru column had been replaced with a Flaming River version but the rest of it is as originally built.
16916038025_8830592be5_b.webp

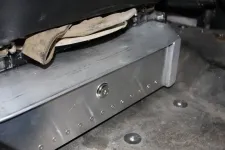
As noted, a fiberglass tub is utilized and that obviously didn't have the underseat toolbox so about 20 something years back, after the purchase of a spool gun for my MIG welder, I had to practice a little. The replacement locking tool box was one of the first items made. It had to be front opening as the seats are solid mounted. I keep all the hand tools in this.
9257165846_ea69c3209a_b.webp

When I rebuilt the hood, I remodeled all the trail tool/jack/lug wrench mounting brackets that had previously resided in that Saturday night special.
9257228644_fcb4349af1_b.webp

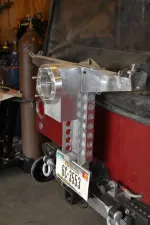
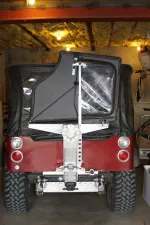
The steel tire carrier was also replaced at that time. The new version has a triple extension door carrier built into it.
12591340005_b6f6bd35e9_b.webp

12591302875_e8d4494592_b.webp

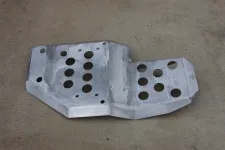
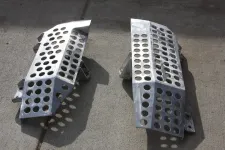
The aluminum skid plates for the exhaust and Transfer Case /Transmission . The latter is due for further modifications at the present time as the D18 emergency brake it protected no longer exists.
9694523574_d9bc949e34_b.webp

9694561032_2f37fc190e_b.webp

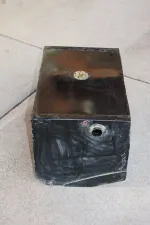
The ConFer fuel tank was replaced in the early 2000's at the same time the tire carrier was replaced. I welded it up out of too heavy 14 gauge steel and made it as large as I could possibly fit. That turned out to be 24.5 gallons.
50793203621_e98031c76c_b.webp

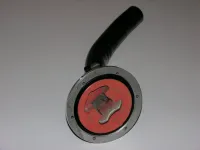
The filler was also replaced then.
11871977626_ffb7ef2575_b.webp

11871407273_40f2ca2012_b.webp

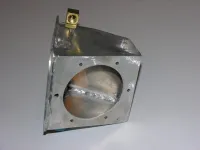
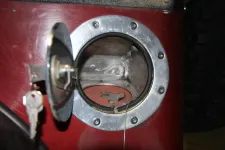
A modified CSI door for a GMC finished that project.
17636412442_e477349301_b.webp

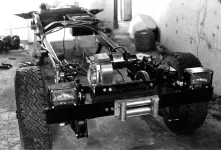
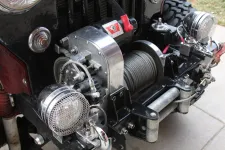
That era also saw the front bumper winch/fairlead remodeled. The winch remained the Warn 5721 purchased new for this Willys as seen in the above post black and white photo.
12928640624_75a3e1a6f6_b.webp

16992623643_296c044871_b.webp

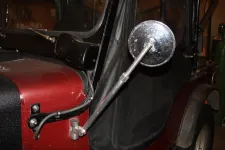
And finally, after dealing with the stock rear view mirror that was impossible to keep adjusted, I fabricated new ones for both sides out of aluminum.
14219420510_df1b6f6d88_b.webp

54361723596_1682c49163_b.webp
 
Parting shots of the final reiteration of the 381 era.
9671173973_153bf5954f_b.webp

9671181465_2f8df4290b_b.webp

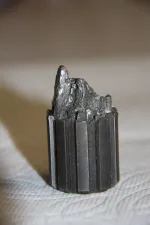
Sooooo, after piloting the Willys for four decades with that proverbial raw egg located under the right pedal and cringing every time the tires were aired down, the D25 departed in somewhat stylish fashion with the right side (short) axle shaft literally exploding with a good 2" of that shaft disappearing in a cloud of approximately 1/8" square shards (that were a perfect match to the splines on those 10 spline Spicer shafts. That event also removed much of the inner axle seal seat rendering the housing scrap which was probably a favor for me.
52526545192_cfe4eed031_b.webp

After no shortage of head scratching, I decided to go with a wide track Dana 44 for a front axle replacement and that sort of morphed into new springs, shocks, rear axle, rear driveshaft, more frame modifications, Aqualu aluminum grill, new engine, new clutch, interior modifications, and a winch trade out. Project creep?

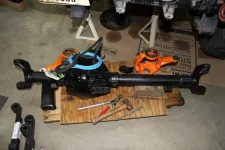
I had previously collected both a Ford F250 high pinion Dana 44 and a Scout II Dana 44 anticipating the demise of the D25. After initial mockups, I decided to use neither. There was no way the high pinion would clear the chassis without a LOT more lift and the Scout version required outboarding the mounts which I decided I didn't want to do either. I finally decided to get one of Richard Imholt's "Freedom" wide track narrowed F250 D44HD housings with 1/2" wall tubes. The rest of that axle was assembled with Reid Scout II knuckles (8 stud), Scout II spindles/hubs/disc brakes, ARB, Yukon 4.11 gears, Dutchman 4340 axle shafts, and Warn Lock-o-matic hubs.

54389581502_7b61c86a07_b.webp

54390670899_a8f6da2d2d_b.webp

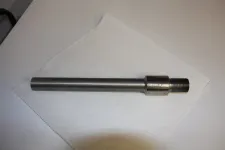
The axle utilizes Moog ball joints and their 7/8-18 TRE's. The tie rod and draglink are made from 1.5" x 1/4" wall DOM tube with RuffStuff weld-in threaded inserts for all but the draglink pitman arm connection to the GM PS control valve ( 1 1/16-18 thread). I machined that adapter out of 4140.
54389629382_6724303b3d_b.webp

45775950155_c9b34f507f_b.webp

46638407532_459e0c68d9_b.webp

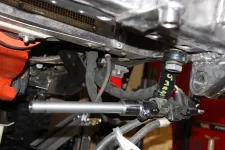
The 2" diameter PSC hydraulic assist cylinder is mounted via a bracket welded to the axle housing on the inside and a modified high-steer arm on the outside. An internal stop was machined from Delrin for the cylinder to limit the stroke.
45916764104_8cdd6249d4_b.webp

32766867378_32d608388c_b.webp

49046689236_9b5133dc96_b.webp

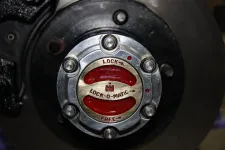
I used 27 spline Warn Lock-o-Matic lockout hubs to finish out this axle. In auto mode, I believe these are among the strongest external hubs made with the sprag clutch rollers sandwiched between that very robust outer steel ring and the steel 27 spline ramp hub on the axle shaft. In manual mode, the drive passes through the steel "spline" roll pins in the outer aluminum housing, identical to other Warn manual hubs of the era. I went through several pairs of hubs to procure parts to build the pair I used.
54390961975_8ecf41ef7c_b.webp

30544636026_e1f2d5450f_b.webp
 
Suspension: old school leaf springs retained but I did go with the long, soft, Holbrook asymmetrical springs. For those unfamiliar with these, the shackle hangers remain in the stock locations and the spring hangers are moved inboard. The Holbrook front and rear springs are 9.5" and 9" longer than stock for the front and rear respectively. The springs are military wrap but that second wrap leaf had some lateral bend to it which required some judicious grinding to keep the wrap from applying force to the hangers and shackles. Those springs were actually manufactured by Benz Spring.
46126964632_f9319a40b5_b.jpg


46177900251_d674f62b29_b.jpg


The spring kit came with rubber bushings, pivot bolts and spring hangers, none of which was used. The base plate in this photo is my creation and used to spread the hanger stress out over a longer reach of the frame rail. The bolt and hanger are Holbrook.
46126966942_7a0950f99c_b.jpg


The kit hangers were fabricated from 3/16 stock while the stock versions are 1/4", no doubt Omix Ada sourced. In addition to that lighter gauge steel, the mounting holes were not perpendicular to the pivot bolt bores. I cut the one in the photo off and reused my originals, along with machining Delrin bushings and greasable pivot bolts from Grade 9. The shackle hangers are all fabricated, as are the shackles and associated hardware.
45550561235_ab6776a136_b.jpg


46281090161_2296df61d0_b.jpg


The front hangers extent to the front of the bumper.
31523492027_ee241ce44d_b.jpg


51130166934_3a5860fbc2_b.jpg


The spring plates are fabricated for a U-bolt flip and incorporate a raised lower mounting for the shock absorbers. Both front and rears are similar.
49171042316_6c0699e2ba_b.jpg


Mock up of the above axle "plate" with a 3/4" drive socket substituting for the axle tube.
49129963561_8b6c170416_b.jpg


49129473208_7d1c4d6835_b.jpg


Even after getting the spring perches welded on the front axle with a nominal 6 degrees of caster, I ended up whittling out some wedge shims to compensate for the asymmetrical springs. I used that opportunity to also pace the axle 3/4" forward.
49093146001_1a5a1faa36_b.jpg


That all ended up looking like this:
49171041466_e4e53ce4b5_b.jpg


Initially I was going to use those pad mounted JK bumpstops but I eventually just machine aluminum "land pads" for those and used Rancho frame mounted urethane bumpstops. The steel bracket visible to the left is the sway bar axle bracket. I used modified JKS quick disconnect sway bar links. The sway bar is the ADDCO 1 1/8" version.
49130143832_527c6b184f_b.jpg


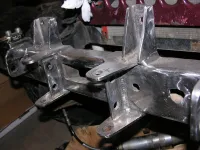
The first step for fabricating the front shock mounts was filling in the space between the machine shop applied fish plates.
33008740618_ce2da15755_b.jpg


46832136132_412691630a_b.jpg
 
  • Thanks for the Post!
Reactions: CJ
Front shock mounts:
49220042438_19c4ec9ca0_b.jpg


52452988022_5598706216_b.jpg


The main rear shock upper mounts are relocated behind the axle and tight up against the bed with a 1" tub lift which apparently wasn't worth a photo----
 
HOLY COW what a read! Amazing work. Tagging this thread for a followup, your work is truly inspiring.
 
  • Thanks for the Post!
Reactions: CJ
The rest of the drive train:
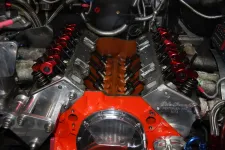
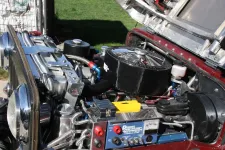
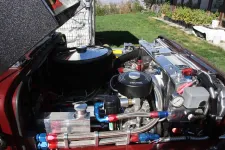
The Gen I small block Chevy engine for this build is based on Dart's aluminum version of GM's Rocket block, incorporating a raised deck (9.325"), spread pan rails, raised cam position, and much improved oiling. Most of the "stops" were pulled on this as it had been on the proverbial bucket list for a decade.
13152064575_9fa3bc4fb1_b.jpg


13406708675_3671513671_b.jpg


I had Dart do all the final machining for the 4.125" diameter, dished custom JE pistons which are zero decked. Those pistons are mounted on Oliver 4340 forged rods.
10889820103_5ea8e47f6f_b.jpg


The crank is a Callies Magnum (4340)with a stroke of 4.125".
13402960013_363bb8cacf_b.jpg


The heads are AFR's Eliminator 195's (full CNC ported).
11531427886_f61f0d53a9_b.jpg


Jones Cam Designs ground the custom hydraulic roller cam and the rest of the valve train is from Comp Cams. The timing chain and cover are Cloyes Rocket block items. I had to machine the timing cover a bit and still had to use doubled water pump gaskets to get everything to clear.
46877363082_3e0d7ed26d_b.jpg


The almost final assembly when I was priming the oil system. The block does not have an integral filter boss and the pressure feed can be either at the front or rear. It is set up with the front feed.
49680891218_bc2e0c192c_b.jpg


It turned out the valve cover mounting rails on the AFR heads was high enough that the spacers were eliminated. Those valve covers are the only GM parts in this engine and I purchased those new 51 years ago. Yep, took a little polishing work---- The engine weight with the PS pump, all the pulleys, fan, and air cleaner is 428 lbs. I sat it on a 4 lb piece of plywood across a couple of the wheel scales.
49940369182_a8951343a7_b.jpg


A McLeod twin disc RST clutch was utilized. I had bought this unit 5 years before it was "installed", only to find out it wouldn't work with the supplied discs. Well out of any warranty but McLeod sent me an entire new unit, even balanced the same, for the cost of the return shipping. That is WAY above and beyond any typical customer service! The replacement unit went together as it was supposed to.
50182947907_d46ed8c538_b.jpg


The RST requires way less pedal effort than the Hays 11" units previously used, both diaphragm and B&B styles.

The Transmission is a hold over from the 381 era, the Auto Gear Equipment M22W. Not much of a first gear (2.56:1) but hell for stout. It has Advanced Adapters' mainshaft and tail housing.
13610346423_98cff60a1a_b.jpg


The Transfer Case is also a holdover from the 381 build. A "super" D18 built 20 something years ago using a Dana 20 case, TeraLow 3.15:1 gear set with the Advanced Adapters tapered intermediate shaft bearing conversion. I have all the pieces to put another one of these together using Jeff Petrowich's 5.07:1 gear set and girdle.
52191663238_c8132d30a1_b.jpg


52192133245_7d6b95e295_b.jpg


The front driveshaft was reused. It is a double cardan shaft I had a local driveline shop build three decades back. The D18 parking brake was eliminated for this build which netted a slightly longer rear driveshaft and a much stronger one eliminating the companion flange arrangement. I elected another double cardan shaft, this one a very short Tom Woods version.
52671460513_56520f40d2_b.jpg


52671397120_9ed6d68b8a_b.jpg
 
  • Thanks for the Post!
Reactions: CJ
Rear axle:
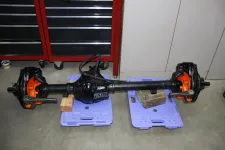
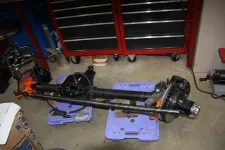
The starting point for this is a 1959 Kaiser FC150 (cab over) offset housing that had moldered in the bottom of my bone pile for 25 years. It was no doubt the reason that FC was put out to pasture as someone was in desperate need of the TSM and obviously didn't find one. The pinion bearings were more than shot, highly likely because no preload was used and the right side tapered hub just fell off after the nut was removed.
49751840892_b5d265c553_b.jpg


And Bubba's finest hour.
49750968603_1462974db8_b.jpg


There was one surprise, a Powr-Lok. I gave that to a friend for his 3A project as this axle has the same ARB RD116 air locker and Yukon 4.11 gears as the front.
54478245020_3b04bfa3ce_b.jpg


As bad as the housing appeared, it had zero runout and the 57" WMS/WMS is essentially the same as the wide track front axle. A pair of Jeff Petrowich's custom machined 4340 "big bore" spindles were used to construct the full float axle.
50633017773_90f1e64547_b.jpg


I ended up re-machining the butt of these so they would fully seat into what was the outboard seal pocket in the housing.
51040472937_40450076ef_b.jpg


Original Dana 30 disc brake hubs are used with two Timken Set 47 bearings instead of the factory Set 47/Set45. The axle shafts are 30 spline 4140 items from Dutchman. I polished those for two seal surfaces each, one adjacent to the differential housing cap just outside the splines and the other spanning the spindle/housing interface. All four seals are Seals-It items.
51849207629_1dca186023_b.jpg


The 78-81 CJ two bolt disc brake calipers are mounted on adapters purchased from Four Wheel Parts 40 years back and I machined out adapters for Wilwood's MC4 manual emergency brake calipers which mount on the inside of the axle flange. It wasn't intentional, but I think that latter plate is 4140, it is some tough stuff for sure.
51924961788_a1fc067e25_b.jpg


51915141692_198789a5df_b.jpg


51946622319_940469c2ee_b.jpg


All the fasteners for this are ARP's 8740 items.

Given the short distance from the axle to the between the seats mounted emergency brake lever (a modified ancient Toyota Corolla item), I reversed the calipers so the e brake cables exited to the rear and brought them up the left side of the differential cover. Not very evident in the photo is the plate I fabricated that bolts over the differential cover to attach the limit strap. The upper end of the strap is hung from an insert I made that fits inside the under-bed cross member.
53680558149_5d631b74af_b.jpg


The fabricated terminal of the cables.
52074114720_90bd8c8627_b.jpg


The only modification required for the MC4 calipers was the addition of a pad spacer shim to widen the "grip" slightly.
51916044044_7aeb687838_b.jpg


Cross member insert. It also serves as the fuel tank skid front mount. The tabs mount the tank breather line from the right side.
52711258426_d545139823_b.jpg


The rear Dana 44 cover is a Ford F 250 item (3/16" thick) and the tie rod flat helps keep it clear of the fuel tank. I TIGed a JIC nipple in the cover for the breather line.
51962276873_ecb193fef7_b.jpg


The axle is finished off with a fabricated skid plate.
52670959286_5243140cfb_b.jpg
 
Last edited:
Really like your work. If you don't mind answering, what do you do to have access to fab machinery?
 
Really like your work. If you don't mind answering, what do you do to have access to fab machinery?
A life time gathering and I'm old---- Three lathes, milling machine, vertical and horizontal bandsaws, MIG/Tig/AC-DC welders, box and pan brake, 5 drill presses ranging from tiny to large and all the tooling that goes with that stuff. I worked most of my career at an university and one of the benefits of that was free classes. I took all their mechanical engineering machining and welding related classes in the 70's-better to learn on someone else's equipment:LOL:
 
Very nice. You have a great collection of much need equipment.
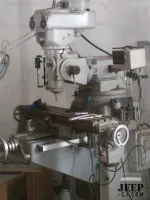
I only have a pic of my XLO 605 (replaced lead screws with ball screws) but have various other equipment including XLO lathe, surface grinder, small HT oven, mig, tig, presses and brakes.
Worked in Aerospace as a toolmaker, CAD CAM (Unigraphics and Pro Engineer), Mechanical engineer (U of F) and many NC machines (Mori Seki, Makino, Ferrari (not the car), G&L, Haas and more). Retired and miss the work.

My knee mill.
1000008903.webp


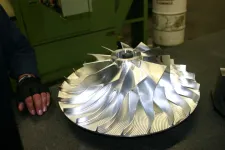
A super charger impeller for a CAT powered locomotive milled on a 5 axis Mori Seki from a solid forging
1000013580.webp
 
Out where I worked at the rocket factory, we had one very large machine shop and probably another 5 or 6 very well stocked smaller ones. I always admired the work those guys did. I was able to get one of the guys to actually make a couple of replacement parts for my soft top on the Jeep. OEM was plastic and replacement are aluminum.
 
  • Thanks for the Post!
Reactions: CJ

Jeep-CJ Donation Drive

Help support Jeep-CJ.com by making a contribution.

Help support Jeep-CJ.com by making a contribution.
Goal
$200.00
Earned
$0.00
This donation drive ends in
0 hours, 0 minutes, 0 seconds
  0.0%
Back
Top Bottom