Build Thread 1981 CJ7 Trail Rig Build

Build Thread 1981 CJ7 Trail Rig Build
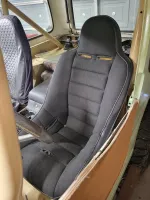
I picked up a PRP bucket seat and modified the stock seat base a bit. Mounted that in the driver's position. Re-evaluating my seating, since I'm going to already be making an expensive order from PRP, for the rock buggy! I was going to run three PRP seats in the CJ7 , and make it a three seater, with a bit more storage, than it has with the factory rear bench. But, seating is "to be determined".20221214_114425.jpg
 
Okay, too much typing. I need to go work on the Jeep now! Gonna get the snow off of it, get it warm in the garage, cleaned up, and apply some vinyl decals that I bought, to class it up a bit.

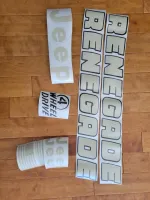
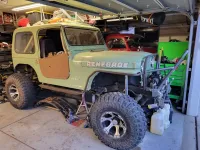
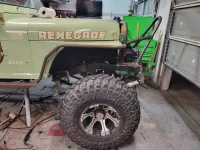
When stripping the original hood, before finding the much nicer one that I ultimately painted, I discovered remnants of old factory Renegade stickers. So, in keeping with its roots, I ordered some vinyl from a company called Vellos Vinyl. They're not all factory correct, but went with my color scheme well enough.20221214_114441.jpg
 
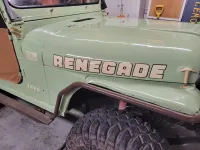
I’m liking the color. Looks a little lighter than Forest Service Green.
 
Okay, too much typing. I need to go work on the Jeep now! Gonna get the snow off of it, get it warm in the garage, cleaned up, and apply some vinyl decals that I bought, to class it up a bit.

When stripping the original hood, before finding the much nicer one that I ultimately painted, I discovered remnants of old factory Renegade stickers. So, in keeping with its roots, I ordered some vinyl from a company called Vellos Vinyl. They're not all factory correct, but went with my color scheme well enough.View attachment 77169
oem jeep graphics reproduction
 
I’m liking the color. Looks a little lighter than Forest Service Green.
Thanks! It's a Fiat color that has been around since like the 50's. PPG Verde Chiaro. Same color as the little Fiats that you see running around. I also thought that it had a little bit of a USFS vibe!
 
Yeah that’s looking really nice. :chug:
 
Definitely gonna be a cool rig, kinda making me wanna strip down all the paint and vinyl thats on my hood and get a new set of stickers


Sent from my iPhone using Tapatalk
 
Ordered some frame outriggers, spring perches and shackle mounts for the front, a Motobilt wheelbase stretch kit/rear bumper for the rear, new XJ rear springs and some reverse eye 2.5" lift front YJ springs. That should get my wheelbase stretched between 8-10", roughly.

I ordered two more PRP bucket seats (making this Jeep a three seater, with one centered rear seat) and three Crow 4 point harnesses.

Today, I got a bit more time to work onnthe Jeep, so I bent up a front grill bar and stinger for the front bumper. I didn't have time to get either installed, but pretty happy with the bends on each.

Also picked up a new rear main seal for the AMC 258 i6 / 4.2l . It's leaking a bit more oil than I am comfortable with. When I pull everything out of the way, I'll likely build a new cross member and skid plate/belly pan, so that the Jeep will slide across rocks, and get hung up a bit less.

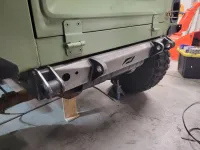
Since I didn't take any pictures while working today, here the stock photos of the Motobilt rear bumper/shackle hangers that I'm going to run. This setup, coupled with XJ springs run reversed will net approx 6" of extra wheelbase. Hoping to add about 3 or 4" of wheelbase up front, with the new outboarded spring hangers moved up to the front bumper. Approach and departure angles will be much improved!

20170120_105602_1000x.png20170120_105556_1000x.png
 
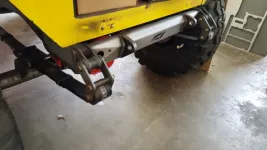
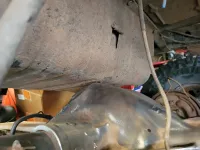
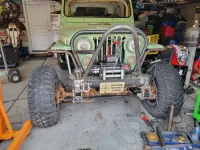
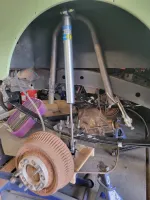
Made some progress on the rear! Still waiting on the XJ leaf spring bushings, and still need to remove the stock fuel tank. It conflicts with the rear axle at ride height! 20230104_145932.jpg20230104_150001.jpg20230104_145919.jpg20230104_121223.jpg20230104_145625.jpg
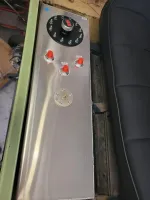
Also need to cut to tub, to clearance for the tires. Will probably start by extending the top of the wheel opening horizontally, straight back, the finish removing as little as possible to clear at full flex, then adjust to make it look good. In the meantime, my fuel cell will be delivered tomorrow, so I will work on dropping the factory fuel tank over the weekend, and building a frame to hold the fuel cell, then work on routing my to/from fuel lines, and my rollover vent.

Have been looking at some 3/16" quarter panel armor, boatside panels, and tube fenders. I'll work on that stuff after I get driveshafts ordered.

Once I get the front and rear axles Completely installed, I'll take it to my buddies shop and flex it with his forklift, measure for shocks, and build my shock hoops.
 
This Motobilt rear bumper came with some 4" boomerang shackles. They angle opposite of normal, to clear the front bumper. I've still been waffling on how exactly I'm going to outboard the front springs. I bought some frame outriggers from Barnes. Also not sure how far I'm going to try to stretch the front axle out. I bought the Rubicon Express 1444 SOA springs. Contemplating putting the shackles up front, and kind of mirroring the rear bumper, with some 5" "boomerang" shackles that I ordered. I'd be happier with driveline movement putting the shackles up front, though, the springs are more susceptible to damage with the shackles up front, versus the spring hanger being up front. I'll probably mock it up both ways and decide how to proceed.
 
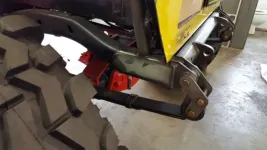
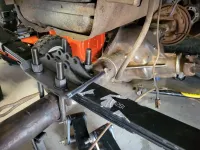
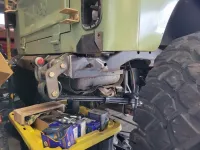
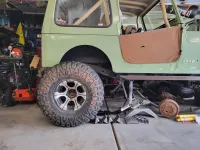
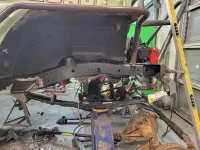
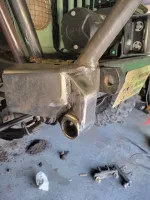
Well more progress has been made! I have removed the gas tank, and currently working on mounting my fuel cell. I yanked the front axle, cut the old shackle hangers off, got the frame all cleaned up and outboarded my spring hangers. I reversed the previous shackle reversal, and went back to a forward shackle. I know that this puts the leaf springs slightly in harms way, but worked best for how I wanted to package everything.20230110_171902.jpg20230109_164452.jpg20230109_131816.jpg
 
Measured my new wheelbase at ride height. Went from the stock 93" wheelbase, to a current 107".

I'll likely be looking at running an Astrovan steering box, but haven't sourced one yet.

Waiting one my new u-bolt kit for the Dana 44 , and some new 3/8" thick spring plates. One of which will need to be modified for the two housing studs.

I got driveshafts measured, and will be ordering both new from Tom Woods. In the mean time, I've sleeved and lengthened a Tom Woods front shaft that I have. Stretched it a few inches and got it fitting appropriately. I've also shortened and sleeved another front driveshaft, to fit in the rear. I need to press two new u-joints in it. This way I will have a spare front and rear, for easy trail repairs, in case I damage either of the new shafts.

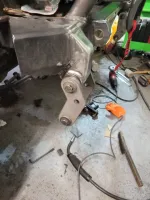
The steering on this axle was garbage. The PO had bent it, and repaired it by sandwhiching two pieces of angle iron around it and welding. So, I'll be drilling the steering arms out, and making some steering out of 3/4"x3/4" heim joints and some 1.5"x0.250" wall DOM tubing. I'll probably double shear the steering arms at the same time.

20230110_145752.jpg20230109_180828.jpg20230109_125636.jpg20230108_121045.jpg20230108_121036.jpg
 
Those welds look beautiful. So does the rest of the work so far.
 
Hey, thanks! It's been a few years since I've really welded much, so I'm still knocking the cobwebs off!
 
What welder do you have? You are making some nice welds


Sent from my iPhone using Tapatalk
 
What welder do you have? You are making some nice welds


Sent from my iPhone using Tapatalk
It's the Lincoln 215 MPi.

https://www.lincolnelectric.com/en/Products/k4876-1

I've been VERY happy with it! When I was shopping for a welder, I was planning on buying a Miller 212. While shopping, I bought an old '70's jet boat, that had a cracked block, that I intended to flip. I was going to do an engine swap. While researching welders, I had read about how these multi-process welders had greatly improved in quality. So, this welder will MIG, TIG, and stick weld! And, I even have an aluminum spool gun for it.
So, I had landed on this machine. The tipping point was that it would stick weld. So, I bought it and some high nickle content rod, pre-heated and welded the cracked Oldsmobile block, then post heated with a torch and packed with sand, in an effort to slow the cooling process. I ran that boat really hard on multiple trips. I sold it with that engine, and last I heard that engine was still running strong, after two years.

It's a great machine! No more reading a matrix of MIG gas, wire diameter and material thickness. When you fire it up, you run through some questions on the screen, and it sets everything for you. You can, of course modify the settings for various conditions. But, overall I could not be happier with this machine! I highly reccomend it to anyone looking for a good welder, that will do a lot of different kinds of welding. It will also run on 220V OR 120V!

I run this machine almost exclusively with mix gas (75%/25%), 0.030" MIG wire, and on 220V.

Anyway, I digress. Sorry for the Lincoln sales pitch! I actually used to prefer Miller welders, but apparently am a convert.
 
These newer inverter style machines take welding to a whole new level. I recently acquired the the Miller Multimatic. I use 100% CO2 for mig and Argon for tig with exceptional success.
 
Not to mention the stick welding. It sounds very different, and the beads mimic those of tig welding.
 

Jeep-CJ Donation Drive

Help support Jeep-CJ.com by making a contribution.

Help support Jeep-CJ.com by making a contribution.
Goal
$200.00
Earned
$25.00
This donation drive ends in
Back
Top Bottom