Build Thread 1986 CJ7 Rebuild - Chasing my youth
-
Hello Guest, we are proud to now have our Wiki online that is completely compiled and written by our members. Feel free to browse our Jeep-CJ Wiki or click on any orange keyword when looking at posts in the forum.
You are using an out of date browser. It may not display this or other websites correctly.
You should upgrade or use an alternative browser.
You should upgrade or use an alternative browser.
Build Thread 1986 CJ7 Rebuild - Chasing my youth
- Thread starter Masscj7
- Start date Start date:
- Last post Last post:
Build Thread 1986 CJ7 Rebuild - Chasing my youth
Project86
Old Time Jeeper
- Posts
- 1,093
- Thanks
- 55
- Location
- Tx Gulf Coast
- Vehicle(s)
- 1986 CJ 7 Blue
2004 Chevy LWB CC,
2012 Corvette Grand Sport
1986 CJ 7 Red Garnet
1978 CJ 7 Kinda Orangish
knobs for windshield frame.... go on. I did a swap on the second one I did. It was a lot of work but worth it in my opinion.
- Posts
- 729
- Media
- 10
- Thanks
- 75
- Location
- West Springfield, MA
- Vehicle(s)
- 1986 CJ7, SBC 350, Dana 300, D30, AMC20
Yes, going to swap fuel filler to passenger side. When I bought it, had a YJ tub already on with tailgate. YJ windshield squirters as well. Will be an auto Transmission .
Defrost, not sure how far along previous PO was. This was non running with no motor when I got it out of a storage locker. Did have all heater components installed. I’ve seen Shum’s and Gert’s windshield defrost mods.
I’m not quite sure how to spot a YJ windshield frame. Mounting holes were all
Lined up on previous tub.
Sent from my iPhone using Tapatalk
caveman
Full Time Jeeper
- Posts
- 1,700
- Solutions
- 1
- Thanks
- 63
- Location
- Central Maine
- Vehicle(s)
- 88 YJ with a CJ nose, 4.7 Stroker, AW4 transmission, Dana 35 HP front Ford 8.8 rear
Yes, going to swap fuel filler to passenger side. When I bought it, had a YJ tub already on with tailgate. YJ windshield squirters as well. Will be an auto transmission.
Defrost, not sure how far along previous PO was. This was non running with no motor when I got it out of a storage locker. Did have all heater components installed. I’ve seen Shum’s and Gert’s windshield defrost mods.
I’m not quite sure how to spot a YJ windshield frame. Mounting holes were all
Lined up on previous tub.
Sent from my iPhone using Tapatalk
A YJ windshield frame will have a glued in windshield where a CJ will have a rubber gasket. The YJ windshield will have 3 holes in the far upper right and left for the spreader bars between the roll bar and windshield.
- Posts
- 729
- Media
- 10
- Thanks
- 75
- Location
- West Springfield, MA
- Vehicle(s)
- 1986 CJ7, SBC 350, Dana 300, D30, AMC20
Well then it’s a CJ frame as windshield was pressed rubber gasket.
Thanks for the info! I figured it would have the roll bar mount holes if it were a YJ.
Sent from my iPhone using Tapatalk
Thanks for the info! I figured it would have the roll bar mount holes if it were a YJ.
Sent from my iPhone using Tapatalk
- Posts
- 729
- Media
- 10
- Thanks
- 75
- Location
- West Springfield, MA
- Vehicle(s)
- 1986 CJ7, SBC 350, Dana 300, D30, AMC20
So super pumped tonight as I figured out my Transmission bolting up to motor issue. So issue one was that apparently Summit had issues with the flex plate they sent me. So they sent me a new flex plate with supposedly new bolts for the torque converter. Well, as par for the course, new converter fits perfect, but they sent the wrong thread pitch bolts again. I’ll just source myself at Fastenal.
So Saturday bolt it all up again and still don’t have the right clearance, still binding on flex plate. Shelf it for the night. And go back at it today as had the day off for deer season, but feet of snow and then pouring rain on top just didn’t sound like fun.
Pull the tranny and pull the converter. Start looking at tranny pump and front seal. Notice that the dogs on the fluid pump weren’t clocked at 180 degrees. Reach in with a pick and find I can move them!! Oh man, looks like both dogs broke off!
Hit up YouTube, to see if I can learn how to disassemble the pump assembly. Of course anything is on the Tube.

Was able to use a couple 3/8 bolts to push out the assembly.


Pull the pump, split it and yep, broken dogs!

brought them down to the local tranny shop and got some new ones, $25!

Put it all back together and man does it go together like a charm!! Bell housing pulls right up to block with extra clearance to pull the converter to the flex plate.

Next, address the cross member mount. The Advanced Adapters Mount is going to work perfect! Love the set up and bushings. Will just need to elongate some existing holes in the cross member as well and it’ll be perfect height. Won’t be able to run the driveline drop kit from BDS, but CV driveshaft will fix that.


Sent from my iPhone using Tapatalk
So Saturday bolt it all up again and still don’t have the right clearance, still binding on flex plate. Shelf it for the night. And go back at it today as had the day off for deer season, but feet of snow and then pouring rain on top just didn’t sound like fun.
Pull the tranny and pull the converter. Start looking at tranny pump and front seal. Notice that the dogs on the fluid pump weren’t clocked at 180 degrees. Reach in with a pick and find I can move them!! Oh man, looks like both dogs broke off!
Hit up YouTube, to see if I can learn how to disassemble the pump assembly. Of course anything is on the Tube.
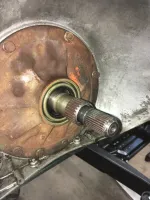
Was able to use a couple 3/8 bolts to push out the assembly.
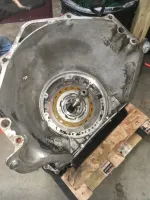
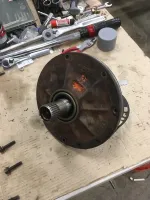
Pull the pump, split it and yep, broken dogs!
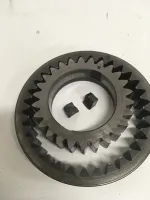
brought them down to the local tranny shop and got some new ones, $25!
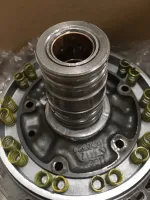
Put it all back together and man does it go together like a charm!! Bell housing pulls right up to block with extra clearance to pull the converter to the flex plate.
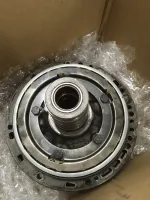
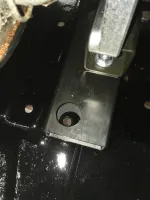
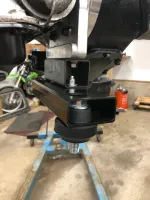
Next, address the cross member mount. The Advanced Adapters Mount is going to work perfect! Love the set up and bushings. Will just need to elongate some existing holes in the cross member as well and it’ll be perfect height. Won’t be able to run the driveline drop kit from BDS, but CV driveshaft will fix that.
Sent from my iPhone using Tapatalk
- Posts
- 729
- Media
- 10
- Thanks
- 75
- Location
- West Springfield, MA
- Vehicle(s)
- 1986 CJ7, SBC 350, Dana 300, D30, AMC20
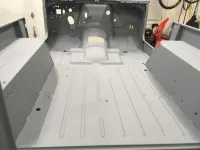
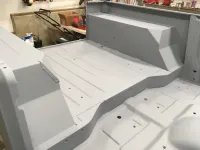
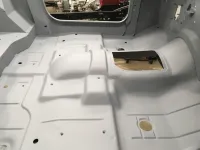
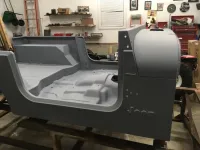
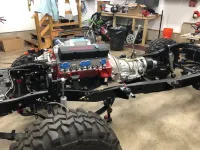
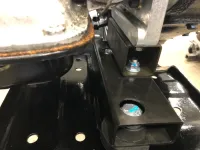
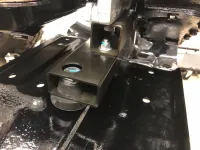
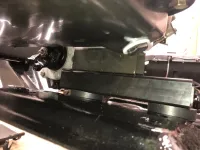
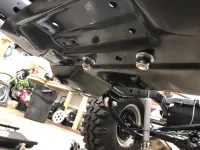
So everything is bolted up and snug. Very excited. I ended slotting the six holes on the skid plate cause I didn’t want to have any slop on the actual mount bolts as they were so close to perfect alignment. The Advanced Adapters set up was perfect, driveline is just 2 degrees out of level which is fine.


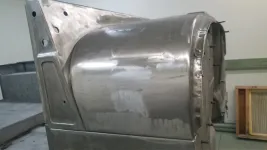
And even better, getting progress on the tub.
A little DA work

Ready for some primer


Sent from my iPhone using Tapatalk
And even better, getting progress on the tub.
A little DA work
Ready for some primer
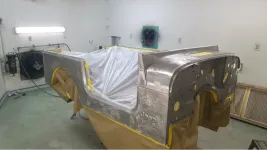
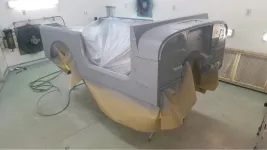
Sent from my iPhone using Tapatalk
TnCJ
Senior Jeeper
- Posts
- 566
- Thanks
- 6
- Location
- South East Tennessee
- Vehicle(s)
- 1980 CJ 5, 4.2 engine, D30,AMC 20, T176, Dana 300, MC 2100 carburetor.
Lookin good!!!!!
mitchelllogic
Active Jeeper
- Posts
- 305
- Thanks
- 1
- Location
- Edmonton
- Vehicle(s)
- 1982 CJ7 Returned to stock (Sold), 2002 Jeep Cherokee Sport stock (Sold), 1985 CJ7 - Restomod
Very Nice! Great job!
Sent from my Pixel 2 using Tapatalk
Sent from my Pixel 2 using Tapatalk
- Posts
- 729
- Media
- 10
- Thanks
- 75
- Location
- West Springfield, MA
- Vehicle(s)
- 1986 CJ7, SBC 350, Dana 300, D30, AMC20
Heres the next project.
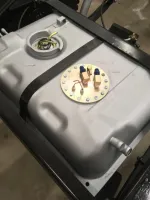
Mriplaybass deserves the credit for being the first one to do this and I followed his lead as I installed a Tank’s INC PA-4 fuel pump.
Started with a new tank for my canvass.

Marked and cut my hole and then assembled my arm and pick up to dry fit and see how I would orientate it so that the tray was horizontal in the tank. As well as figure depth to cut bracket.

Remember to put in your pick up when doing this to make sure you’re clear of it.
I also decided to flatten a raised boss in the bottom of the tank to get as flat as possible.

Once dry fit, I clamped the ring and marked my holes. I actually drilled them out with clamps and ring so that bit would not walk at all.


After vacuuming out the large stuff. Then I used some acetone and found a good use for our extra box of Save of Date magnets from our wedding. 5 years ago!! They worked great. Took lots of times of rinsing and new magnets. Be patient.


After flushing, I used Eastwood’s gas tank sealer kit to ensure no rust from the drilling and grinding. This process is way more of a pain the arse then their instructions lead you to believe. Messy, crazy fuels and real tough to drain excess out.

After a couple days of the treatment curing, I installed a new sending unit with the pick up tube cut off.

Assembled the in tank pump and sock per instructions


Here I would recommend that you weld the ring into the tank. I chose the clamping method, which means you have to be very careful when threading in the fine thread screws. Don’t try go across the circle like torquing a wheel or other circular mount. Problem is that using the single long screw method causes the ring to angle downward.
Watch the couple videos online. It’ll pay off. work your way around the circle one screw at a time one hole at a time sequentially. Use a little never cease and a hand but driver to not force the screws or strip them.
I got 15 of 16 screws in and then cross threaded the last one cause I had tried to put it in across the circle from one of my first screws installed at the beginning!! Had to go out and get a tap and a new screw that doesn’t match. Grrrr.
In the end, it’s all in and fits perfect. Hope this helps someone else.

Sent from my iPhone using Tapatalk
Mriplaybass deserves the credit for being the first one to do this and I followed his lead as I installed a Tank’s INC PA-4 fuel pump.
Started with a new tank for my canvass.
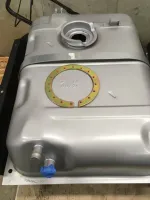
Marked and cut my hole and then assembled my arm and pick up to dry fit and see how I would orientate it so that the tray was horizontal in the tank. As well as figure depth to cut bracket.
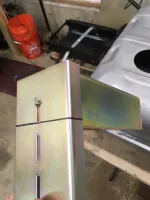
Remember to put in your pick up when doing this to make sure you’re clear of it.
I also decided to flatten a raised boss in the bottom of the tank to get as flat as possible.
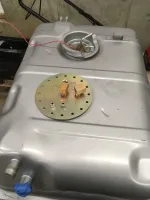
Once dry fit, I clamped the ring and marked my holes. I actually drilled them out with clamps and ring so that bit would not walk at all.
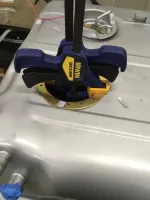
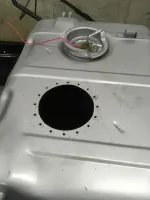
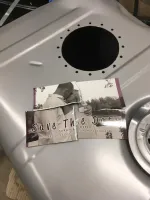
After vacuuming out the large stuff. Then I used some acetone and found a good use for our extra box of Save of Date magnets from our wedding. 5 years ago!! They worked great. Took lots of times of rinsing and new magnets. Be patient.
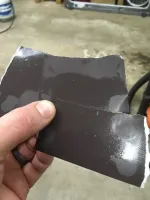
After flushing, I used Eastwood’s gas tank sealer kit to ensure no rust from the drilling and grinding. This process is way more of a pain the arse then their instructions lead you to believe. Messy, crazy fuels and real tough to drain excess out.
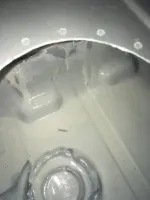
After a couple days of the treatment curing, I installed a new sending unit with the pick up tube cut off.
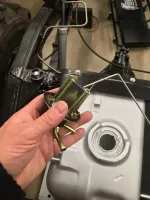
Assembled the in tank pump and sock per instructions
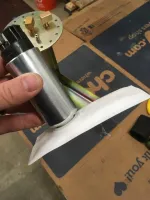
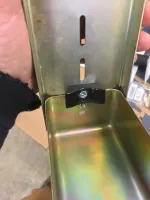
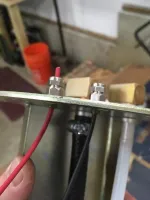
Here I would recommend that you weld the ring into the tank. I chose the clamping method, which means you have to be very careful when threading in the fine thread screws. Don’t try go across the circle like torquing a wheel or other circular mount. Problem is that using the single long screw method causes the ring to angle downward.
Watch the couple videos online. It’ll pay off. work your way around the circle one screw at a time one hole at a time sequentially. Use a little never cease and a hand but driver to not force the screws or strip them.
I got 15 of 16 screws in and then cross threaded the last one cause I had tried to put it in across the circle from one of my first screws installed at the beginning!! Had to go out and get a tap and a new screw that doesn’t match. Grrrr.
In the end, it’s all in and fits perfect. Hope this helps someone else.
Sent from my iPhone using Tapatalk
- Posts
- 729
- Media
- 10
- Thanks
- 75
- Location
- West Springfield, MA
- Vehicle(s)
- 1986 CJ7, SBC 350, Dana 300, D30, AMC20
I went with a Crown. For $89-$100, can’t remember, wasn’t even a thought to try to reuse. Yes, smaller tank, prob could have tried to find a YJ tank with an in tank pump, but I know that there’s fitment issues with the CJ frame. Think Gert went that route, but had to widen the frame.
Sent from my iPhone using Tapatalk
Sent from my iPhone using Tapatalk
Ultrunner
Senior Jeeper
Yeah, I’m not looking to under-go a bunch of other mods. Gert is setting a paradigm with how much customization he’s achieved.
I think the larger tank will better support the sbc 350.
Sent from my iPhone using Tapatalk
I think the larger tank will better support the sbc 350.
Sent from my iPhone using Tapatalk
- Posts
- 729
- Media
- 10
- Thanks
- 75
- Location
- West Springfield, MA
- Vehicle(s)
- 1986 CJ7, SBC 350, Dana 300, D30, AMC20
Spent the weekend doing multiple things. Spent some time prewiring an outlet for my plan for a heater in the garage. Getting insulation blown in Friday.
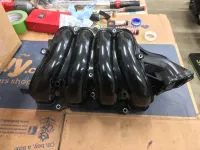
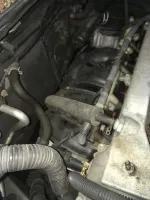
Also had to replace the intake manifold on my daily beater, my 03 Camry. Been waiting to do this for awhile. Apparently there is a baffle inside that comes loose over time and makes it sound like a rod is going to let go! Thanks to YouTube, it was not bad at all to do.


Purrs like how a 4 cylinder Toyota now!
So only had a little time on the Jeep. Did get to play with AN fittings for the first time. And I feel that they’re worth the $4 a fitting, look real sharp!


Also had time to drop in my new HyperSpark distributor.

Sent from my iPhone using Tapatalk
Also had to replace the intake manifold on my daily beater, my 03 Camry. Been waiting to do this for awhile. Apparently there is a baffle inside that comes loose over time and makes it sound like a rod is going to let go! Thanks to YouTube, it was not bad at all to do.
Purrs like how a 4 cylinder Toyota now!
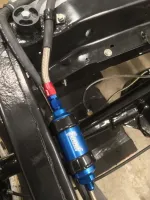
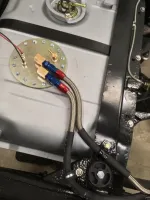
So only had a little time on the Jeep. Did get to play with AN fittings for the first time. And I feel that they’re worth the $4 a fitting, look real sharp!
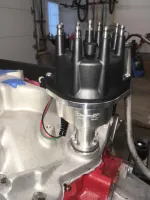
Also had time to drop in my new HyperSpark distributor.
Sent from my iPhone using Tapatalk
- Posts
- 729
- Media
- 10
- Thanks
- 75
- Location
- West Springfield, MA
- Vehicle(s)
- 1986 CJ7, SBC 350, Dana 300, D30, AMC20
TnCJ
Senior Jeeper
- Posts
- 566
- Thanks
- 6
- Location
- South East Tennessee
- Vehicle(s)
- 1980 CJ 5, 4.2 engine, D30,AMC 20, T176, Dana 300, MC 2100 carburetor.
Oh wow. It doesn't get much better than that!!
- Posts
- 729
- Media
- 10
- Thanks
- 75
- Location
- West Springfield, MA
- Vehicle(s)
- 1986 CJ7, SBC 350, Dana 300, D30, AMC20
Yep, really scored on that one basically only some rust under the seam seller and some stress cracks around seat mounts. Fixed some wavy fenders and now time to start mocking everything up.
Sent from my iPhone using Tapatalk
Sent from my iPhone using Tapatalk
Similar threads
Build Thread
1986 CJ-7 Laredo ALL NEW but the sheet metal...
- Replies
- 44
- Views
- 1,340
Build Thread
‘84 CJ-7 Laredo. Rebuilding My First Jeep.
- Replies
- 2
- Views
- 416
- Replies
- 17
- Views
- 1,099
- Replies
- 38
- Views
- 1,326
Build Thread
1972 CJ5 “re”build
- Replies
- 8
- Views
- 775
Jeep-CJ Donation Drive
Help support Jeep-CJ.com by making a contribution.
Help support Jeep-CJ.com by making a contribution.
Goal
$200.00
Earned
$25.00
This donation drive ends in
0 hours,
0 minutes,
0 seconds
12.5%

