• Hello Guest, we are proud to now have our Wiki online that is completely compiled and written by our members. Feel free to browse our Jeep-CJ Wiki or click on any orange keyword when looking at posts in the forum.
    To dismiss this notice
    click the top right X.

Build Thread 1986 CJ7 Rebuild - Chasing my youth

Build Thread 1986 CJ7 Rebuild - Chasing my youth
Yeah, I’m not looking to under-go a bunch of other mods. Gert is setting a paradigm with how much customization he’s achieved.

I think the larger tank will better support the sbc 350.


Sent from my iPhone using Tapatalk


LMAO, I want to put a parts book together so I can remember what everything came from and what to buy


Sent from my iPhone using Tapatalk
 
Very good progress on a good looking Jeep


Sent from my iPhone using Tapatalk
 
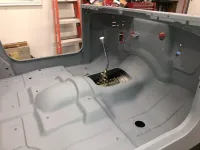
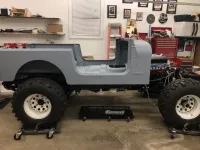
First body fitment done. All mounts lined up and tub seems pretty square on the frame overall.

435d284abf4660fac542b4b3efdc3321.jpg

81dfda058122e185dc23956ef96cf9d8.jpg

c35b7bb4e8174e52252ebfcd46eb7514.jpg

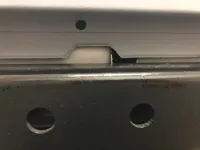
The one area that doesn’t seem right is the relief in the rear pan area where I belief it’s notched to accommodate the over the top gas tank strap. When I was bolting the tank in, I noticed there were 5 offset holes in the rear cross member and only 4 holes in the tank skid and neither left or right mount centered the tank. There were 3 holes in the front part of the skid and 3 holes in the frame and so there was only way to orient it in the front. So the tank ended up being offset to the passenger side slightly. I assumed this was normal. But now that the tub is on, it doesn’t seem like it’s correct. Any thoughts from the gallery?

7988fb1ec359f1a783e724d11cdd5a5e.jpg

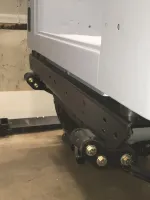
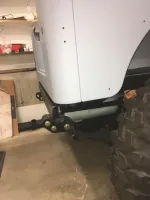
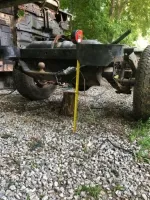
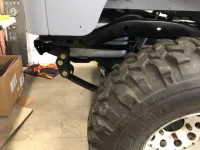
Also spoke to BDS today about my rear springs. Told them tub was now on and unlike what they told me, the springs haven’t flattened out. Sent them pics and said it’s not right.

d8603221d4d1af9778ec9fcb6afe955d.jpg

129498c3d46e076d4cc1425cb1be9959.jpg

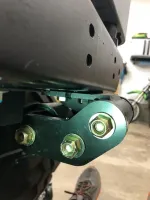
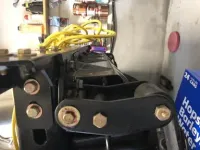
They replied that my spring hangers are too far back. And that I may also have to flip them to have the eyelet towards the front of the vehicle?? This doesn’t seem right? I looked again, there is only one set of holes in the frame, so they cannot he moved forward given the only two holes in frame. Any heard of turning the spring hangers around?

26af222eddf59c7d34491806c2c35064.jpg

Sent from my iPhone using Tapatalk
 
Last edited:
LMAO, I want to put a parts book together so I can remember what everything came from and what to buy


Sent from my iPhone using Tapatalk


I have a tracking sheet I’ve put together in excel. It has a main “dashboard” worksheet that is fed from several others to automatically calculate what category (engine, interior, suspension etc...) is the biggest portion of the cost and what the average cost within a category is.

I’ve also created hyperlinks to each part I’ve purchased to keep track of vendors. Happy to share if you’re interested.

Also, I looked back at my disassembly. My rear shackle mounts had the eyelet facing towards the front.


Sent from my iPhone using Tapatalk
Do share! I'm interested. Very. Just need to put a password on it so the wife doesn't see totals!!!

Sent from my Pixel 2 using Tapatalk
 
Do share! I'm interested. Very. Just need to put a password on it so the wife doesn't see totals!!!

Sent from my Pixel 2 using Tapatalk


Oh God! Yeah I’m certain my wife hasn’t seen the actual projected cost or else this project would have come to a grinding halt long ago.


Sent from my iPhone using Tapatalk
 
I have a tracking sheet I’ve put together in excel. It has a main “dashboard” worksheet that is fed from several others to automatically calculate what category (engine, interior, suspension etc...) is the biggest portion of the cost and what the average cost within a category is.

I’ve also created hyperlinks to each part I’ve purchased to keep track of vendors. Happy to share if you’re interested.

Also, I looked back at my disassembly. My rear shackle mounts had the eyelet facing towards the front.


Sent from my iPhone using Tapatalk


So you’re saying yours or orientated like this?
1061b15d3ae6f7122edd3832ff883bd3.jpg


Sent from my iPhone using Tapatalk
 
So you’re saying yours or orientated like this?
1061b15d3ae6f7122edd3832ff883bd3.jpg


Sent from my iPhone using Tapatalk


That’s right. I’ll take a picture for you when I get home today.

1766710789e2c5559078d7055f22086a.jpg
Here’s a before picture. If you’ll notice. There’s no way the bumperettes or tow bar would fit of the mounts were oriented with the eyes facing aft.


Sent from my iPhone using Tapatalk
 
They replied that my spring hangers are too far back. And that I may also have to flip them to have the eyelet towards the front of the vehicle?? This doesn’t seem right? I looked again, there is only one set of holes in the frame, so they cannot he moved forward given the only two holes in frame. Any heard of turning the spring hangers around?

26af222eddf59c7d34491806c2c35064.jpg

Sent from my iPhone using Tapatalk

BDS is correct, you have the spring eyelets on backwards, turn them around and that should allow the springs to hang properly.
The rest of the build looks good, nice work.
 
Well imagine that, I was replacing them as they had come off from the previous hack. And I figured they just hung out case bumper hadn’t been put on yet.

Ultra, did you document your gas tank location lol?


Sent from my iPhone using Tapatalk
 
Yes, I have photos, I’ll get them, them spreadsheet and shackle photos for you this evening when I get home. Weirdly, the five bolts across the rear bumper cross member were attached to nothing when I removed it.


Sent from my iPhone using Tapatalk
 
Tried uploading the build planning spreadsheet. The site reported back it was an invalid file type.

I really want to get this out to you you as it’s been a great planning tool and a good way to keep track of everything. I’ll reach out to the forum admin.


Sent from my iPhone using Tapatalk
 
How about putting it together on drop box and post a link?

Sent from my Pixel 2 using Tapatalk
 
How about putting it together on drop box and post a link?

Sent from my Pixel 2 using Tapatalk


Good idea. I’ll drop it tonight.


Sent from my iPhone using Tapatalk
 
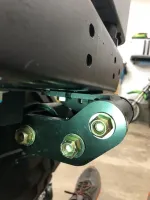
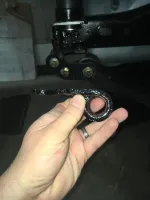
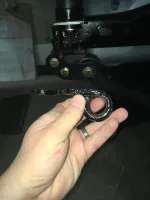
After 14 months of sitting in garage due to work, life and kids I am getting back to my build now and catching up on projects. Here is a photo of my new rear shackles with no load on them. Can’t remember brand,size or anything till I start digging through receipts I’ve hid from wife.
 

Attachments

  • 20A1DA81-ECDD-4110-B1FC-15D74C45BEB0.jpg
    20A1DA81-ECDD-4110-B1FC-15D74C45BEB0.jpg
    19.9 KB · Views: 26
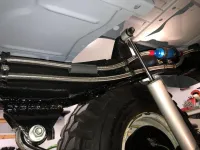
So, BDS was right. Amazing how much better springs fit when the mounts are in the right direction.

d63093a0a221b00965e8f292ce27c84e.jpg

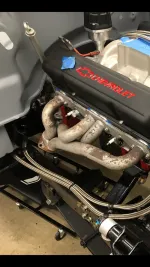
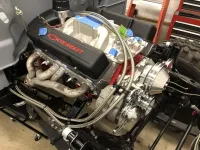
Also get rest of fuel system run up front. Got a little crazy with the stainless rubbing on the frame, so I got some heavy heat shrink tubes to put in strategic spots where there was contact with the frame. Also tried to minimize proximity to where the exhaust will route and still keep it from sticking up above the frame rails too far and looking funny.

e3b93c87c5c03f3f22f333e8928d2695.pngd15bc7835ddd1128faed7d66ea8ad623.jpg

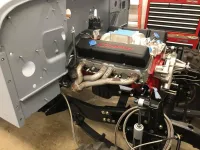
Really stretched my fab skills and bent up some flat stock and was able to find a sweet spot on the alternator mount to put a plate to secure the lines as they transition from the frame to the motor.

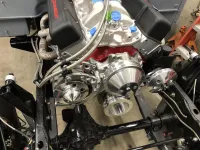
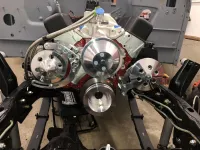
Speaking of the alternator. I originally was trying to retro fit a serpentine belt set up. But with the camel hump heads, it was going to be a bear to try to retro fit stock GM set ups to those heads. So then started exploring aftermarket set ups, dang, way to much money!!! But was missing most of the pulleys and brackets and found that for a relatively decent price, CVF made a full pulley and bracket kit that would work with the fuelie camel jump heads. Little more blinging than I was going for, but at did look better than the stuff I did have.

c235a66471e50c412f499fded75baa26.jpg29197eb23ea546ed6632188592e4d993.jpg582f408494e3be3209ae9061d42ce5d9.jpg

c60bce734e06f49a2e546847520e005e.jpg

I’m supposed to be focusing on items that affect the body and dry fitting, so I can finish mocking up and get it back to paint, but I figured that those items would be easier to put on with no fenders and grills. And it was way easier. Plus who doesn’t want to put on shiny parts right away. Now back to where I should be focusing.


Sent from my iPhone using Tapatalk
 
Are you going fuel injected or carbureted?


Sent from my iPhone using Tapatalk
 
Fuel injection, just ordered yesterday actually


Sent from my iPhone using Tapatalk


My Block is at the machine shop. When I get it back and start the top end I’ll probably have a ton more questions for you.


Sent from my iPhone using Tapatalk
 

Jeep-CJ Donation Drive

Help support Jeep-CJ.com by making a contribution.

Help support Jeep-CJ.com by making a contribution.
Goal
$200.00
Earned
$25.00
This donation drive ends in
Back
Top Bottom