• Hello Guest, we are proud to now have our Wiki online that is completely compiled and written by our members. Feel free to browse our Jeep-CJ Wiki or click on any orange keyword when looking at posts in the forum.
    To dismiss this notice
    click the top right X.

Build Thread Finishing Another Fella's CJ7 Build

Build Thread Finishing Another Fella's CJ7 Build
As I mentioned, the clutch linkage felt, uhh..., dodgy.

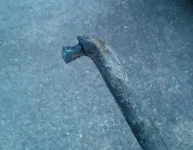
The boot into the bellhousing was torn, and I decided it needed some attention. I undid the linkage by pulling the hitch pin on the pedal. Then I went under the Jeep to find that some dope put a blob of weld on the linkage rod rather than fixing or replacing the rod. Great. I managed to work the sawzall in there and cut the end off. I'd like to meet the fella that did that and activate his dental plan.

Beautiful, eh?

IMG_20130817_182649-XL.jpg

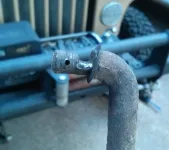
Strangely, the bellcrank device was in pretty good shape. The OE clutch pushrod end was not so much....

IMG_20130817_182631-XL.jpg

Those linkage rods should have been retired a long time ago. :censored:

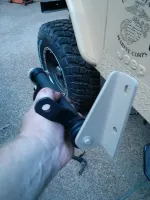
I assembled a brandy new bellcrank....

IMG_20130817_182743-L.jpg

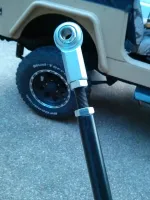
And installed it with linkage rods from SpeedDirect.

IMG_20130817_182809-XL.jpg

The clutch is much, much smoother and more linear.

Next fun will be the power brake booster :chug:
 
Time for a brief update. I still haven't even started the power brake swap. I got too busy on a few other things that needed a little help.

The previous owner had 6" shackles installed, and they were not in the best of shape. Although I straightened them already, it was fairly obvious that the front ones were not even the correct spacing. I don't need the shackle lift so much, so I got some 4" HD shackles, and installed them with new urethane bushings and gun drilled, greaseable bolts.

There is still plenty of lift in the Jeep. What I found rather remarkable is how much of an effect they have on the street manners of the CJ.

IMG_20130907_143051-XL.jpg

IMG_20130907_143036-XL.jpg

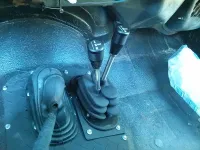
Next, the linkage on the Transfer Case was quite sloppy. Although it had a couple grease zerks on it, it would appear they didn't get any love on a regular basis. So I removed it all, and installed a twin stick arrangement from JB Fab for the old Dana 20 . Much, much nicer.

IMG_20130907_143018-XL.jpg


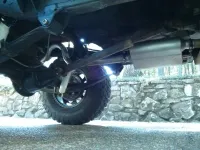
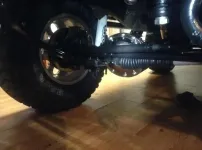
Lastly, the exhaust fabricated by the prior owner would not allow full travel of the rear axle. I installed a 2.25" Flowmaster and a new tailpipe to allow clearance.

IMG_20130907_143102-XL.jpg

The Flowmaster makes the otherwise 'industrial' sounding AMC 258 i6 / 4.2l growl a little bit.

The CJ is coming along nicely, and I am enjoying driving it. I still plan to do a power brake swap, and perhaps install power steering. But I think the next item will be to install a Maradyne cab heater for winter.
 
Over the past year, I really hadn't driven the Jeep much, as I was primarily using what little time I have at home to fix stuff rather than tool around with a busted Jeep. :D

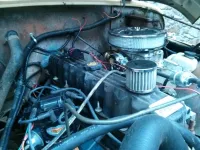
The filter element in the little 6" air cleaner assembly needed to be replaced, so I just swapped out the whole assembly for a 9" one I got from Summit Racing for $16. While I was on that site, I got a set of 2 5/8 gauges, and the tailpipe that I made the exhaust from (for $30). That whole tailpipe was much cheaper than the mandrel bends I was planning to fabricate it with.

Anyway, I finished de-smogging the engine. The last step was no more CCV to the intake manifold. That was an small orifice and a full time vacuum leak in the case of this CCV configuration. Now it vents to the atmosphere. The engine appears to be happier and runs much nicer now, likely from the loss of the vacuum leak.

I used two vents on the valve cover - one fore, one aft. Now there is one vacuum line on the whole engine, and that goes to the spark advance. Simple is good.

IMG_20130910_164817-XL.jpg

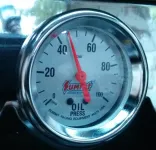
Over he past couple couple weeks, I started to drive the CJ fairly often to make beer runs and test out changes, and became alarmed at the oil pressure. At cold start up, it would indicate 40psi. Hot, at idle, it showed 5psi. Not exactly confidence inspiring. Yet, at the same time, the engine was remarkably quiet -- no rattles or knocks. Today I got around to installing a mechanical gauge.

This is hot idle, at 600rpm, with 15W50 Rotella.

IMG_20130910_164845-XL.jpg

It runs 60psi as it tools down the road at 2,000 rpm.

Evidently, the combination of the 33 year old OE gauge and sender was no longer a beneficial union of parts. The engine always felt good, and now I feel a little better about the guts.
 
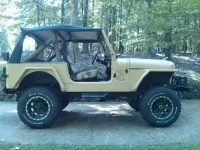
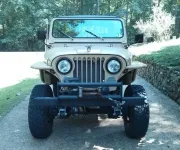
Looks like you made it yours, nice job.
 
It's lookin' good. Did you have trouble getting that Flowmaster to fit? I had gotten one, the super44 delta I believe, and it had 2 1/2" at both ends but also an offset in and a centered out, which is opposite of what I needed. Did you have to angle your exhaust towards the frame and then tilt the muffler down on that side? Curious as to how you made it work.
 
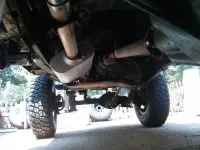
PaRenegade -- > I installed a vintage Flowmaster 2 1/4" series 40 from the closeout rack at the local Autozone. It also had an offset in and a center outlet. I had to rotate it to clear the frame. This pic should show what I did...

IMG_20130912_124816-XL.jpg

In hindsight, if I'd found a slightly more narrow muffler case, I could have moved it rearward (no catalyst) and probably could have tucked it inside the frame rail. The first time I knock it off, I reckon that will be exhaust 2.0. Although difficult to see in the pic, the Transmission /Transfer Case skid plate is still the lowest point under the Jeep.

I originally wanted to do a 2 1/2" exhaust, but the collector on the 4.0 manifold is 2 1/4" and I could get the whole tailpipe for $30. So a compromise was struck.
 
Love the desert sand paint. I am just finishing up a ch7 and it is painted axles up, insideout desert sand. I was thinking of olive drab, but with the current military this works. I will put on the stars and my VN unit numbers on the bumpers with my serial numbers on the sides of the hood. The license reads VFW2455 as that is our local post. Has been a fun frame off build. Just fired it up yesterday, still have fenders and finish paint to do with a small amount of wiring. I slipped in a 350 chev with 350 turbo auto. It had an auto with the AMC 258 i6 / 4.2l six. Anyone out there needs either of these they are good to go. The six did smoke a bit after idling but ran well.

I live in Washington State, pm me if you are interested.
 
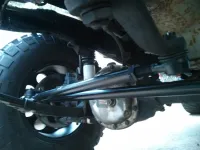
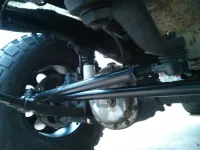
Brown Santa rolled by today and dropped off my heavy duty tie rod and drag link. The slightly bent, mostly worn, and somewhat whimpy OE equipment went into the scrap bin.

The new parts are huge.

IMG_20130917_160816-XL.jpg
 
Last edited:
Brown Santa rolled by today and dropped off my heavy duty tie rod and drag link. The slightly bent, mostly worn, and somewhat whimpy OE equipment went into the scrap bin.

The new parts are huge.

IMG_20130917_160816-XL.jpg

Nice! Now I know what mine will look like , only Im gonna do the flip right away as well. :chug:
 
I've been traveling quite a good deal working this past year, and my progress on the CJ has been slow. The job trail has not been fun.

I've put a few miles on the CJ, and did some fun exploring with it, but realized I need to drag it forward a bit more. The 4.0 head conversion is working quite well, and the rebuilt suspension/brakes have been doing fine. Anyway, I've accumulated a pile of parts to fabricate/modify, and install as soon as I can. Tilt column, power steering and brake conversion are about to happen....:cool:

I'll add up some stuff here as soon as I get some pics together.
 
A big pile of parts arrived via FedEx & Brown Santa on Friday afternoon, but unfortunately I had to work today. Tomorrow, the install starts. I'll take some pics for y'all to see.

I started modifying the power steering brackets tonight. Looks like it's going to be relatively straight forward. The manifold/block bracket was already 'notched' somewhere along the line with the hot wrench, so I'm going to need to do some cleaning up the gnarly flame cuts, and reinforce some of that piece.

The steering box I got is an earlier flare type, as is the pump (double pulley for some reason...). I might just go with a HD mount for the box. I also ordered some new power steering hoses today, since the return line fitting was cracked, and the line I got at the junk yard with the box looked pretty dodgy. No sense working this hard to not put new lines in.

The brake booster install should be a PITA, they always are. Brake fluid makes everything crusty.

Lastly, I'm going to fabricate an improved throttle linkage setup for the MC2100. The one on there now won't allow for full throttle, and is basically made of worn out parts from the old linkage.

Fun, fun!
 
Nice! Now I know what mine will look like , only Im gonna do the flip right away as well. :chug:

Looks very familiar. Brilliant minds think alike.

imagejpg1-24.jpg
 
Sunday was something of a bust. I spent the day tearing the Jeep apart, removing the upper and lower steering columns, ospho-ing some old parts and cleaning up some of the new parts to prime and paint before installing.

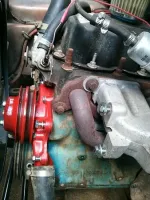
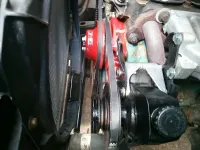
The power steering pump sort of starts with the water pump. Although mine wasn't yet leaking, there was a little radial play in the shaft. So off it came. A new pump and gasket were installed. I had decided to ditch the fan drive off the end of the waterpump, and go electric. So I bought 4 5/16" x 3/4" 24tpi bolts, and installed only the double water pump pulley back on the water pump flange.

IMG_20140728_145636-M.jpg

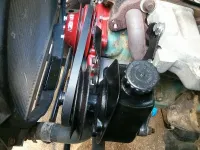
Next was to make the power steering pump fit. The issue here is the 4.0 head makes the AMC 258 i6 / 4.2l head sit higher on the engine than the AMC 258 i6 / 4.2l head. So the bracket needs to be modified. The second issue is that the 4.0 header (OEM) somewhat intrudes into the real estate needed by the bracket. The OEM bracket I got out of the salvage yard already had a rather poorly done 'notch' cut into it with an oxy/acetylene torch, presumably to make room for a header. I cleaned up the janky cut and made a few more mods. This isn't my final run, but it will work well enough to get it going. I just notched the bolt holes where the bracket attaches to the intake manifold, and used some heavy duty 3/8" fixture washers to hold it together for now. I have a length of cold rolled 3/16" steel that I will rectify the situation later on.

IMG_20140728_163833-M.jpg

The aluminum sandwich bracket needs to be relieved somewhat also. And I need a slightly longer belt than the 43" to get the pump done. I have the next few days off, so I aim to get the brakes and steering done.
 
Last edited:
Moving ahead at the speed of smell....I finished clearancing the bracketry, and got the pump installed. The 43" OE size belt works.

IMG_20140729_154404-M.jpg

As I mentioned prior, I'm moving to an electric fan.

Next, I started removing the very cantankerous brake master cylinder. This will be a fight if I want to preserve the original brakes lines, which are in fairly good shape.

bugs-bunny-this-means-war-M.jpg
 
I'm still plodding along. I finally broke the brake lines and master cylinder free. A little patience and PB Blaster are my friend here.

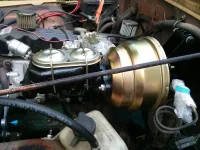
I'm going to run new 3/16 brake lines from the master cylinder to the proportioning valve. Since the Jeep has funky sized fittings at the MC, it's better (IMHO) to run new lines rather than screw around with brake line adapters. The new 1" bore MC I am using is set up for 3/16 lines anyway.

IMG_20140730_170211-XL.jpg

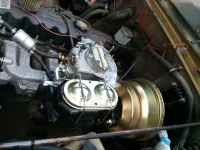
It's a tight fit in there. It will be a challenge to build a throttle linkage for the Motorcraft carb. Nevertheless, it's getting closer.

IMG_20140730_170203-XL.jpg
 
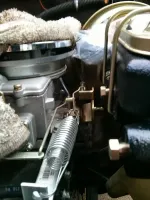
I think I came up with a workable plan to make this work. Note how there is no clearance for the throttle linkage.

IMG_20140731_185053-L.jpg

A little careful cutting and reworking of the linkage, and fabricating a new cable pull bracket ought to do it. I'd considered making a bellcrank assembly, but decided simpler would be better. I'd been meaning to rework the linkage the previous owner built, as it would not allow for full throttle anyway. The brake booster swap just forced the issue.
 
I'd considered making a bellcrank assembly, but decided simpler would be better.

As usual, I've procrastinated the hell out of this - because I hate doing things twice. I don't get to quote myself much, but what I've decided to do it make a throttle cable rig that pulls from the front. Simple is better for me, and I don't want to introduce any weird angles into the throttle shaft. I've got a 48" generic cable enroute, and will weld/machine a stay and linkage to make that work.

Looks like standard 51" pre-made 3/16" brake lines will work fine, but I'll need a 1/2" and 7/16" adapter at the prop valve. I always hated making double flares. And that length will give me loads of room to make some coils. The pre-made lines are under $4 each, too.

Moving ahead of myself, I got a dropped pitman arm for the PS box to correct the angle. My manual box had a dropped one, and it worked well enough - so I'm going to stick with that geometry for now.

Next, the PO said he had a 'locker' in the rear AMC20 . I suspect it's just welded spiders - I used to roadrace in the SCCA, and know darned well what a spool rear feels like. I bought a gasket today so I can pop off the cover and take a look in there, and make a plan. It's really not drive-able the way it is w/o tearing things up.

I ditched the OE fan (no fan clutch even...) and am planning to use a Ford Contour e-fan and a solid state controller.

Next update when I have some pics to share. And advice is always welcome.:chug:
 

Jeep-CJ Donation Drive

Help support Jeep-CJ.com by making a contribution.

Help support Jeep-CJ.com by making a contribution.
Goal
$200.00
Earned
$25.00
This donation drive ends in
Back
Top Bottom