• Hello Guest, we are proud to now have our Wiki online that is completely compiled and written by our members. Feel free to browse our Jeep-CJ Wiki or click on any orange keyword when looking at posts in the forum.

JB Fabrication Aux. Idle Install (New Thread)

JB Fabrication Aux. Idle Install (New Thread)

Hedgehog

Always Off-Roading Jeeper
Posts
9,370
Thanks
4
Location
Tucson/Marana Arizona
Vehicle(s)
-1975 Jeep CJ5, 360 V8, Headers, Duel Exhaust,T15 transmission, D-20 Transfer case, Twin Stick Conversion, Warn 8274 Winch
-1951 Willys Wagon, 4 cylinder, "F" head, little rust, very close to stock
So, here's how I installed my JB Fab. Aux. Idle.

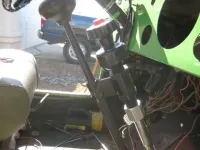
This is a picture of the control knob installed on my shifter. I like the location a lot. The shift adaptor didn't come stock and had to be ordered. When it arrived the sleeve that goes on the shift stalk was big and nasty with a set screw that you know wasn't going to hold for long. The sleeve looked like a the arm of a skinny clown sticking out of a fat clown suit. So, I cut off the sleeve and found a nut coupler of the right size and welded it on the adaptor. Then, and some won't like this, I threaded the shift stalk to accept the nut coupler. The control was timed or threaded to be tight at the angle I wanted to work with. Then Set screws were tapped in to hold things in place. This turned out to be a nice clean install.

IMG_0006.webp

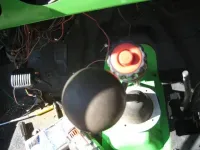
Looking down on the Idle Control knob.

IMG_0005.webp

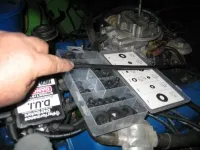
Under the hood. I did not get pictures of the throttle bracket in place. In this picture I am holding the Idle cable, it's a long cable indeed. The right size grommet came from the box.

IMG_0004-1.webp

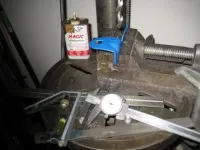
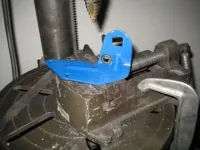
Getting ready to drill the cable hole in the throttle bracket. This thing is harder metal than you'd expect.

IMG_0008-1.webp

The hole was drilled, cleaned up, and the grommet was added. Additional smaller holes were added for the clamp and #10 Allen head screws.

IMG_0009-1.webp

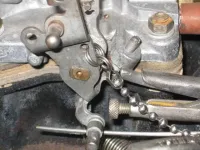
A close up of the Idle attachment. A tiny key ring and a BIG bead chain at the throttle end keeps things loose when the Idle isn't being used. The Idle cable wire is near the bottom. It needs to be cut again. I cut short lengths off until the right length was found.

IMG_0002-1.webp
 
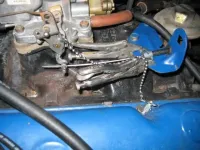
The throttle bracket is in place. The clamps are holding the Idle cable in place for drilling.

IMG_0003-1.webp

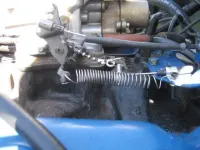
The Idle install in mostly complete. I didn't like the look of the cut off cable end so heat shrink tubing was used to make things look better. I don't like the throttle return spring, it will be replaced. The throttle took more effort than anticipated. The PO did something, I don't know what to the throttle cable and throttle pedal. It was a far to fiddly a process to fit a new cable than should be necessary.

IMG_0001.webp

Done, not a great picture, but it gets the point across.

IMG_0003.webp

All in all this was easier than anticipated. The throttle is stiff. I expect it to work itself in eventually. I also don't like the way the ring on the cable stop settles inconsistently. I'm looking into finding a better solution to the cable stop, bead chain attachment. The Bead chain works great in this application, it's the stop that I'm concerned about.

All in all I think this will be a great addition to my Jeep. I'm getting excited about getting out of the driveway and on the two tracks and trails.

I hope someone gets some good information from this thread. I enjoyed writing it for you all to read.
 
Looks great! Looking forward to a test drive report :chug:
 
How did the cable run from the shifter? Through the boot and then up or on top of the Transmission tunnel and then out through firewall? If I had to guess, by the pic it is on top of the tunnel. How is the cable doing while shifting through the gears? I like the shifter mount but I think the cable will take a beating with all the shifting back and forth and stress it will see. Maybe it's not as bad as I suspect. This is an upgrade that I plan on doing while I'm rebuilding the T case with the 4-1 gears that have been sitting on my shelf for months now... Like most things, I over think :rolleyes:
 
In the planning stages I wanted to run the cable through the boot. Fairly quickly it became obvious that the idea simply wouldn't work. No the cable runs from the shifter through a hole in the floor cover, with a grommet to protect the cable. Surprisingly enough the bend is fairly gentle. The one hard bend is shown as it turns into the throttle bracket. This is one solid cable. Under the outer plastic cover the cable is constructed of wire running lengthwise with the actual throttle wire running down the middle/center. The wires are high carbon steel and not easy to cut, I had to use a cutoff tool to get the job done. Other than running the motor to test the function of the cable I have no idea about how it shifts. I have run the Transmission through the gears with no problem there. Honestly I expected more trouble with this but actually as these projects go it was easy. As far as movement damaging the cable is concerned. Cables move a lot everyday and this is no ordinary cable. I'm not worried about cable durability.

I'm tryin' to get this thing on the road. But it seems like every time I move forward a couple new problems pop up. I could ignore most of them, but I don't ignore problems easily. Seats go in, seats come out, the front won't fit so a small lift is necessary for front fit, while doing the lift I find other some structural rust in the body around the middle mounts. That leads to fixing some poor welds I did before I had my MIG. Stick welding was too much heat for sheet metal. So I cleaned up the notch area and welded in patches. I swear this thing will be on the road soon, but I've said that before.
 
Last edited:
I couldn't tell from the pics how the cable got to the engine bay, so I started thinking of ways to do it in my head. Thank you for the clarification. I look forward to the on the road review, sounds like you're getting close :driving:
 
Yeah I realized after doing the posts that I never showed how the cable went through the firewall/floor. I just went through my spare pictures and the cable hole isn't shown even in a glancing blow. A picture needs to be taken.
 
Also, I am a terrible speller. I've looked and looked at my title to this thread .... "idol" is not correct, it should be "idle". Every time I see it, it feels like I'm sticking my finger in my own eye.
 
I used to be a great speller until I got a computer :rolleyes: now there's all these wavy red lines under my words....;)
 
:)
I find it troubling when the spell checker can’t figure out what you are attempting to spell. It’s even worse when you pick a word amongst the several suggested then days later rereading the post you see that the wrong word was chosen. …..ERRRRRrrrrrr ……. Hit the dummy button please.
 
ANNNNNDDD the fact of the matter is, I can not recommend anyone mounting their JB Throttle on their stick shift. The cable is far to stiff for this application and puts a strain on the Transmission . I.E. the darned thing pops out of gear..... I like the idea and I'm convinced that with a flexible throttle cable this would be a great use for the throttle. ........ the bike shifting cable thing would work, but I like idea of a purpose built part.
 
Thanks for the update. I'm planning on ordering one this week so it's one less location to consider. I hope it's not too much trouble to relocate.
 
Should be easy enough to put it in the dash. I'm more educated on these things now. The JB version is EXTREMELY stiff. Others aren't and might work better. MY buddy with a '69 had one in the dash, but he was amazed at how stiff mine is. His is much more flexible.

I really likes the location on the stick. It looked good and worked well. Oh well the bracket holds a flash light now.
 
Proper flashlight placement is often over looked ;)
 
The throttle will end up in the dash, it's to handy to not use.
 

Similar threads

  • Question<br> <font color=black> Reply's are voted<br> on for best answer</font> Question
    Reply's are voted
    on for best answer
Replies
2
Views
96
  • Question<br> <font color=black> Reply's are voted<br> on for best answer</font> Question
    Reply's are voted
    on for best answer
Replies
6
Views
136
  • Question<br> <font color=black> Reply's are voted<br> on for best answer</font> Question
    Reply's are voted
    on for best answer
Replies
7
Views
72
  • Question<br> <font color=black> Reply's are voted<br> on for best answer</font> Question
    Reply's are voted
    on for best answer
Replies
9
Views
358

Jeep-CJ Donation Drive

Help support Jeep-CJ.com by making a contribution.

Help support Jeep-CJ.com by making a contribution.
Goal
$200.00
Earned
$25.00
This donation drive ends in
0 hours, 0 minutes, 0 seconds
  12.5%
Back
Top Bottom