Build Thread Jeep CJ for my daughters first car.

Build Thread Jeep CJ for my daughters first car.
Pants Posi. We sure could have used it putting them back together.

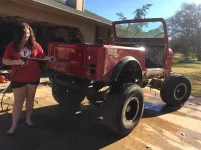
Took yesterday (Thanksgiving) off to be with family. Today was absolutely beautiful here in OK! We pushed the Jeep out of the shop and spent 2 and a half hours pressure washing the tub and frame. I bet we washed AMC 150 lbs of dirt, mud and rocks out of the tub and frame! Wow!
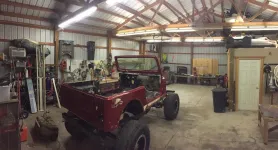
While the Jeep was out of the shop, we took the opportunity to really clean up, sort out the parts and make more room to work on it. It should be much easier to work on now. Plenty of room to paint it when we get ready.

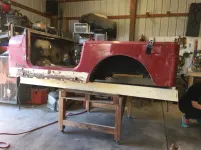
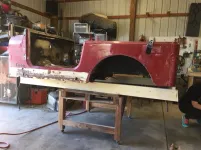
Tomorrow, the tub comes off. I built a wooden roll-around "dolly" to set the tub on to do all of the repair work. Once the tub is off, we will pull the chassis back out for more cleaning and de-greasing.

Stay tuned..........
 

Attachments

  • IMG_3502.jpg
    IMG_3502.jpg
    94.8 KB · Views: 118
  • IMG_3503.jpg
    IMG_3503.jpg
    94.7 KB · Views: 121
  • IMG_3504.jpg
    IMG_3504.jpg
    99.7 KB · Views: 105
We sure could have used it putting them .
Those spindle nuts should be torqued.
I would recommend buying the spindle socket and set to torque.
Inner nut to 50ft lbs while spinning the tire.
Back off the inner nut 1/3 of a turn
Torque outer nut to 50 ft lbs
 
Those spindle nuts should be torqued.
I would recommend buying the spindle socket and set to torque.
Inner nut to 50ft lbs while spinning the tire.
Back off the inner nut 1/3 of a turn
Torque outer nut to 50 ft lbs

Technically, your correct. Being a 30 year seasoned mechanic, I've never liked putting that much pre-load on wheel bearings. There is just no need. Tighten them up, spin the hub/rotor a few times, back off the nut, spin it again and then tighten hand tight. That will set the bearing, squeeze the "extra" grease out. Tighten just enough with slip-jaw pliers to get the cotter-pin in. Hub bearings are different than, say, pinion bearings. The pre-load on the pinion bearings keeps the pinion from moving and affecting gear mesh and damaging teeth.

Seeing how 4x4's are lock nutted, they are a little different. The inner bearing adjustment I do the same way as the 2x4's, the locking nut is different, I do torque those to whatever to manufacturer recommends.

One thing you forgot to mention Posi, after torquing the locking nut, you need to bend over the tabbed washer to lock that nut in place. Love your ride Posi! Nice!
 
If you can set the outer spindle nut torque correctly to 50ft lbs with channellocks your a better man then me.
I didn’t mention the bending the tabbed washer because it was a visual thing (see/do), but good you did as it may help others.
Working with your daughter has to be a fun project, enjoy!
Thanks for the jeep compliment.
 
Oh, no, I'm sorry, I didn't mean to imply that could set the torque with a pair of pliers. I didn't mean for it to come off like that. My apologies. You are correct though, I DO need to set that torque correctly, you are absolutely correct, no doubt about that. I will be ordering one of those sockets, for sure. And before it hits the road, I'll be torquing them just as you suggested! Thanks for the link, the only one I can currently get my hands on is a 3/4 drive, the 1/2 in drive will be really nice!

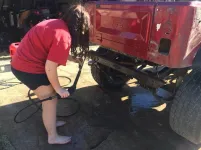
The picture of my daughter is when she is taking the hubs apart. I wanted her to get in there and get some of that nasty grease on her hands! It will make her appreciate the nice clean grease it went back together with! :-)
 
I have a OTC 1901 socket which is 3/4". Seams like at the time I was having trouble finding something in 1/2" drive also. I have a cheap 3/4" socket set I got back in 80 and use that and for my torque wrench I use a 3/4 to 1/2" reducer
 
Got the body removed yesterday. I was amazed at how much flex the tub had. I am sure it’s because of all the metal that’s now turned to iron oxide! The factory manual I got came with the supplement for frame and body repair. We made a 2x6 frame based on the factory dimensions for the body mounts. We used them to shim the tub to make sure it was straight. This should keep it from flexing when out back on the frame.


Sent from my iPhone using Tapatalk6e21403e934e14b08b14140c433846bb.jpg


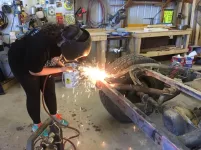
We also got the remaining rusted, frozen up body bolts and mounts cut off. She is pretty darn good with a torch!082845ed42cb5908cd19258f71456d28.jpg


Sent from my iPhone using Tapatalk
 
PLZ, put a long sleeve shirt on her, to protect her arms when using a torch like that. :notworthy:
Get the hub socket, so the bearing preload can be set 'rite'.
LG
 
PLZ, put a long sleeve shirt on her, to protect her arms when using a torch like that. :notworthy:

Get the hub socket, so the bearing preload can be set 'rite'.

LG


All right......enough about the socket already......I’m getting it with the next order......


Sent from my iPhone using Tapatalk
 
All right......enough about the socket already......I’m getting it with the next order......


Sent from my iPhone using Tapatalk


Just didn't want ya to forget is all. :laugh: :poke:

LG
 
Just didn't want ya to forget is all. :laugh: :poke:


LG


LOL!! Probably a good thing......I probably will forget it when it comes time to order. I’ll remember about the same time I hit the “submit” button!


Sent from my iPhone using Tapatalk
 
LOL!! Probably a good thing......I probably will forget it when it comes time to order. I’ll remember about the same time I hit the “submit” button!


Sent from my iPhone using Tapatalk


Ordered the socket with my order today!


Sent from my iPhone using Tapatalk
 
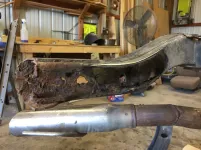
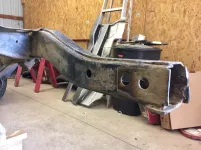
Back out in the shop today. Working on frame.ad7d36f8069b987d8cfd8bd733095d6b.jpge46c0495809ff93141f4842983a33eb1.jpg14196821c27093778a9be4188dbefbee.jpg


Sent from my iPhone using Tapatalk
 
:eek:

Hope that is the worst of the frame issues.
LG
 
:eek:

Hope that is the worst of the frame issues.
LG

:eek: :eek: :eek: Wow. U da man for being able to handle that :chug: lining that up straight isn't for the timid. Good luck and we are watching !
 
:eek: :eek: :eek: Wow. U da man for being able to handle that :chug: lining that up straight isn't for the timid. Good luck and we are watching !


Thanks! Lining it up should not be much of a problem. I have the sublimely that a body shop would use to repair a frame. Lots of measurements to off of.


Sent from my iPhone using Tapatalk
 
I see you already purchased floor panels and what looks like a rear floor riser.
Frame looks in good shape other then the left rear rail.
You still have the bump stops, out here their one of the first things that rust off.
If you care to match the original thickness, inside frame is 1/8" outside 3/16".
 

Jeep-CJ Donation Drive

Help support Jeep-CJ.com by making a contribution.

Help support Jeep-CJ.com by making a contribution.
Goal
$200.00
Earned
$25.00
This donation drive ends in
Back
Top Bottom