• Hello Guest, we are proud to now have our Wiki online that is completely compiled and written by our members. Feel free to browse our Jeep-CJ Wiki or click on any orange keyword when looking at posts in the forum.
    To dismiss this notice
    click the top right X.

notch in fender for more leg (belly) room

notch in fender for more leg (belly) room
That is why they have latex gloves to save that manicure. :D
 
your supposed to tell me these things before I do something dumb.:o
 
Gee I thought everybody had a box of them in there shop/garage.
 
I do,:o.

I read seam sealer and my brain heard latex caulk.:bang:

It did rub off, didn't take much skin at all.:D
 
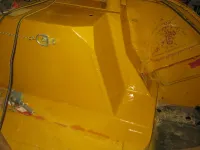
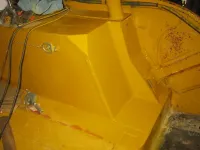
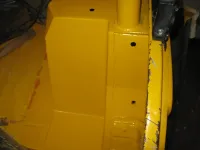
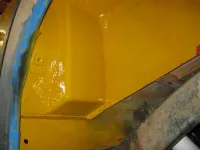
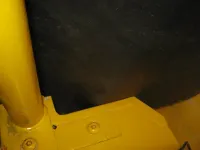
OK, cleaned up, etched. primed with 2 or 3 coats of urethane primer, under coated on the bottom and 2 coats of Caterpillar highway yellow urethane. looks pretty good if I do say so.

img_0128.webp
img_0127.webp
img_0129.webp
img_0130.webp

Of course the new paint makes the rest look like :dung: but it is, for the most part up under the seat. A little honest effort and I mayeven be able to drive it this weekend.:D
 
Nice metal work. Before painting I probably would have moved the air gun and masked off or painted the tie downs. :) I really like that color yellow and who can argue with the time proven durability.
 
Nice metal work. Before painting I probably would have moved the air gun and masked off or painted the tie downs. :) I really like that color yellow and who can argue with the time proven durability.

your right, kind of sloppy. doing a little every night after work, got in a hurry. no excuse and my shop is a total wreck right now. be glad to be able to pull the jeep out, have a little room to move and regain some order.:cool:
 
IO - Actuially I'm smiling thinking of the oversprayed tools I have from doing exactly the same thing. or Thinking, "I'm good enough with a spray can to control the over spray." On one project I thought a simple piece of card board would control over spray. It did, at least for the parts it was covering, all around the card board there was a fine mist you couldn't see until the card board was removed ...... and my windshield, who knew that "Etching" primer will etch glass too. That was a real "Darn It" moment. No worries sir I can totally relate.
 
actually, the proper color with decent paint is a big step forward for me. I used to just use flat black Rustoleum for pretty much everything.:D
 
img_0131.webp
img_0133.webp
img_0132.webp

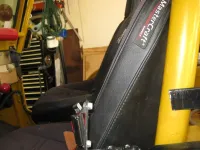
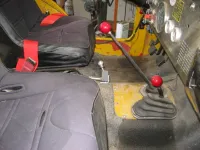
OK, this should pretty much wrap this up. a few shots of the seat back in place. I hope there is enough perspective to show the 2" difference in the seat positions. I know, 2" does not sound like a lot but it makes a major difference.

as an exercise in perspective, I went out to my Tundra and powered the seat forward until I was dragging the wheel then powered back 2" and was amazed at how much difference it made.

this was well worth the time and material spent and as a bonus I learned a lot about working with sheet metal and had reason to buy some new toys which made it tons and tons of fun.:D

now 11:50 Sat morning by the time I make it out to the fridge it will be Miller time. "Miller" is a metaphor for good/real beer.:chug:
 
That`s nice on my 1947 CJ2a , before I sold it to the buyer, sent it down to the Hotrod Shop 1/4 mile down the road and they flipped the pieces, from side to side. I then had to remount the seat frame, and made it fit. That was with OEM seats & frames, the guy was 6' 2" with a barrel in the middle, cost me $250.00 unpainted. Just remember there is a tire on the other side.

Nice, it is something Jeep never thought of.
I am 6' and own 2A with full cage, almost killed myself getting out in a hurry ONCE!

Thanks for sharing.
 
I hear ya there Craig, when I first got 'BB' the P.O. remarked she couldn't get in or out of her anymore. I really liked the Corbeau A4's which made matters worse. Having no welding skills or gear I went the other way and when the steering column went nutz I got the shortest GM one I could find... and a smaller radius steering wheel ("only vay ya can drive with hancuffs on, mang") <~name that movie/song :D

...although my money these days goes into the Jeep. :p
 
I did the notch and did get more room. My problem isn't belly room as much as it is leg room under the steering wheel. I did shorten the steering mainshaft oddly enough for more belly room, but now with the stock 17" wheel there is an elevation problem. It is rediculous, but I do love that stupid big wheel. With power steering it really isn't needed and it might have to go though. Oddly enough shortening the steering main shaft by 2" will allow for a new wheels adaptor and dish to end up with a new smaller diameter wheel in about the same posiion as an original setup.
 
Last edited:
That’s not the way I do it.
On mine, I make a straight cut right where the factory roll bar bracket ends, from about 1” from the outside wall toward the center of the tub. Then follow that line to the floor.
I then make another cut, exactly the same about 2”-3” forward... just before it interferes with the top, front, inside beveled corner. Resulting in two parallel cuts.
Then a horizontal cut along the floor.
One last cut on top, following the outside of the tub, 1” from the wall.
The piece removed is simply an “L” shaped chunk of sheet metal.
Next cut the front angled portion lose from the floor, inside and front. Then again, 1” from the outside wall.
Slide the front portion to the rear and butt weld the seams together.
The seat belt attachment remains undisturbed.
There will be an opening, on the front bottom edge and along the outer wall. On the bottom edge I simply use a short piece of 2” x 2” x 1/8” angle. The outer wall I recycle some of the steel I cut out or new 18 ga, bent to fill the gap, then welded into place.
After buffing down the welds and painting it impossible to see the modification unless one is very familiar with Jeeps.
 
I think we can all agree that early Jeeps, until the ‘76 had a tilt column and the longer CJ7 came along were “cozy” to say the least. In non-politically correct terms... too tight and uncomfortable! In some cases impossible to drive.
The Greyhound bus size steering wheel didn’t help.
Now I’m a purist when it comes to preserving and restoring vintage Jeeps, but situations such as these really need to be addressed. Done properly, they actually improve the factory design and since they make driving MUCH more enjoyable, maybe help save more Jeeps!
In my post just prior to this I described how to get substantially more leg room. Here I want to add how to get the steering wheel off your lap, out of your gut and away from your chin!
First thing... the giant steering wheel can leave in most cases. Next either shorten the existing column or replace it with an aftermarket tilt.
For even more room, there is more than ample space to lift the column up on the dash. You can also move it up on the firewall if desired.
All of the CJ5s I’ve done this to are extremely comfortable and a pleasure to drive!
It’s a simple, basic operation. I believe a novice Jeeper could pull it off with excellent results.
Look at the attached photos and note the bottom of the dash and new column position.
 
That’s not the way I do it.
On mine, I make a straight cut right where the factory roll bar bracket ends, from about 1” from the outside wall toward the center of the tub. Then follow that line to the floor.
I then make another cut, exactly the same about 2”-3” forward... just before it interferes with the top, front, inside beveled corner. Resulting in two parallel cuts.
Then a horizontal cut along the floor.
One last cut on top, following the outside of the tub, 1” from the wall.
The piece removed is simply an “L” shaped chunk of sheet metal.
Next cut the front angled portion lose from the floor, inside and front. Then again, 1” from the outside wall.
Slide the front portion to the rear and butt weld the seams together.
The seat belt attachment remains undisturbed.
There will be an opening, on the front bottom edge and along the outer wall. On the bottom edge I simply use a short piece of 2” x 2” x 1/8” angle. The outer wall I recycle some of the steel I cut out or new 18 ga, bent to fill the gap, then welded into place.
After buffing down the welds and painting it impossible to see the modification unless one is very familiar with Jeeps.

Please try the pictures again, I can't open them in an image large enough to see what you did.
 
Please try the pictures again, I can't open them in an image large enough to see what you did.
I tried... and failed miserably. Look in my gallery pics, they are there too. If that fails I can email them to you.
 
It's funny the mentioning of Greyhound Bus sized steering wheel. I've been working for that company on and off since I was 15, working at a station for my dad.
 

Jeep-CJ Donation Drive

Help support Jeep-CJ.com by making a contribution.

Help support Jeep-CJ.com by making a contribution.
Goal
$200.00
Earned
$100.00
This donation drive ends in
0 hours, 0 minutes, 0 seconds
  50.0%
Back
Top Bottom