• Hello Guest, we are proud to now have our Wiki online that is completely compiled and written by our members. Feel free to browse our Jeep-CJ Wiki or click on any orange keyword when looking at posts in the forum.

Build Thread 1986 CJ7 Build

Build Thread 1986 CJ7 Build
Might have another problem/project…
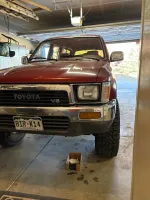
I believe our Gen 2 4Runner needs a new/rebuilt steering box. Leaking consistently now. Put a litter box under her a while ago, but she’s getting worse. 240,000 miles though.
IMG_8155.webp
 
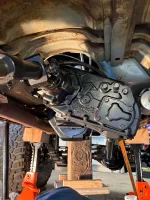
Maybe this will be helpful as a tip for removing the oil pan on a CJ Jeep AMC 258 i6 / 4.2l , AMC 258 i6 / 4.2l .
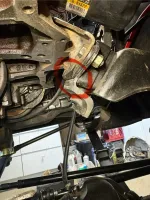
That last bolt (dang sucker) tucked under the passenger side motor mount, is a bit tricky.

I believe, conventionally, the passenger side motor mount is in the way and removing it is the chore.

Instead of removing the motor mount, I took one of my 1/4” drive sockets in 7/16” and I ground it down on the bench grinder to as short as possible. The goal is to get a socket on that sucker.
View attachment 103244

We all have “junk” sockets. There’s a small space in there, behind the motor mount, to fit a socket. The socket ends up being about 9/16” tall to squeeze in there.

The scale vs a .280 Rem case (same as 30-06). Ha!
View attachment 103245

That replacement bolt will be a socket head bolt (Allen head).
Interesting !
 
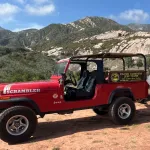
Wife is in So Cal with the ladies for a girls long weekend. They did a “Jeep Tour”.
Nice looking CJ!
IMG_3463.webp
 
Is that tour out in the Sierra Mountains or in the costal mountains ?
 
Mar 2, ‘24:
-Been thinking about a very minimalist rear bumper. More of a step up to the back than anything. Have a naked rear now. Swing away spare carrier might come later, eventually.
- I spent a few hours and about $50 to get something that’ll do.
-3x3x1/4” angle with a stubby receiver tube and the d-rings attached. Used the 8 factory bolt holes. Chamfered the 4corners to clean it up. Simple and it’ll work.
-I was thinking that I could always attach a spare swing out to it later, since it’s heavy enough. Would penetrate through the top with the pivot point and get a good weld.
View attachment 100722View attachment 100723
That's a great looking bumper. I'd go with that for sure. Have you sold the OME console you had? If not, I'd be interested in it if it is for sale. Thanks,
/I, [_____],
I---L-OIIIIIIIO
()_) ()_)-<>)_)
"It's a Jeep thing...
 
Is that tour out in the Sierra Mountains or in the costal mountains ?
They’re in Ojai, which is between LA and Santa Barbara. So, I’d say the coastal hills.

That's a great looking bumper. I'd go with that for sure. Have you sold the OME console you had? If not, I'd be interested in it if it is for sale. Thanks,
/I, [_____],
I---L-OIIIIIIIO
()_) ()_)-<>)_)
"It's a Jeep thing...
Thanks. That console is long gone. About the only thing left for sale is the dash pad.
 
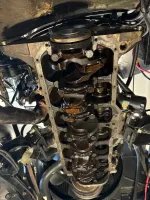
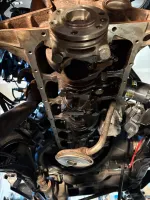
-Spent a couple hours and about 10 razor blades scraping off the old gasket residue and crud from the bottom surface of the motor block. Very messy but got er clean.
IMG_8164.webp

-In anticipation of a tight fit when replacing the oil pan, (since I didn’t remove the motor mount) I took the angle grinder and shaved a bit of the metal plate and rubber from the inside corner of that passenger side motor mount. Has a bit more breathing room now.
IMG_8166.webp

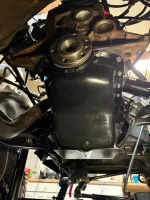
-Cleaned and wire brushed the oil pan and gave it a couple coats of new paint.
IMG_8162.webp

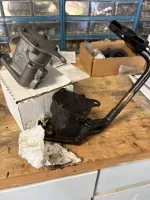
-Decided I should probably replace the oil pump while I’m inside the bottom end. Poor little spinner has been grinding through a lot of crud, from the looks of it.
IMG_8161.webp
 
  • Thanks for the Post!
Reactions: CJ
-Spent a couple hours and about 10 razor blades scraping off the old gasket residue and crud from the bottom surface of the motor block. Very messy but got er clean.
View attachment 103268

-In anticipation of a tight fit when replacing the oil pan, (since I didn’t remove the motor mount) I took the angle grinder and shaved a bit of the metal plate and rubber from the inside corner of that passenger side motor mount. Has a bit more breathing room now.
View attachment 103269

-Cleaned and wire brushed the oil pan and gave it a couple coats of new paint.
View attachment 103270

-Decided I should probably replace the oil pump while I’m inside the bottom end. Poor little spinner has been grinding through a lot of crud, from the looks of it.
View attachment 103271
Are you doing the rear main seal?
 
CJC,

Yes, I’ll be replacing the Rear Main Seal.
IMG_8167.webp
 
Excellent - same products I used but I had to do the upper seal twice. First time used grease, it didn't slide in and tore the rubber. Bought a new one and used Dawn liquid soap on the outer part and it slid right in. The little shoe horn helps to start it. I also loosened a couple rear main bolts. Wish I had done the oil pump while there. All in all not hard, just messy, had to remove my passenger side mount and you are on your back. The Snap UPs really help too.
 
CJC,
Thanks for the info. I'll be doing that soon and will post how it goes.

Today I picked up my resurfaced flywheel.
Still have to install the pick up tube into the new oil pump. Then I'll do that seal and then the oil pan.
 
It's looking very nice, good luck with it.
You can see the timing chain with the pan off. I wiggled my finger up in there and it was super loose so I replaced that with a new Cloyes chain. One thing seems to lead to another:chug:
 
Mar 8, 25:
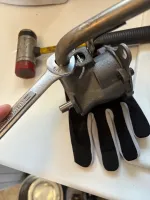
-Oil pump pick up tube cleaned (Hot water, detergent, brush, wire and swab).
Drove it into the new oil pump with the help of a 5/8” open end wrench as a driver.
IMG_8176.webp

-Rear Main Seal removed and replaced. This could be a separate topic/write-up on its own. Key here is cleaning the bearing cap and block mating surface & carefully inserting the upper seal into groove. A bit of dish soap on the outside of the seal made it easy.
A swipe of RTV on either side of the bearing cap too, over the “ears” of the seal at the cap’s mating surface.

-Oil Pump installed, with pick up tube.
IMG_8177.webp

-Cleaned up the mating surface on bottom of motor block again, along with the 187 bolts for the oil pan.
-Cut my under-Jeep time short today. Very important day tomorrow to prepare for - My wife’s birthday and I have some presents to wrap.
 
Mar 14, 25:
-Haven’t worked on the Jeep in a while due to too much work and other vehicle issues.
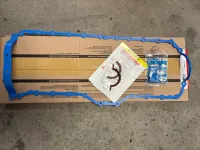
Did get to it for a bit the other day and my grand plan was smashed. I could not get the oil pan back onto the block, without sliding out that dang motor mount! Had to put a ratchet strap to the ceiling of garage and support the motor, while I slid that passenger mount up. Used the Fel-Pro blue gasket, put a dab of RTV at the 4 corners where it advises. It should hold oil.

-This weekend, plans are to at least have time to pop in the new pilot bushing and get the flywheel and clutch back on.
One of my boys is home from KU for spring break, so priority is kinda hanging out with him.
IMG_8181.webp
 
Mar 15, 25:
-Worked a few hours on reassembly this morning. Popped in the new pilot bushing.
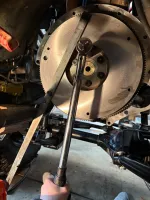
Installed flywheel with new ARP bolts with locktight and assembly lube under the heads. Torqued in steps up to 105 ft lb. Used a scrap piece of steel strap as a “stop” so I could torque the bolts.
IMG_8184.webp

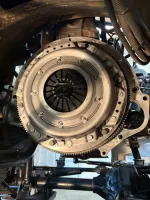
-Installed new Luk clutch disc and pressure plate with new Centerforce bolts with a drop of locktight. The alignment tool was handy. Torqued bolts in steps up to 36 ft lb.
IMG_8186.webp

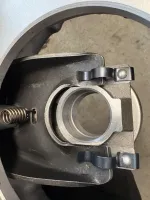
-Installed new fork, ball and spring onto the “new” bell housing from Novak. The new Luk throwout bearing has a shoulder with square parallel sides that are supposed to slide into the gap in the fork. Had to grind the inside of that fork gap a tad to allow the shoulder to fit.
IMG_8187.webp

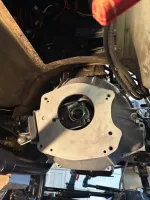
-Installed bell housing onto motor with original bolts which were cleaned up. Bolted on the inspection plate and starter as well.
IMG_8188.webp

-Tomorrow I’ll lube up and install the clutch crank arm and possibly hoist up the Transmission .
 
Last edited:
Mar 17, 25:
-Installed the clutch crank arm (Bell Crank) and ran into an issue.
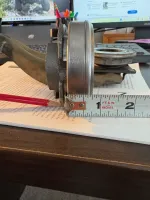
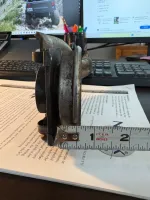
When attempting to adjust for the 1/8" or so air gap between the throwout bearing and the fingers on the pressure plate, I could not achieve any gap with the adjustment. The fork will not go any further forward in the hole through the bellhousing either. So, I removed the new Luk throwout bearing and measured it compared to the original one. The new one is about 1/8" taller than the old one, which would account for my clearance issue. Ordered an OEM replacement throwout bearing from NAPA and we'll see how it compares.

New throwout bearing height is about 3/4"...
throwout a.webp


Original throwout bearing height is shorter at 5/8"...
throwout b.webp


-I also have a new fork, pivot ball and bell housing, along with the new clutch assembly. There's certain to be some slight measurement differences with all these new parts as well. But, I think a shorter T.O. bearing will do the trick.
I called Novak to see how short their adjustable T.O. bearing goes, but it won't go that short and they recommended going the auto parts store route. Great service/support again from the Novak guys.

-Also noticed that the clutch push rod (goes through the firewall) is pretty worn at the 90 bend where it goes through the bell crank arm. Ordered a replacement for this as well to eliminate that slop. I think the corresponding hole in crank arm is OK though.
Didn't get the fancy push rod with heim-joint ends, just an OEM style.
 
Mar 18, 25:
-With new T.O. bearing , I still wasn’t happy with the gap I could achieve with the threaded adjustment. I decided to do a bit more.
-I cut into the fork’s sides with a thin wheel in order to bend it to my will, then weld the gaps. I achieved 1/4” difference at the end of the fork (traced on cardboard beforehand). I haven’t changed the length/radius, which is probably most important.

IMG_8197.webp

-Hoisted and stabbed in the NP435 Transmission . Didn’t have a helper, but it went in fairly smooth. Tightened everything down then cycled the clutch pedal a few times and it feels good.
IMG_8200.webpIMG_8202.webp

-Noted there are some slight measurement differences with where the new Transmission mount lands on the cross pan. Will have some fore - aft and up - down issues to work through before I install the Transfer Case .
 
Last edited:
  • Thanks for the Post!
Reactions: CJC
Mar 24, 25:

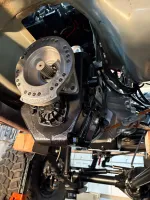
-Turns out that even with the 1”drop on the cross pan, the bigger belly on the NP435 will hit the cross pan. So, some notching and patch-back on the cross pan is in order. The forward part has a raised area that’ll have to be removed and reworked.
IMG_8230.webp

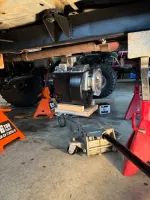
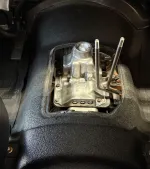
-I’m at a point now where I’m considering clocking the Transfer Case up one hole in the adapter ring, or about 10 degrees. I installed the Transfer Case in the factory position of downward angle, and loosely attached the driveshafts. My axles are at close to full droop now, as the jeep is resting high with jack stands beneath the frame.
I think I’ll have room between the tunnel sheet metal and the Transfer Case shifter mount with the rotation up. I will have to remove, heat and bend the twin sticks though, but not a big deal. The front drive shaft appears to have enough slip still to extend a bit more.

IMG_8225.webp

-While I’m modifying the cross pan, I thought I’d also flatten out that dropped area too, which accounts for the angled Transfer Case . I’ve got hung up more than once on this low point and the scrape marks are right there to prove it.
 
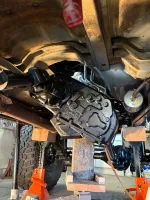
-Clocked the Transfer Case up another hole in the adapter ring. Looks better and sits about level with the bottom of the Transmission now. The mount for the shifters fits tight against the Transmission now too. There’s a little pocket there in the passenger side of the NP435 that looks like it’s made for that.
IMG_8234.webp

-I’m leaning towards bending just the inboard shifter a bit outward. Overall, they look pretty good.
IMG_8235.webp
 

Jeep-CJ Donation Drive

Help support Jeep-CJ.com by making a contribution.

Help support Jeep-CJ.com by making a contribution.
Goal
$200.00
Earned
$0.00
This donation drive ends in
0 hours, 0 minutes, 0 seconds
  0.0%
Back
Top Bottom