• Hello Guest, we are proud to now have our Wiki online that is completely compiled and written by our members. Feel free to browse our Jeep-CJ Wiki or click on any orange keyword when looking at posts in the forum.

4.0 Swap w/Pictures

4.0 Swap w/Pictures
I worked on the tc a bit tonight. Removed the input shaft housing then removed the shaft and bearing from the housing.

Once out I installed the advanced adapter sealed bearing and longer input shaft. To mate the Dana 300 correctly to the the nv3550 I will need to use a clocking ring becausE although the Dana 300 will physically mount up the angle is way too low.

The clocking ring is .75 inches thick. According to aa this is enough to lose spline engagement on the stock input shaft. They make this kit that comes with a longer input shaft.

50-8604 : Dana 300 Clocking Kit | Advance Adapters

The process is very simple, remove old bearing and shaft, press new bearing onto input shaft. Reinstall.

I got my kit used off eBay for about 100 less than new and the bearing was already pressed on.

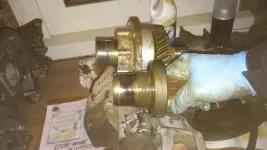
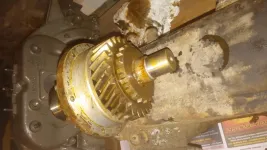
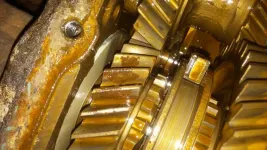
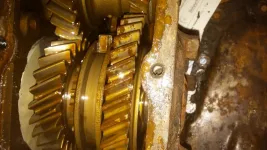
I drained the Dana 300 , the fluid was milky and had alot of water in it. The gears look ok but do have some patches of surface rust. It's my understanding that this isn't too bad and will work it's way out through use. The jeep Sat dormant for eight years.

20140516_223918.webp

20140516_223934.webp

20140516_231025.webp

20140516_231215.webp

20140516_231537.webp
 
I wouldn't worry about the corrosion on the gears. It doesn't look like it's on the contact area at all on the second to last photo.
 
Surface rust is not an issue. Check for pitting and if you see that then consider replacing the offending gear.
 
I wouldn't worry about the corrosion on the gears. It doesn't look like it's on the contact area at all on the second to last photo.

This is for you benT! By the hair on my chinney chin chin, eh?

20140517_165414.webp
 
Room to spare I'd say!

It was a litte tough getting that vacuum line for the pcv in, it almost touches the cylinder on the HB
 
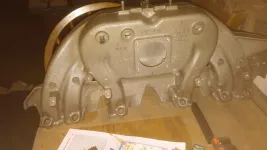
So, like I said in the first post, there was an issue that came up because I am using a Horshoe (same issue for 96-99 intakes) intake on an OBD1 block. This issue would exist on anyone with a AMC 258 i6 / 4.2l /4.0 hybrid who wanted to run an OBD2 intake as well.

On the obd1 set up the PS pump is used to tension the belt. Because of that it is on a swiveling bracket and it is simply not a good design (IMO). So regardless of a 4.0 build I honestly would swap to a OBD2 belt set up because the OBD2 mounts the PS pump in a fixed position and uses an idler pulley to tension the belt. I think it is a better and cleaner set up.

If you are planning on running a mechanical fan you will need a YJ, TJ, or ZJ bracket set up. The Xjs have an offset mechanical fan that mounts to the ac bracket. If you are running electric fans then it doesn't matter you can use and XJ setup and run the fan pulley as an enormous idler.

IF YOU HAVE a AMC 258 i6 / 4.2l w/ 4.0 head you can swap the serpentine brackets onto the your set up. This isnt a AMC 258 i6 / 4.2l thread but the run down on this is. First I would use the OBD2 intake (either horseshoe or regular) with the fixed ps pump and the idler. The 4.0 revers rotation pump bolts right in and the so does the PS idler bracket no issues (On the idler bracket you will have the same issue with belt clearence I am about to address on the obd1 4.0). On the passenger side of the engine you must use a bracket setup from a ZJ or wrangler. These setups use both the ac and the lowe alt bracket to mount the alternator. The xj uses a stand alone bracket to mount the alternator and this will not work in a AMC 258 i6 / 4.2l . The reason is the lower bracket mounts to the engine in 4 places, 2 through the timing cover and 2 to the block. See pic 3 below for a pic of the lower mount. The timing cover bolts line up perfectly but the AMC 258 i6 / 4.2l lacks the bolt mounts. The timing cover bolts will fail eventually from the weight of the alternator. If you go this route using the two piece bracket should rest most of the weight on the ac bracket (direct bolt in) and have good service life. Finally the AMC 258 i6 / 4.2l crank snout is longer so when you swap the balancer you would need to get or make a spacer to seat it all the way. Clear as Mud? If you are doing this and are confused PM me and i will help you through it.

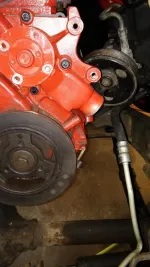
Back to the 4.0, all the brackets from a 96-99 ZJ bolt up to the obd1 block no issues. I used a 96 as my donor so my entire bracket system was matched. The only issue is a belt clearence issued caused by the new routing of the belt from the addition of the tension idler under the ps pump.

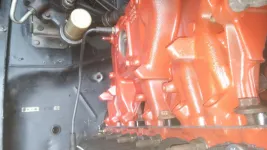
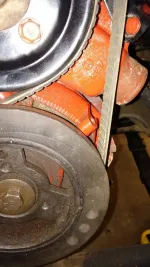
Take a look at the first pic attached below, there is some sort of dowel shaped "sight?" cast into the block by the timing marks. If someone knows what this is please speak up! It is hollow in the center, and in my case full of mud, Im not sure its purpose but this is not on the OBD2 blocks. Unfortunately the belt hits this post coming off the idler to the balancer. This is an Issue you would also see on the AMC 258 i6 / 4.2l .

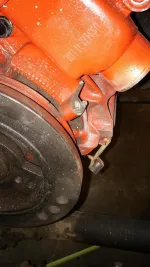
In pic 2 below, you can see I took a 4.5inch cutting wheel and carefully cut the post approximately in half. The cut came out pretty clean so I didnt even bother to grind it and just primed and painted it.

Pic 4, you can see how this gave just enough clearence on the belt.

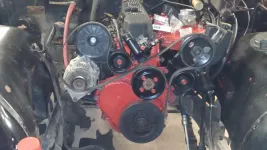
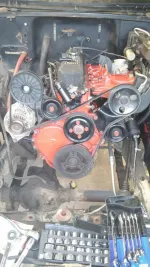
And Finally in pic 5 below you can see the final routing that the belt will be following, obviously I need to get the correct length belt, but you get it..

I am using a horseshoe intake so I was obligated to do the Idler bracket on the drivers side. But I could have kept the passenger side the same with the one piece alternator bracket. I opted to change everything because 1. I figured it would be best to just have a matching bracket set up so that all I need to do is look up 96 ZJ for the correct belt length and 2 I am running a contour fan with this and, even though I could, I didn't want to have that big old pulley acting as an idler seeing as it was completely unnecessary without the fan.

20140520_195057.webp

20140520_195644.webp

20140520_201054.webp

20140520_210337.webp

20140520_210351.webp
 
Last edited:
Progressing nicely! You'll have mud on it by July. I think that tube you cut off the timing cover is just to hold a TDC probe for an engine analyzer.
 
Below:
Serpentine with correct size belt

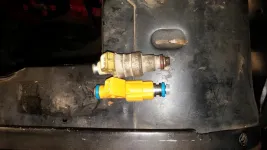
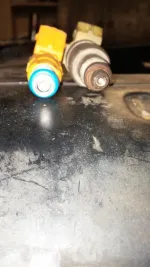
Side by side shot of the oem single spray injectors (the fat ones) and the 4 spray nozzle upgraded injectors. Both injectors have the same flow rate so what I am looking for is better atomization and fuel/air mixture. Imagine the injector like a garden hose nozzle. The oem sprays out like the jet setting, and the new nozzles will come out like the mist setting so, in theory mind you, the new nozzles will allow more air to get in between the gas molecules resulting in a better burn.

20140521_194444.webp

20140521_215739.webp

20140521_215747.webp

20140521_222440.webp
 
Here are just some dress up shots:

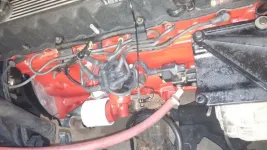
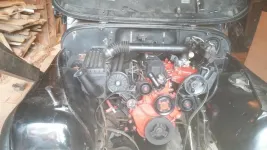
Grabbed a plastic piece off of a ZJ at the yard that corrals all the plug wires, seems to minimize the wires crossing each other and cleans the spaghetti up a little

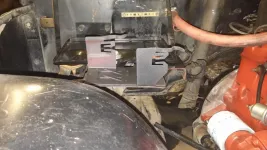
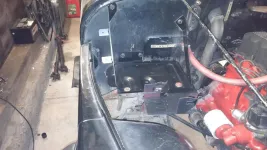
The next two pics are of the PDC mount I will be using. It came from a YJ and originally Mount in two spots to the tray and one to the fender. i drilled a hole in the cj battery tray to ad a bolt and then used the existing bolt for the lower strut to mount it. I dont think the PDC is heavy enough to cause an issue with only two bolts holding it..... but i have been wrong before.

the last pic is a mock up to just kinda see how it fit. I will be using a factory tj Breather. it looks good I think, and will make for a clean install.... I really really dislike reusable filters which are pretty much what you have to use with most of the after market cold air intakes. I like a good old fashion replaceable filter that I can look at and tell its dirty! I said from the beginning I dont want the layman to be able to look at this and tell that it is not a stock set up so I think the TJ breather will be a nice touch.. When I get everything installed I will need to create a custom bracket to mount the filter housing.. I need to wait until last because I still need to run coolant hoses and ac hoses and I need to be absolutely sure that the mount accounts for the needed clearances.


By the way I was doing real good of cleaning and repainting everything but as this is progressing I am getting a lot more lazy about that so now stuff is going back in dirty or with a quick shot of carb cleaner... Its gonna get dirty anyway.

20140521_222456.webp

20140521_213438.webp

20140521_213512.webp

20140517_191821.webp
 
Why are you mounting your air box on the right side? It looks like it will be in the way of the oil filter and the dissy. Is there not room for it in the front left corner where you could get fresh air to it.
 
The next two pics are of the PDC mount I will be using. It came from a YJ and originally Mount in two spots to the tray and one to the fender. i drilled a hole in the cj battery tray to ad a bolt and then used the existing bolt for the lower strut to mount it.

I tried that approach as well, but didn't want to move the CJ jack from its original location on the right inner fender....keeping the whole stock vibe. The side of the tray is Limited too with the wiring and heater hoses...

..... so I think the TJ breather will be a nice touch.. When I get everything installed I will need to create a custom bracket to mount the filter housing.. I need to wait until last because I still need to run coolant hoses and ac hoses and I need to be absolutely sure that the mount accounts for the needed clearances.

Let me know if you get that bracket figured out because the bottom of that box is a nightmare of uneven surfaces. I'm mounting the YJ AC dryer on the indent of the right inner fender by the grill and with the air box, jack, and PDC/ wiring....its a tight grab for real estate. My heater hoses turn inward from the firewall and run down the engine with a special bracket from an XJ I think.
 
I tried that approach as well, but didn't want to move the CJ jack from its original location on the right inner fender....keeping the whole stock vibe. The side of the tray is Limited too with the wiring and heater hoses...


Let me know if you get that bracket figured out because the bottom of that box is a nightmare of uneven surfaces. I'm mounting the YJ AC dryer on the indent of the right inner fender by the grill and with the air box, jack, and PDC/ wiring....its a tight grab for real estate. My heater hoses turn inward from the firewall and run down the engine with a special bracket from an XJ I think.

Ed, I'm closely following your build on the the stroker, and using your work as a guide. I haven't mounted the air box yet and won't until I've gotten everything else in. I don't think the pdc where it is will interfere with the Jack, but I only have the Jack mount because the p.o. didn't include the Jack with the sale( cough cough ;-)) this weekend it's on to making the harness and getting the tranny mount measurements
 
Why are you mounting your air box on the right side? It looks like it will be in the way of the oil filter and the dissy. Is there not room for it in the front left corner where you could get fresh air to it.

This is a stock breather for a tj they were not plumbed into the grill like in your cj stock. The air on the passenger side fender, close to the grill where this will pull air, is not directly heated by the exhaust and the hear from the radiator should have little too no effect. It's as good a place as any to get air from, I think,
 
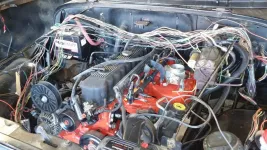
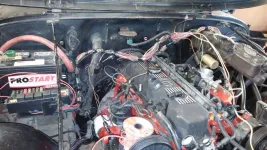
And now we are at wiring where clean projects go to die.

20140524_175935.webp

20140524_193019.webp
 
Unless you are a wiring genius like yourself.;)

This will be a good example of the harnesses I offer to build for people in the classifieds.

As usual almost everything will run though the harness, with the exception being the sensor wires , heater blower, etc.

I have bypassed the headlamp switch and put the relays and fuse in the pdc. This isn't as heavy duty as jimbos bypass relay setup but it will work for now. I utilized the oem wiring which is about 14 ga. I checked it for resistance and found it to be pretty low so I felt I did not need to replace the wiring in the grill. The wiring should be able to handle stock to slightly higher out put lamps. I will be using some kc h4 light housings with 55/60 watt bulbs. Math puts that high output to 10 amps at 12v and 8.5 @ 14v.

Later I might try the ipf fatboys sold at quadratec. Those are 80/60 watt so about 13.3 amps @12v and 11.4@14v.
IPF 4X41 - IPF Fatboy II Super Clear H4 Bulbs - Quadratec

I'd say the circuit can handle 20 amps so the fanboy
bulbs would probably be the highest wattage lamps I'd put in that circuit.

After the headlamp bypass was done and the harness was thinned out, I was left with 3 extra maxi fuses in pdc to use for stuff. One with be the fuse for my flexilite fan controller, another will supply power for my heated seat pads I had them sneak in when I had the seats upholstered, the third will remain unused for now.
 
I kinda skimped on the pictures but this weekend I went ahead and installed the cluch linkage.

In the light of making this as stock looking as possible, the clutch setup became sort of an issue. The CJ tub is stamped for the hydraulic MC used in 4 cyl Cjs. Since the YJs used a hydraulic clutch, it made sense to go ahead and swap out out the pedal assembly for a YJ setup.

I have known that I was going to use a NV3550 in this Jeep since square one. So when I bought the Jeep I asked Ed (onlyinajeepCJ) whom I bought the Jeep from to go ahead and predrill the fire wall for all the extra stuff on the YJ.

There are two generations of YJ pedal assemblies. the 87-90 assemblies still used the same MC as the 4cyl cjs. That means that the MC will cleanly fit into the pre stamped portion of the fire wall. 91+ went to a different MC that has a wider mounting footprint. So if you use that it would look awkward, I have done this before with my previous CJ and the result is not that great.

The rub is that the pre 91 MCs were not used with external slaved transmisions and the fitting on the MC is different between the years. Because of this, I could not reuse the preformed hydraulic linkage from a YJ. I had to go to a hose shop and have them make me a hose that had the screw in style fitting for the MC and the push in style for the slave. Fairly easy process, I walked in and in 30 minutes walked out with a hose. Most of the time was used explaining what I wanted and finding a fitting that worked with the firewall constrictions.

I assembled the hose assembly and bled it with DOT3. Technically these are prebled in factory and you supposedly cant bleed them but the linkage is self bleeding. If you actuate the slave it will push all the air out of slave .

The biggest PITA was the removal and reinstall of the pedal assembly, I'd recommend completely removing the dash which I didnt do. Once it was in, everything bolts up in the same spots as the CJ assembly. The only different is that the pedal pivot has a bracket on the end of it that reinforces the firewall around the MC and has studs to bolt the MC to. There is also an extra support rod that runs off the left side of the assembly and bolts through the fire wall close to the fender.

20140526_140836.webp

20140526_151249.webp
 
This is a stock breather for a tj they were not plumbed into the grill like in your cj stock. The air on the passenger side fender, close to the grill where this will pull air, is not directly heated by the exhaust and the hear from the radiator should have little too no effect. It's as good a place as any to get air from, I think,

With the stock breather / box on my XJ, the air filter showed evidence that air was pulling through one half of it stronger than the other. In essence, once one side was dirty, you could turn it and use the other side... Once I saw this I modified the box somehow to pull evenly across the filter and get better flow but I don't remember what I did. I also swapped out the exhaust header with a better one that still looked stock. With both of these simple changes the power and mpg really improved especially around the Rockies while I lived there.

Wish I had looked into the injectors like you are going to install. Wondering what that would have done. :cool:

That's interesting on the breather, we will just have to see.
 

Jeep-CJ Donation Drive

Help support Jeep-CJ.com by making a contribution.

Help support Jeep-CJ.com by making a contribution.
Goal
$200.00
Earned
$0.00
This donation drive ends in
0 hours, 0 minutes, 0 seconds
  0.0%
Back
Top Bottom