• Hello Guest, we are proud to now have our Wiki online that is completely compiled and written by our members. Feel free to browse our Jeep-CJ Wiki or click on any orange keyword when looking at posts in the forum.

4.0 Swap w/Pictures

4.0 Swap w/Pictures
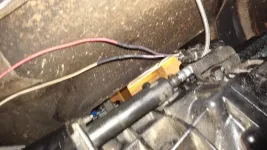
I kinda skimped on the pictures but this weekend I went ahead and installed the cluch linkage.

In the light of making this as stock looking as possible, the clutch setup became sort of an issue. The CJ tub is stamped for the hydraulic MC used in 4 cyl Cjs. Since the YJs used a hydraulic clutch, it made sense to go ahead and swap out out the pedal assembly for a YJ setup.

I have known that I was going to use a NV3550 in this Jeep since square one. So when I bought the Jeep I asked Ed (onlyinajeepCJ) whom I bought the Jeep from to go ahead and predrill the fire wall for all the extra stuff on the YJ.

There are two generations of YJ pedal assemblies. the 87-90 assemblies still used the same MC as the 4cyl cjs. That means that the MC will cleanly fit into the pre stamped portion of the fire wall. 91+ went to a different MC that has a wider mounting footprint. So if you use that it would look awkward, I have done this before with my previous CJ and the result is not that great.

The rub is that the pre 91 MCs were not used with external slaved transmisions and the fitting on the MC is different between the years. Because of this, I could not reuse the preformed hydraulic linkage from a YJ. I had to go to a hose shop and have them make me a hose that had the screw in style fitting for the MC and the push in style for the slave. Fairly easy process, I walked in and in 30 minutes walked out with a hose. Most of the time was used explaining what I wanted and finding a fitting that worked with the firewall constrictions.

I assembled the hose assembly and bled it with DOT3. Technically these are prebled in factory and you supposedly cant bleed them but the linkage is self bleeding. If you actuate the slave it will push all the air out of slave .

The biggest PITA was the removal and reinstall of the pedal assembly, I'd recommend completely removing the dash which I didnt do. Once it was in, everything bolts up in the same spots as the CJ assembly. The only different is that the pedal pivot has a bracket on the end of it that reinforces the firewall around the MC and has studs to bolt the MC to. There is also an extra support rod that runs off the left side of the assembly and bolts through the fire wall close to the fender.
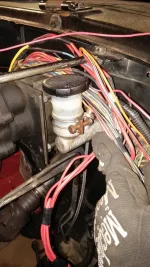
A couple more pics of the Clutch linkage

20140529_212707.webp

20140529_212751.webp
 
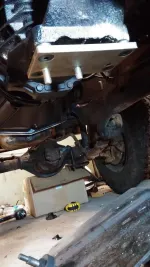
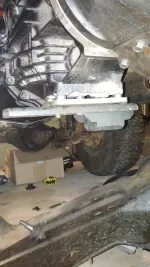
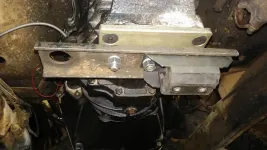
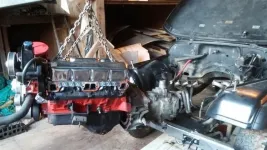
Last night I mounted the Transmission to the x-member finally. I did not want to modify or cut any original parts if I did not have to so getting this done has taken some research and trial. i was originally going to have Ed (onlyinajeepcj) fab me up something but he has a lot on his plate with building jeep stuff for people already and trying to get good measurements from across the country is like trying to do math over the phone (his words). So I opted to find an alternative.

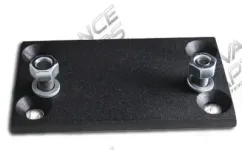
My first thought was that plate made to match the bolt pattern on the 3550 with counter sunk holes and studs to mate to the oem tranny bracket would work. The problem is that I do not have the skills or equipment to make such an Item.

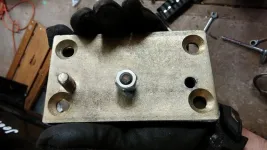
As chance would have it I stumbling across an adapter Advacedadapters makes for YJ puegot to Nv3550 swaps. Wouldn't you know it, the damn thing is a square adapter plate with contersunk holes and two studs to mate to the YJ bracket. 716007 : NV3550 Crossmember Mount Kit (for Jeep YJ Wranglers) | Advance Adapters

It would seem someone at AA had the same thought process I did. I decided to take a gamble on the plate. When I got it, as expected the studs didnt magically line up. One stud lines up with one of the mounting holes in the CJ7 bracket but the other is way off. All I did was remove the stud that did not mate by drilling out the weld. Then I bolted everything up and marked where the hole was and drilled out the bracket. Then I tapped it and installed a bolt with the same thread.

The kit came with 1/4 inch spacers just incase you needed them. Since I didnt have a stud and used a bolt I had to use the spacers to accomadate the head of the bolt between the plate and tranny. Maybe later I will acquire a stud and mount this flat. The overall adapter pushes the Transmission about 1/2 inch up from the crossmember mount.

20140529_201210.webp

20140529_202938.webp

20140529_205000.webp

20140529_205008.webp

fab.webp
 
Last edited:
Everything now bolts to the OEM x-member in the same spot as it would with a T-5 Transmission

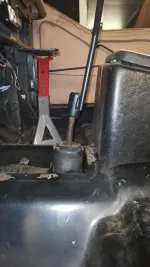
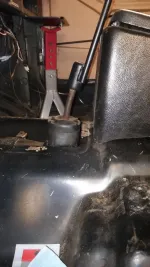
Now that the tranny is situated. The shift tower looks to be coming up and sitting in the tunnel like I wanted it to but now is going to cause some snowball issues that I didn't expect coming into this.

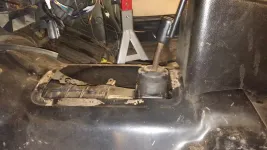
First for some reason I thought the Nv3550 shift tower was in the same location as the AX-15. (I know from past experience that the AX15 shifter comes up in the same spot as the T-5 through the tunnel cover). I did know that the 3550 was slightly longer and I guess this pushes the shifter back an Inch or two.

It would appear that I am going to have to end my streak of not cutting or modifying anything stock. As you can see in the pics, the shifter clears the floor but the tunnel cover will definitely need some hacking in order to accomodate the further back shifter. Not big deal, I think I have seen replacement covers out there somewhere, I may pic one of those up and hack it instead of hacking a stock cover plate.

This next issue make me a little sad. There is no way that the OEM console will fit in and allow me to shift into 2, 4, or R. Its just too close, even if I bent the shifter I think I will have issues. Finding a boot is also going to be a pain, the tjs had a console that these poked up through so as you can see the attachment point for the shifter to the assembly is really tall.

I'd prefer not to drop 200 dollars on an after market shifter but the ones I have seen might allow me to retain the stock console and look like they would work with a shallower boot.

20140529_212608.webp

20140529_213246.webp

20140529_212616.webp
 
Does the top part of the shifter have to be in that position or can it be turned 90 degrees?
 
Does the top part of the shifter have to be in that position or can it be turned 90 degrees?

Yes it can be but I'm pretty sure it will still hit the console. Also the shifter will bend towards the dash then.
 
Yes it can be but I'm pretty sure it will still hit the console. Also the shifter will bend towards the dash then.

Gonna be up and running by July 4th weekend?
 
Yes it can be but I'm pretty sure it will still hit the console. Also the shifter will bend towards the dash then.

I know this isn't exactly what you want, but how about putting some slight bends in it so it looks more like a T-5 shifter?
 
I know this isn't exactly what you want, but how about putting some slight bends in it so it looks more like a T-5 shifter?
Matt,
I've already enlisted you to fix up my custom yj shackles, I think you just enlisted yourself to modify my shifter. :D

I'm thinking we remove the 3550 shifter from the center hub and weld a T-5 shifter in its place so that the welded side faces the dash. Should clear the console and look very stock.
 
I have lift off.th_20140531_121246_zps1e154176.webp

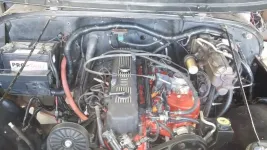
I have to admit I had a good deal of unexpected trouble, kinda shook my confidence in the 4.0 department. It wouldn't idle, shot fireballs out of the header. Turned out I didn't set the dist correctly.

I set the engine to 0 and pointed the rotor directly to the number one plug. Apparently that is wrong. After severely bruising my fist on the garage door, I did some googling and found that the rotor is supposed to be 3cm from the cam sensor. That puts it past the number one plug clockwise. This is one tooth off of where I had the dist.

It fired up no fuss no muss one the dist was corrected.

After I got it started, I covered all the spaghetti in split loom conduit.20140531_162933_zps2817f189.webp

Looks a lot better but still cluttered on think... I'm not sure what else I can do to clean it up more, though.
 
Congrats Man , glad to hear you got her up and running. The 4th of July is still awhile away. ;)
 
Congrats on bringing it back to life I'm sure you will have it on the road in no time and a big thank you from someone who has plans to put a 4.0 in mine I have learned alot from your build. :chug:
 
Congrats on bringing it back to life I'm sure you will have it on the road in no time and a big thank you from someone who has plans to put a 4.0 in mine I have learned alot from your build. :chug:

Want me to make you a 4.0 harness?
 
No I have been thinking about this for a long time and what I'm thinking is buying a Yj with a 4.0 and cannibalizing it. My tub is shot so buy buying a YJ I can use the tub and the 4.0 with all the wiring and Transmission because I have the T-5 and then I get the YJ brake booster and all that goes with it. It seams to me like a cheaper way to go I get everything to upgrade my Jeep and can sell everything I don't need to recoup what I spent on the YJ. I think it would be way cheaper than to try and buy all the parts separately. And I don't think the world will miss a YJ :D
 
No I have been thinking about this for a long time and what I'm thinking is buying a Yj with a 4.0 and cannibalizing it. My tub is shot so buy buying a YJ I can use the tub and the 4.0 with all the wiring and Transmission because I have the T-5 and then I get the YJ brake booster and all that goes with it. It seams to me like a cheaper way to go I get everything to upgrade my Jeep and can sell everything I don't need to recoup what I spent on the YJ. I think it would be way cheaper than to try and buy all the parts separately. And I don't think the world will miss a YJ :D

If your going through all that trouble ditch the T-5 for an ax15. If you get the right yj that will already be in it.
 
Ha, didn't I say it sounded like you were one tooth off!
Glad you got it .

If you plan on using the T-5 boot, watch for isolator clearance
 
Ha, didn't I say it sounded like you were one tooth off!
Glad you got it .

If you plan on using the T-5 boot, watch for isolator clearance


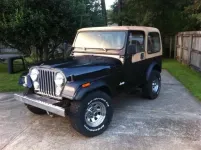
Are you glad? I am pretty certain you hired a voodoo shaman in New Orleans to curse the Jeep when I bought it from you! I'm guessing you were really ticked I wouldnt let you take it apart and paint it blue with a white top!:cool:
 
Are you glad? I am pretty certain you hired a voodoo shaman in New Orleans to curse the Jeep when I bought it from you! I'm guessing you were really ticked I wouldnt let you take it apart and paint it blue with a white top!:cool:

Or did you just curse the 360 because I wouldnt let you drop in a AMC 258 i6 / 4.2l ?
 
Very nice write up so far. I subscribed so i can follow every post. Keep up the good work.

Me too. Very well written.

Sent from my GT-I9152 using Tapatalk
 
Are you glad? I am pretty certain you hired a voodoo shaman in New Orleans to curse the Jeep when I bought it from you! I'm guessing you were really ticked I wouldnt let you take it apart and paint it blue with a white top!:cool:

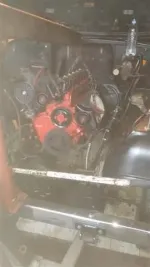
Well I was bored and found one of these...

Timscurse_zps86aa0f44.webp

and gave him this

Timscurse1_zps1592f266.webp

along with a picture of this

Timscurse2_zps7193fdf4.webp

I told him I wanted you to do this

Timscurse3_zpsbe6a2db7.webp

He laughed and said no problem.... So after this

Timscurse4_zps2ea7d3f9.webp

came out and this went in

Timscurse5_zpsf9c9fd99.webp

you THINK the curse is lifted. But its not......beware of this:

jeeponfire_zpsc3e5fda0.webp

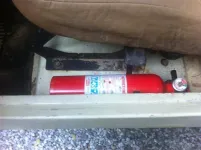
and make sure you have one of these

fireext004_zps75ba66ca.webp

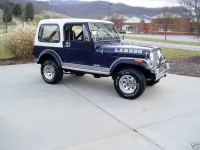
or you'll end up wishing I turned it into this instead

1981Laredobluenwhite3_zps0254393c.webp
 

Jeep-CJ Donation Drive

Help support Jeep-CJ.com by making a contribution.

Help support Jeep-CJ.com by making a contribution.
Goal
$200.00
Earned
$0.00
This donation drive ends in
0 hours, 0 minutes, 0 seconds
  0.0%
Back
Top Bottom