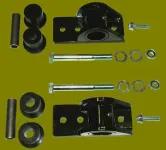
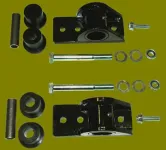
I got them to email me these instructions today, not very detailed and the pictures that came with them are very difficult to see.
Doesn't address which direction the rear shackle hangers go and where the longer hangers go...
Once I get the disc brake issue hashed out I will give it a whirl.
Jeep CJ Spring Hanger, 1976 and up
Thank you for your Rocky Road,llc purchase! We value your business and appreciate any input you might have on this product and/or its installation. Read these instructions thoroughly before beginning installation. If you ever have any questions on this or other modifications to your 4WD vehicles, please do not hesitate to give us a call, 435-654-1149 or email… gwbuild@ rocky-road.com
Place a floor jack under rear differential and raise vehicle until the tires are about a foot off the ground.
Place jack stands under frame in front of the rear springs. Now lower jack, you want to have your suspension hanging so that your tires are about an inch or two off the ground.
With vehicle properly supported pick a side to start on & place jack under axle on that side, now slightly jack up axle so it is supported. Remove the bolt that goes through the shackle and the factory spring hanger. If you need to lower the axle so you have room to work you may do so at this time.
Remove factory bolts holding stock spring hanger in place.(Bolts are re-used, remove with care! They can be rusty, we recommend soaking them with penetrating oil several days before installation. Be careful not to break any of the bolts, or it’s a whole bad can of worms to deal with!). With the factory hanger removed time to mount the heavy duty replacement. The new hanger basically just bolts back in the stock location. The extra hole in the front of hanger gets the 3/8 self threading bolt provided in kit, For this you will need to drill a 5/16 hole in the bottom of your frame. Make sure you drill a clean straight hole (do not wobble drill or enlarge the holes, or self-threading bolts will not work properly!)
When installing self threading bolts you may have to tap the head of the bolt with a hammer while turning to get the bolts to catch and thread in. Also be careful not to over tighten these bolts and strip out the new threads. Our spring hanger comes with new hardware to mount shackles. Depending on the shackles you have, you may have to drill out the upper hole on your shackle to a 14mm or 9/16 for our hardware to work. (you must use our hardware )
Repeat on other side. Grease bushings via grease zerks, Also coat the outside of bushings with grease ( polyurethane bushings should be greased with a synthetic lithium based grease(SUPERLUBE), lubrathane with Teflon, or a quality moly lube. Also coat the 14mm bolt with grease or anti-seize.
Photo shows properly installed greaseable shackle mount.
CJ OME spring conversion lift kit
Thank you for your Rocky Road,llc purchase! We value your business and appreciate any input you might have on this product and/or its installation. Your OME conversion kit is one of the best off-road mods you can make to your CJ. Read these instructions thoroughly before beginning installation. If you ever have any questions on this or other modifications to your 4WD vehicles, please do not hesitate to call us.
This suspension is an off-road suspension system. Modification of vehicles for off-road use, especially suspension modification & oversized tires, will affect the center-of-gravity & steering or handling of your vehicle. By the sale of these products, we are neither recommending that you modify your vehicle, nor are we assuming any responsibility for the consequences of such modifications. Summit Off-road llc/Rocky Road Outfitters, has no control of how these component parts are installed or utilized in the operation of a vehicle on which they are installed. We, therefore assume no liability for any circumstances connected with their use. The purchaser of these parts should be aware that he or she acquires, installs and utilizes these parts at his or her own risk, and agrees not to hold Rocky Road Outfitters/Summit Off-road llc, responsible. By installation of our products, you are agreeing to the above. This suspension system should be installed by those 4 wheelers experienced enough to be able to perform their own mild level of fabrication, or a professional installation shop. Particular interest should be paid to such systems as brake lines, steering, shocks, drive lines, & other components which may be affected by large amounts of wheel travel.
This kit is for spring under applications. For the rear you will just be replacing your stock springs with the OME lifted springs.
STEP1:
Place jack under rear axle and raise vehicle until tires are about a foot off the ground. Then support frame with jack stands and leave jack under axle so you can move axle up and down as needed to remove and replace springs. Remove tires, then remove springs (with a bolt on each end and Ubolts at the axle). Also remove shackles.
STEP2:
The rear springs require no adaptor brackets. Install new OME springs with new shackles and new u-bolt skid plates as pictured above.
STEP3:
Install the rocky road 804 shocks in the rear or the OME N34L.
Torque all bolts to factory specs. Double check all your hardware for proper tightness. Replace rear tires, remove jack stands and lower vehicle. Now for the front
STEP4:
Place jack under front axle and raise jeep so the tires are about a foot off the ground. Support frame with jack stands. Remove front wheels, shocks, and disconnect your sway bar links. Unbolt and remove stock front springs from the Jeep. Save all nuts, bolts, hardware.
STEP5:
Remove stock spring hangers and replace with the new spring hanger and hardware. YOU WILL BE REUSING THE STOCK HARDWARE AND MOUNTING LOCATIONS SO BE VERY CAREFUL REMOVING THE STOCK BOLTS, THEY CAN BE RUSTED AND HARD TO GET OUT. SOAK WITH A GOOD PENETRATING LUBE FOR SEVERAL DAYS BEFORE ATTEMPTING INSTALL IF YOUR BOLTS LOOK LIKE THEY COULD BE RUSTY/STICKY.
STEP6:
With the stock hangers removed, hold new hangers in position with the stock mounting holes and mark the hole in the front for the extra bolt. Remove bracket and drill ½” hole. Now install bracket using stock bolts in the stock location. Install the ½”x 1.25” (BOLT B) bolt from the kit in the new hole. Insert bolt with washer from top and use the thin ½” nylock with washer inside bracket. Use the ½”x 1.5” (BOLT A) bolt, washers, and nylock on the side of bracket thru the frame
STEP7:
With new YJ conversion hangers installed, you can now install shackles and YJ springs. If you have a spring under and have rocky road’s u-bolt skid plates then make sure you have the plates oriented properly ( they are side specific) the sway bar mount is the one that sticks out and should be in front and facing out toward tire. The shock mount is in the rear and depending on your year and model of CJ, It may or may not be used. Some CJ’s have the shock mount on the axle and some are studs coming off the u-bolt plate. You will have to check your suspension travel to determine which setup you should use (use the axle mount if you have it!)
STEP8:
Install brake line extensions and bleed brakes as per vehicle service manual.
STEP9:
Pictured above. Install T-case lowering kit. To do this simply place jack under T-case remove hardware and lower T-case until you can slide spacers between frame and cross member. Use new hardware from kit and tighten.
You will need to get a professional alignment after performing lift. Double check all hardware (especially the u-bolts) after the first off road adventure or the first couple hundred miles, whichever comes first, and as routine maintenance after that. Custom shims are available if you need to adjust pinion angle. We offer a few different length shackles to adjust ride height if necessary. You may also want our rear heavy duty spring hanger, for the ultimate Bolton setup on the market today!![/COLOR]


